Splitting PDF Invoices by Invoice Numbers
AutoSplit Pro plug-in for Adobe® Acrobat®
- Introduction
- It is a common task to split a PDF document that contains multiple invoices (or similar documents) into separate files. The AutoSplit™ software can split PDF documents that contain variable-length invoices, account statements, and reports into separate PDF files. The following tutorial shows how to split a PDF file that contains multiple invoices. Each output PDF file will contain only a single invoice and will be named using the corresponding invoice number.
-
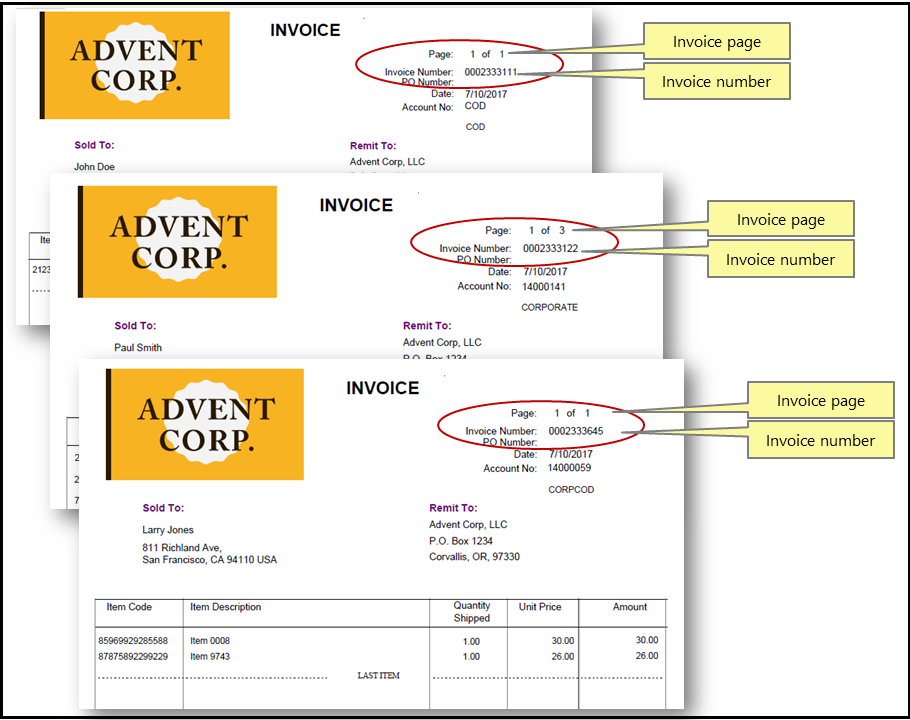
- Input Document Description
- The input PDF document contains multiple invoices of variable length. The goal is to split it into multiple documents that contain each invoice as a separate file and name it, using invoice numbers from the first page of each document for file names.
- Splitting Approach
- It is common that each invoice has its separate page numbering, typically in a form of "Page N of M" text pattern. The easiest method to split such documents into separate files is to use "Page 1 of " or “1 of N” text as a separator. Since this text always occurs on the first page of each invoice, it is natural to use it as a reliable separator. Using “Page 1 of” is the very common method for splitting invoices or statements.
- Prerequisites
- You need a copy of Adobe Acrobat Standard or Professional along with AutoSplit Pro plug-in installed on your computer in order to use this tutorial. You can download trial versions of both Adobe Acrobat and AutoSplit Pro.
Step-by-Step Tutorial
- Step 1 - Open a PDF File
- Start Adobe Acrobat and open a PDF file using “File > Open…” menu.
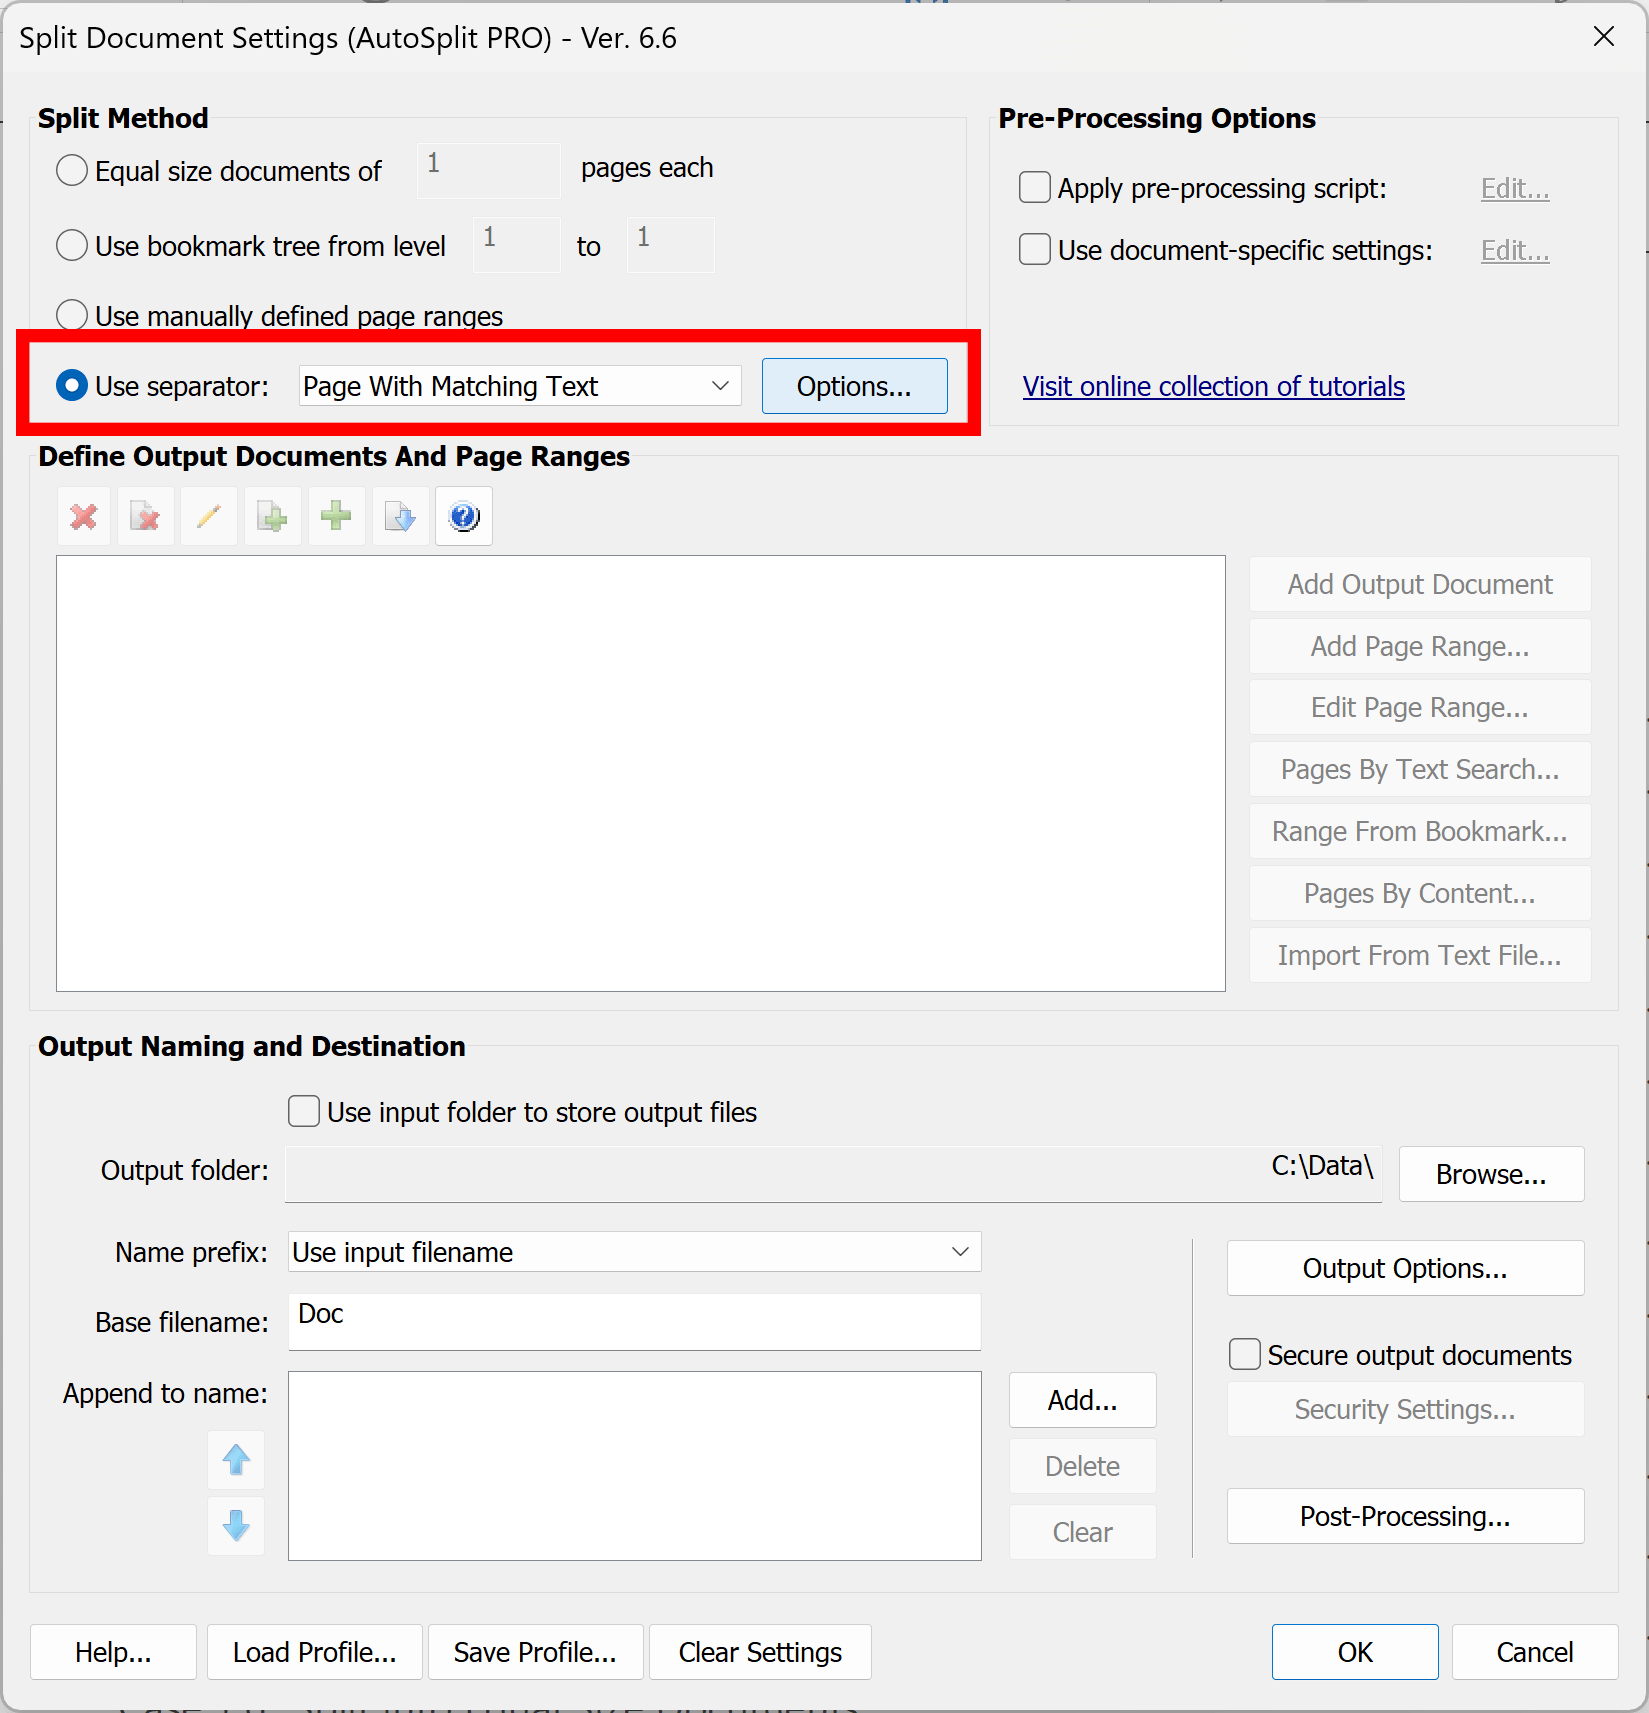
- Step 2 - Open "Split Document Settings" Dialog
- Select Plug-ins > Split Document… from the main Acrobat menu to open
Split Document Settings dialog.
[⚡ How to locate Plugins menu in Adobe® Acrobat® ⚡] - Step 3 - Select Splitting Method
- Check “Use separator” box, select “Page With Matching Text” from the list of available options.
- Next, press “Options…” button.
-
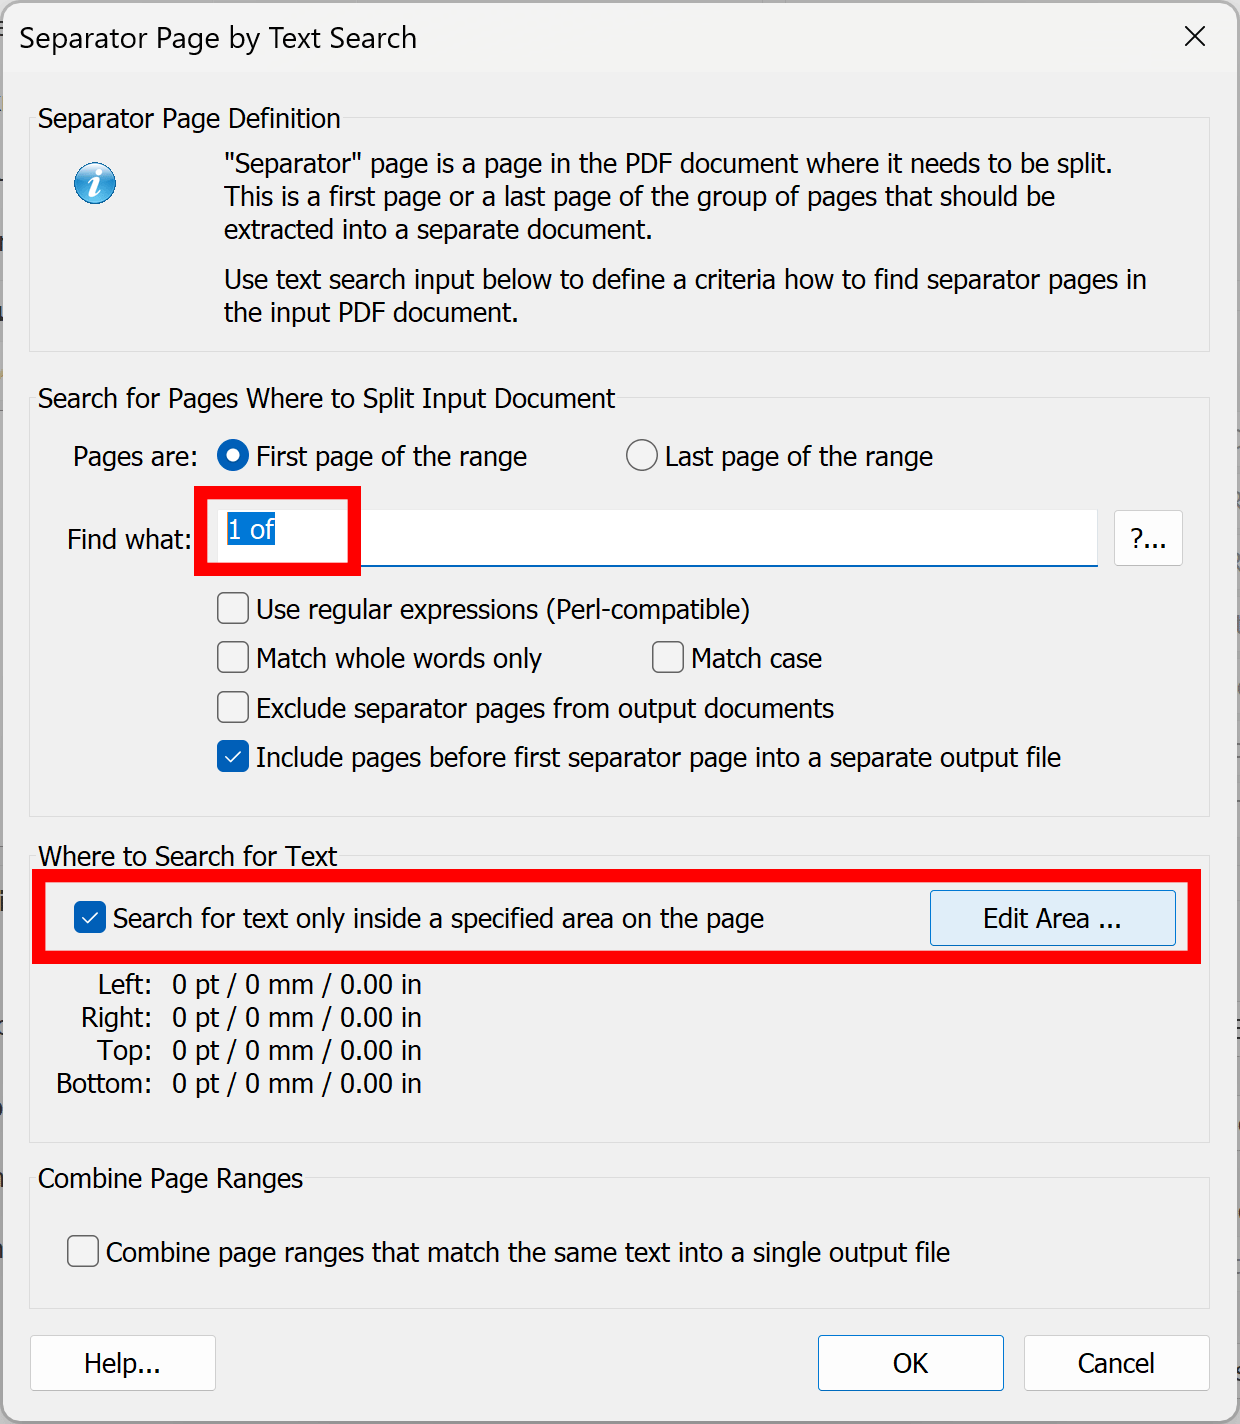
- Step 4 - Configure Splitting Parameters
- Enter “1 of” into “Find what” box. The document will be split at pages that contain “1 of …” text. This is a common way to detect a first page of each invoice since it often contains "Page 1 of N" labels. Check “Search for text only inside a specified area on the page” box to limit text search to a specific area.
- Press “Edit Area…” button to define an area on the page where to look for the text.
-
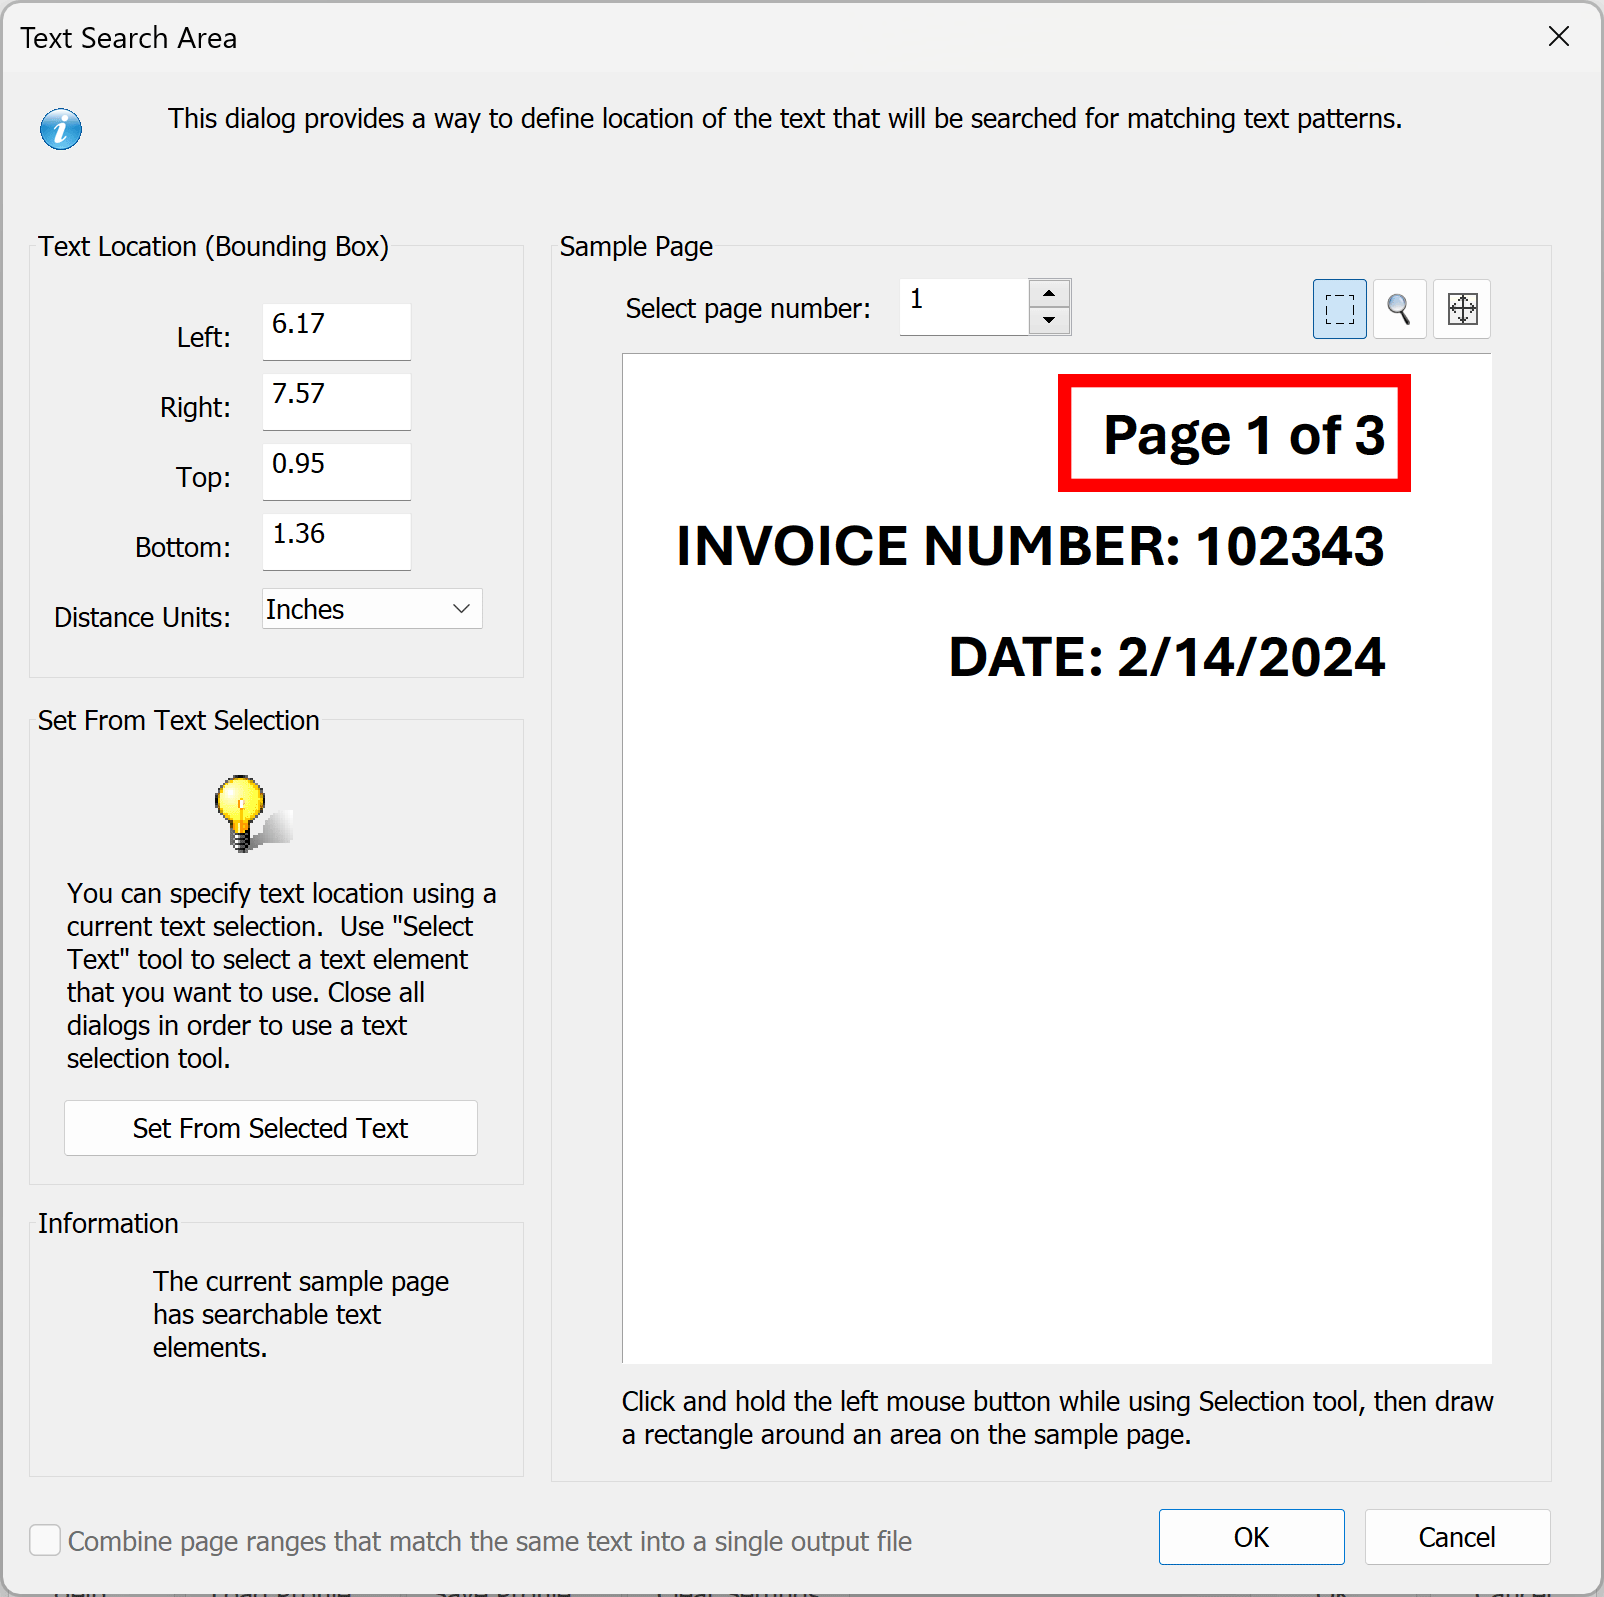
- Step 5 - Define Text Location On the Page
- Define page area where a separator text (“1 of ...”) is located by drawing a box around it. Try to select an area that does not include any other text. Use "Zoom" tool to enlarge part of the page for a more precise selection.
- Click “OK” once done.
- Step 6 - Confirm Split Method Settings
- Press “OK” button in the “Separator Page by Text Search” dialog to save settings.
- Step 7 - Specify Output File Naming
- Set "Name prefix:" to "No Prefix" option. Make sure "Base filename" box is empty and there are no any entries in "Append to name:" list.
-
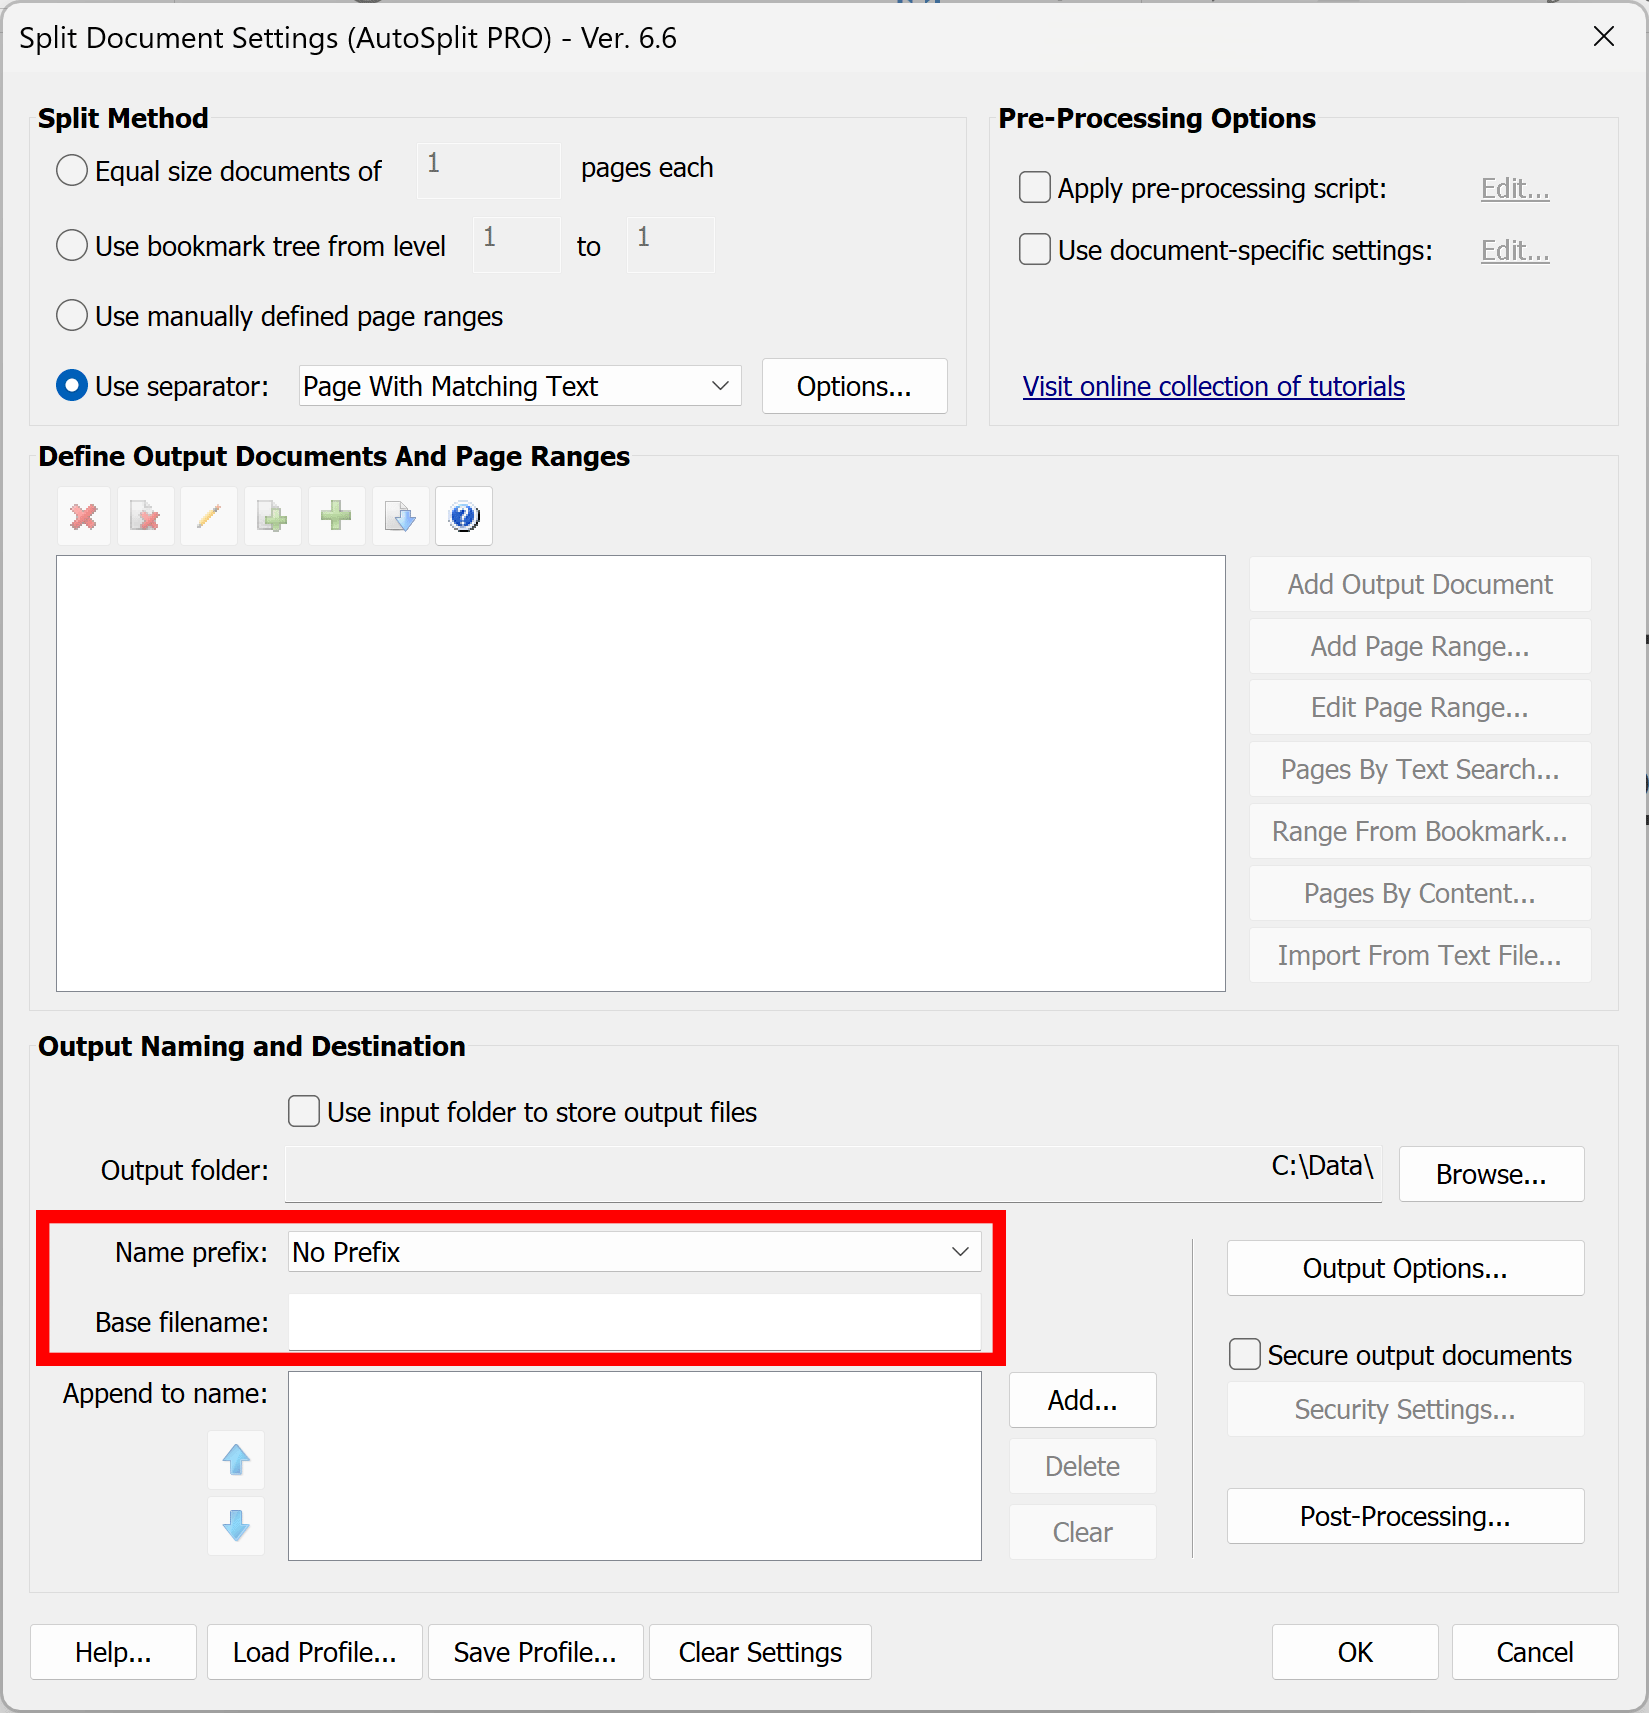
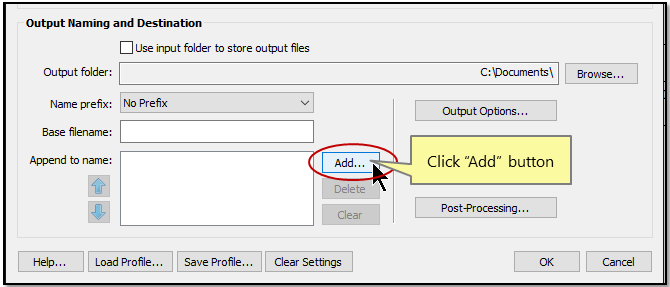
- Step 8 - Define a Naming Scheme for Output Files
- Press “Add…” button to define how to name output PDF files. The output file name can be assembled from multiple components. One of the options is to extract text from a specific page location.
-
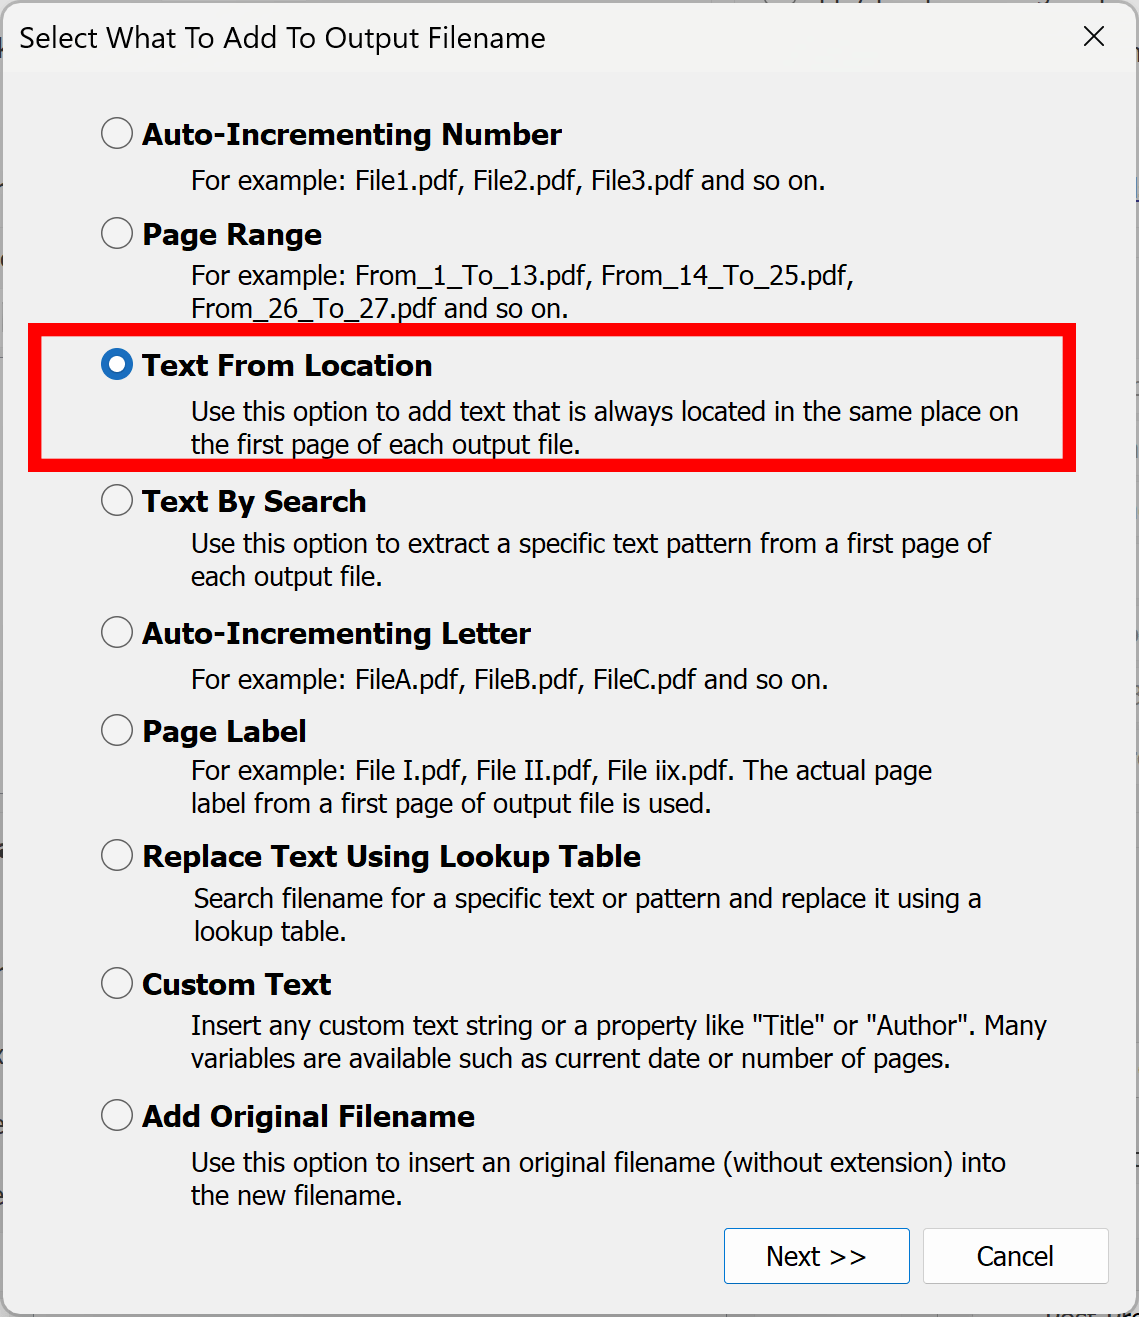
- Step 9 - Select "Text From Location" Option
- The text for the filename will be extracted from the first page of each output document.
- Select "Text From Location" option and press "Next" button.
-
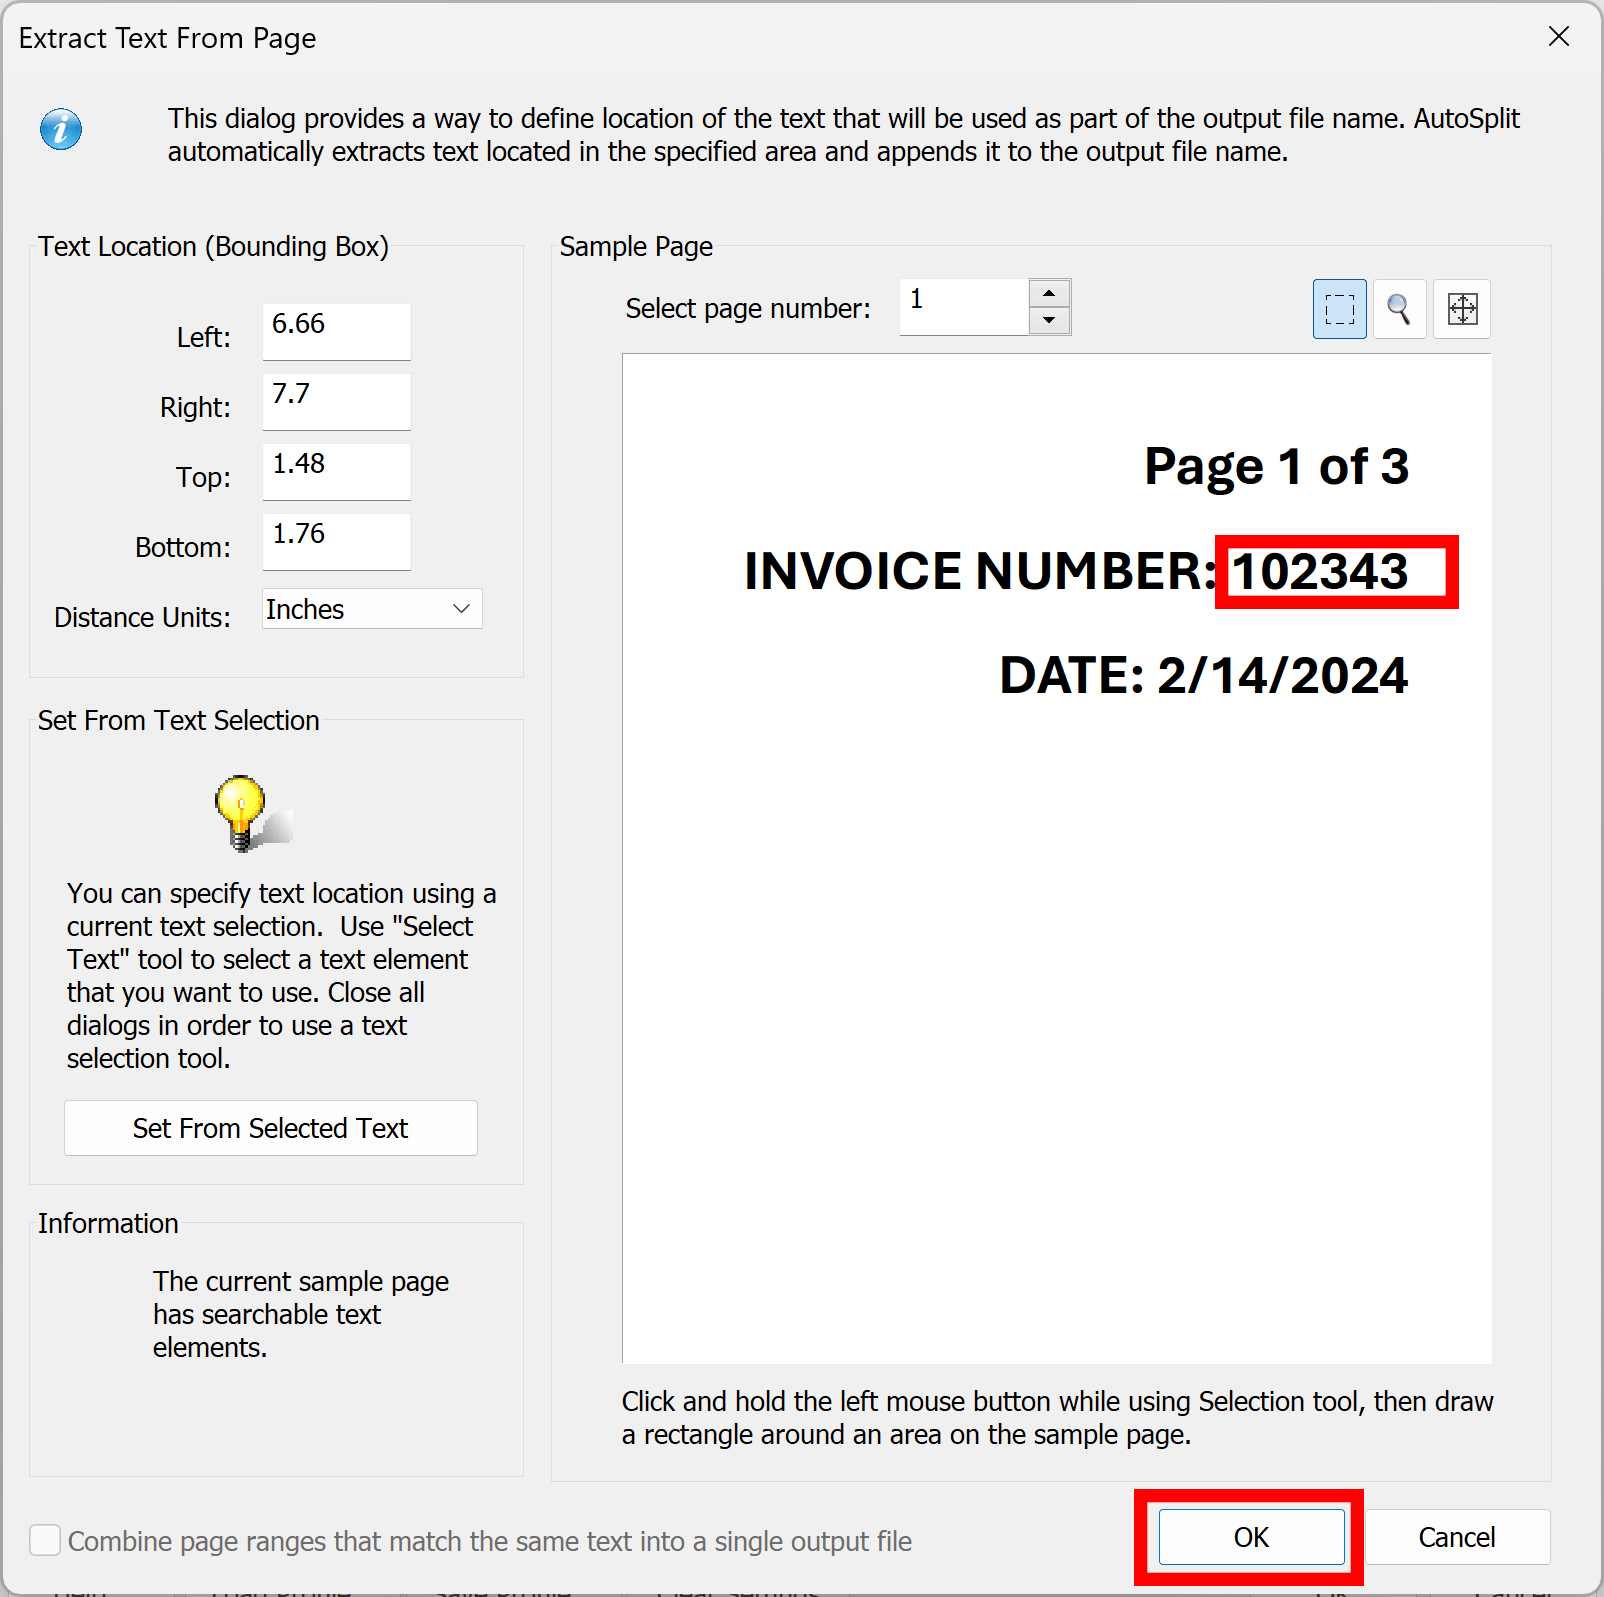
- Step 10 - Define Page Area for Extracting Text for the File Name
- Position mouse at the page area where you want to extract text for the filename (where invoice number is located) and press and hold left mouse button. Draw a box around the area and release mouse button. Now you have defined the area for thtext extraction. If you made a mistake simply do it again. Use Zoom tool to enlarge page area where the text is located.
- Press “OK” button once done.
-
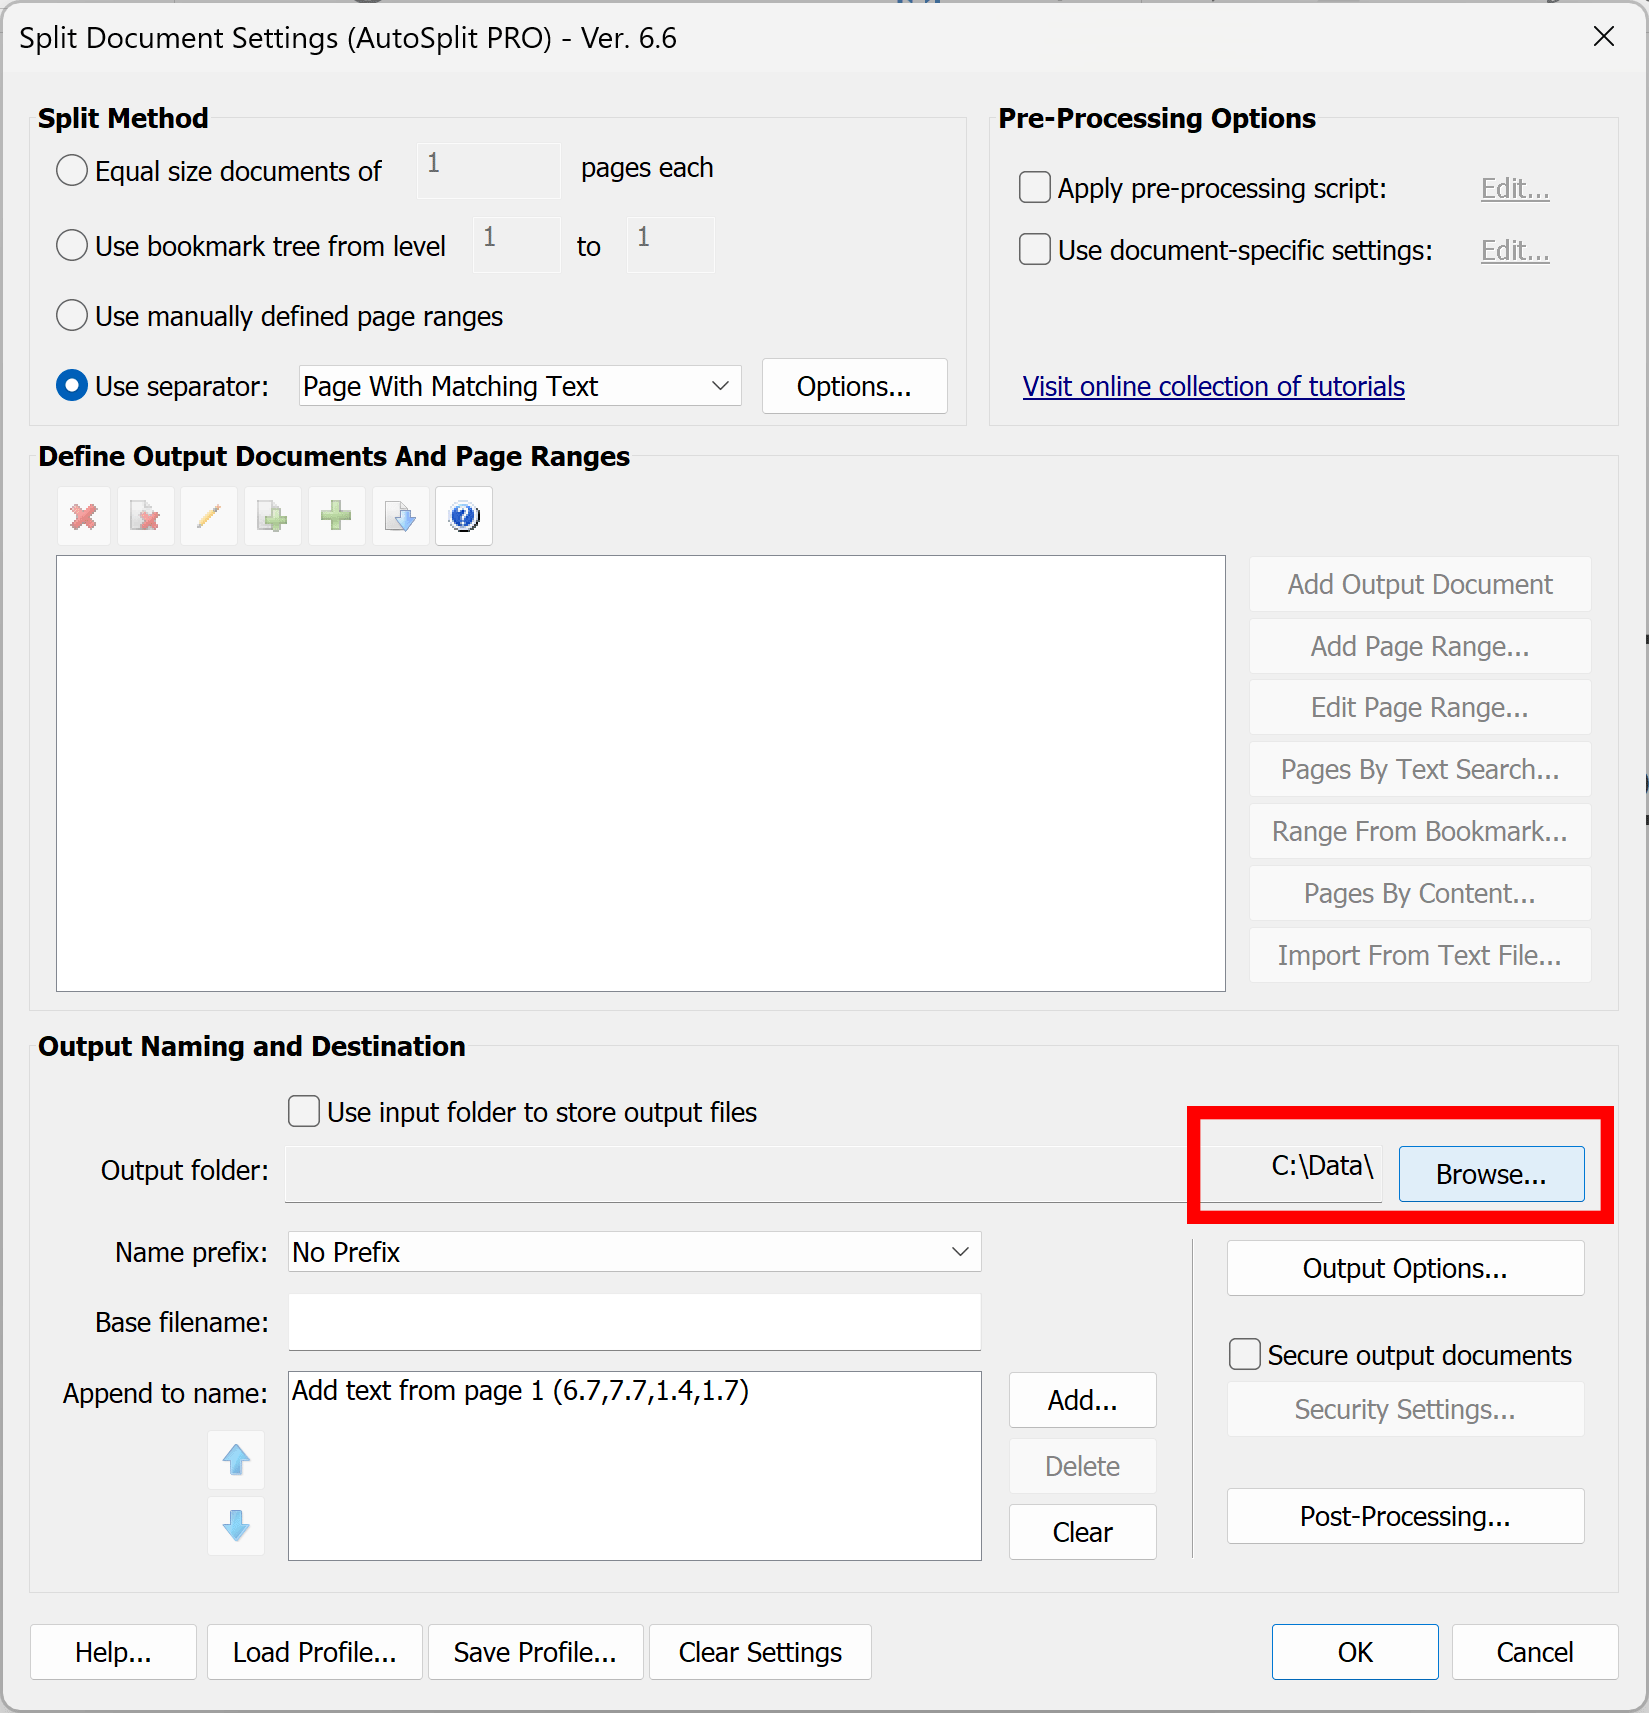
- Step 11 - Specify an Output Folder
- Press "Browse..." button and select a folder where to store output PDF files.
-
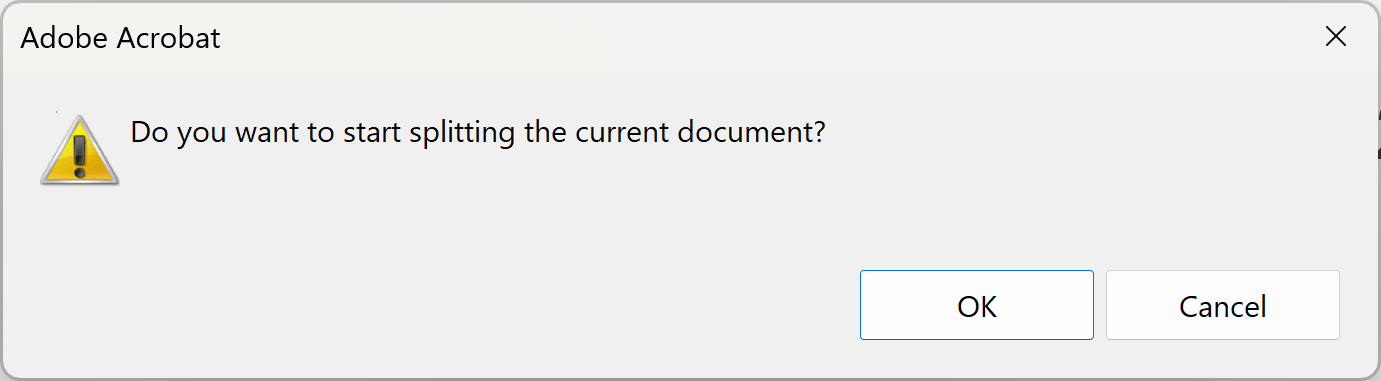
- Step 12 - Start Splitting Process
- Click “OK” in the dialog box to start the process.
-
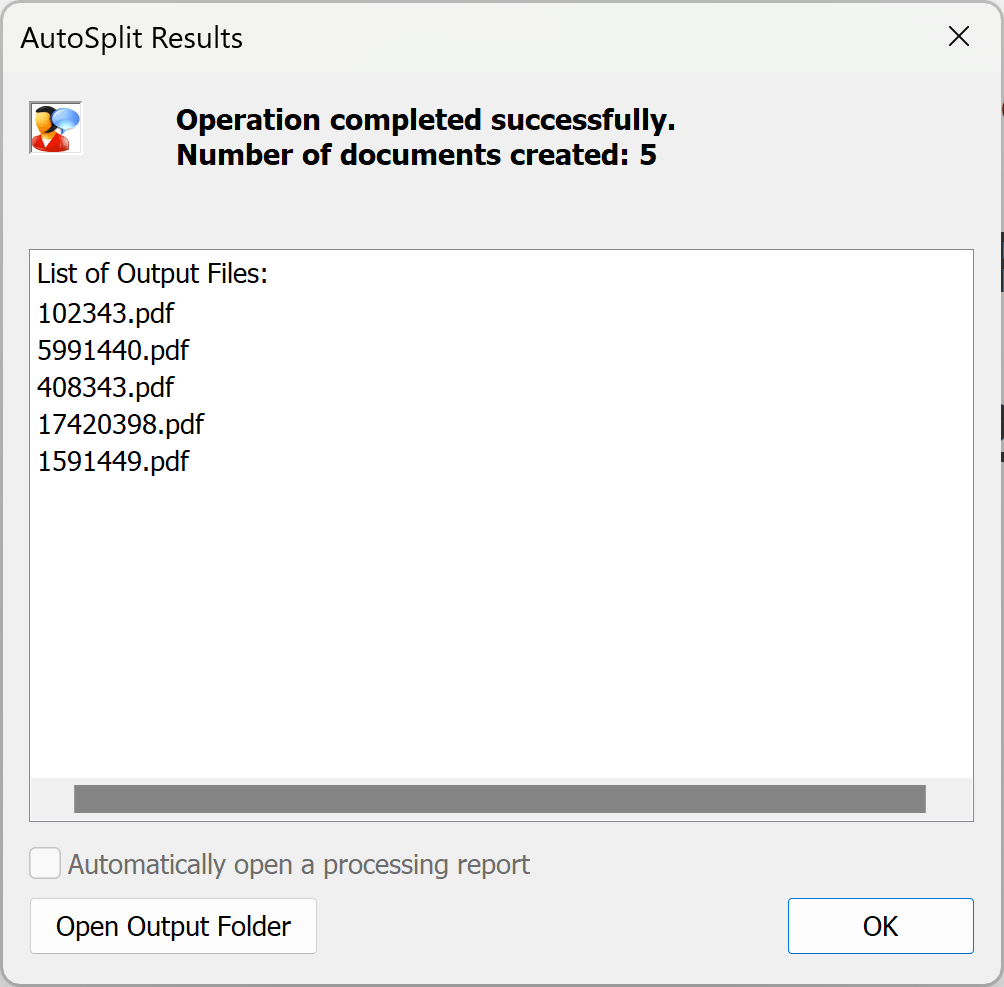
- Step 13 - Examine Output Files
- The “Results” dialog will list output files that were created during the processing.
- Click “Open Output Folder” to inspect the results.
-
- Click here for a list of all step-by-step tutorials available.