Personalizing PDF Documents with Watermarks
AutoMailMerge plug-in for Adobe® Acrobat®
- Introduction
- The tutorial shows how to personalize PDF documents by watermarking pages with recipients' names. It is often necessary to personalized each copy of the same PDF document with the recipient's name or some other identifying information before distributing it among a group of recipients. The AutoMailMerge plug-in allows adding the custom watermarks to PDF documents by using data from a spreadsheet or a database. The watermarking is performed as a part of the mail merge process and creates watermarks that are different for each output PDF document.
- Tutorial Overview
- The tutorial explains how to watermark copies of the same PDF document with a custom text and individual recipient name. Watermark text includes a custom text along with first and last name:
Issued for [First name] [Last name](for example: "Issued for Emily Roberts" and etc.). The watermarking data is stored in the Excel spreadsheet. Each row of the spreadsheet contains data for watermarking a single PDF document. The resulting PDF documents are individually named using data from the spreadsheet. .PNG)
- Data Description
- The tutorial is using a PDF document that contains 3 pages and an Excel spreadsheet with 5 fields (columns): "Record", First name", "Middle name", "Last name" and "E-mail". The data from the "First name" and the "Last name" columns will be used to add watermarks into a PDF form template. The "E-mail" column contains e-mail addresses and could be used to e-mail watermarked PDF documents to the corresponding recipients. See the tutorial how to automatically e-mail generated PDF documents.
- Prerequisites
- You need a copy of the Adobe® Acrobat® along with the AutoMailMerge™ plug-in installed on your computer in order to use this tutorial. You can download trial versions of both the Adobe® Acrobat® and the AutoMailMerge™.
- Step 1 - Create a PDF Form Template
- The first step is to turn the PDF document we want to distribute into a fillable PDF form. Once the PDF document has fillable fields, then it can be run through the mail merge process and personalized with the custom watermarks.
- Start the Adobe® Acrobat® application.
- Open "Prepare Form" Tool (New Acrobat Interface)
- Prepare Form tool is used in Adobe® Acrobat® to create and edit interactive PDF forms. Use it to add text fields, checkboxes, buttons and other interactive elements to the PDF documents.
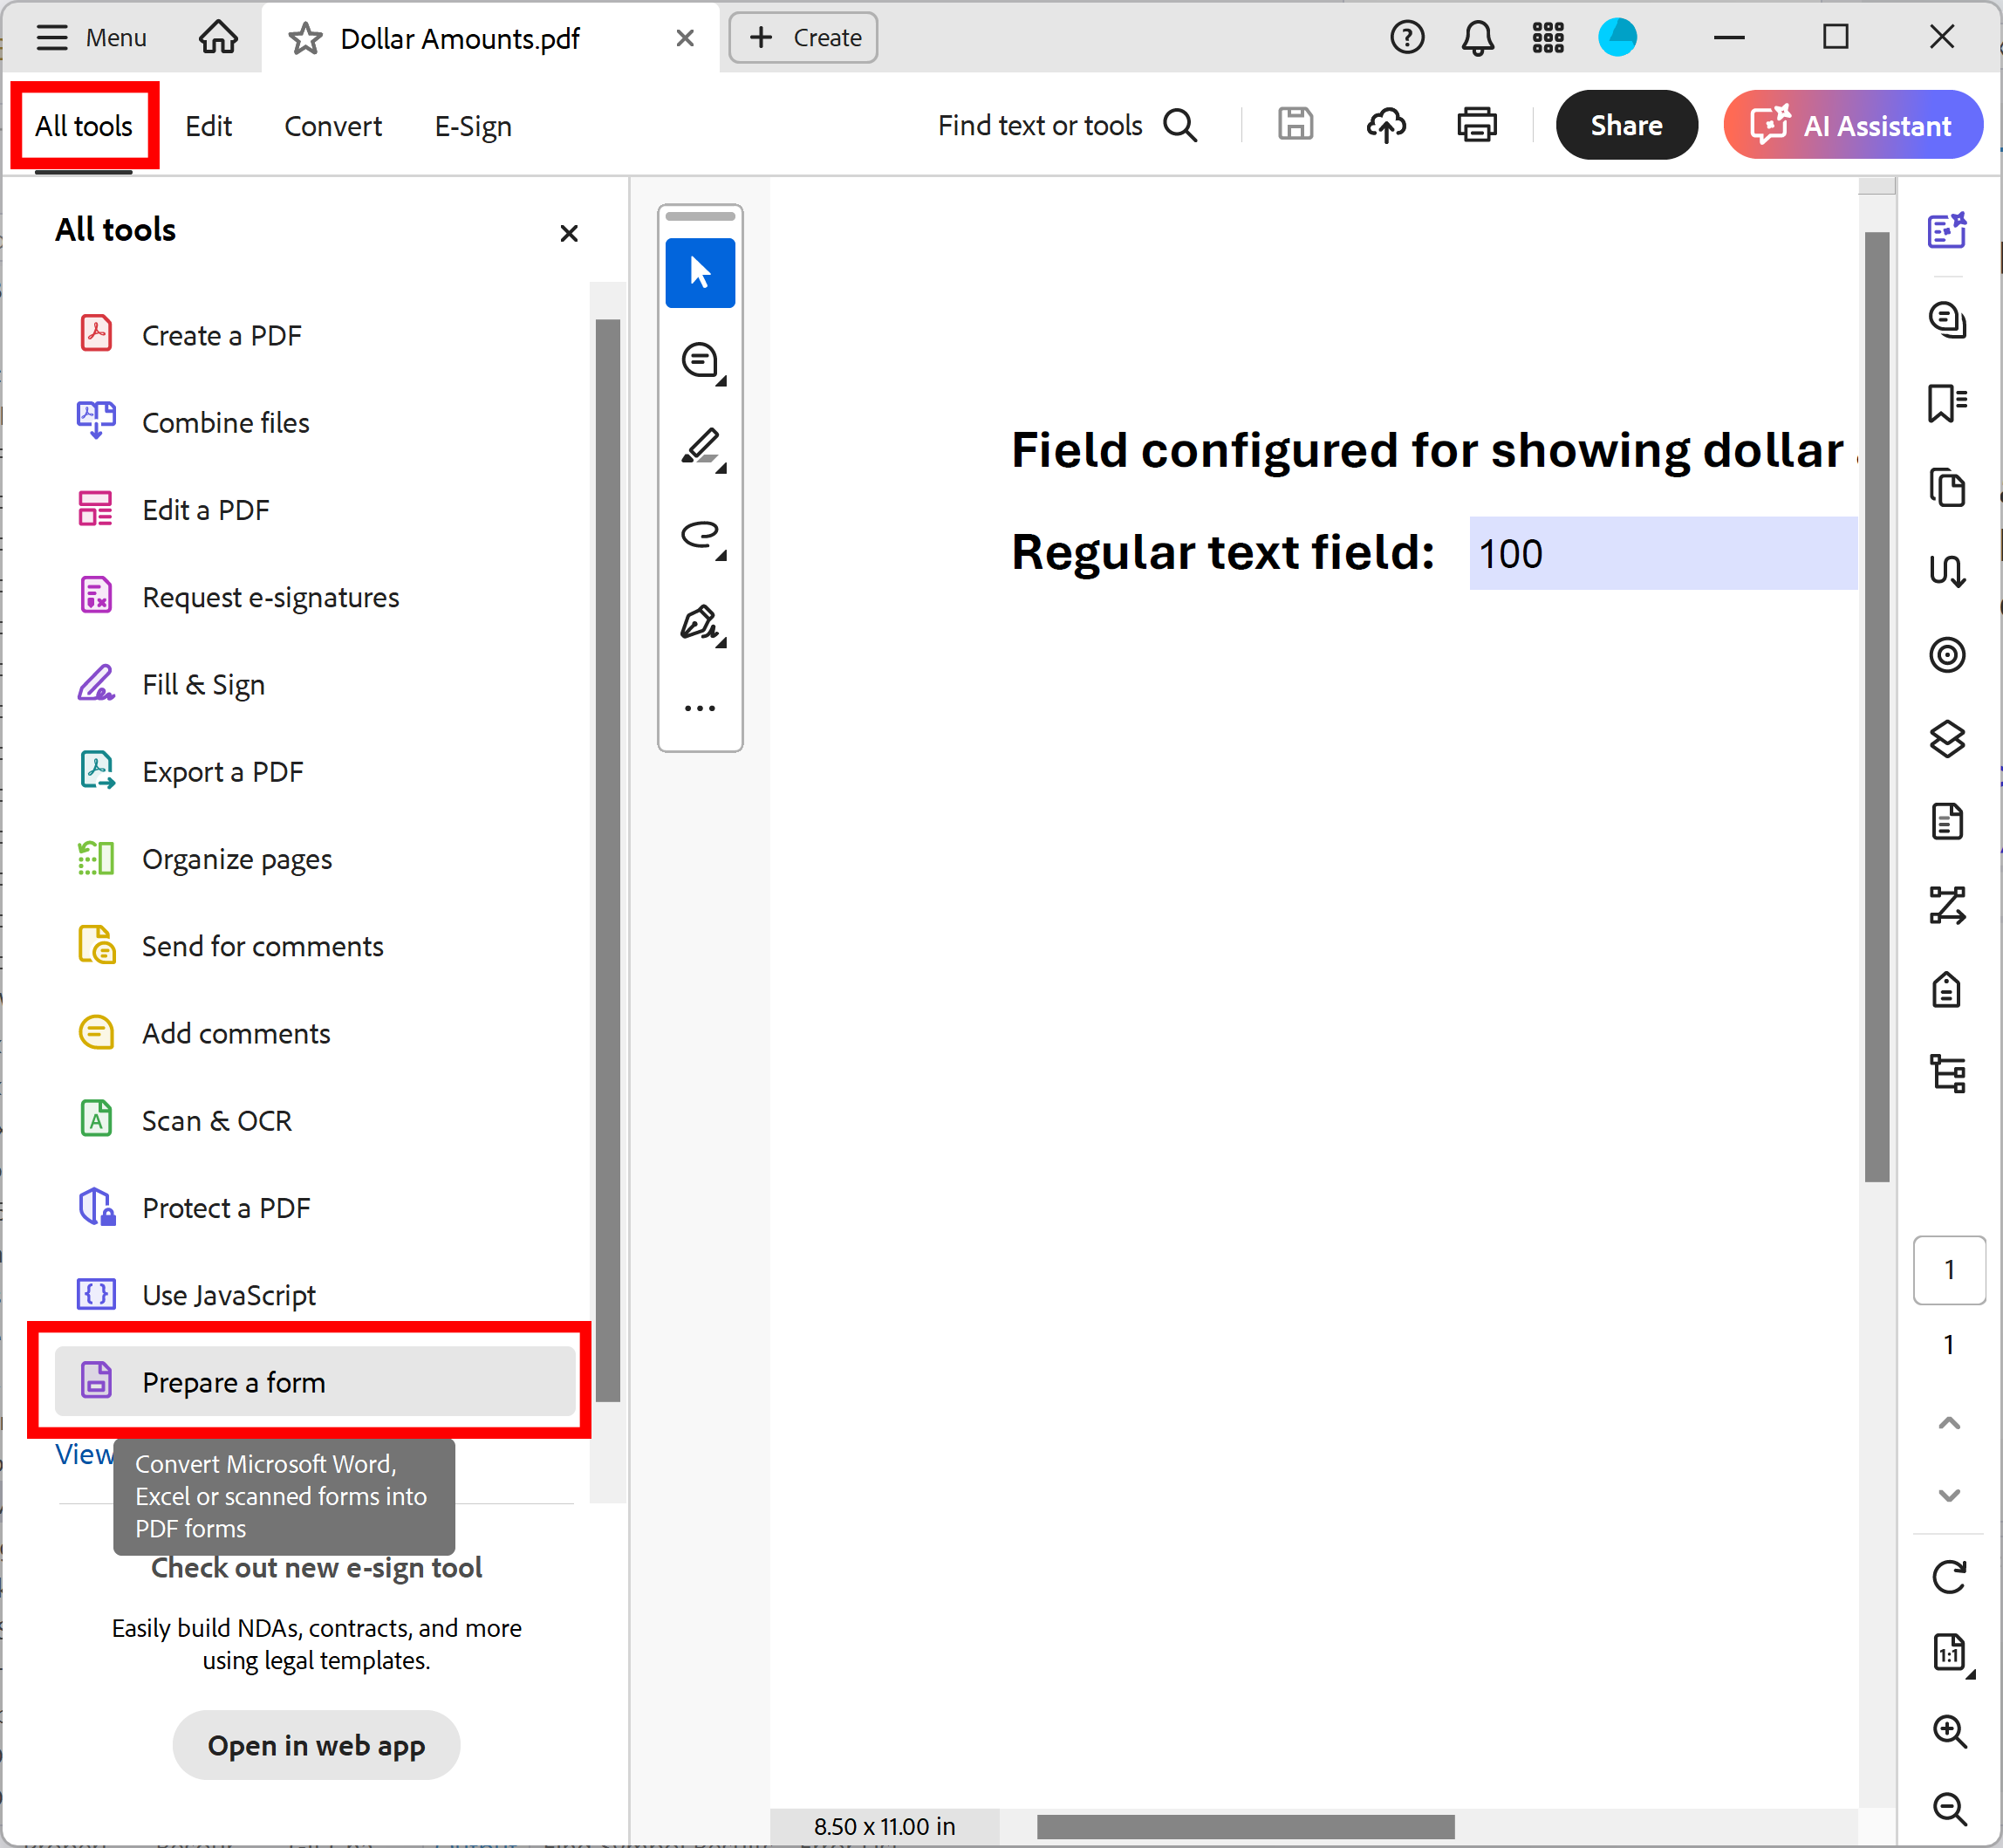
- If you are using a "new" Adobe® Acrobat® interface, then expand All tools and find Prepare Form tool located towards the bottom of the list. Depending on your screen size you may need to click on “View more” link to find it.
- Open "Prepare Form" Tool (Classic Acrobat Interface)
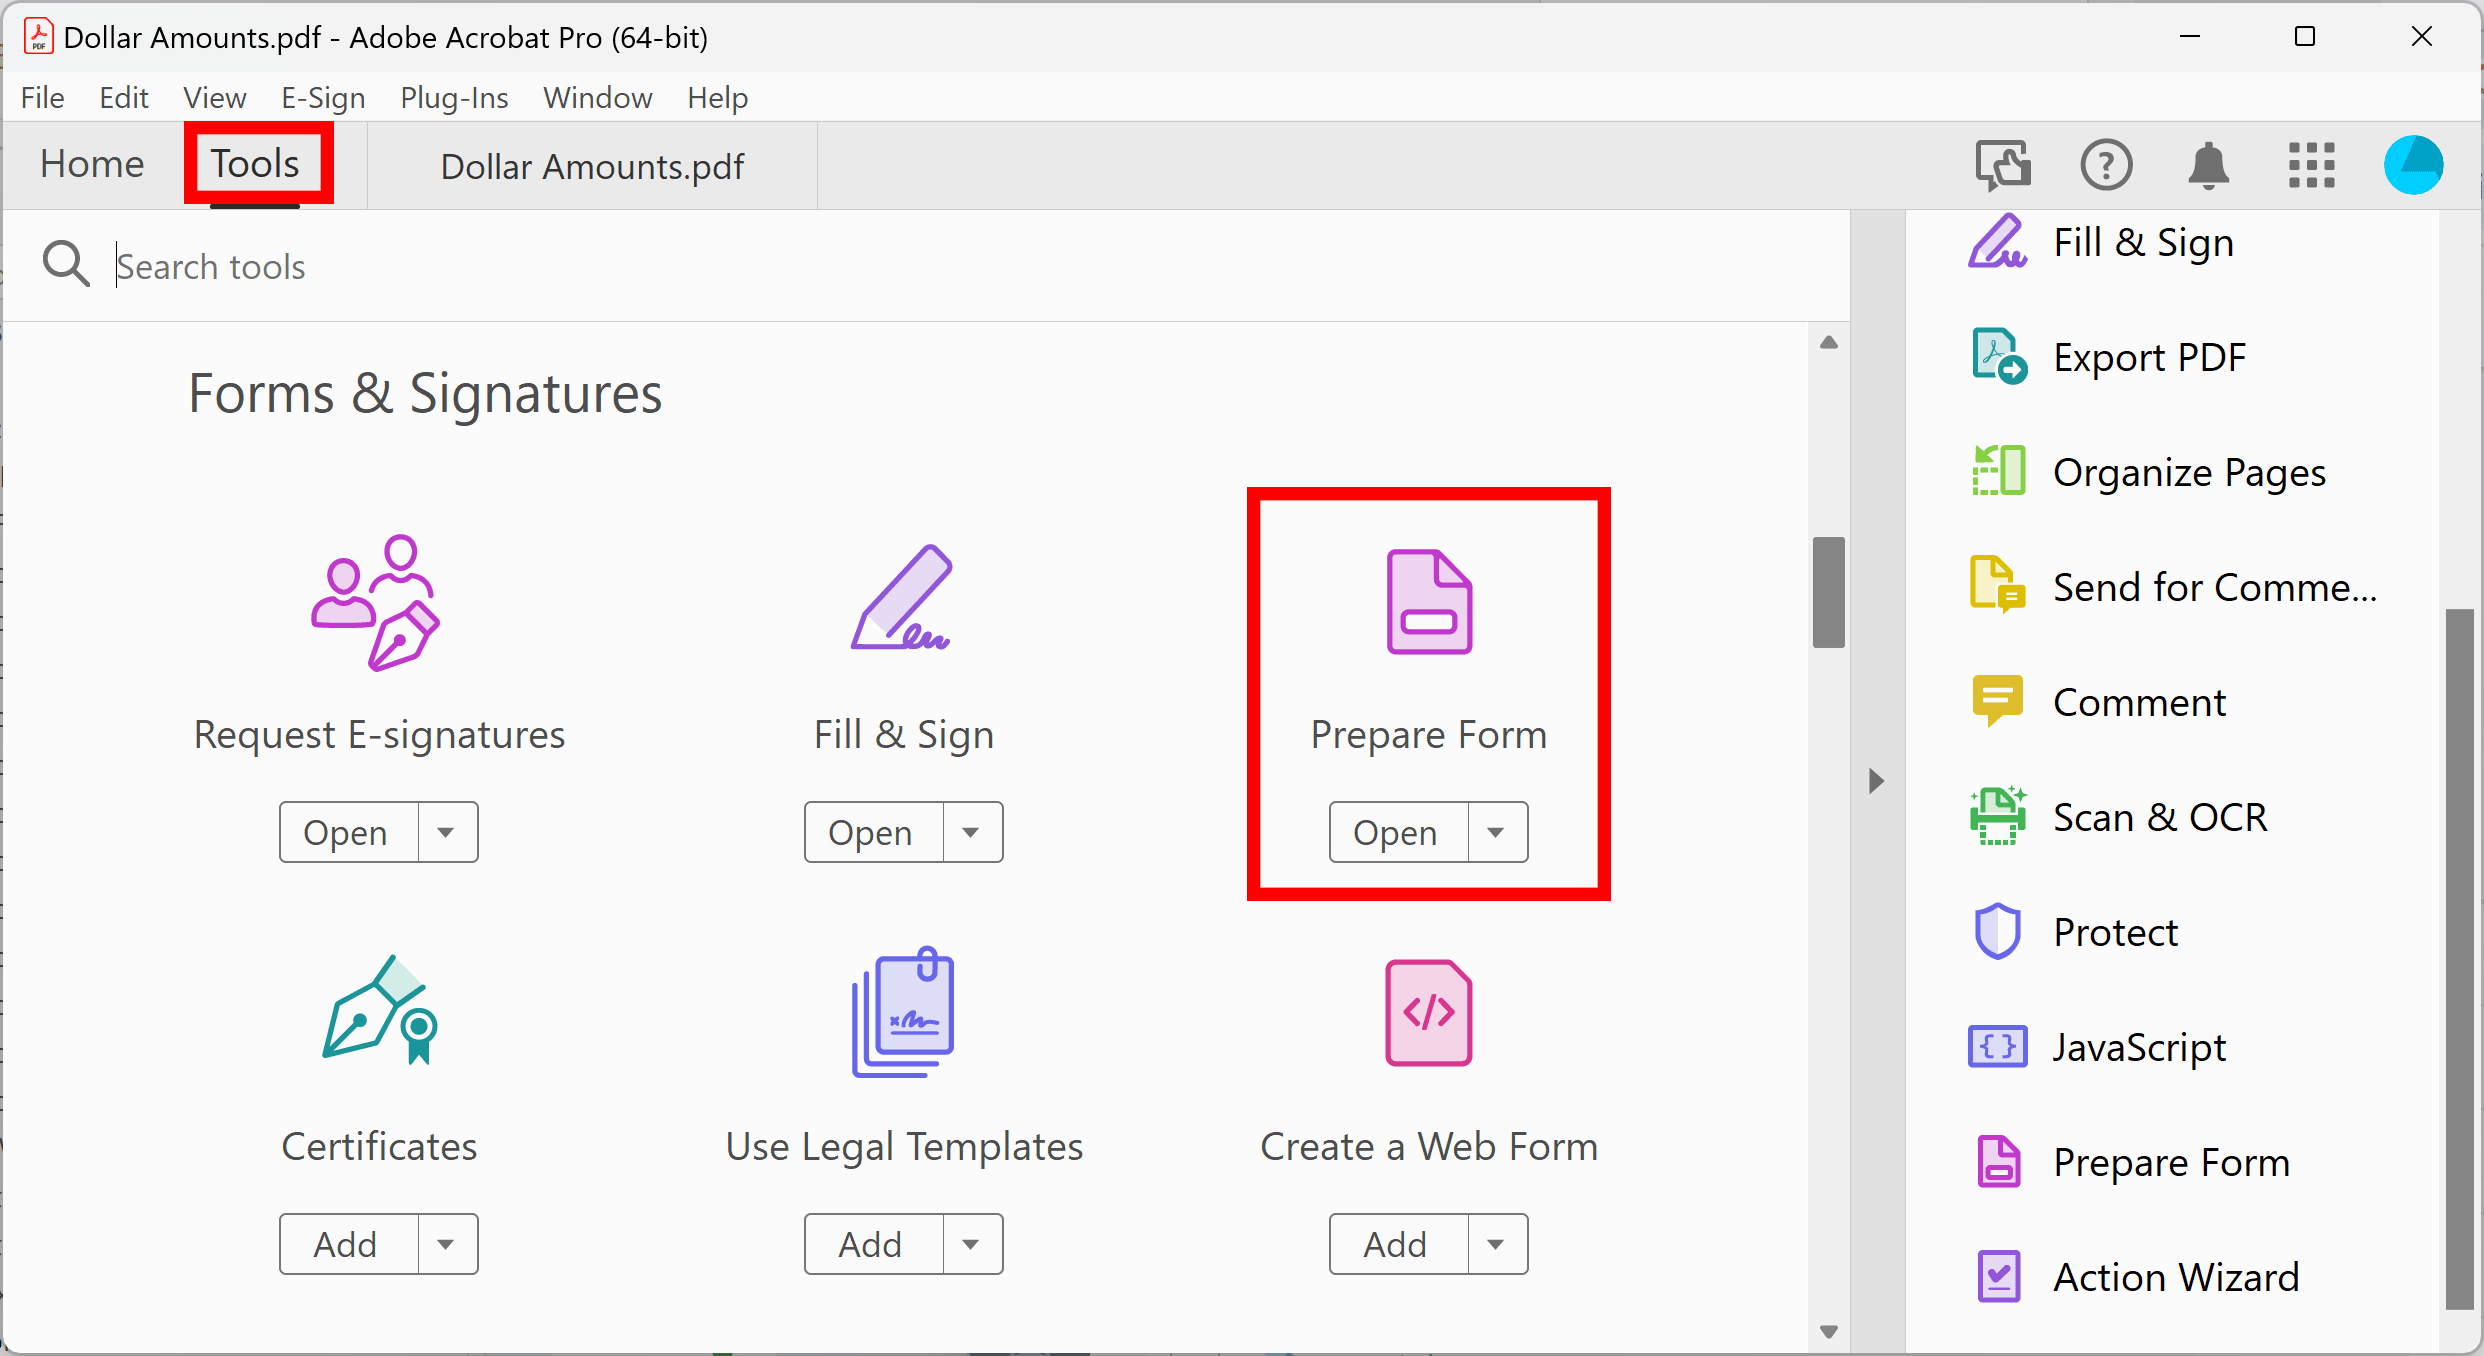
- If you are using a “classic” Adobe® Acrobat® interface, then expand Tools and find Prepare Form tool.
- Select an existing PDF file that will be as used as a base for the PDF form. It is common to design documents in the regular text editors such as the Microsoft Word, the Adobe InDesign, or in any other similar application and then export it into PDF format. The form editor in the Adobe® Acrobat® is used only to add fillable form fields to allow using the document in the mail merge process.
.PNG)
- Now we are going to place a hidden text field on the PDF form. The purpose of this form just to turn this PDF document into a fillable form. Alternatively, this field can be made visible and also used for personalization.
Click the "Add a Text field" icon on the toolbar. Next, click on a page location you want to place a text field. Type a desired field name into a "Field Name" entry box (for example, enter "Name"). - Click the "All Properties" link to open the "Text Field Properties" dialog.
.PNG)
- Select "Hidden" in the "Form Field:" list of the "General" tab. That will make a text in the field invisible. Click "Close" to save and exit the "Text Field Properties" dialog.
.PNG)
- Select "File > Save As..." from the main menu to save changes into a new file. Now a previously static PDF document became an interactive PDF form template.
.PNG)
- Step 2 - Prepare Data in the Microsoft Excel
- We are going to use an Excel spreadsheet to store text for the watermarks. The folowing sample spreadsheet contains information for 10 persons. There are 5 data fields (columns) in the spreadsheet: "Record", "First name", "Middle name", "Last name" and "E-mail". The data from the "First name" and the "Last name" rows will be used to add watermarks. Optionally, the "E-mail" column could be used for sending output PDF document via email to a corresponding recipient.
.PNG)
- Step 3 - Configure Mail Merge Parameters
- Start the Adobe® Acrobat® application and using "File > Open..." menu open a PDF form template that was prepared.
.PNG)
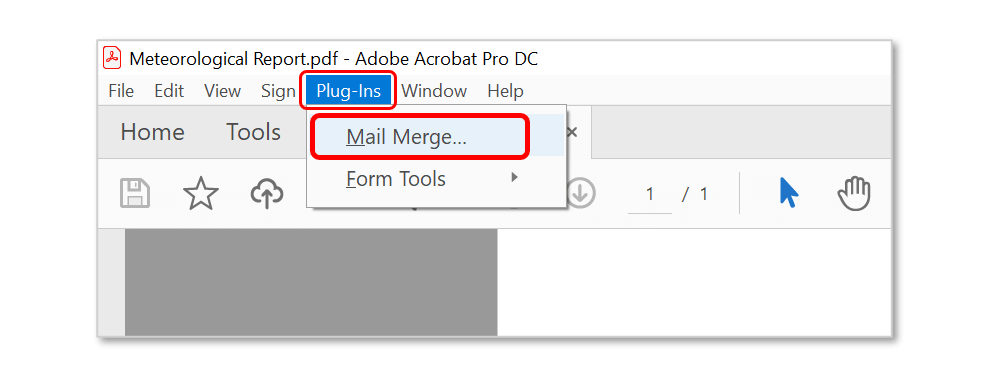
- Select Plugins > Mail Merge… to open the Mail Merge dialog.
- If you are using a new Adobe Acrobat interface, then you can locate Mail Merge menu here:

- Please see the following page for a short video tutorial on how to locate Plugins menu in the new Adobe® Acrobat® interface.
- If you are using a "classic" Adobe Acrobat interface (pre-2022), then you can locate Mail Merge menu here:
- Press the "Edit Settings..." button to configure the mail merge parameters.
.PNG)
- Press the "Browse..." button in the "Data Source" screen to select an input spreadsheet.
.PNG)
- Select "Microsoft Excel Worksheet (*xls.*xlsx)" from the list:
.PNG)
- Select a data source file (use file prepared at the step 2). Click "Open".
.PNG)
- Select a sheet and click "OK".
.PNG)
- Step 4 - Map Form to Data Fields
- Select the "Name" form field from the list of available fields (or a text field that you have created). Click "Add Mapping..." button to establish a correspondence between any of the data fields and the "Name" form field.
.PNG)
- Select a data field. For example, select the "Last name" data field. This is just to get the mail merge running. Click "OK".
.PNG)
- Click "Next >" to advance to the next screen.
.PNG)
- Step 5 - Specify Output Options
- Click "Next >" to advance to the "Output Files" screen.
- Click "Browse..." to select an output folder. Next, specify a desired file naming by using the "File Naming" controls. We are going to name output PDF files by appending a value of "Last Name" data field to the original PDF file name. The output files will be named such as "Technical docs_Doe.pdf", "Technical docs_Smith.pdf", "Technical docs_Swenson.pdf" and so on. Press "Next >" to advance to next settings screen.
.PNG)
- Step 6 - Specify Watermarking Options
- Check the "Add watermark to each output form" box in the "Add watermarks" dialog. Enter watermark text into the "Text to add:" field. Watermark can use one or more data values along with fixed text to create a desired watermark. Any text inside square brackets is treated as a reference to a value of the corresponding data field. All text outside of the square brackets is used "as-is". For example, type "Issued for [First name] [Last name]" to get documents watermarked with text like "Issued for John Doe", "Issued for Mary Smith" and etc.
.PNG)
- Specify watermark text parameters: font size and name, text angle, color and transparency. Uncheck the "Add watermark behind all other page content" box to create watermarks above all page content. Note that if this option is ON, then watermarks could be invisible (watermark text can be covered by images).
- IMPORTANT: Adding watermarks to PDF files with enabled extended rights for the Acrobat® Reader will invalidate the extended rights. It will prevent users from filling such forms in the Adobe® Acrobat® Reader.
- Click "Next >" to proceed.
.PNG)
- Step 7 - Specify E-mail Options
- Click "Next >" to skip the "Security" dialog.
- Optionally, use the "E-mail" dialog to configure the e-mail settings. Check the "Send e-mails to the recipients using addresses from the data source" option to distribute the output PDF files via email. The "E-mail" column from the data source could be used to sending output PDF document via e-mail. See the tutorial how to automatically e-mail generated PDF documents.
- Click "Next >" to proceed. Skip the rest of the screens and click "Finish" on the last "Advanced" screen.
.PNG)
- Step 8 - Save Settings
- Check the settings summary. Optionally, save the mail merge settings into the *.mms file for a later reuse by pressing the "Save Settings" button. Use the "Load Settings" button to load them back later. Click "OK" to advance to the mail merge process.
.PNG)
- Step 9 - Start Mail Merge
- Press the "Run Mail Merge" button in the "Confirm Processing" dialog to start a mail merge process.
.PNG)
- The "Mail Merge Results" dialog will appear at the end of the processing. Click "OK" to close this dialog and open an output folder.
.PNG)
- Step 10 - Examine Output Files
- Examine output files by opening them in the Adobe® Acrobat®. There are 10 individual PDF documents with watermarked recipient names that have been created in this tutorial. They are stored in the output folder.
.PNG)
- Here are the examples of the output PDF documents with custom watermarks that have been generated by the mail merge:
.PNG)
- Click here for a list of all step-by-step tutorials available.