
Auto-Rename PDF Files: Switching Words in the File Name
AutoSplit plug-in for Adobe® Acrobat®
- Introduction
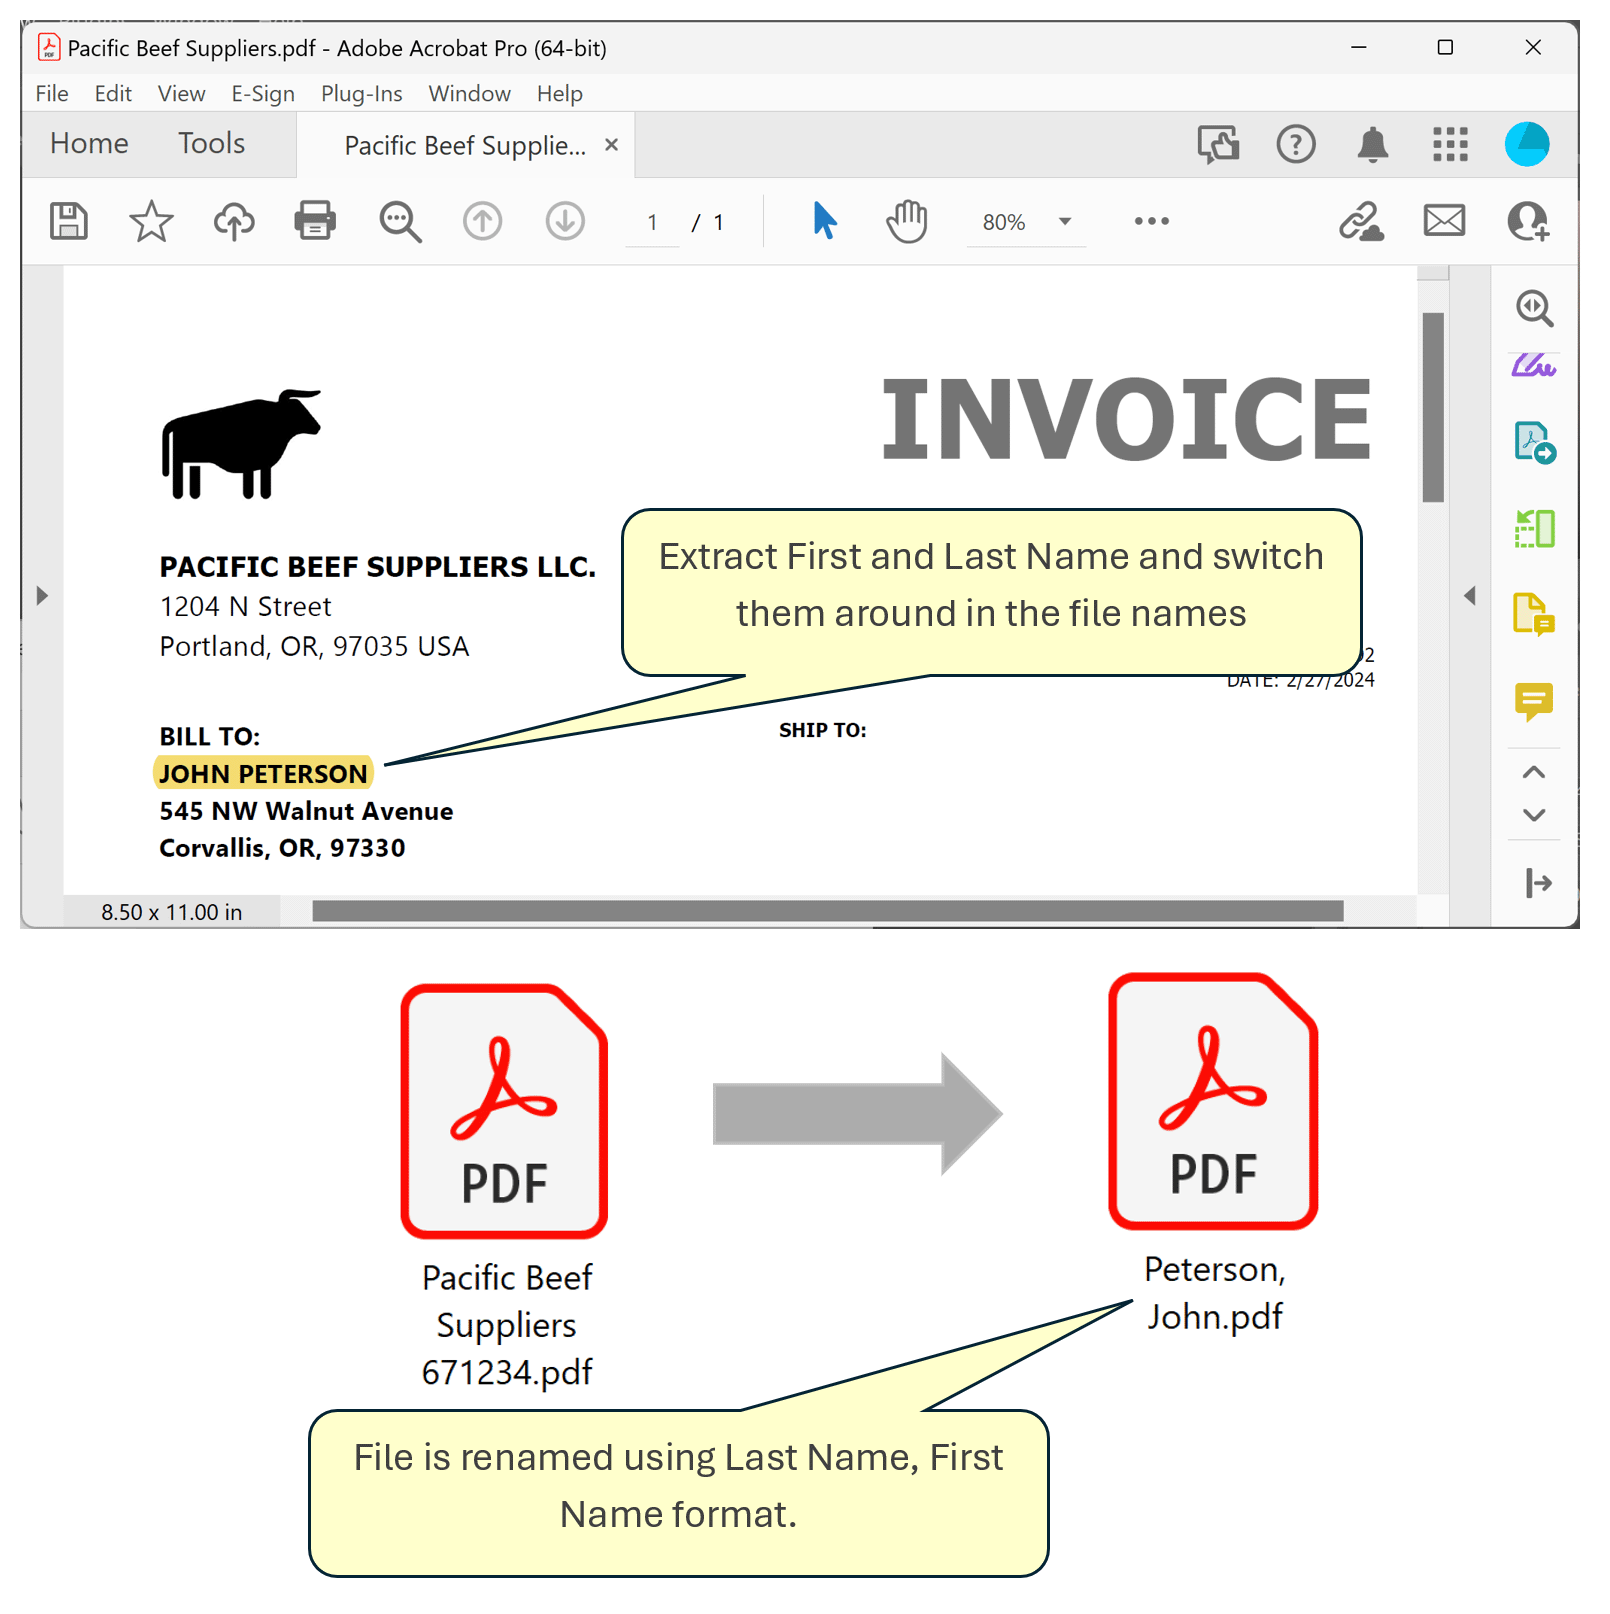
- It is a common task to use AutoSplit plug-in to rename PDF files using text extracted from the document’s content. It is often consisting of multiple words that are not in the desired order. For example, document may have the name of the recipient as first and last name, while it is more convenient to have files renamed using last name, first name format. This tutorial is going to show how to rename PDF files by extracting text from the document while switching two first words in the resulting file name.
- Prerequisites
- You need a copy of Adobe Acrobat Standard or Professional along with AutoSplit™ plug-in installed on your computer in order to use this tutorial. You can download trial versions of both Adobe Acrobat and AutoSplit™.
- Are my PDF documents searchable?
- The very first step is to verify that PDF documents do contain searchable text. If you are working with scanned paper documents, make sure that the text recognition operation has been applied to the files. See Recognize Text in Scanned PDF Documents tutorial for detailed instructions.
Step-by-Step Tutorial
- Step 1 - Open the "Auto-Rename PDF Files" Menu
- Close all open PDF documents to avoid possible file access conflicts. Start Adobe® Acrobat® and select “Plug-ins > Auto-Rename PDF Files…” from the main Acrobat menu.
- [⚡ How to locate Plugins menu ⚡].
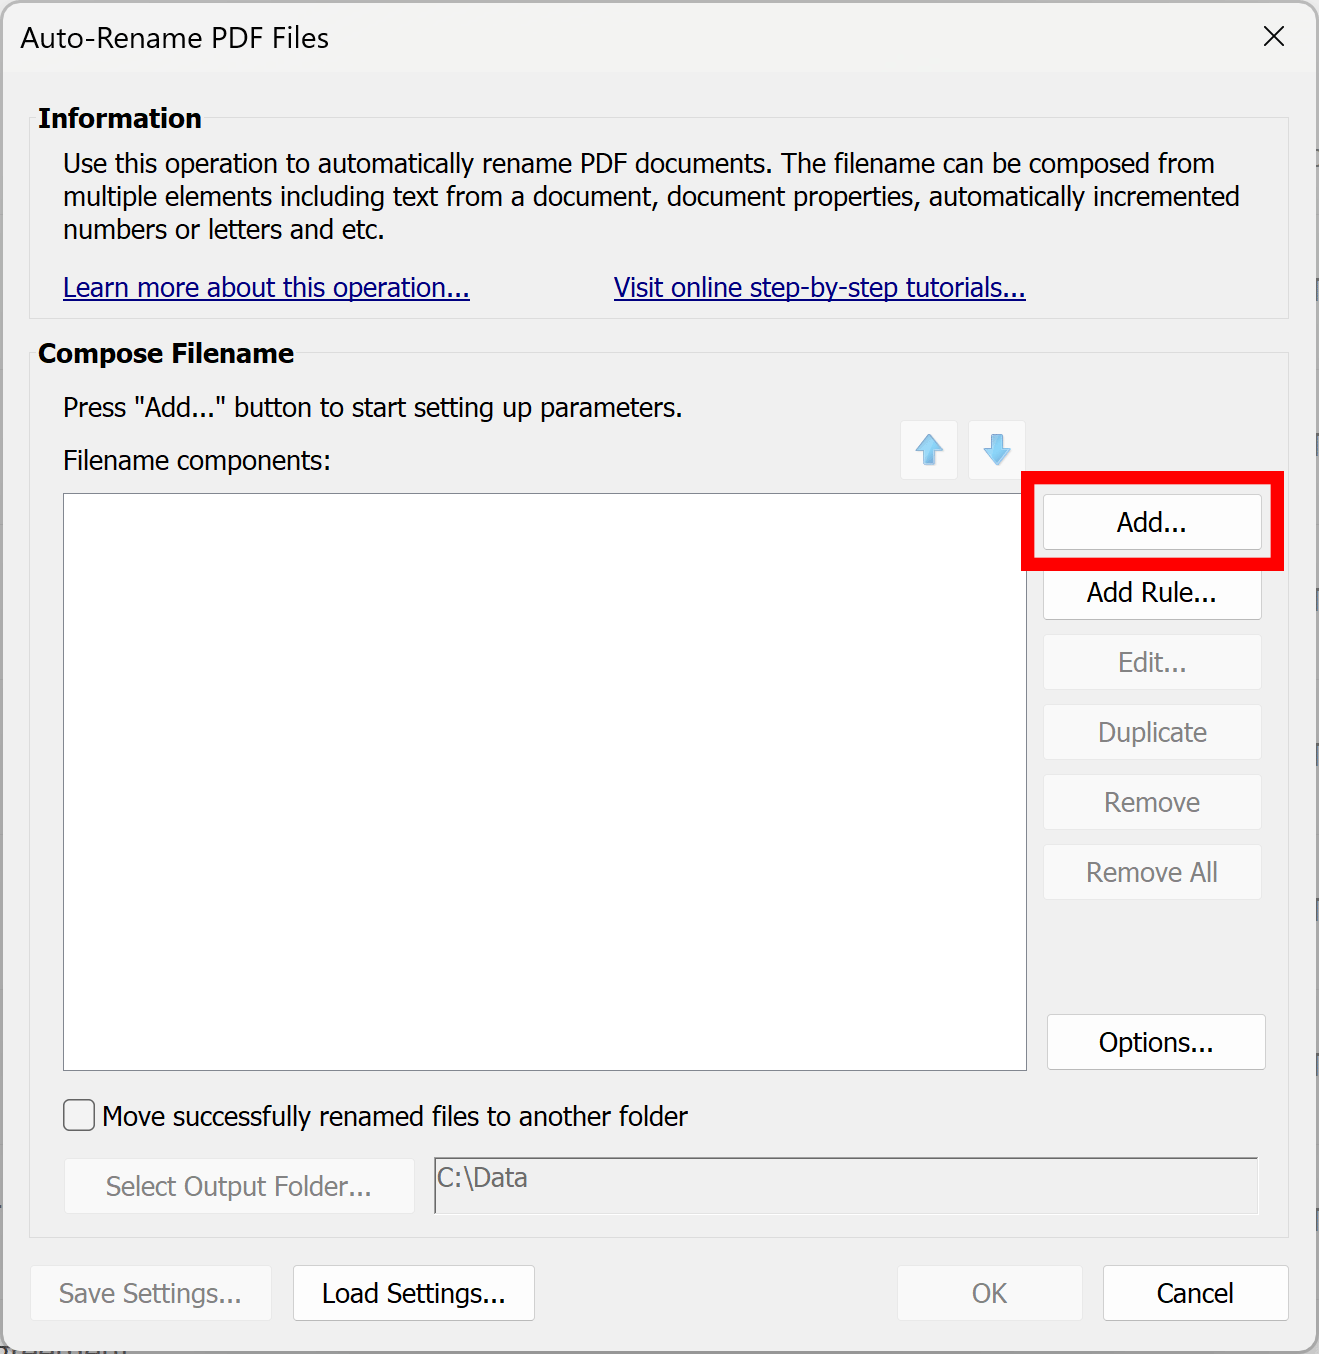
- Step 2 - Add Text From Document
- Press "Add…" to add a first naming component to the output file name.
- Step 3 - Select "Text From Location" Option
- We are assuming that this text is always located in the same page area on all PDF files we are going to rename. If this is not the case, then you would need to use "Text by Search" option. Select the "Text From Location" option and click "Next" to enter parameters.

- Step 4 - Select a Sample File to Define the Text Location
- Select a sample PDF file. This file is going to be used to define a location of the text we are going to extract.
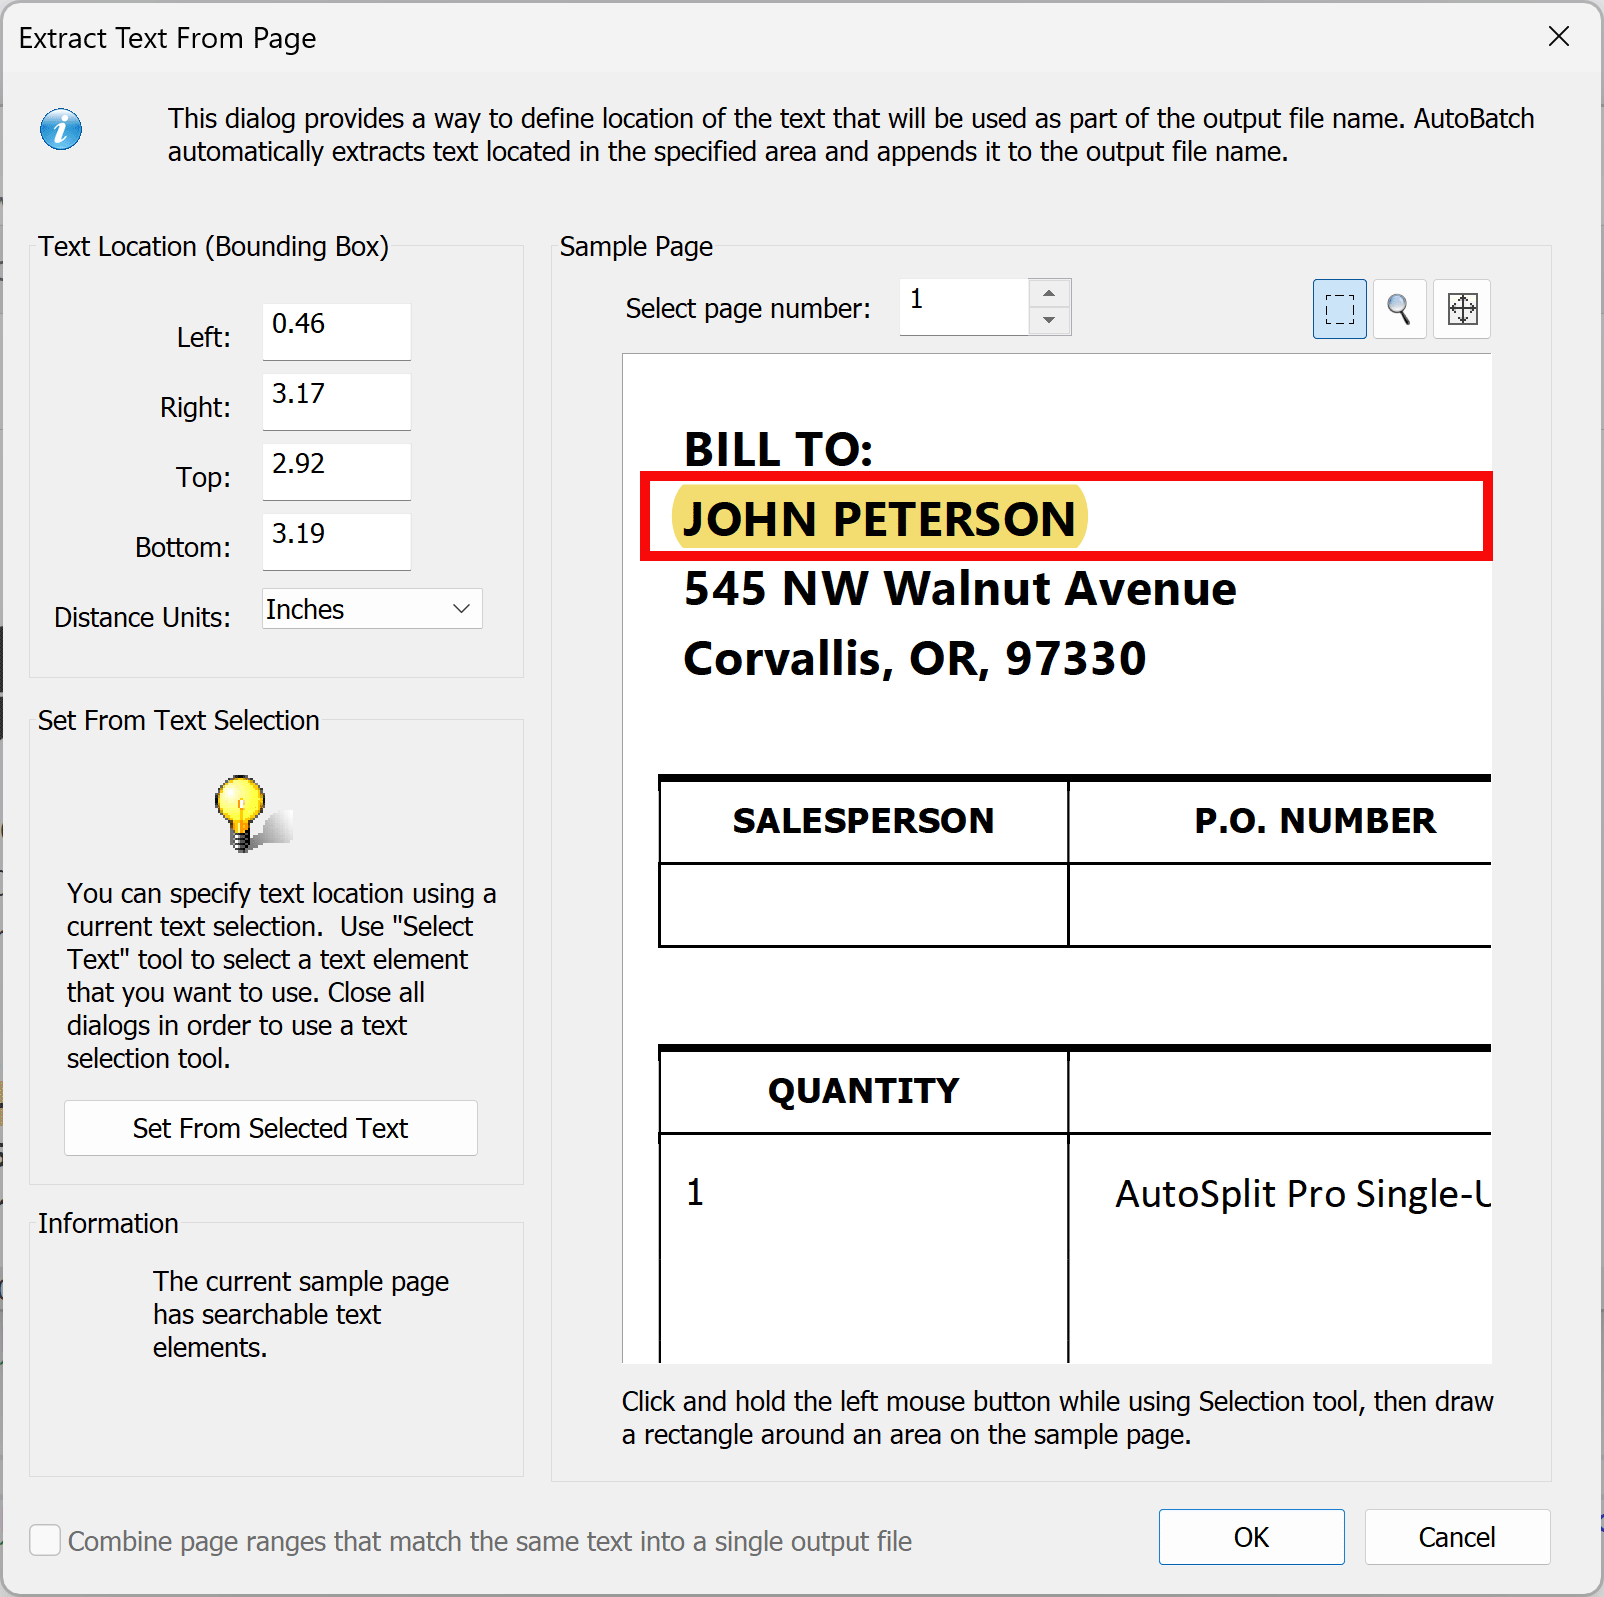
- Step 5 - Select Page Area Where to Extract Text
- Draw a box around text that needs to extracted to record its position on the page. All text within this box will be used as a part of the file name. Click "OK" once done. A new entry would appear in the "Filename components" list.
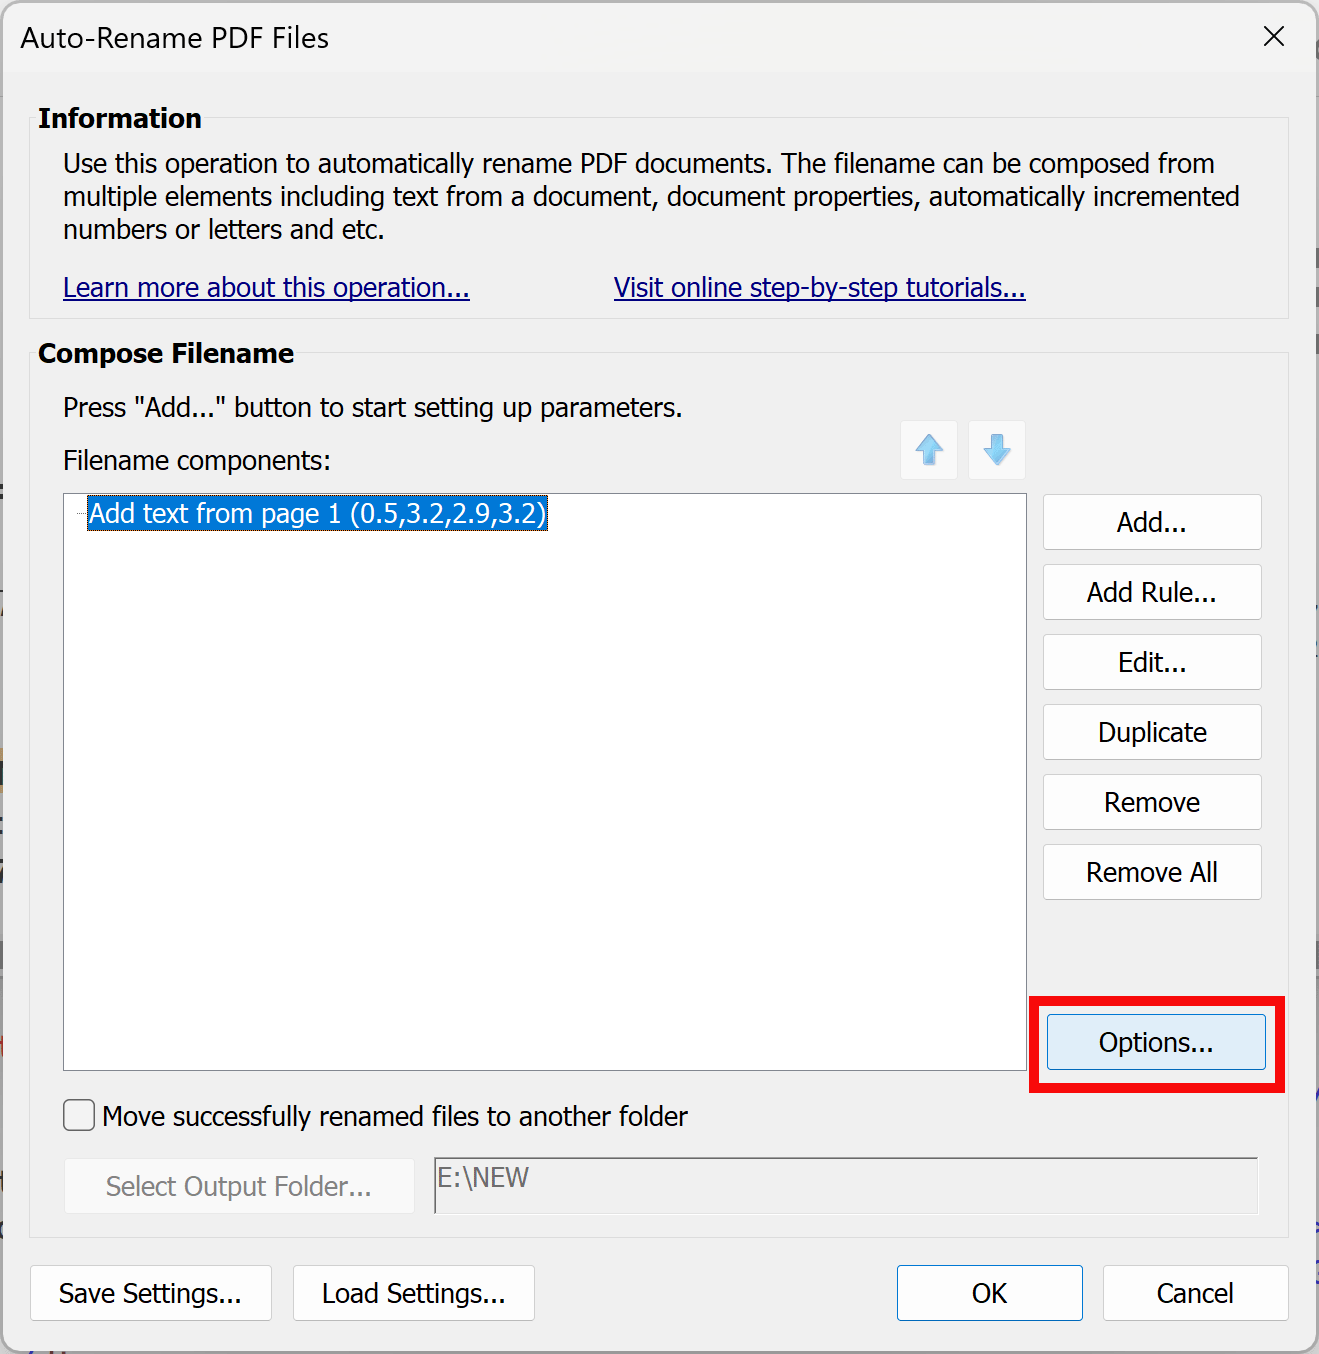
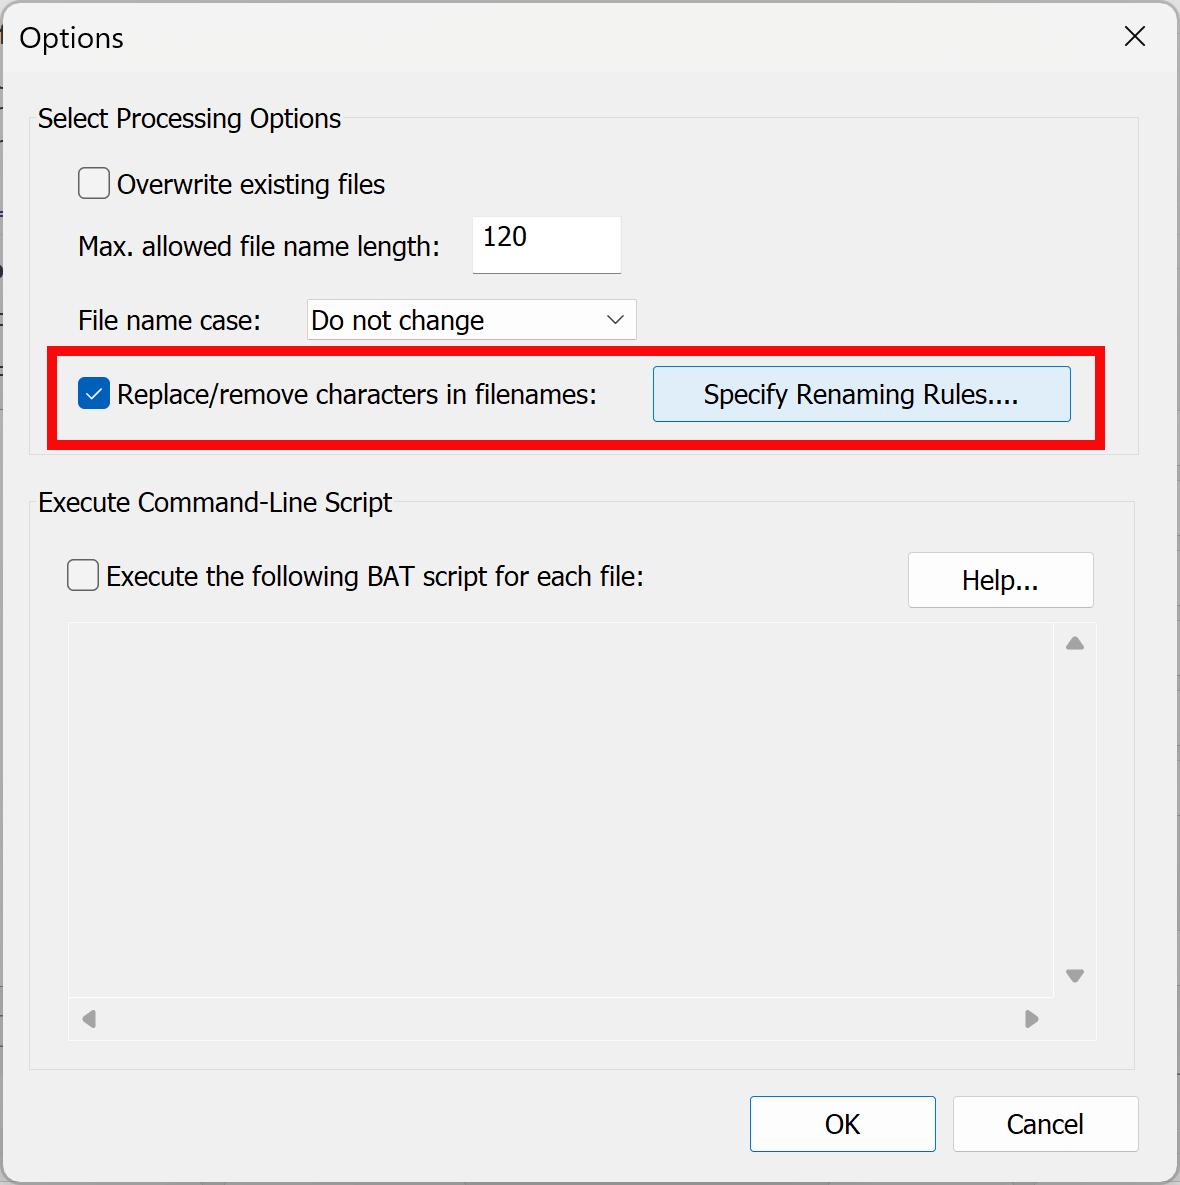
- Step 6 - Press "Options" Button
- Press "Options" button to access settings dialog.
- Step 7 - Press "Specify Renaming Rules" Button
- Check "Replace/Remove Characters in the File Names" option and press "Specify Renaming Rules" button.
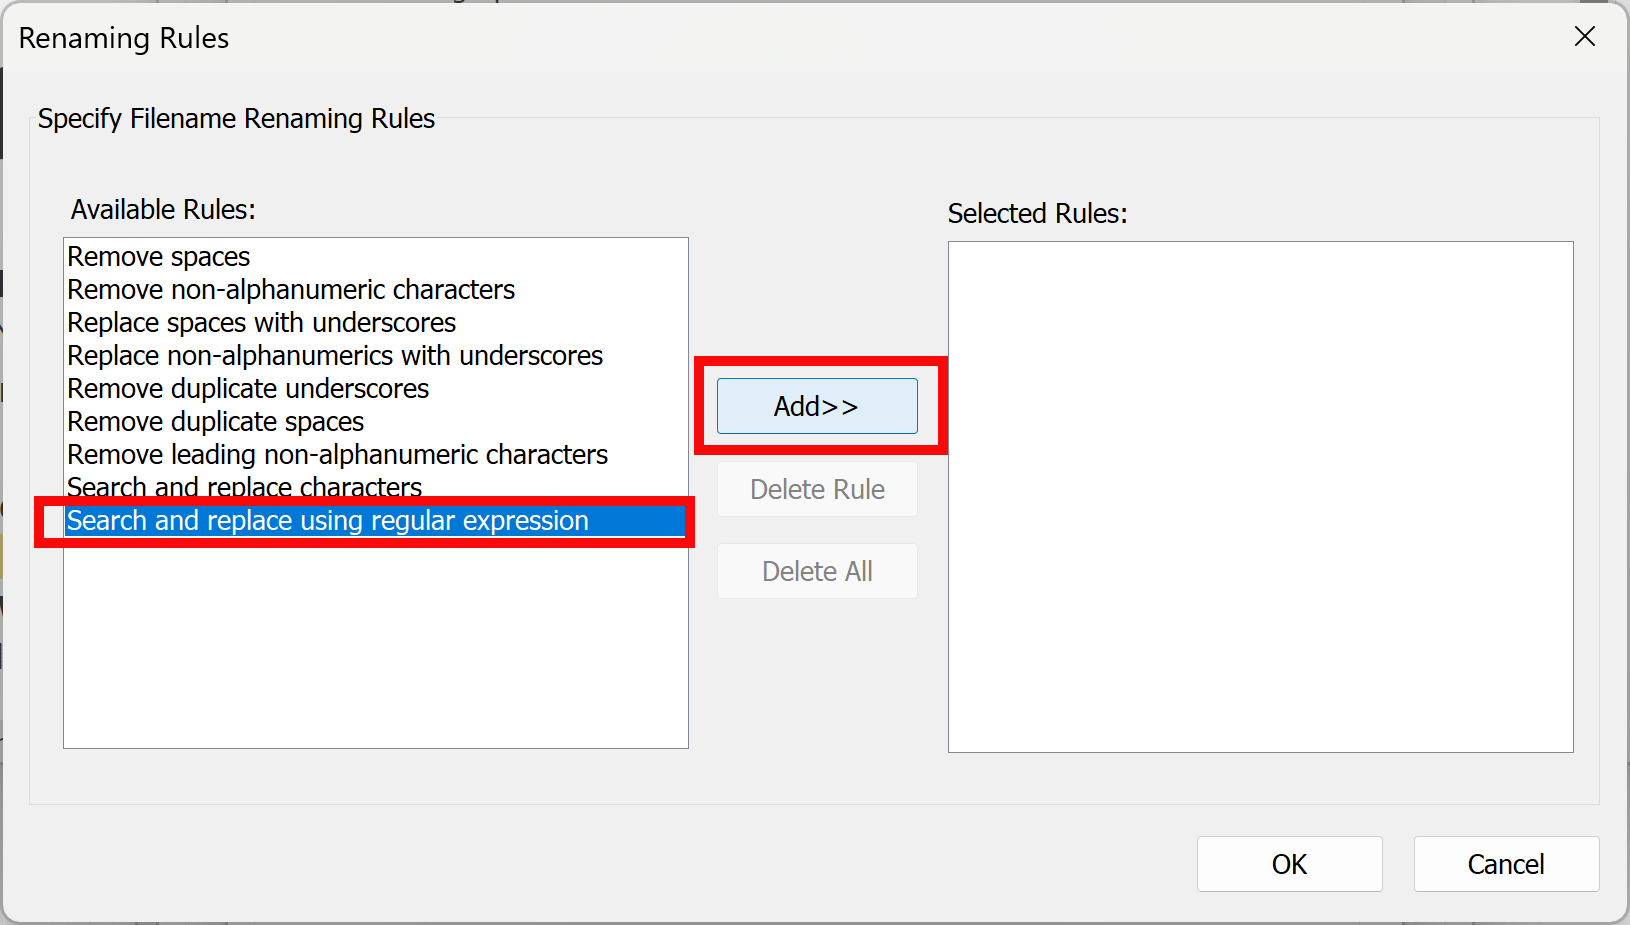
- Step 8 - Add New Renaming Rule
- Select "Search and replace using regular expressions" option and press "Add>>" button.
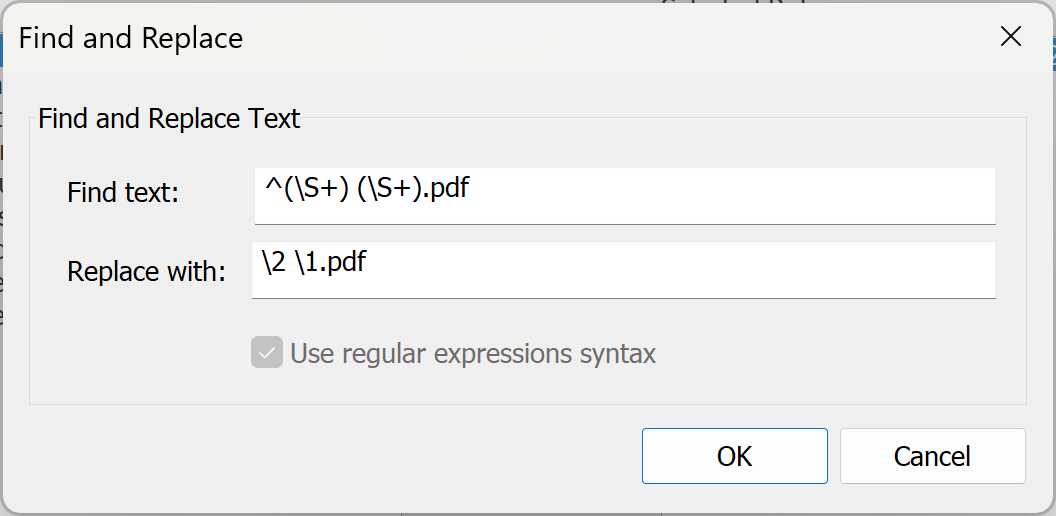
- Step 9 - Enter Search and Replace Expression
- Type the following search and replace expressions:
-
Detailed explanation of the "Find text" expression: ^(\S+) (\S+).pdf
- ^ - matches start of the text string (file name)
- (\S+) - matches a first sequence of non-space characters that appears at the start of the text (first name). It will match everyting except blank spaces. \S+ is enclosed in parentheses. It makes it a capturing group. We can refer to the text that matches this part of the pattern using \1.
- (\S+) - matches a second sequence of non-space characters (last name). It will match everyting except blank spaces. \S+ is enclosed in parentheses. It makes it a capturing group. We can refer to the text that matches this part of the pattern using \2.
- This expression will match two words separated by a space and followed by .pdf.
- Detailed explanation of "Replace with" expression: \2 \1.pdf
- \2 refers to the second capturing group (last name). It will be replaced with actual text that matches a second word.
- \1 refers to the first capturing group (first name). It will be replace with actual text that matches a first word.
- This search and replace expressions will switch first two words around. For example, it will transform John Peterson.pdf into Peterson John.pdf
- You can insert any desired text into replacement string. For example, use \2, \1 to separate last and first name with a comma. This replacement expression will produce Peterson, John.pdf as output.
- Press OK button to close this dialog and again press OK to close "Renaming Rules" dialog.
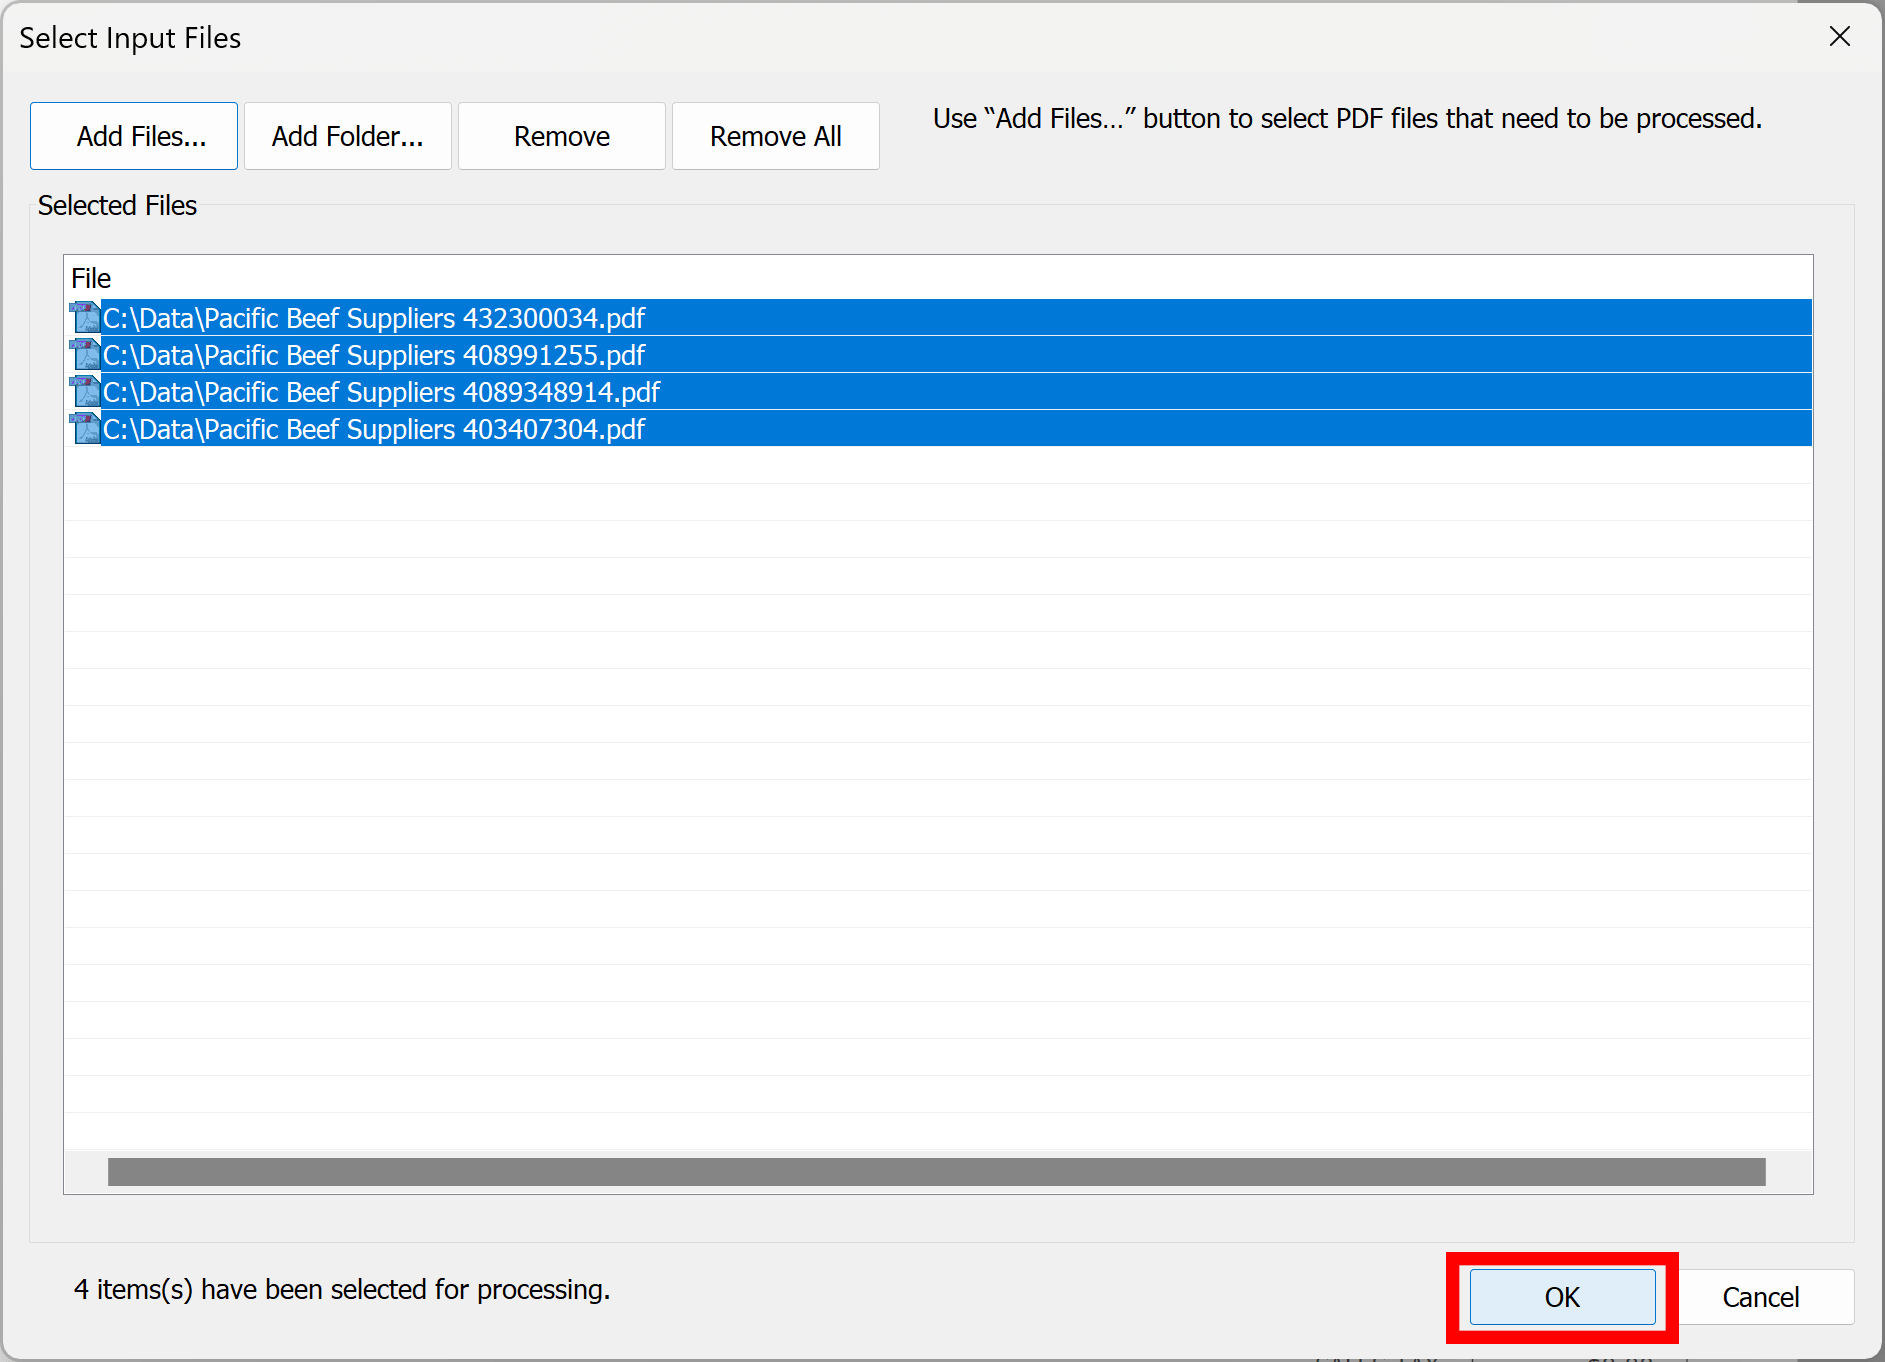
- Step 10 - Select Input Files
- We have finished configuring the renaming settings. Press "Next >>" button to select input files. Press "Add Files..." or "Add Folder..." button. Select input files that needs to be renamed.
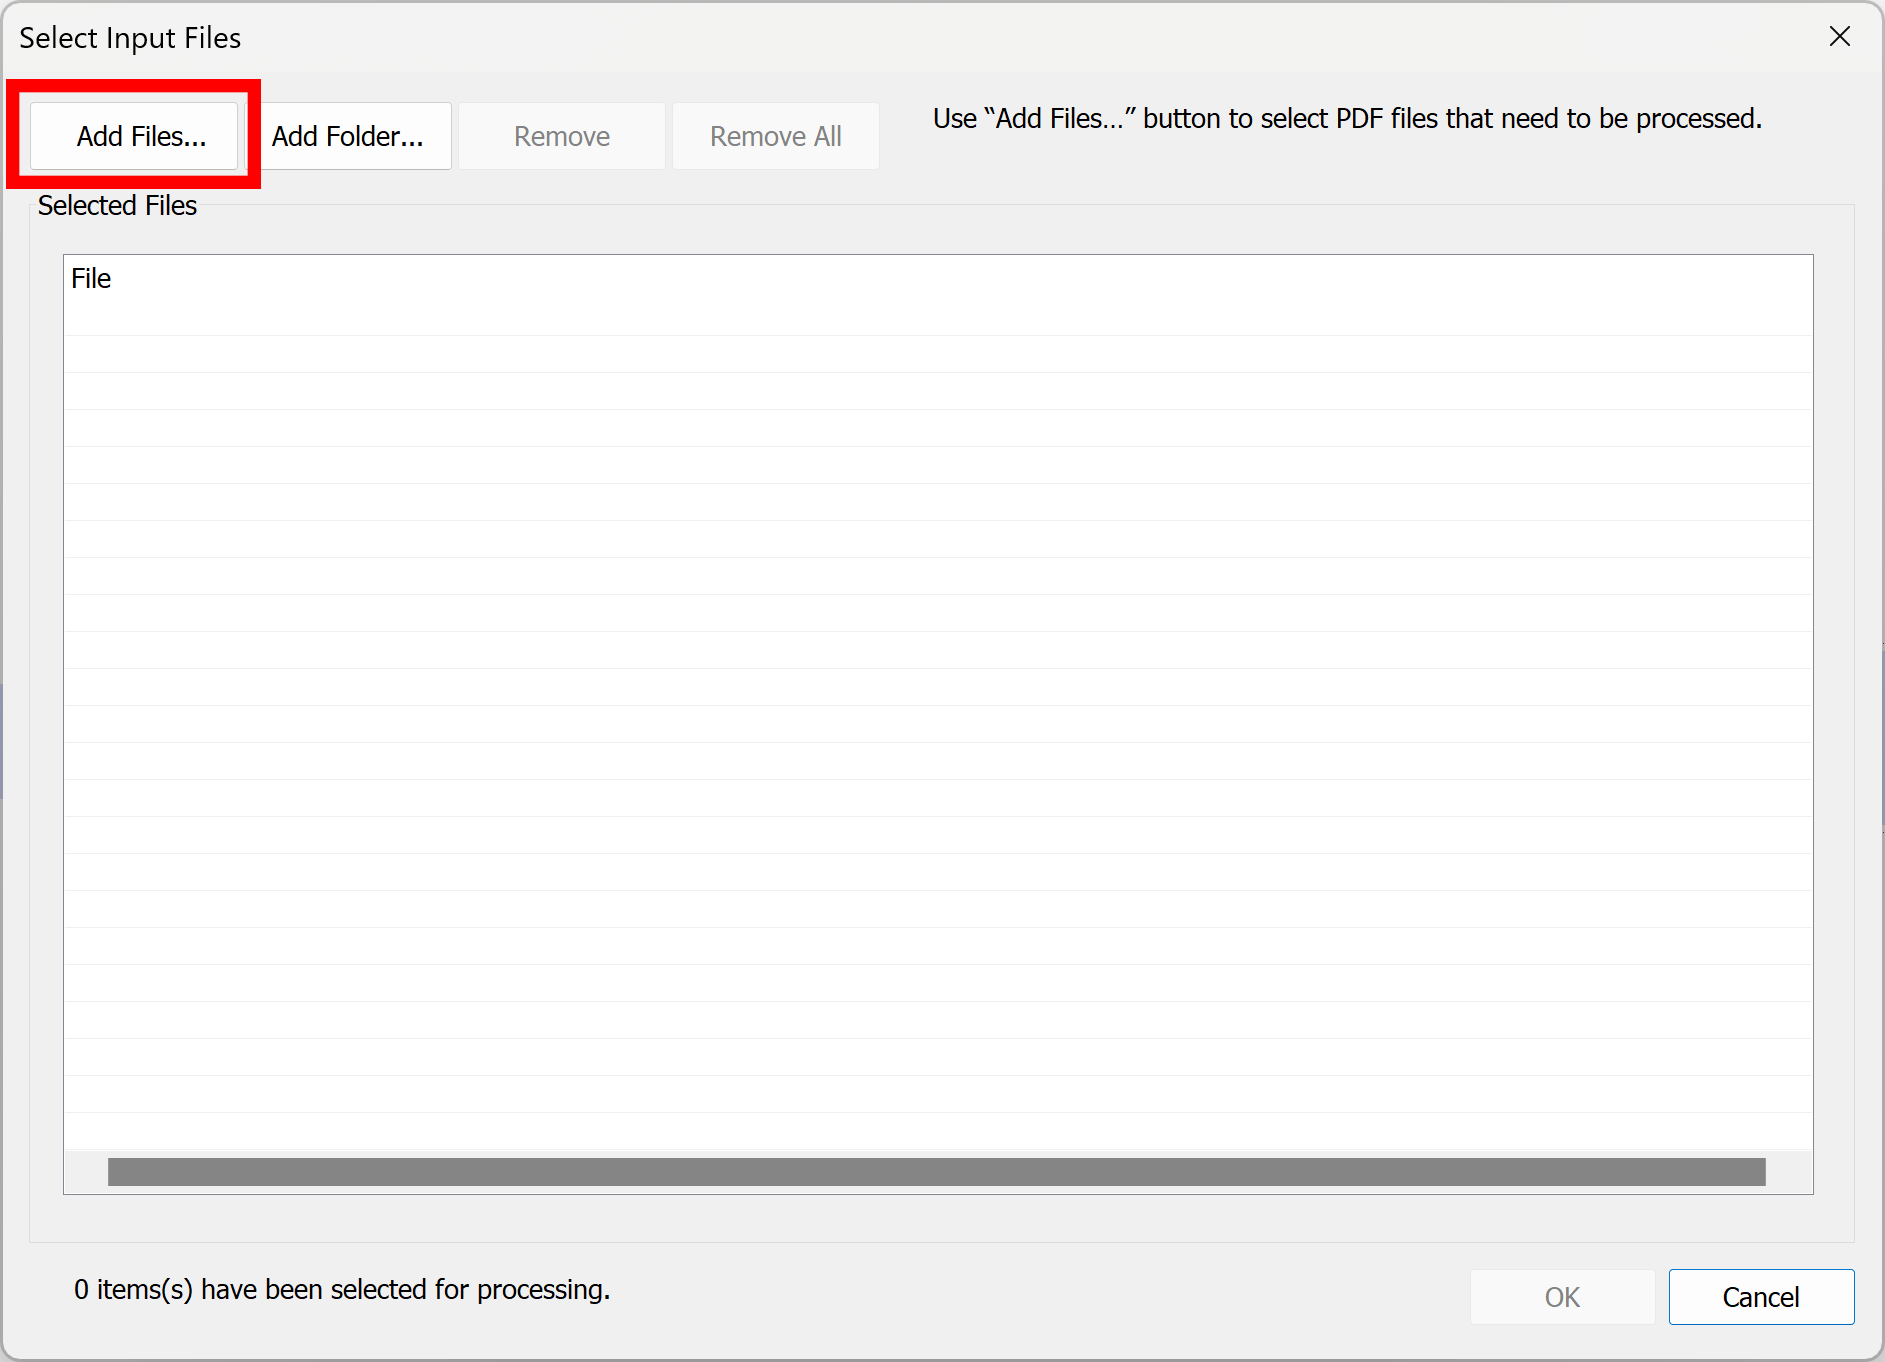
- Press OK button to start processing files. No files will be actually renamed at this stage.
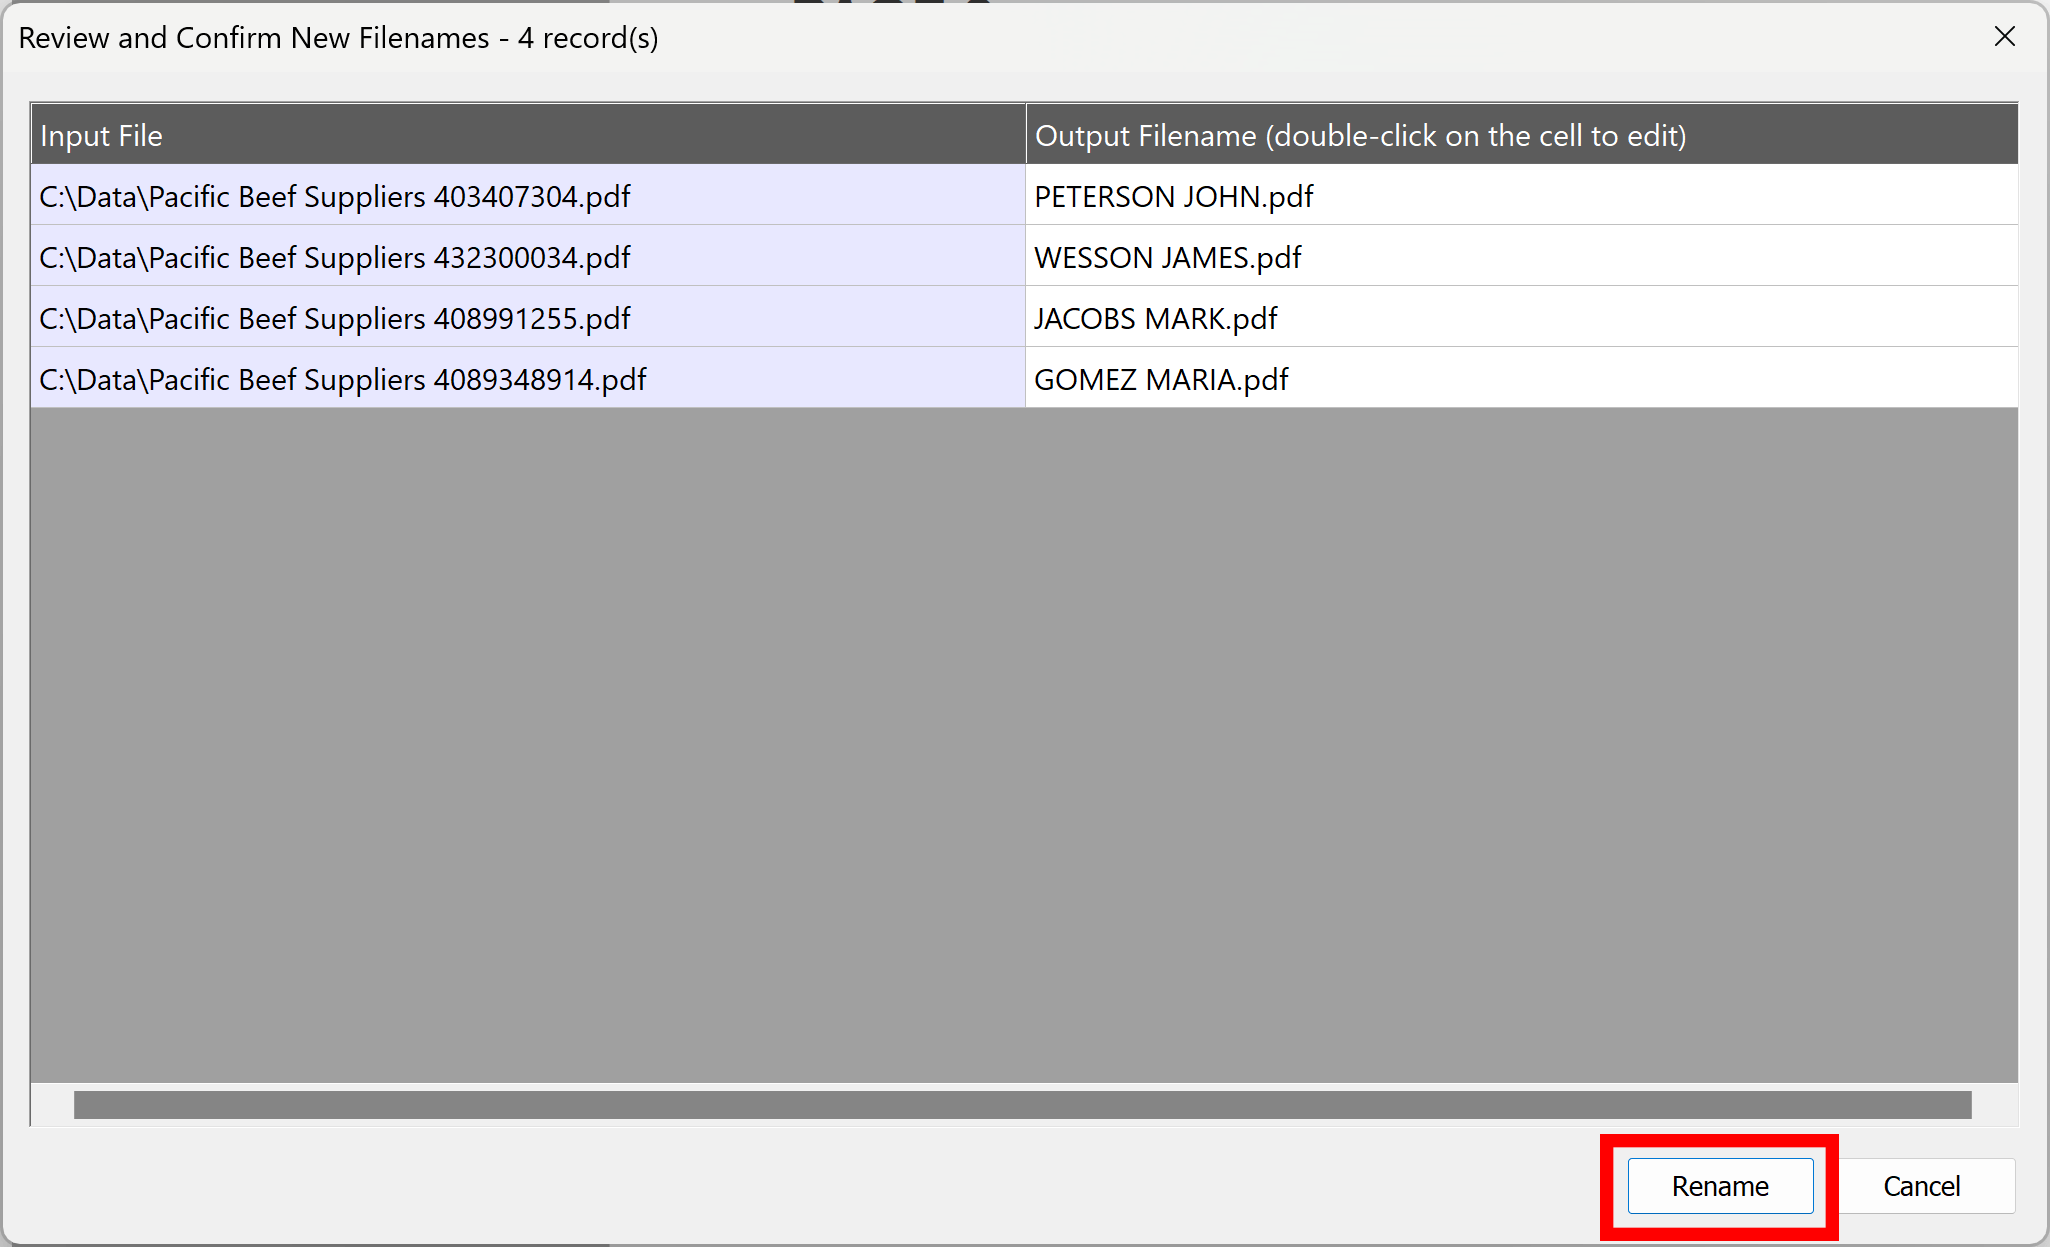
- Step 11 - Review and Confirm New File Names
- The software will process input files without renaming them yet and present "computed" file names in the "Review and Confirm New Filenames" dialog. Review file names that have been generated and make edits/adjustments if necessary. Double-click on an output filename to edit. No files have been renamed at this point yet. Click “Rename” to start the renaming process.
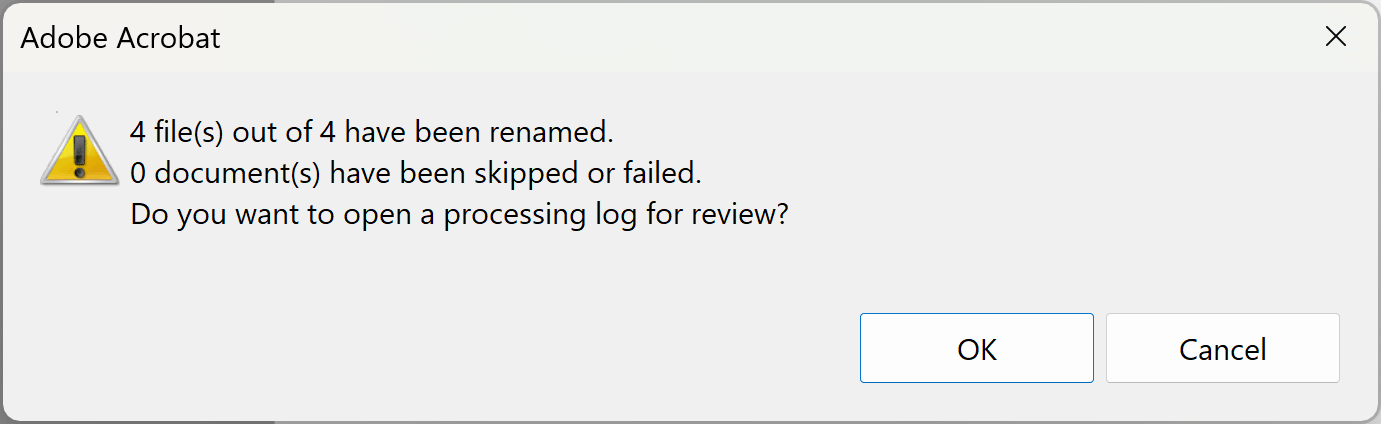
- Step 12 - Review Processing Report
- Check the renaming statistics. Click “OK” to open a processing report.
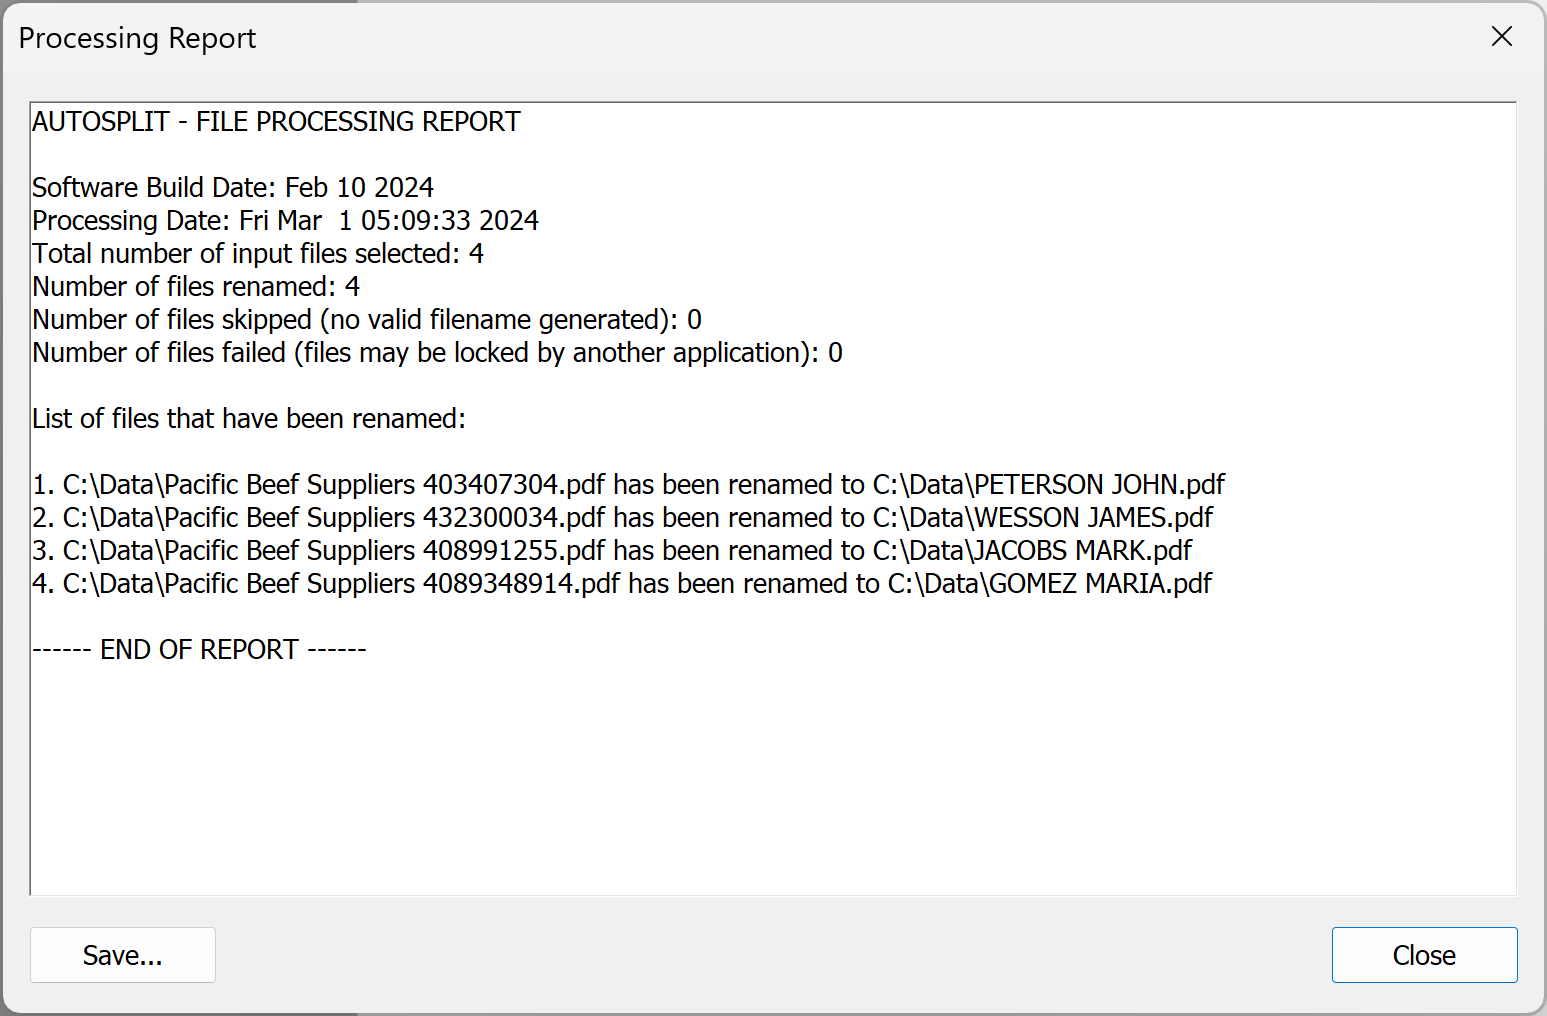
- The processing report shows detailed information on how many files have been renamed or failed along with input/output file names for each document.
- Click here for a list of all step-by-step tutorials available.