Using AutoDocMail™ to Distribute PDF Files using Email Addresses Located Within Them
- Introduction
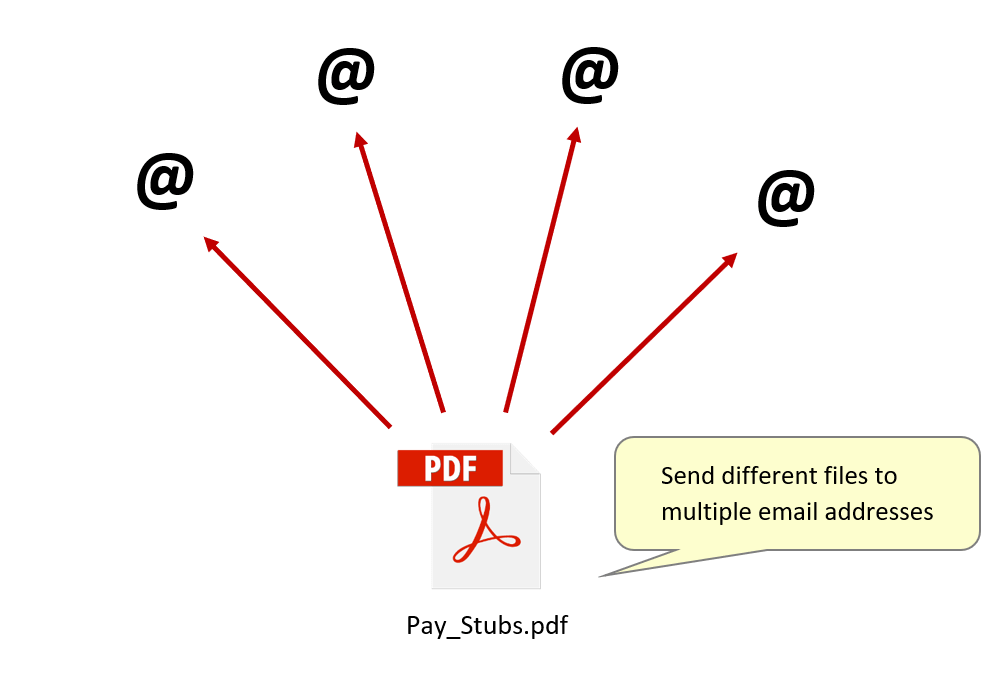
- This tutorial demonstrates how to configure AutoDocMail™ to distribute business documents to multiple email addresses at once. These could be anything such as invoices or pay stubs: 1) Either as individual documents 2)or combined as a single PDF. The plug-in can be used for this second option to split them into single files, and automatically send them to their corresponding recipients. In this example, we split one source file containing multiple combined pay stubs. Each one features the email address for the recipient somewhere on the page. Use the plug-in to extract necessary email addresses, and send the correct files to them. This means that the correct recipient only receives the necessary document, delivered as an email attachment. This advantages admin/payroll departments needing to distribute multiple pay stubs or invoices at once, to many customers or employees.
- Input Documents Description
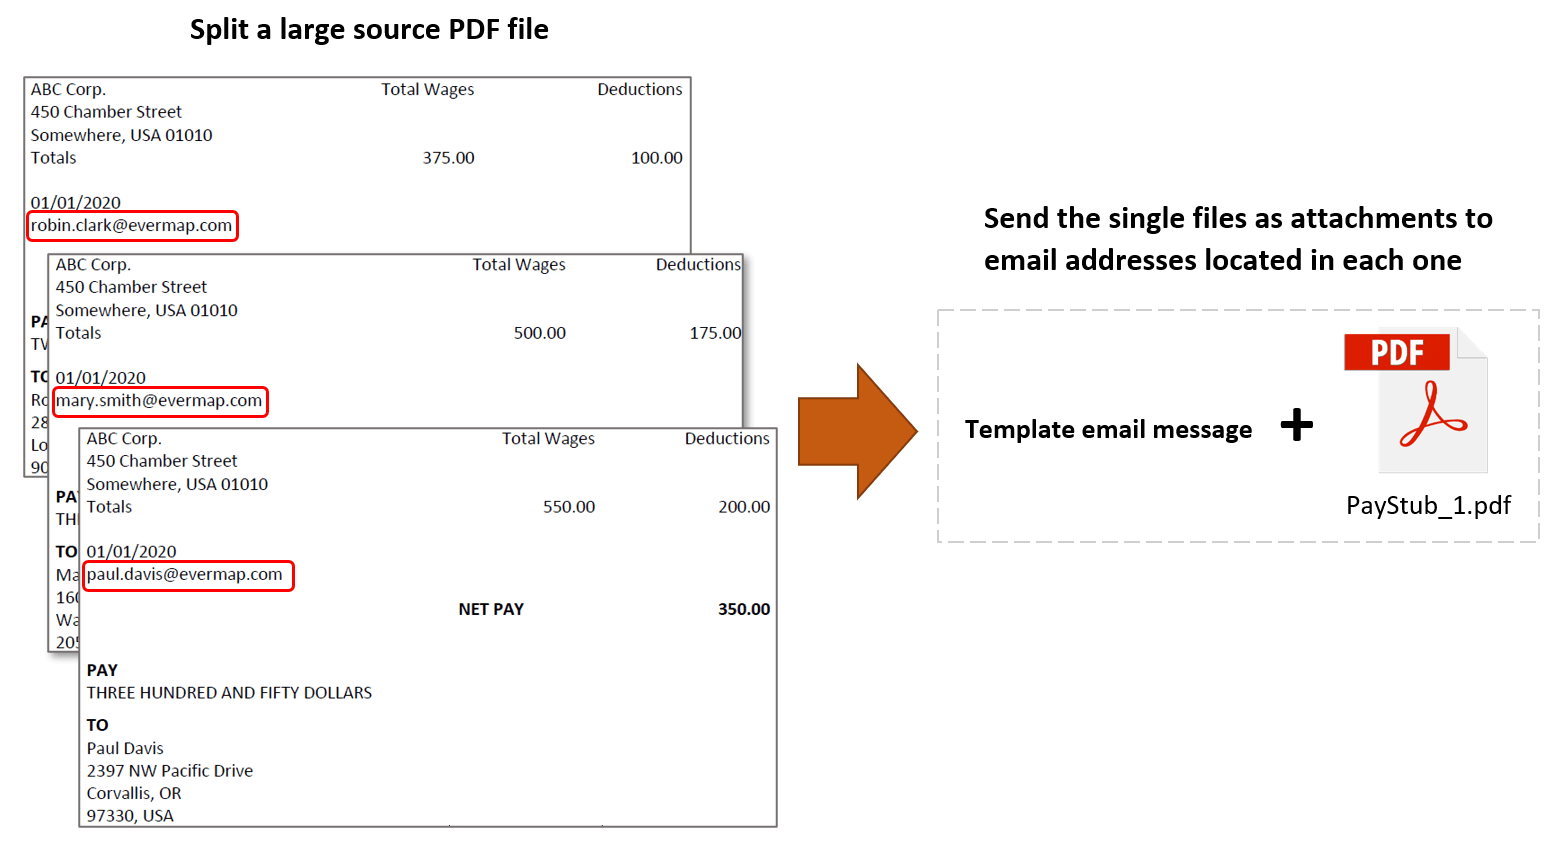
- This example uses one PDF file consisting of multiple pay stubs. The plug-in is used to split this into individual files to be sent to each recipient, using email addresses located within each one. Note that the email addresses do not have to be visible on the page. It simply needs to be ‘readable’ text that can be identified by the plug-in. If it is not suitable to show email addresses on the documents being distributed, they could even be written as white text on a white background - or be hidden by other page elements. The sample documents used here contain clearly written email addresses, but these could also be entered into a simple text box to trial this method.
- Prerequisites
- You need a copy of Adobe® Acrobat® (Standard or Pro) along with the AutoDocMail™ plug-in installed on your computer in order to use this tutorial. Both are available as trial versions.
- Step 1 - Open the "Auto-Email Documents" Dialog
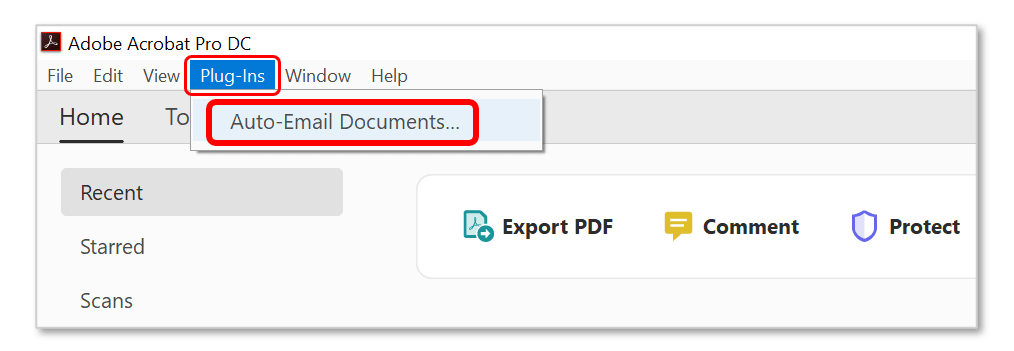
- Start the Adobe® Acrobat® application. Now select “Plug-ins > Auto-Email Documents…” from the main Acrobat menu.
- Step 2 - Open the Email Settings
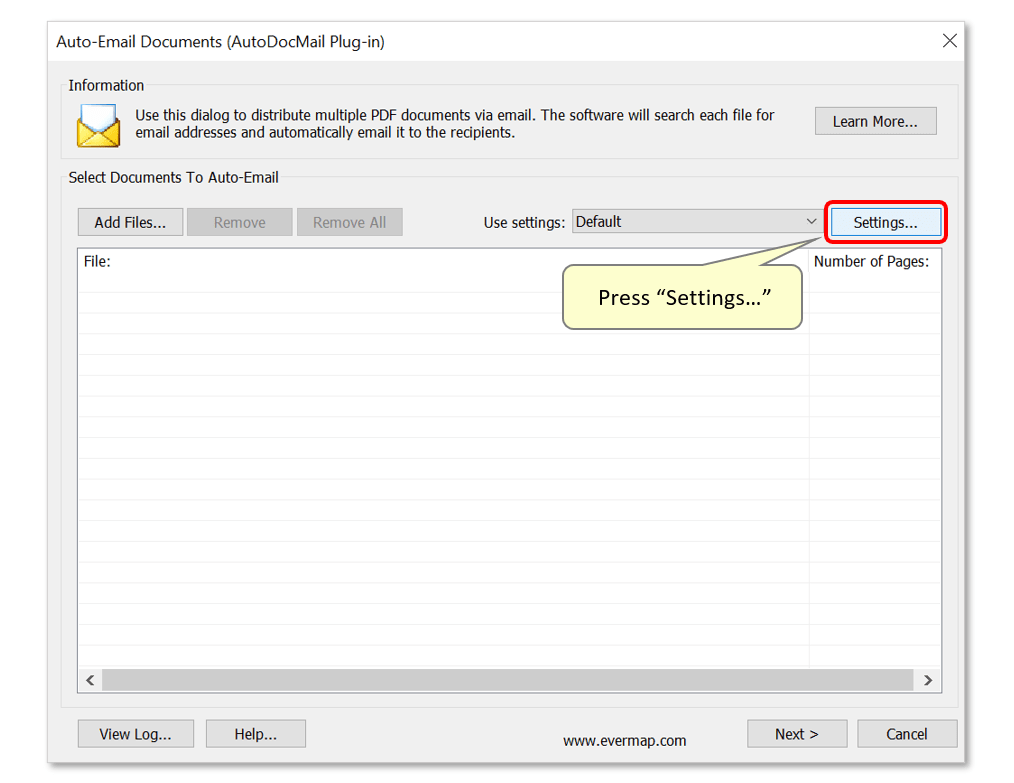
- In the "Auto-Email Documents" dialog, press the "Settings..." button.
- Step 3 - Edit Settings
- This opens a dialog showing a list of saved settings configurations. Click the “New…” button to configure new settings, or double-click on “Default” settings to modify these. Any settings configuration can also be changed by selecting it and pressing the "Edit..." button.

- Step 4 - Open "Email Extraction" Settings
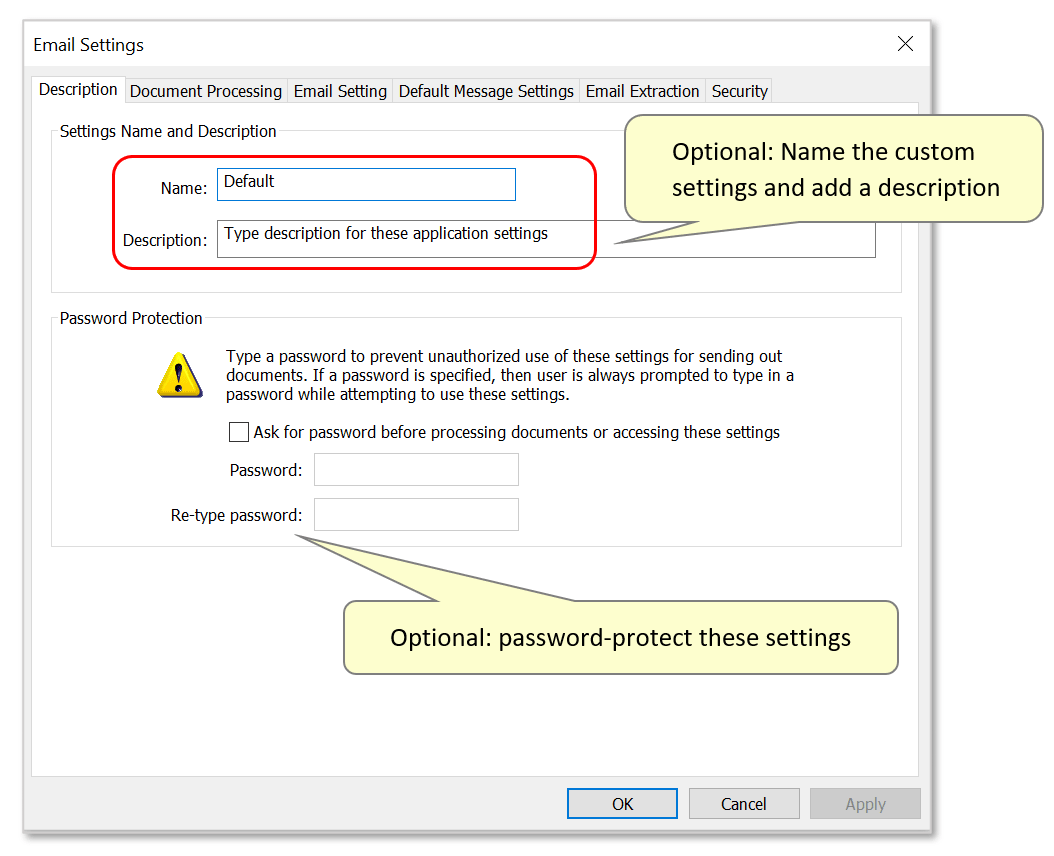
- Under the "Description" tab, optionally edit the configuration's name and/or add a description that describes the configuration's function.
- It is also possible to password-protect the particular settings configuration here to prevent unauthorized use. To do this, check the “Ask for password…” option and set a suitable password using the entry boxes below.
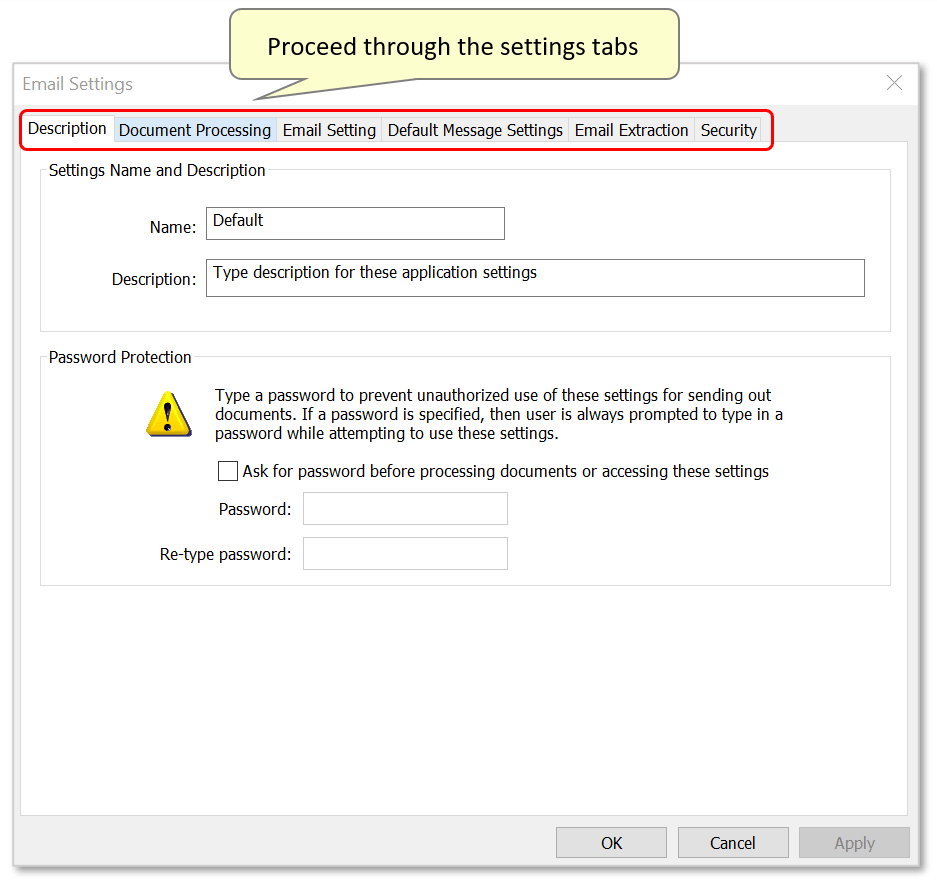
- Proceed to the next settings screen by clicking on the "Document Processing" tab.
- Step 5 - Select Input Document Processing Options
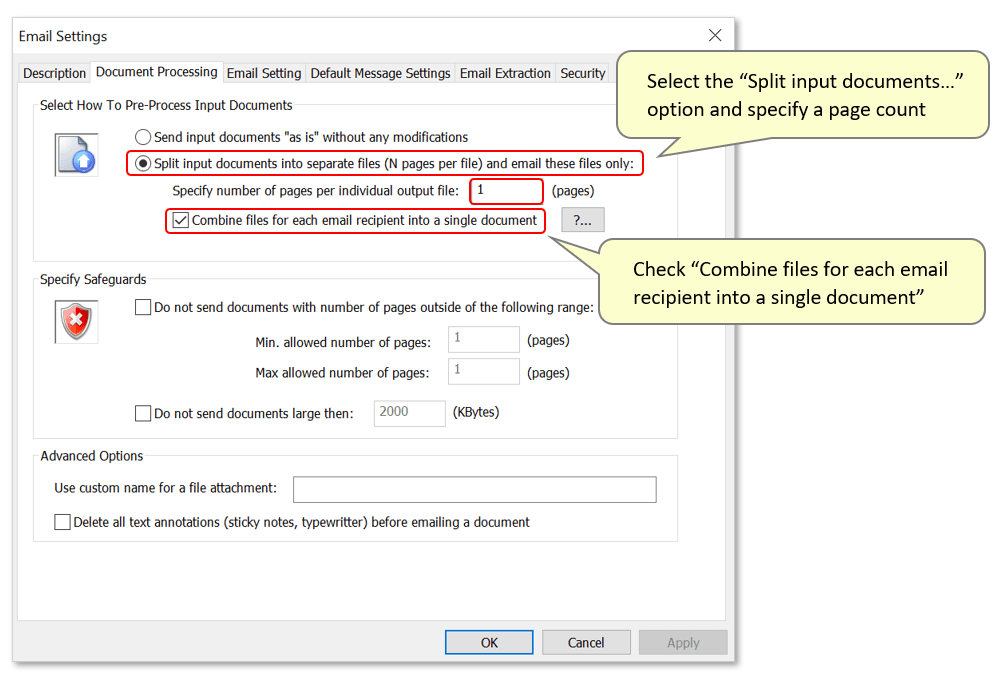
- On this screen, select the “Split input documents into separate files…” option. This is necessary because we are going to process a single PDF file that contains multiple subdocuments (pay stubs), and each sub-document needs to be separately emailed to a different recipient. (If you are sending files that are already split for each recipient, leave the 'Send input documents "as is"...' option selected.)
- Now use the "Specify the number of pages per individual output file” feature by typing a number in to the box. This example uses “1” as each pay stub occupies one page.
- Also check the “Combine files for each email recipient into a single document” option to ensure that each recipient receives a single email, in case there are multiple document pages containing the same email address. Do not use this option if any documents contain multiple email addresses, or if CC/BCC addresses are used.
- Step 6 - Specify Safeguards
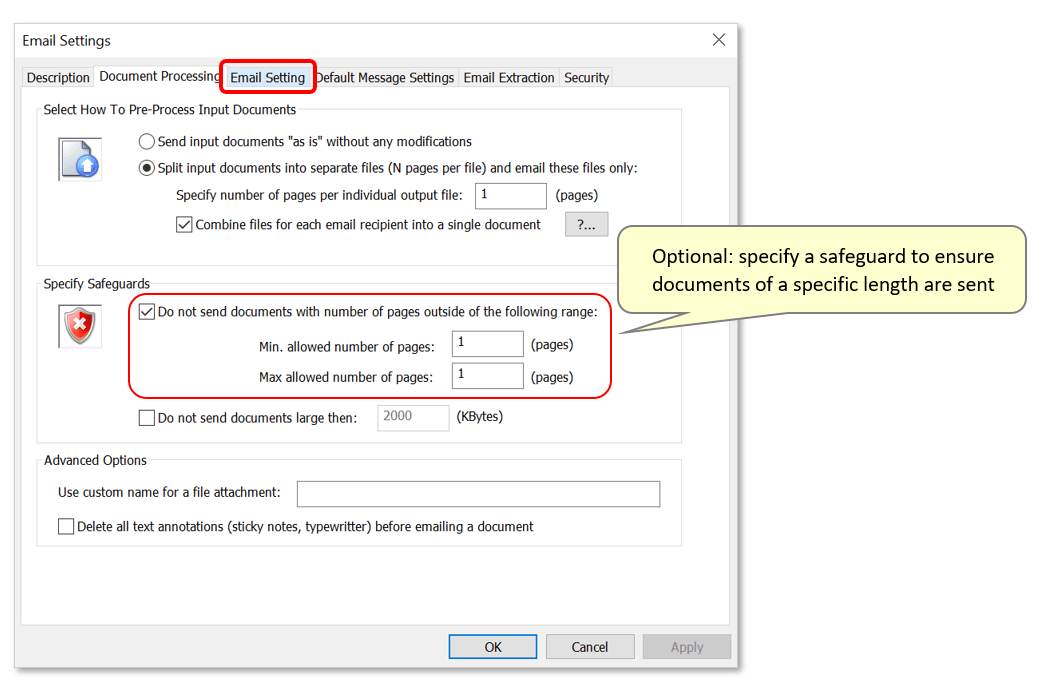
- Check the “Do not send document with number of pages outside of the following range" box, then type “1” in the “Min allowed number of pages” and “Max allowed number of pages” entry boxes. This acts as a safeguard to ensure that each recipient receives the correct document - no longer than 1 page.
- Now click on the “Email Setting” tab to move to the next level of the settings configuration.
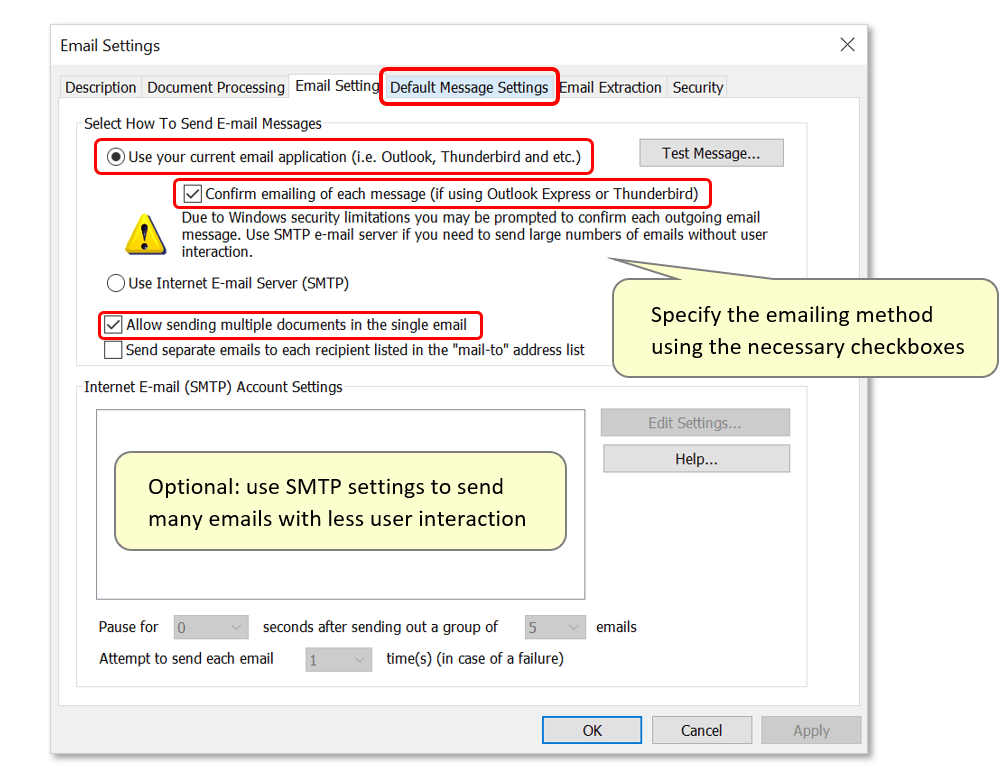
- Step 7 - Configure Emailing Method
- Use this screen to configure the email distribution method. By default, emails will be sent via your default email application (such as Outlook or Thunderbird etc.). Due to Windows security limitations, the program will prompt for confirmation before sending each email unless the "Confirm emailing of each message" option is manually unchecked. Use the SMTP email server options below if you need to send large numbers of emails without user interaction. See the separate tutorial containing more detail on how to do this here.
- Ensure that the “Allow sending multiple documents in a single email” option is checked, if there may be multiple files (pay stubs) addressed to the same recipient.
- Once the emailing method is configured correctly, click on the “Default Message Settings” tab.
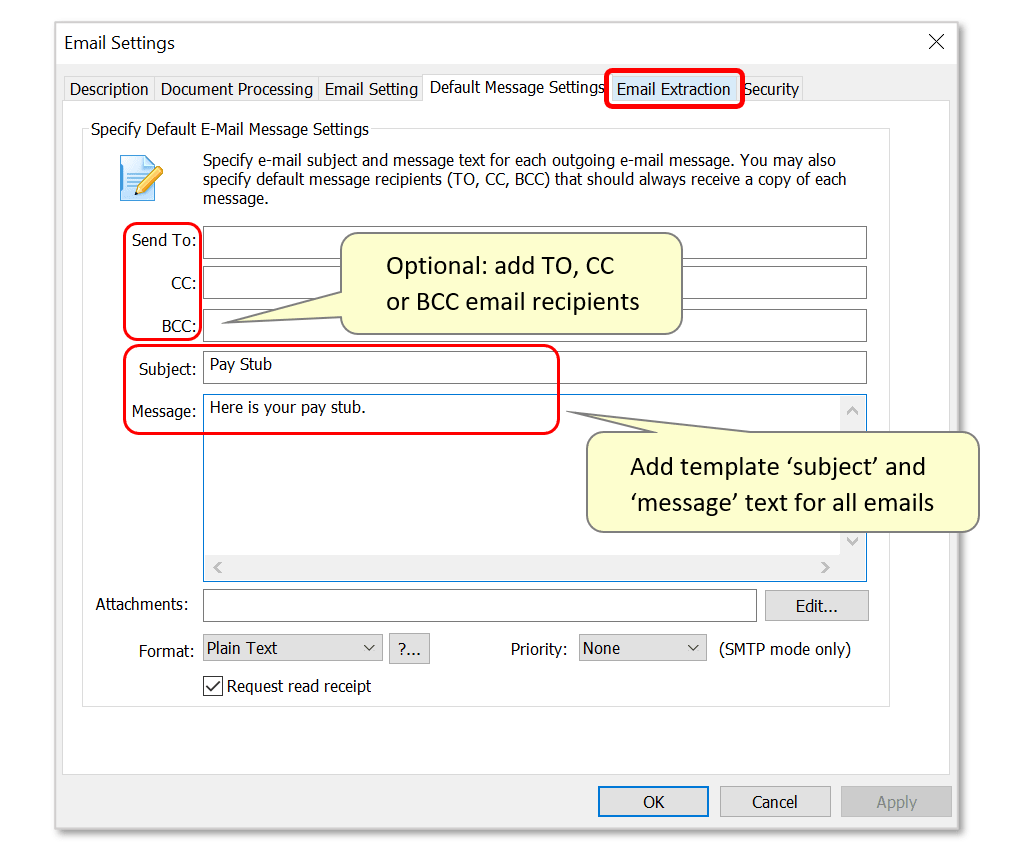
- Step 8 - Specify a Default Email Message
- On this screen, type the 'Subject' and 'Message' text to be sent with all outgoing emails in the appropriate entry boxes.
- Optionally specify TO, CC, and BCC recipients, who will always receive a copy of each email.
- Click on the “Email Extraction” tab, to move to the next level of settings.
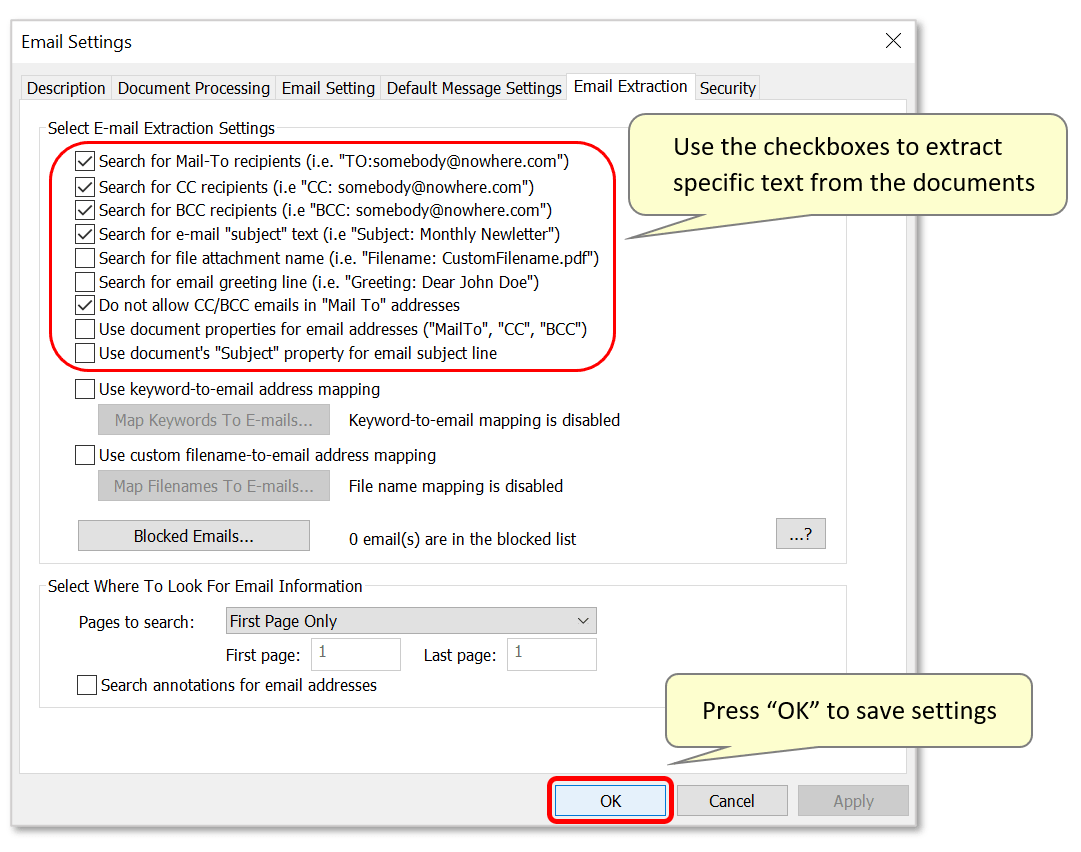
- Step 9 - Select Email Extraction Settings
- This is an advanced settings page with various text-recognition features. Modify these settings so that the application can recognize and extract information from within the document’s text. For example, if you check the “Search for CC recipients” box, you can specify a CC recipient within the text using the keyword “CC:” followed by the email address. The plug-in then extracts the CC information from each document. Other keywords are also supported, such as “BCC,” “Subject,” Filename,” and “Greeting.” See the advanced keyword extraction tutorial here for more information on these settings.
- Unless you require advanced settings, you do not need to modify anything in the “Email Extraction” tab - or the “Security” tab. There are more detailed separate tutorials on how to password-protect the emailed attachments.
- Press “OK” to save changes to the settings configuration.
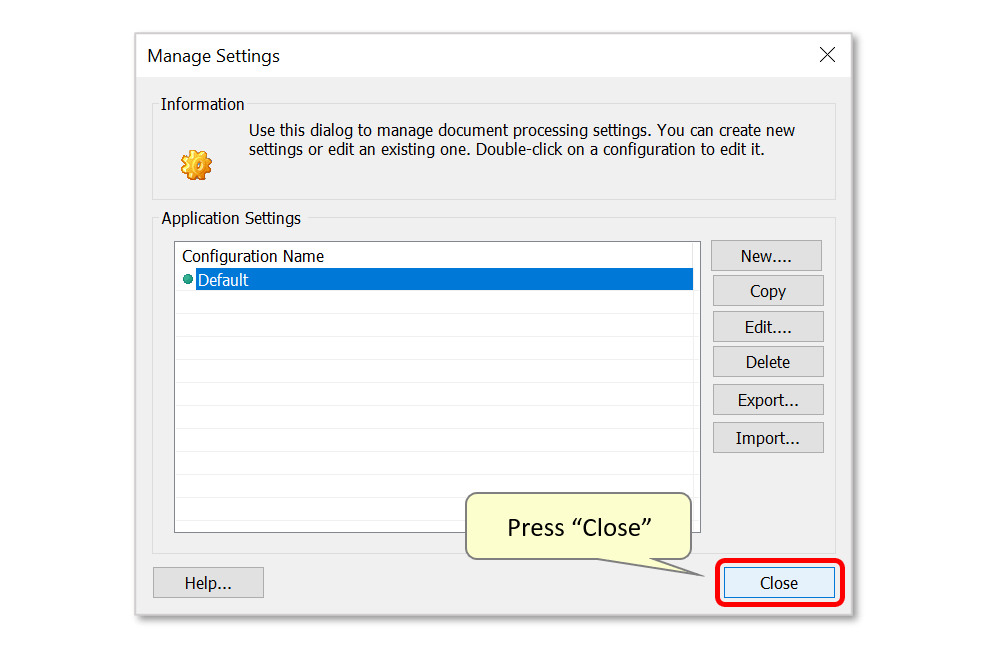
- Step 10 - Finish Configuring Settings
- Press “Close” to finish the settings configuration and proceed to processing your documents.
- Step 11 - Select the Source File
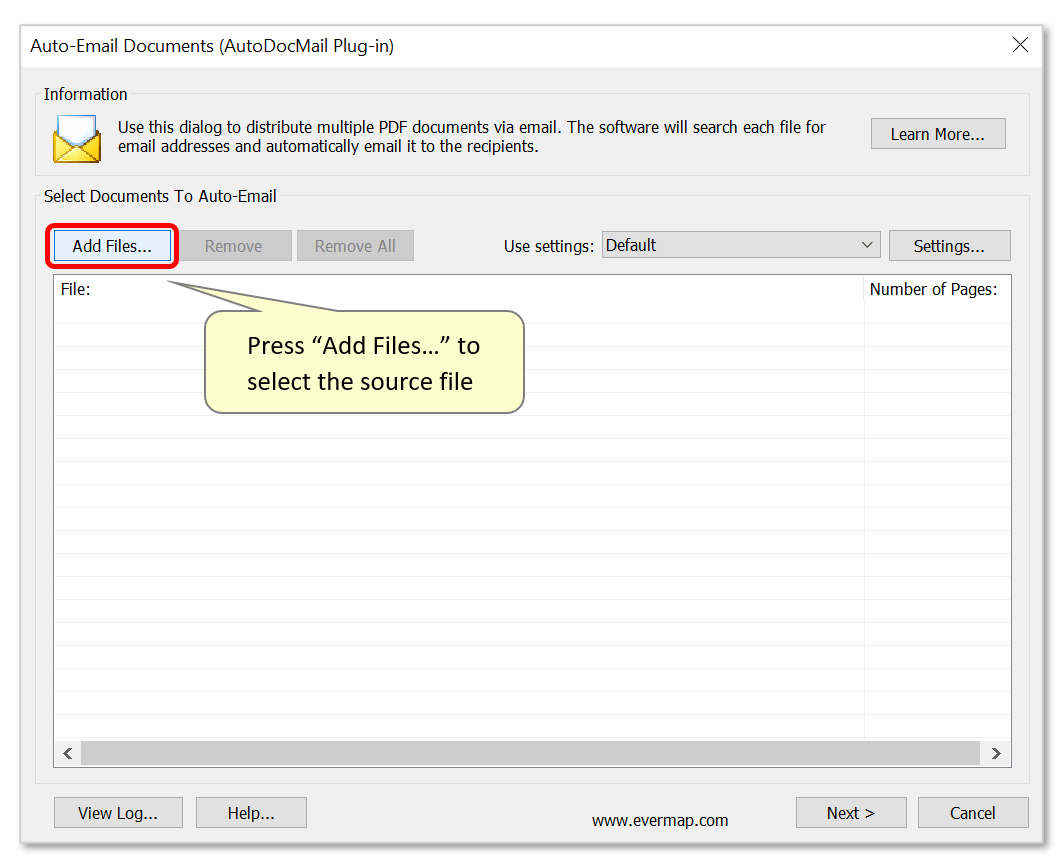
- In the "Auto-Email Documents" dialog, press the "Add Files..." button to select the source PDF file(s) that needs to be distributed. In this example, this is the PDF containing multiple single-page pay stubs.
- Locate the file, select it, and press "Open".

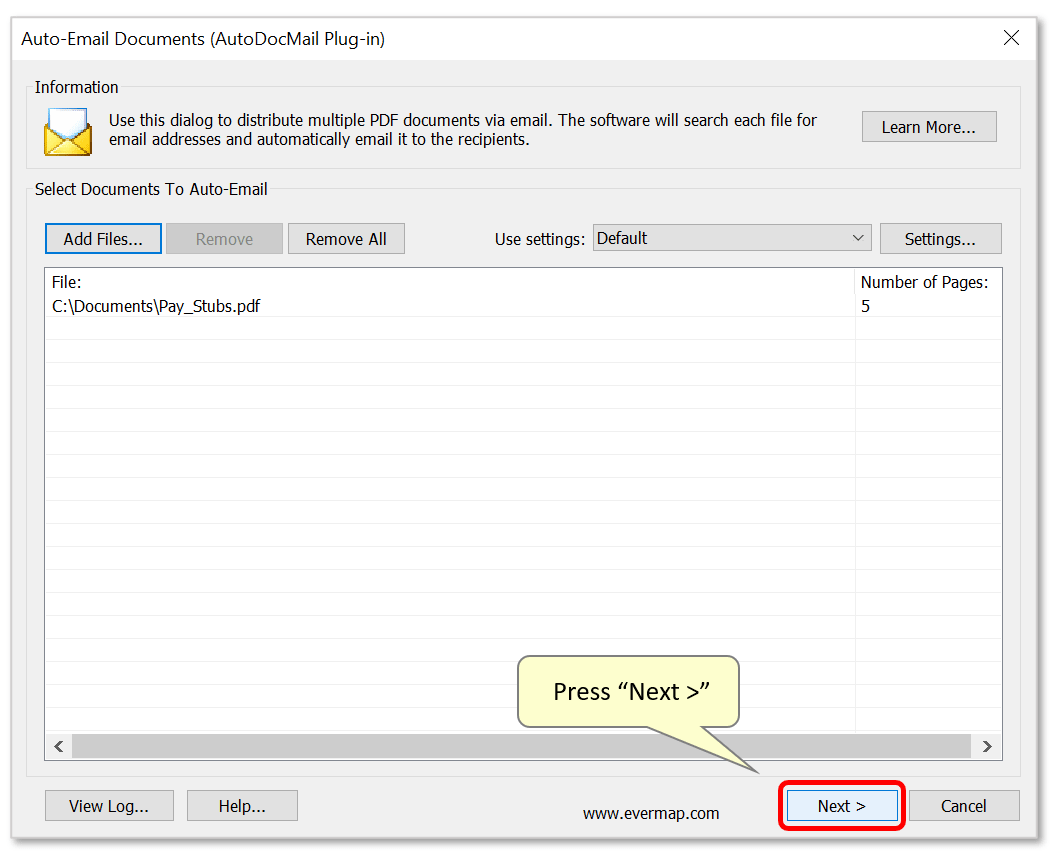
- The input file path and it's number of pages will now be listed in the dialog. Press "Next >" to proceed.
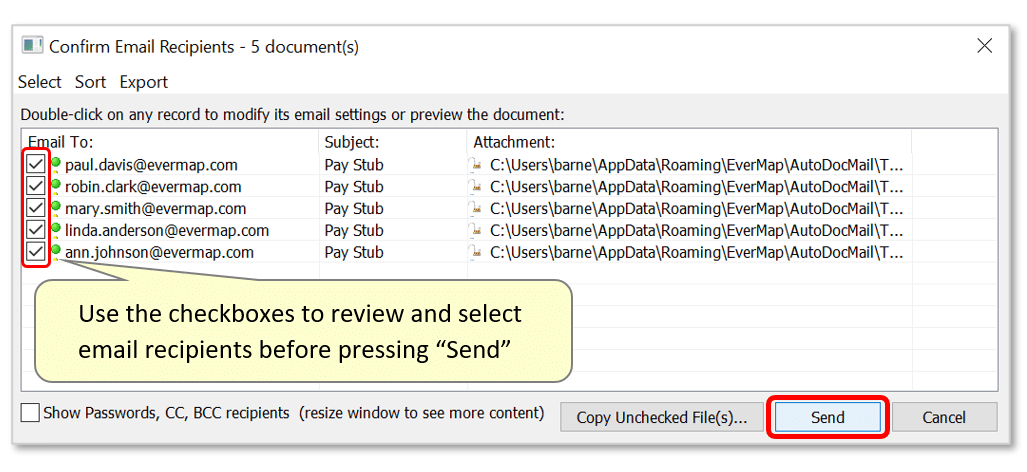
- Step 12 - Review Email Recipients
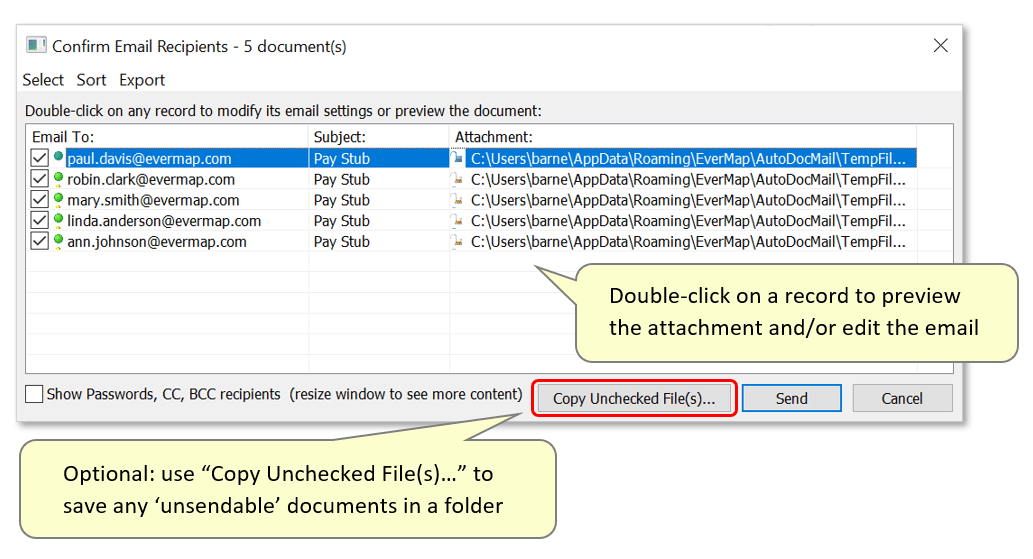
- Once the document is split and processed, the “Confirm Email Recipients” dialog opens. A green circle on each line indicates that processing was successful, and extracted information for each recipient is listed here. Each recipient’s e-mail address, 'Subject', and 'Attachment' for all messages should be listed.
- Unsuccessful processing may be due to email addresses not being present in some documents. For example, some employees may not provide email addresses and need physical pay stubs sent to them. The "Copy Unchecked File(s)..." button can be used to save all 'unchecked' files (that can't be emailed) to a specific folder.
- The plug-in creates temporary files when splitting the single large document into smaller ones. The attachment pathways listed on this screen reflect these temporary files, which will be deleted once processing is complete.
- Double-click on any record in the list to preview the document and/or modify the e-mail settings.
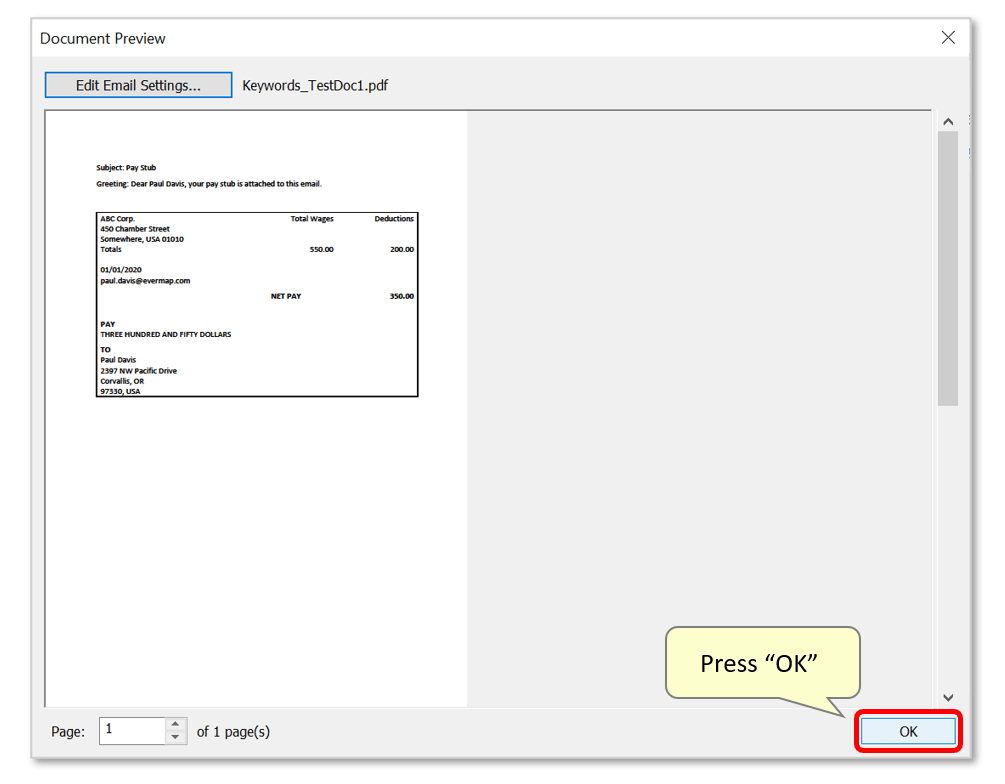
- Step 13 - Preview Attachments (Optional)
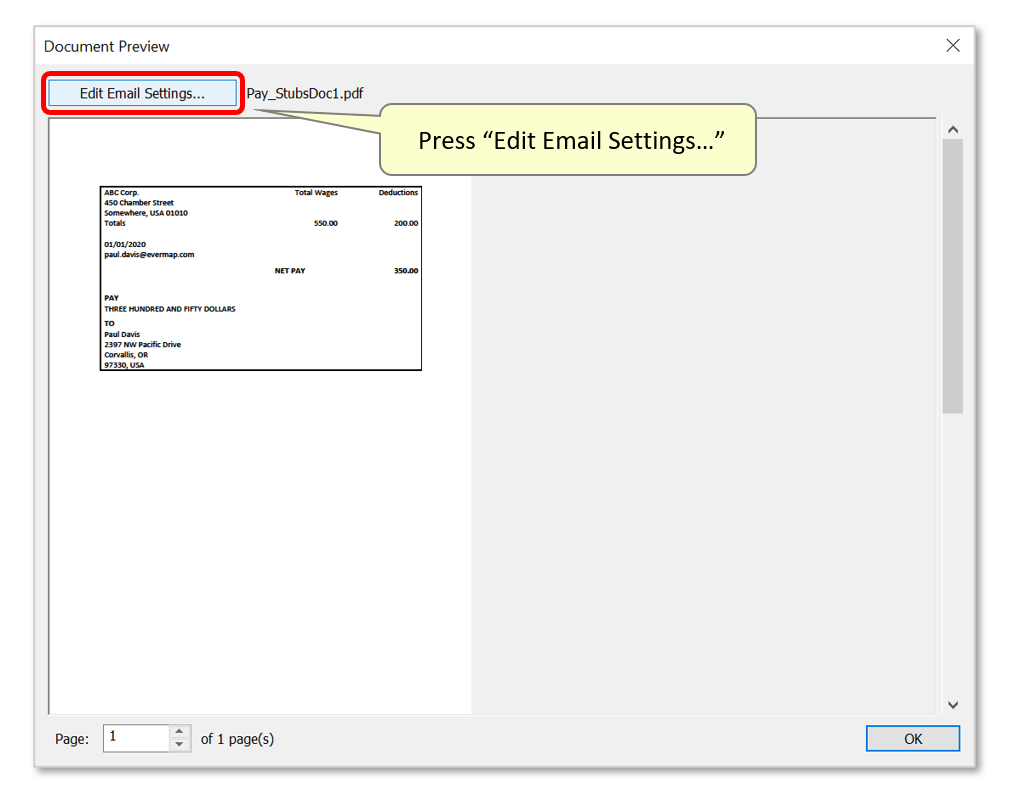
- This "Document Preview" window allows you to review attachments. It shows the single-page document (pay stub) extracted from the larger source file that will be sent to the email address located on this page.
- Press “Edit Email Settings” to add additional recipients (TO, CC, BCC), or edit the 'Subject' and 'Message' content of the email for this recipient.
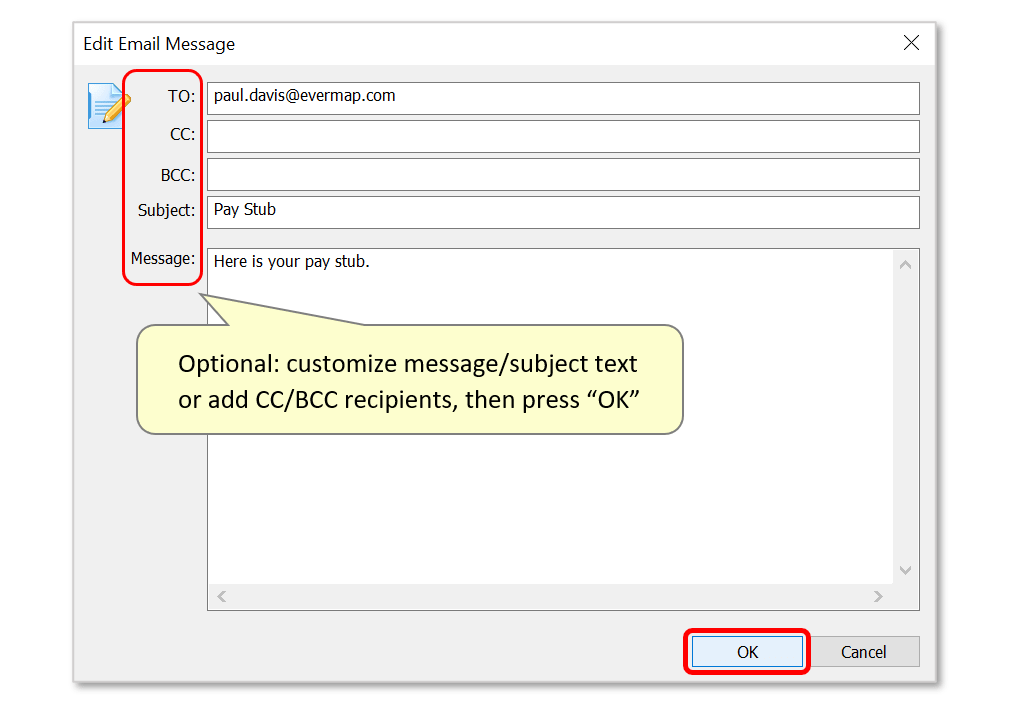
- Step 14 - Customise the Email Message (Optional)
- The 'subject' and 'message' shown in this window is the default template that was defined in earlier settings instructions (step 8). You can manually modify all fields here to customise each message by typing in the appropriate boxes.
- Click “OK” when finished.
- Then press "OK" to close the "Document Preview" dialog.
- Step 15 - Confirm Recipients
- Before completing the email distribution, use the checkboxes to control which recipients will receive emails. Continue using this dialog to review the mass-mailing arrangement before pressing “Send”.
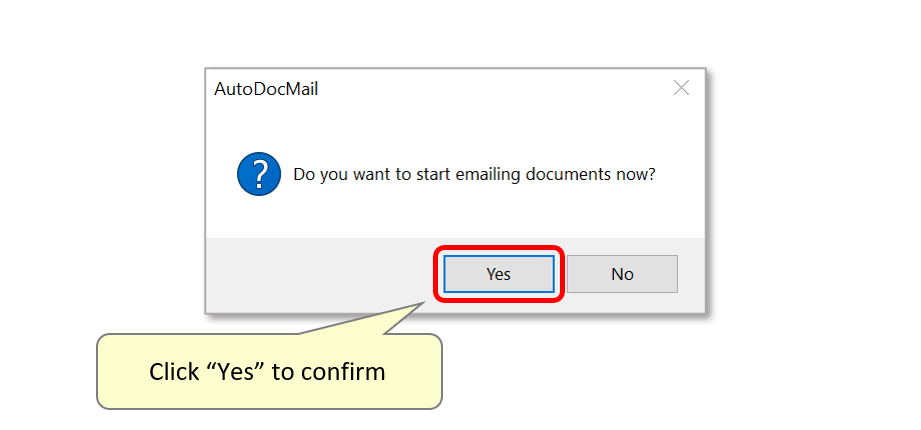
- Step 16 - Confirm the Emailing Process
- A dialog box will appear prompting the user to confirm the procedure. Click “Yes” to start emailing the documents.
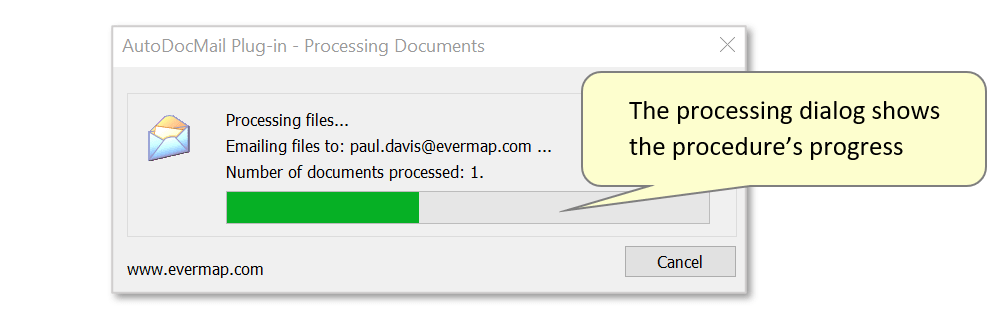
- Step 17 - Processing Emails
- The “AutoDocMail Plug-in - Processing Documents” window opens, displaying the progress of the procedure. This window disappears once mass-distribution of all documents is complete.
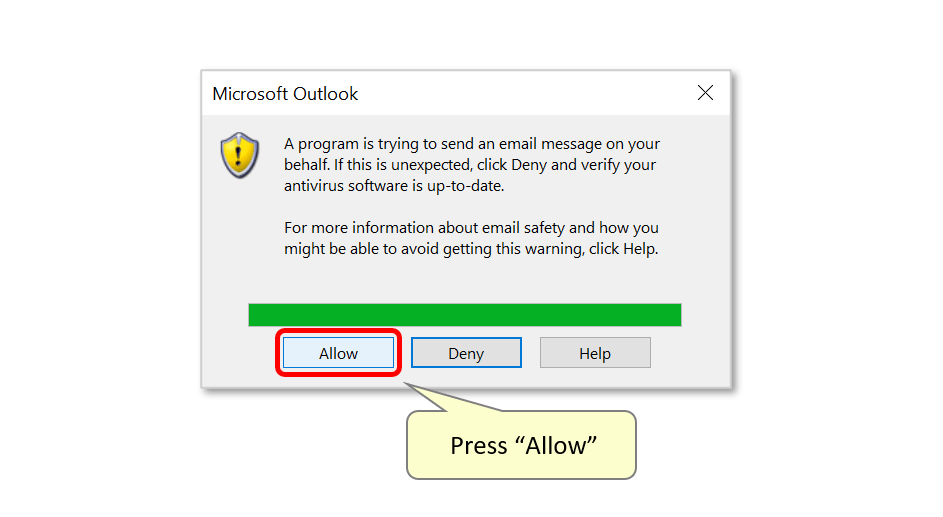
- If the "Confirm emailing of each message..." option was left checked under "Email Settings" (step 7), MS Outlook (if used) will prompt for confirmation of the sending of each email. When this dialog appears, press "Allow" each time to approve the email being sent. Sending emails and attachments using this method is much faster when this option is unchecked. Generally, you should consider using the SMTP method to send emails silently and securely.
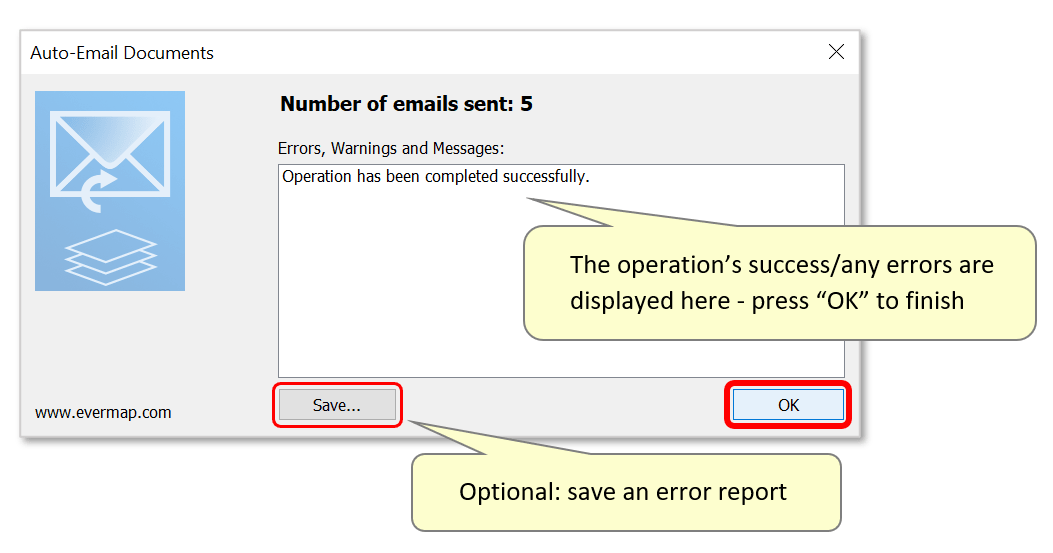
- Step 18 - Finish the Procedure
- When processing is completed, the “Auto Email Documents” window opens, informing the user of how many emails were successfully sent and if any errors occurred. If any errors are encountered, optionally press the "Save..." button to save a processing report in *.txt format. This file displays detailed information about emails sent successfully and any errors that occurred.
- Click “OK” to finish.
- Click here for a list of all step-by-step tutorials available.