Grouping Output Mail Merge PDFs By Value
AutoMailMerge plug-in for Adobe® Acrobat®
- Introduction
- This tutorial shows how to create and group mail merge output files into multiple compound documents based on a data field value. This is the way to combine files that belongs to the same logical group into a separate PDF file. For example, this method can be used to combine invoices for each company into a single PDF document. The mail merge is performed using the AutoMailMerge™ plug-in for the Adobe® Acrobat®.
- Tutorial Overview
- We are going to generate multiple invoices by filling a PDF form template with data from an Excel spreadsheet. Each data row will produce a single invoice (PDF file). The output files will be grouped into multiple compound PDF documents based on the value of the "Company" data field. Each compound PDF document will be named using the text from the "Company" field and contain all invoices that belongs to a corresponding company.
.PNG)
- Data Description
- The tutorial is using an Excel spreadsheet as a mail merge data source. The spreadsheet contains 14 rows of data (i.e. for 14 invoices) for 4 different companies. The data from each row will be used to populate a PDF form template and produce a separate invoice (PDF file). All invoices that belong to the same company will be saved into a separate compound PDF document. The output from the mail merge will be 4 compound PDF files that contain all invoices for each company.
.PNG)
- Prerequisites
- You need a copy of the Adobe® Acrobat® along with the AutoMailMerge™ plug-in installed on your computer in order to use this tutorial. You can download trial versions of both the Adobe® Acrobat® and the AutoMailMerge™.
Step-by-Step Tutorial
- Step 1 - Create a PDF Form
- PDF Form is a document with interactive (fillable) form fields. Fields can be used to enter text or select options (checkboxes, comboboxes, lists). Any PDF document can be converted into PDF form by adding form fields.
- Select an existing PDF file that will be as used as a template for the PDF form. It is common to design documents in the text editor such as Microsoft Word, Adobe InDesign, or in any other similar application and then export it into PDF format. The Prepare Form tool is used only to add fillable forms fields to allow using the document in the mail merge process.
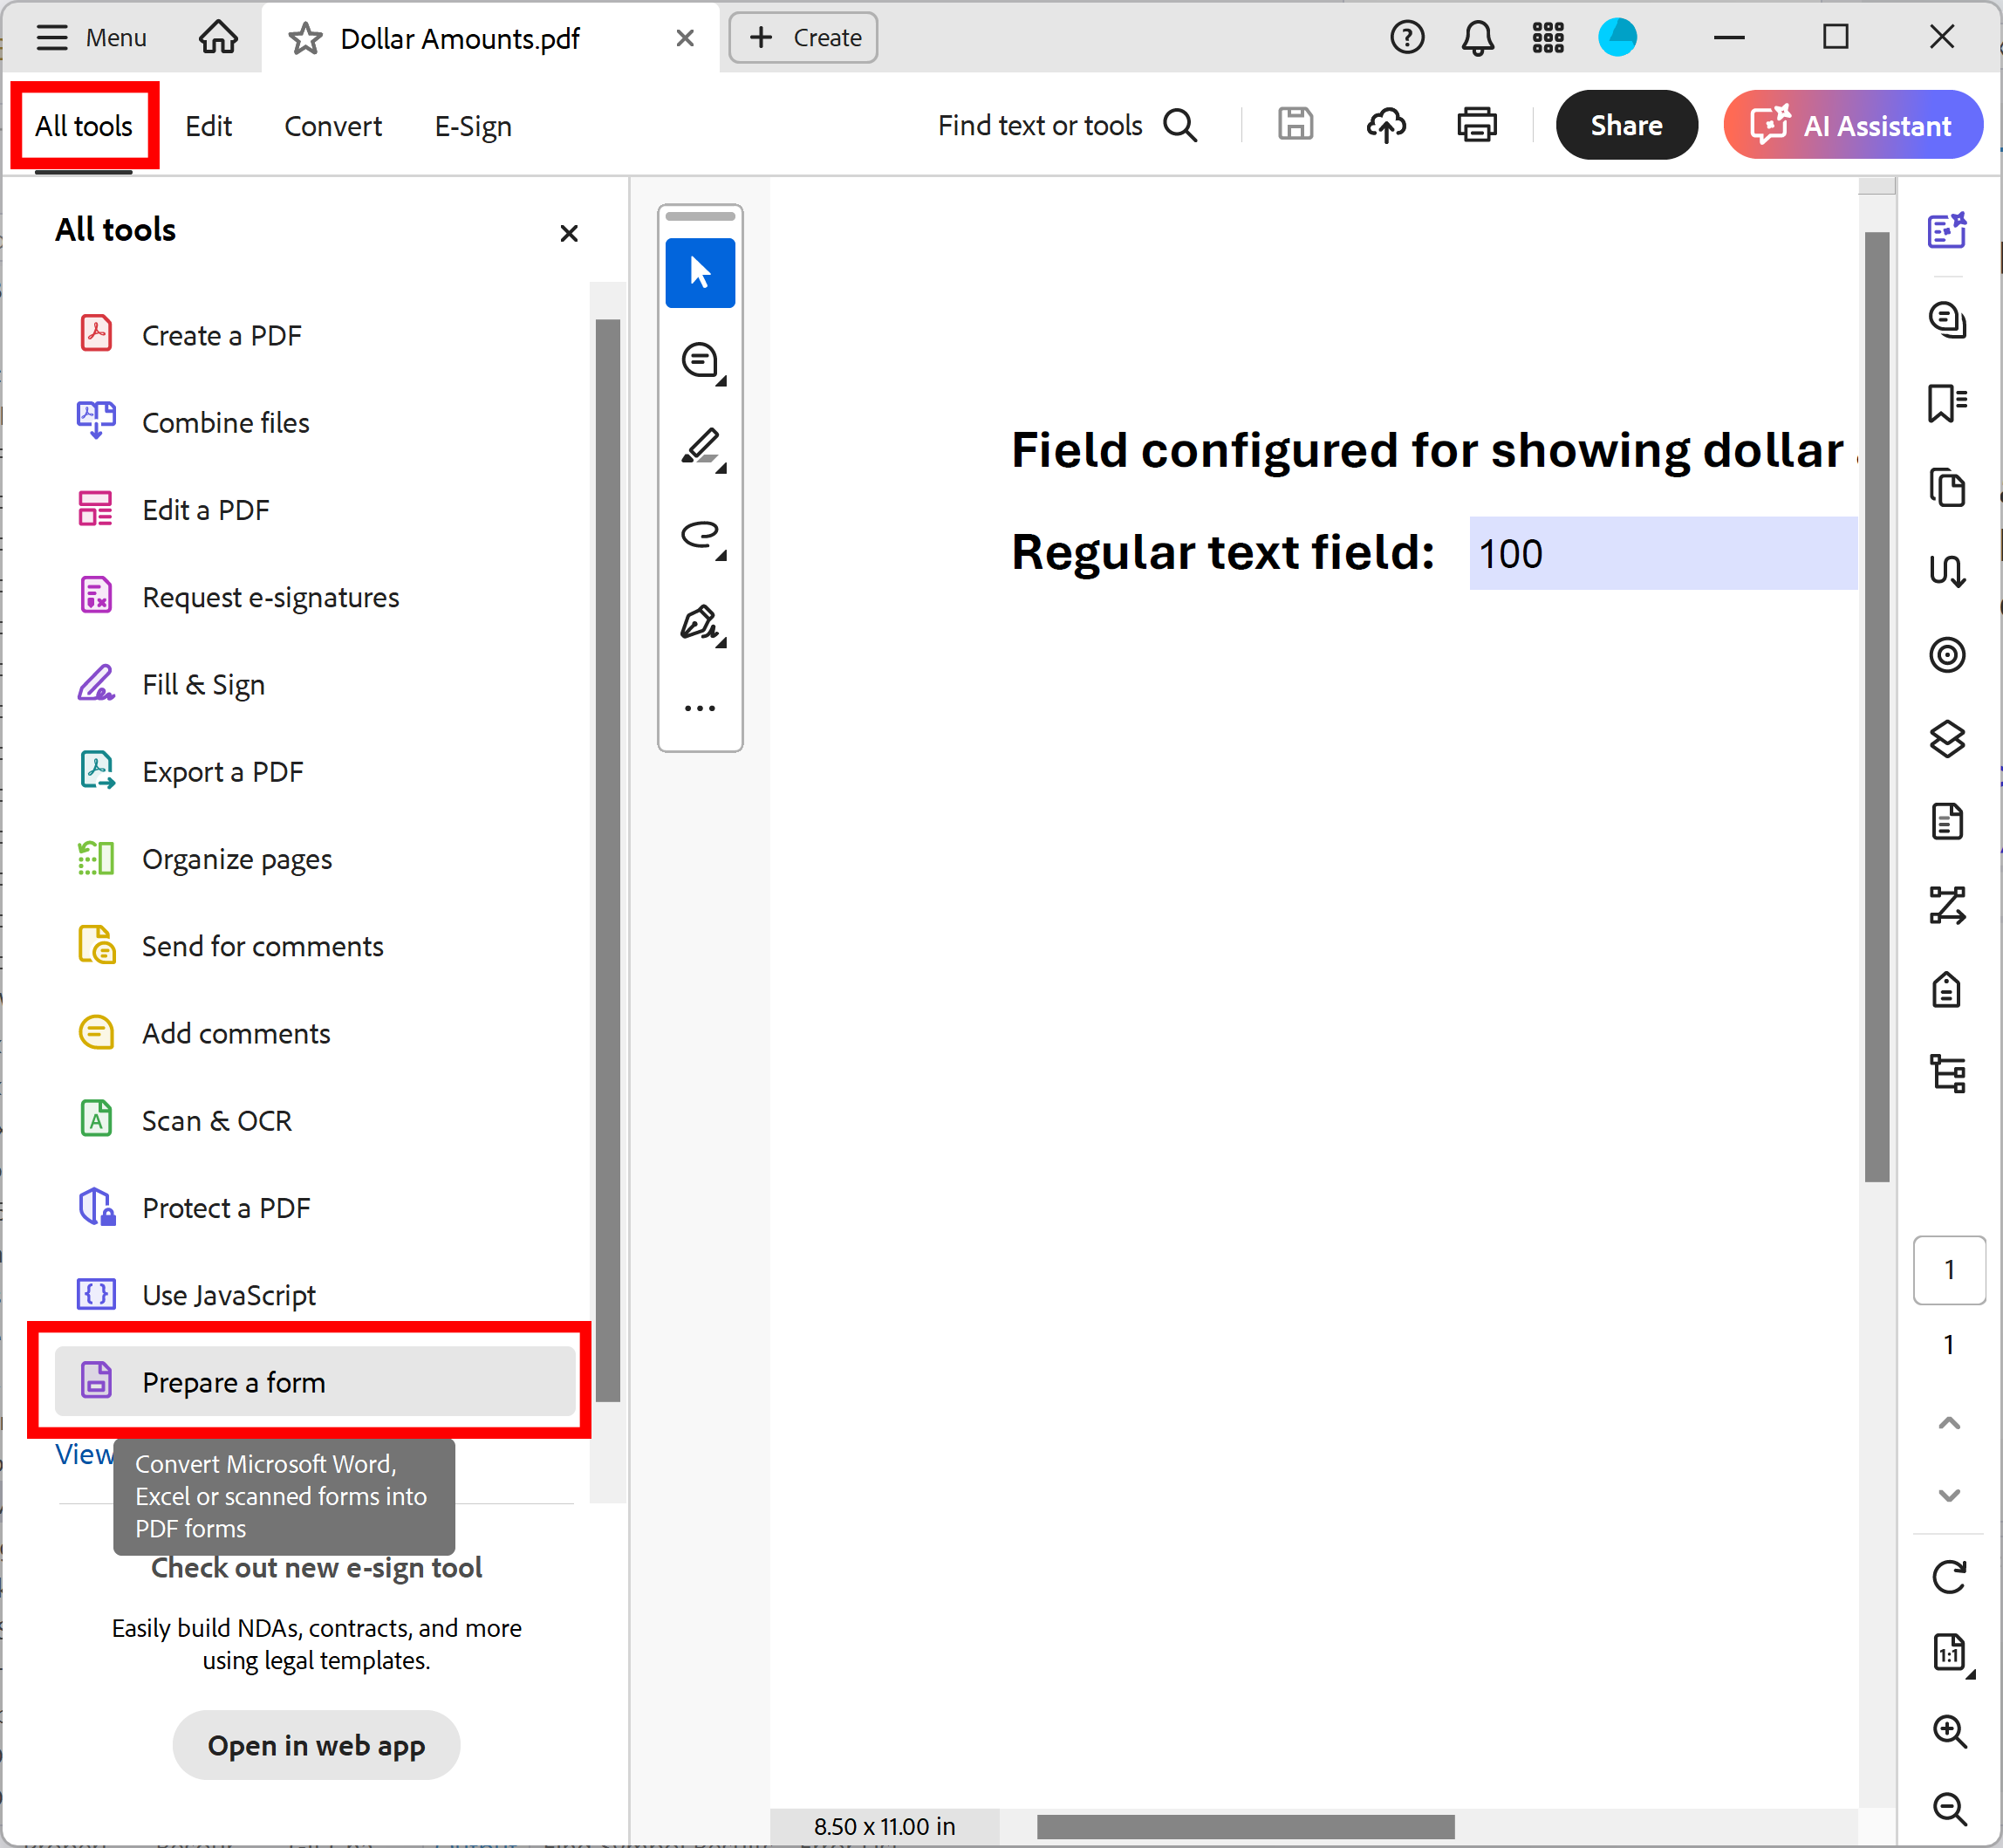
- Open "Prepare Form" Tool (New Acrobat Interface)
- Prepare Form tool is used in Adobe® Acrobat® to create and edit interactive PDF forms. Use it to add text fields, checkboxes, buttons and other interactive elements to the PDF documents.
- If you are using a "new" Adobe® Acrobat® interface, then expand All tools and find Prepare Form tool located towards the bottom of the list. Depending on your screen size you may need to click on “View more” link to find it.
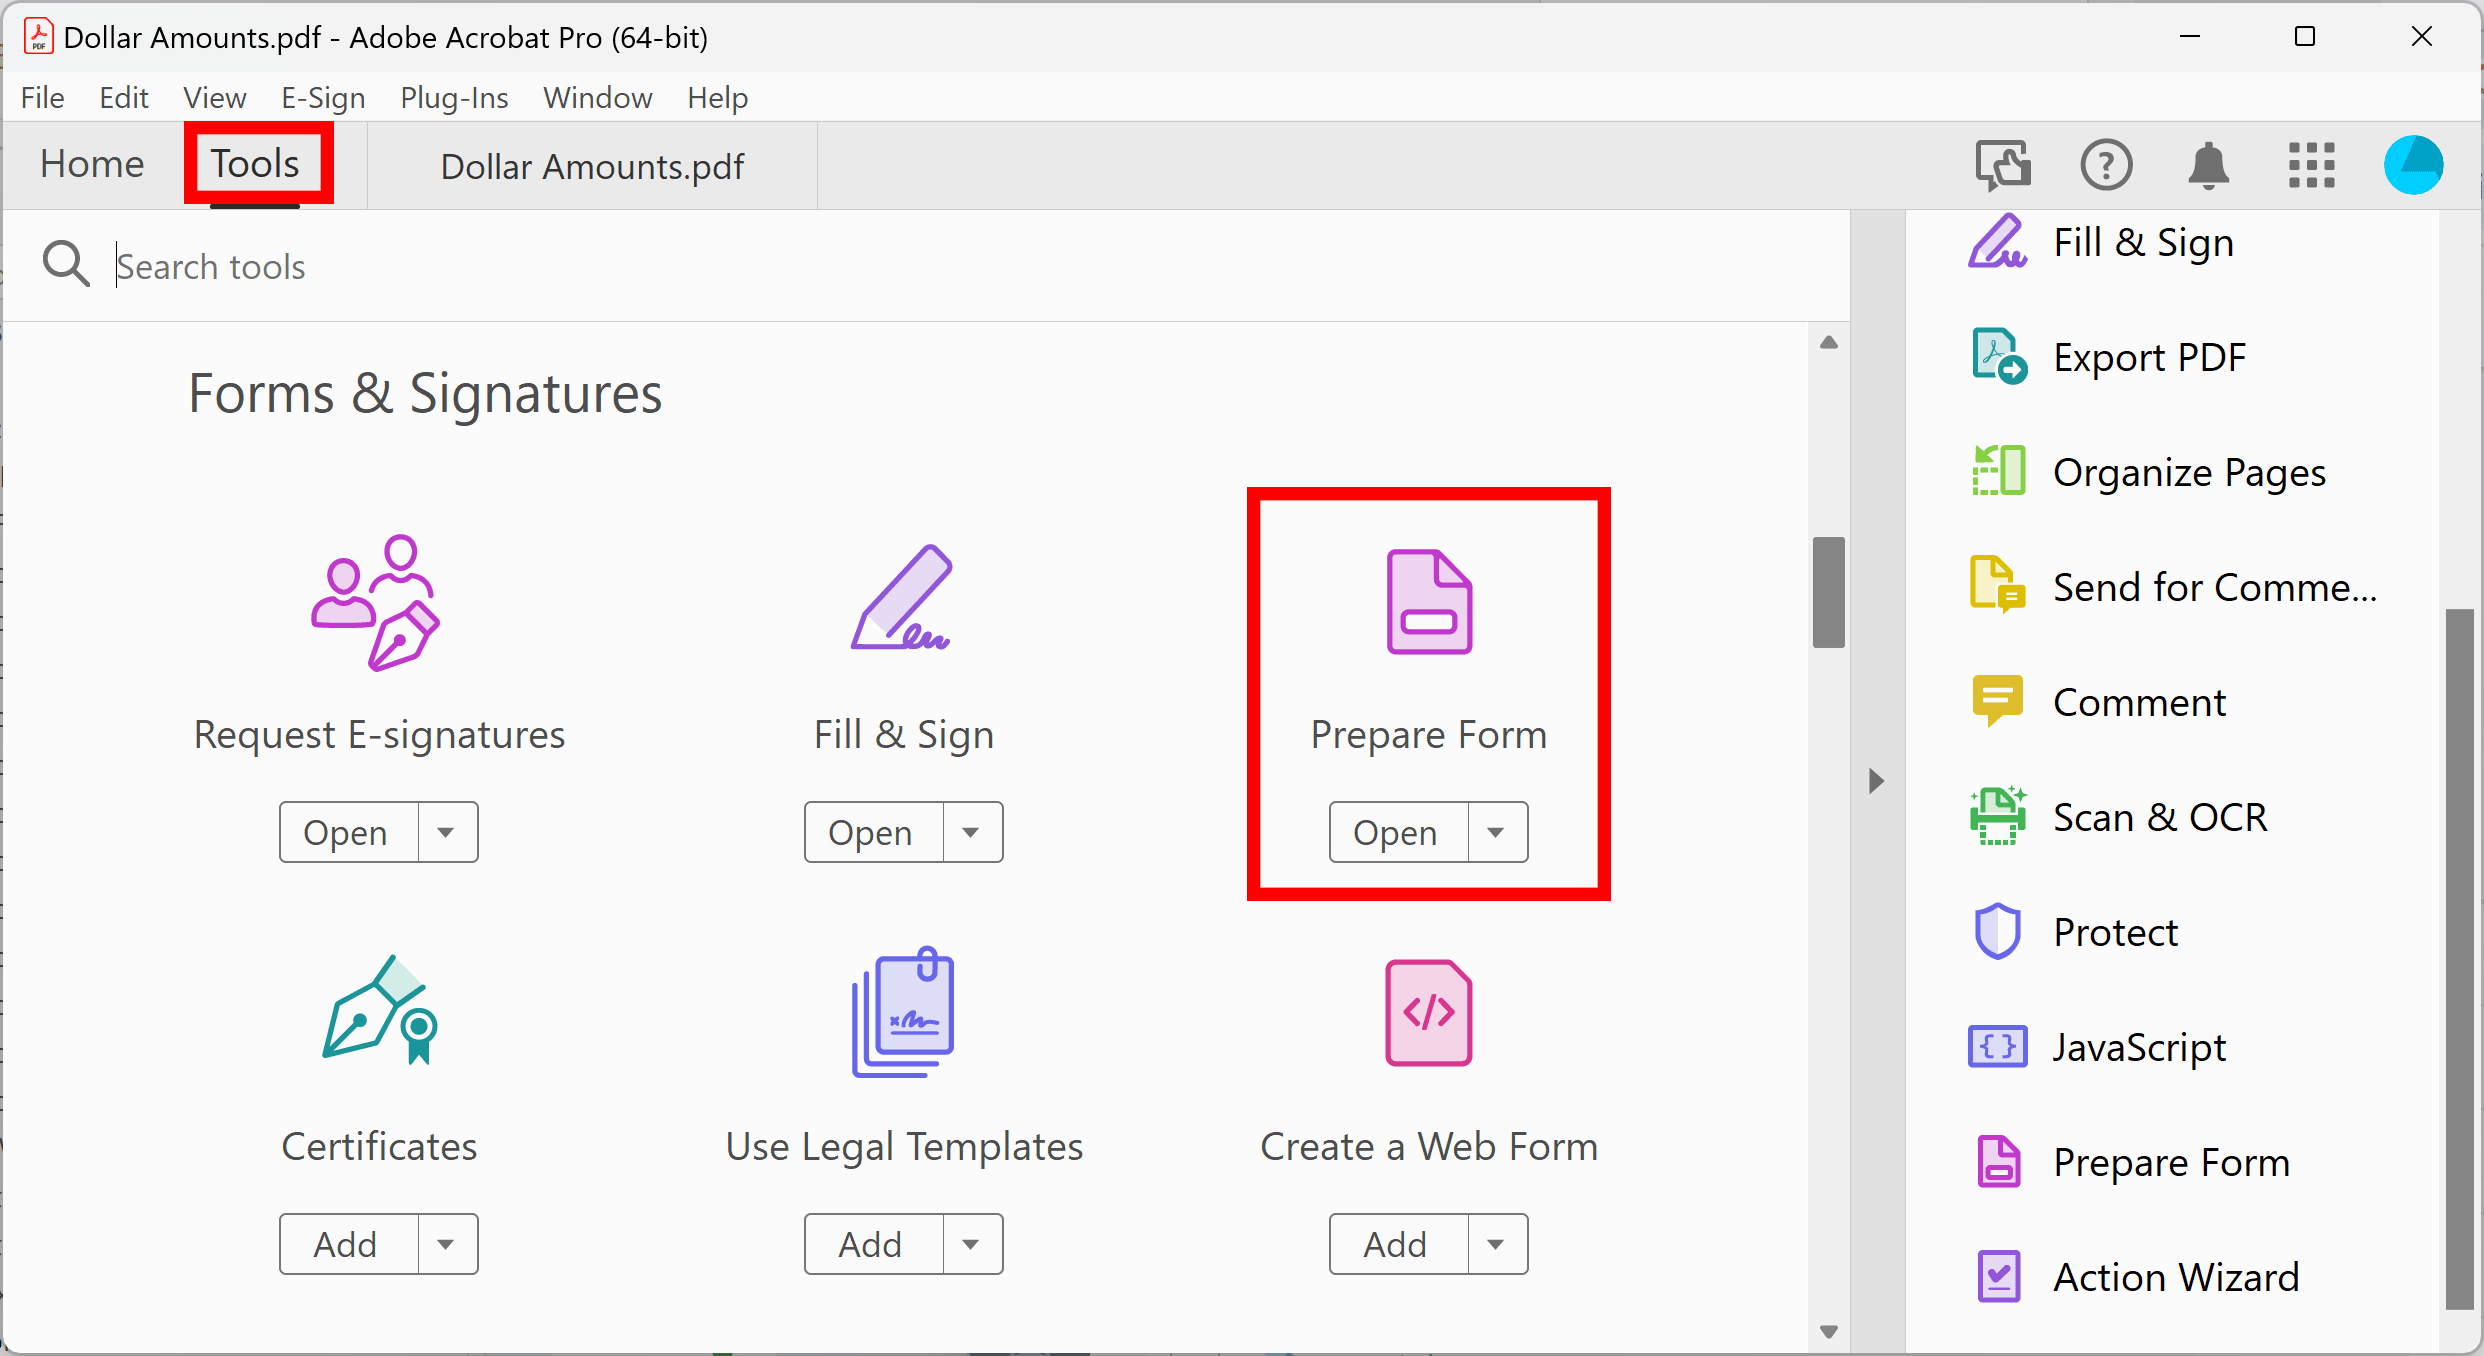
- Open "Prepare Form" Tool (Classic Acrobat Interface)
- If you are using a “classic” Adobe® Acrobat® interface, then expand Tools and find Prepare Form tool.
- See how to create interactive PDF form in the Adobe® Acrobat®.
- We have placed two text fields on the PDF form. One for "Company" and one for "Amount" field:
.PNG)
- Click "Save file" to save changes to the file. Now a previously static PDF document became an interactive PDF form.
.PNG)
- Step 2 - Prepare Data in the Microsoft Excel
- Prepare the data in the Microsoft Excel. Below is an example spreadsheet that contains data for 14 invoices. There are 3 data fields (columns) in the spreadsheet: "Record", "Company" and "Amount".
- We are going to use "Company" field in the spreadsheet to combine all invoices for each company into a separate compound PDF document. Note that this function works on the field value change. All records that should be saved into the same compound document need to be located next to each other in the spreadsheet. Make sure to group records accordingly to produce the correct results. The advantage of this method is that it makes possible to produce multiple compound files for each company simply by sorting records into a required order. For example, it makes possible to produce multiple documents for each company by grouping invoices for each month.
.PNG)
- Step 3 - Open the "Mail Merge" Dialog
- Make sure you have a PDF form opened in Adobe Acrobat.
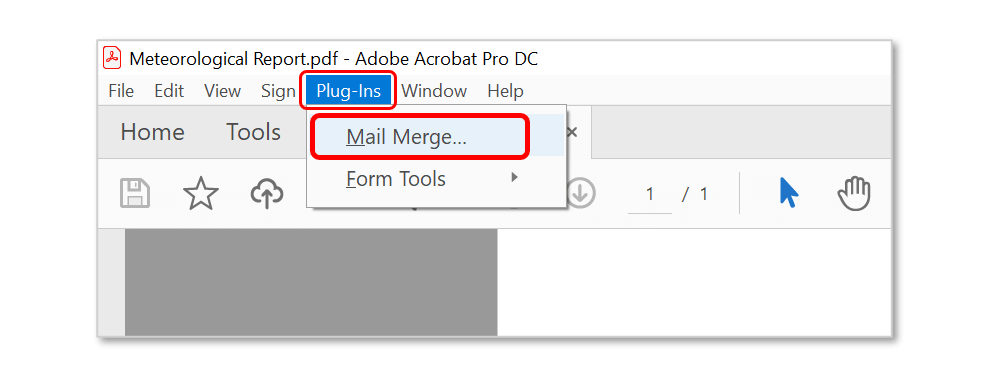
- Select Plugins > Mail Merge… to open the Mail Merge dialog.
- If you are using a new Adobe Acrobat interface, then you can locate Mail Merge menu here:

- Please see the following page for a short video tutorial on how to locate Plugins menu in the new Adobe® Acrobat® interface.
- If you are using a "classic" Adobe Acrobat interface (pre-2022), then you can locate Mail Merge menu here:
- Step 4 - Edit Mail Merge Settings
- Press the "Edit Settings..." button to configure the mail merge parameters.
.PNG)
- Step 5 - Select a Data Source
- Press the "Browse..." button in the "Data Source" screen to select an input data file.
.PNG)
- Select "Microsoft Excel Worksheet (*xls.*xlsx)" from the list:
.PNG)
- Select spreadsheet file that was prepared at step #2. Click "Open".
.PNG)
- Select a sheet from the list. Click "OK".
.PNG)
- Step 6 - Map Form to Data Fields
- Click "Guess Mapping" in the "Data Source" screen. The software will automatically select field correspondence based on field names.
.PNG)
- The confirmation dialog will appear on the screen. Click "Yes" to proceed.
.PNG)
- The dialog showing the number of field mappings will be displayed. Click "OK".
.PNG)
- Step 7 - Examine the Field Mappings
- Examine the field mappings that have been guessed and click "Next >" to advance to the next screen.
.PNG)
- Step 8 - Specify Field Options
- Optionally, use the "Specify Field Options" screen to control if output form fields should remain editable or not. Make sure to check the "Flatten output PDF documents" option to make output documents non-editable. Click "Next >" to advance to the next screen.
.PNG)
- Step 9 - Specify Output Options
- Use the "Select Output Options" screen to control where and how to save output PDF documents. Check the "Output a compound document that will contain all filled forms" option to create a single output PDF document. This option can be used with or without generating separate output documents for each data source record. Check the "Save each copy of the filled form as a separate PDF document" option to create separate output documents for each data source record.
.PNG)
- Check the "Create a separate compound document when value of the field changes" option to produce multiple compound document with files grouped based on the text in the selected data field. Select a data field that will be used (we are using "Company" data fields in this example):
.PNG)
- Check the "Create multiple compound documents with no more than" option to limit the size of the single compound file to a specific number of records. Set a limit number of forms per file. It is recommended to reduce the size of the single compound document that can be potentially very large. Large files are slow to generate and are typically hard to handle.
.PNG)
- The compound document file name(s) can be customized by using text from one or more data fields. The values from the last data record stored in the compound file can be included into the file name. Simply type a data field name in square brackets. For example, use the following syntax to insert a value from "Company" field into a compound document name: "CompoundDocument_[Company].pdf". Make sure to always specify a ".pdf" file extension at the end of the file name.
.PNG)
- Click "Browse..." to specify an output folder. Click "Next >" to proceed.
.PNG)
- Skip the rest of the screens by clicking the "Next>" button multiple times, click "Finish" on the last screen.
.PNG)
- Step 10 - Save Settings
- Optionally, save mail merge settings into the *.mms file for later reuse by pressing the "Save Settings" button. Use the "Load Settings" button to load them back later. Click "OK" to advance to the mail merge process.
.PNG)
- Step 11 - Start Processing
- Press the "Run Mail Merge" button in the "Confirm Processing" dialog to start a mail merge process.
.PNG)
- The "Mail Merge Results" dialog will appear once a mail merge is completed. Click "OK" to close this dialog and open an output folder.
.PNG)
- Step 12 - Examine Output Files
- Examine output files by opening them in the Adobe® Acrobat®. The 14 invoices have been grouped and saved into 4 separate compound PDF documents. The company name is used to name the files:
.PNG)
.PNG)
- Click here for a list of all step-by-step tutorials available.