Placing USPS IM Barcodes in Output Documents During a Mail Merge
AutoMailMerge plug-in for Adobe® Acrobat®
- What is a Mail Merge?
- A mail merge is a computer term describing the production of multiple (and potentially large numbers of) documents, from a single template form and a structured data source. This technique is used to create personalized letters, documents, bills and pre-addressed envelopes or mailing labels for mass mailings (or document creation).
- The steps below outline a basic mail merge procedure, used to generate output documents that feature IM barcodes. For help with more advanced operations, see this list of mail merge tutorials.
- What is an IM Barcode?
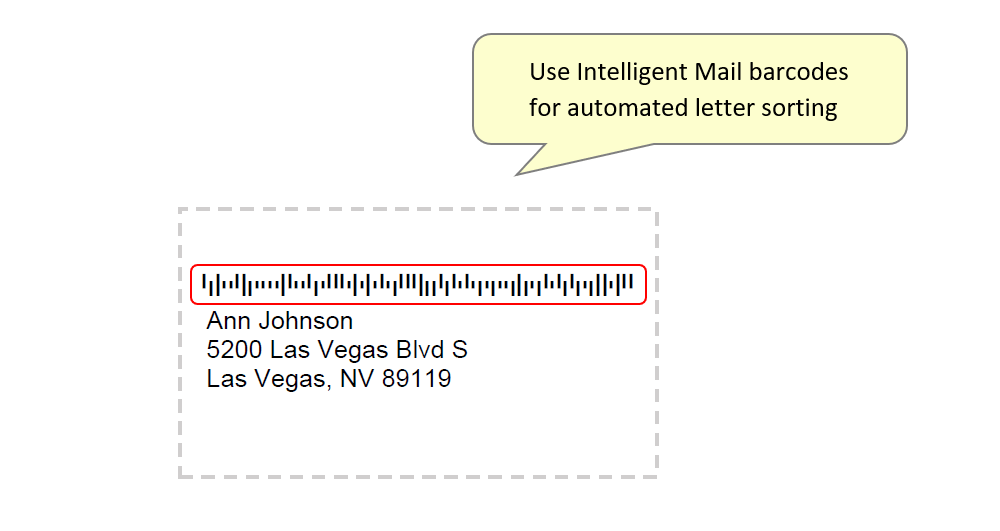
- The Intelligent Mail Barcode (IMb) is a 65-bar barcode, used by the United States Postal Service to sort and track letters and flats. It offers greater versatility by allowing many services to be requested and embedded within one barcode. The Intelligent Mail barcode combines the data of the older POSTNET™ and the PLANET Code® barcodes, as well as other data, into a single barcode. It allows mailers to: use a single barcode to participate in multiple Postal Service programs simultaneously; expands mailers' ability to track individual mailpieces; and provides greater mail stream visibility.
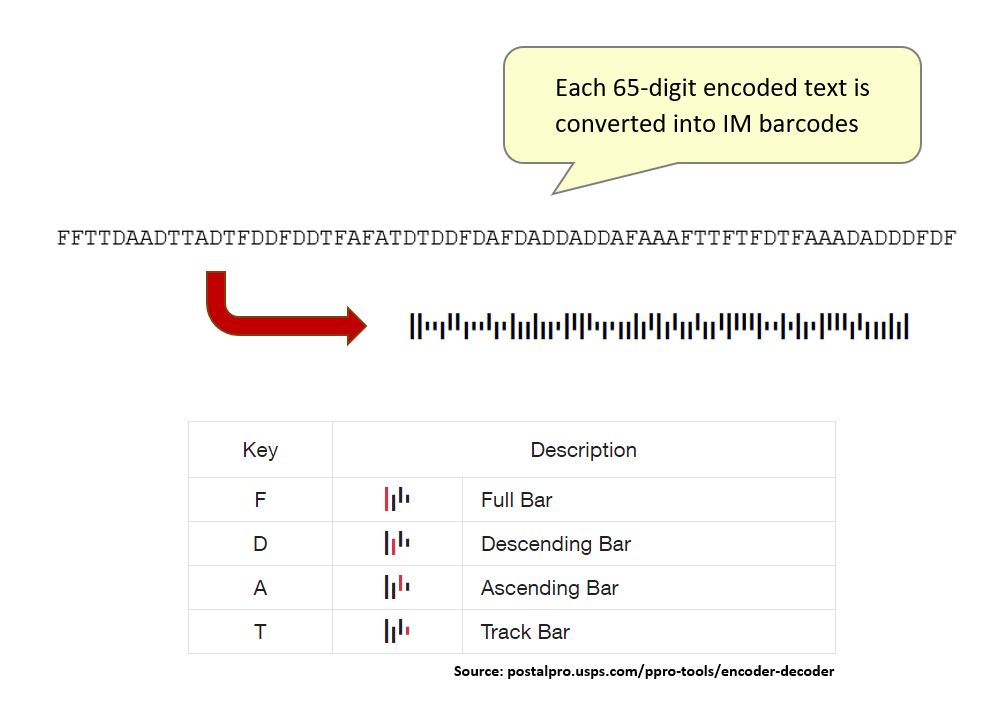
- The barcode is applied by the sender, and the US Postal Service requires the use of the Intelligent Mail barcode to qualify for automation prices since January 28, 2013. It is a height-modulated barcode that encodes up to 31 decimal digits of mail-piece data into 65 vertical bars. The code is made up of four distinct symbols, which is why it was once referred to as the 4-State Customer Barcode. Each bar contains the central "tracker" portion, and may contain: an ascender, descender, neither - or both (a "full bar").
- Introduction
- In this tutorial, we'll use the AutoMailMerge™ plug-in to generate mailing labels that contain IM barcodes. The input PDF form is a custom-size mailing label template which contains form fields. These will be filled with name/address data, as well as coded IMb text that will display as a barcode in the output. The goal is to create separate filled forms for each record in a spreadsheet data source - each one containing a unique barcode.
- IM barcodes are displayed on the filled PDF forms by using encoded text strings. You need to use a special font to achieve this, and it must comply with the USPS-recommended specifications in order to work. The USPS provides both online tools and free software to encode special mailer data into this format.
- Visit this USPS website to access the required Barcode Decoder/Encoder online tools and user guide.
- Input Documents Description
- To carry out the mail merge, we will use:
- 1) An *.xlsx spreadsheet file containing sample data across two columns - 'Recipient' details (name & address) and coded 'Barcode' text. The 'Barcode' column contains sample test strings of IM barcode code from the USPS website that will be used to create barcodes in the output invoices.
- 2) A mailing label template PDF form containing interactive form fields:

- See this separate tutorial for help with creating PDF forms.
- Prerequisites
- You need a copy of Adobe® Acrobat® along with the AutoMailMerge™ plug-in installed on your computer in order to use this tutorial. Both are available as trial versions.
Step-by-Step Tutorial
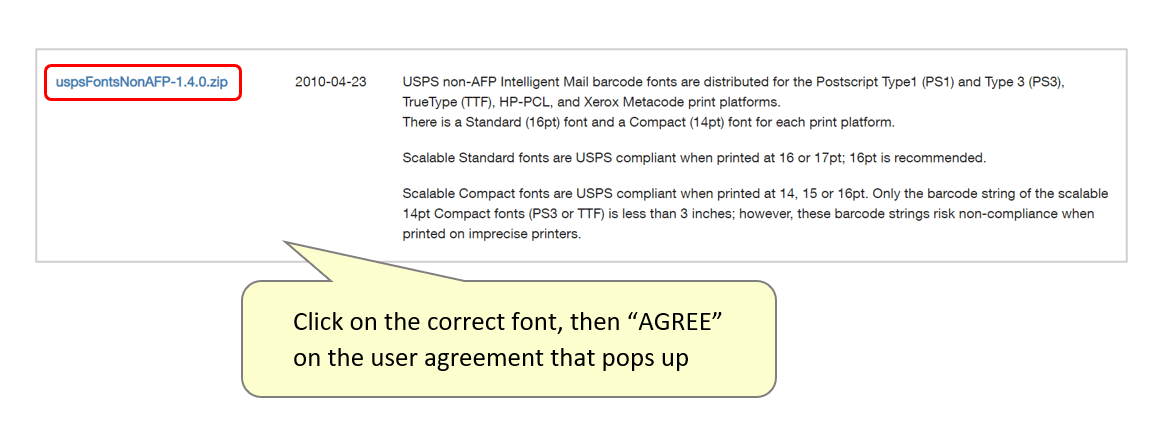
- Step 1 - Download the Unique Barcode Font
- The first step is to download the special USPS barcode font that needs to be installed on your device. Follow this link to view all USPS fonts that are available for download on their website. Scroll down and find the "uspsFontsNonAFP-1.4.0.zip" font in the list. Click on the *.zip filename on the left, then agree to the user agreement that opens in a separate window. The compressed files will then be downloaded.
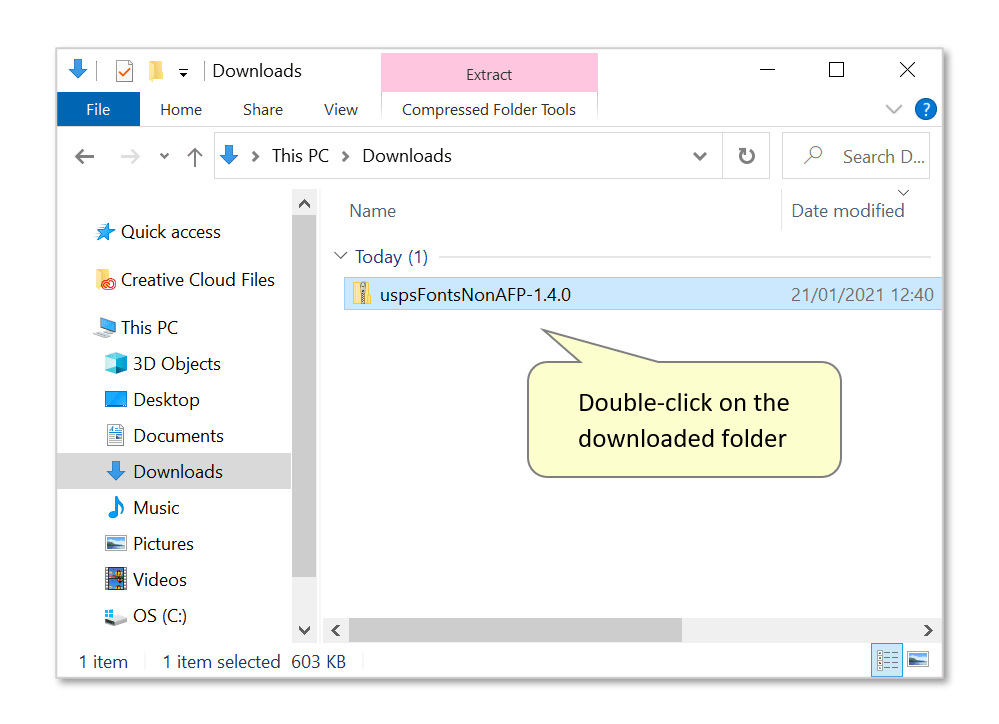
- Step 2 - Install the Font
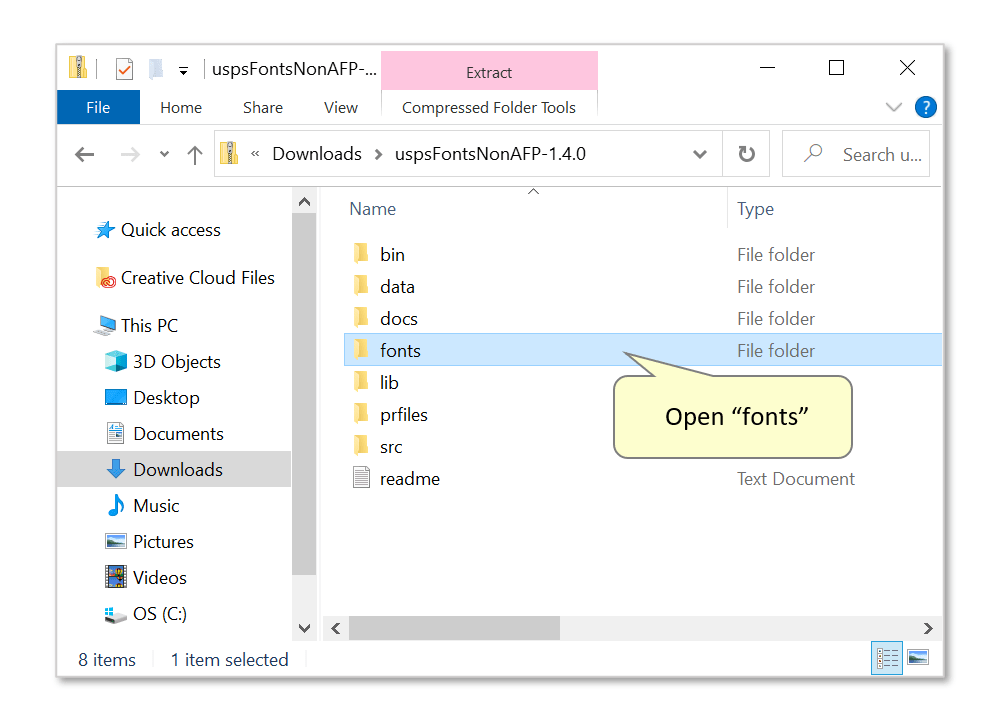
- The *.zip folder will be added to your downloads. Double-click on it to open it.
- Open "fonts":
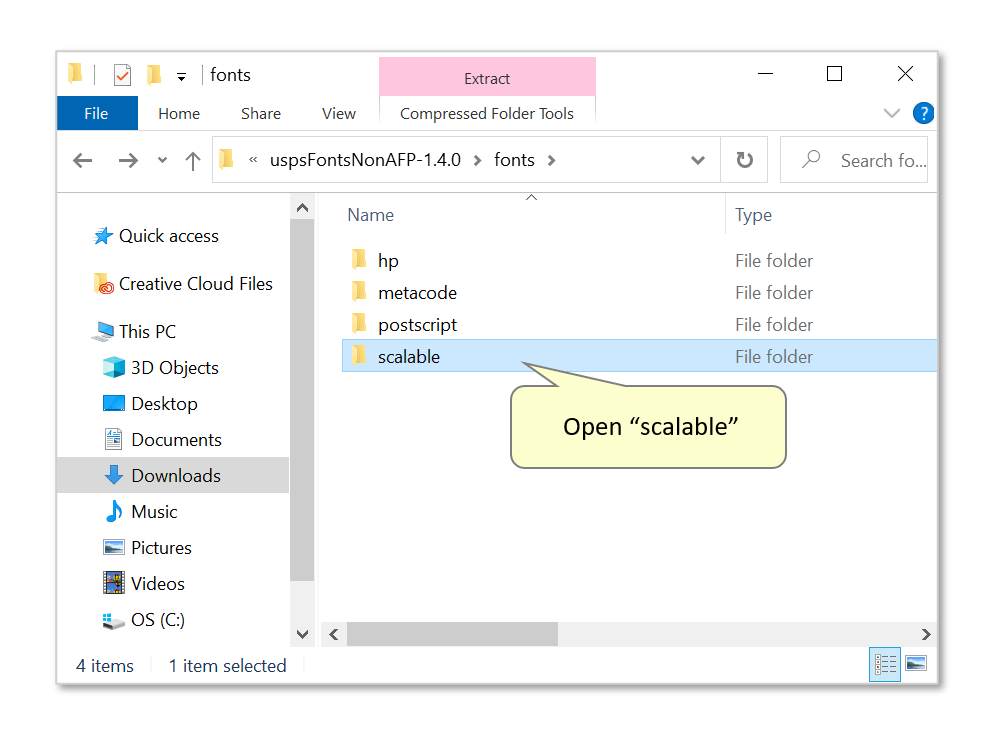
- Open "scalable":
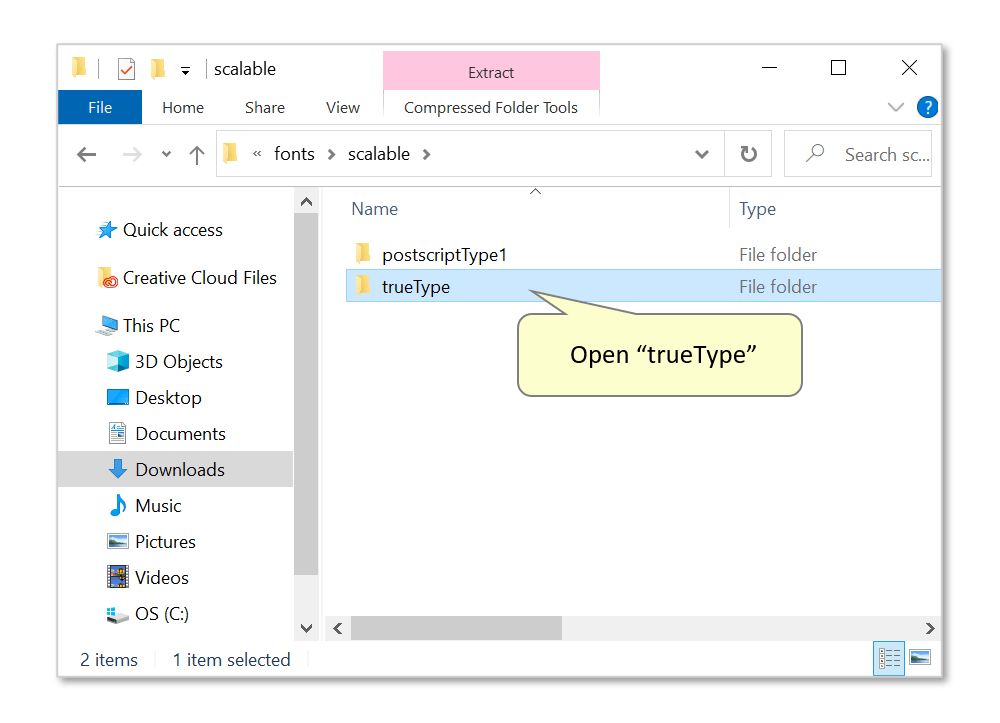
- Open "trueType":
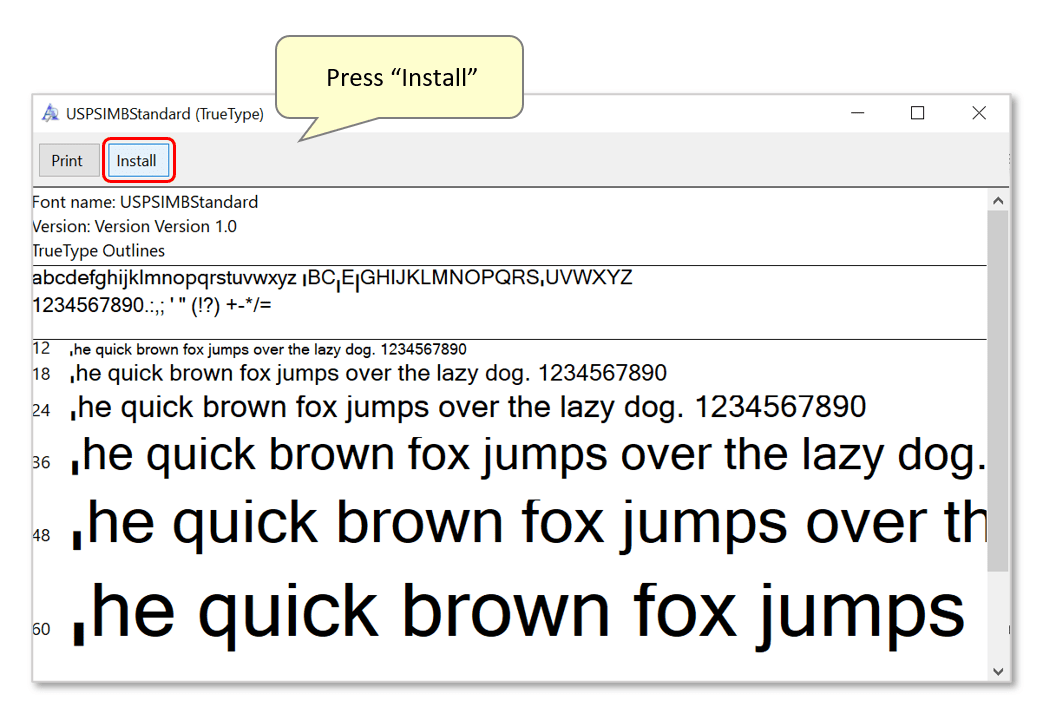
- Double-click on the "USPSIMBStandard.tff" file.
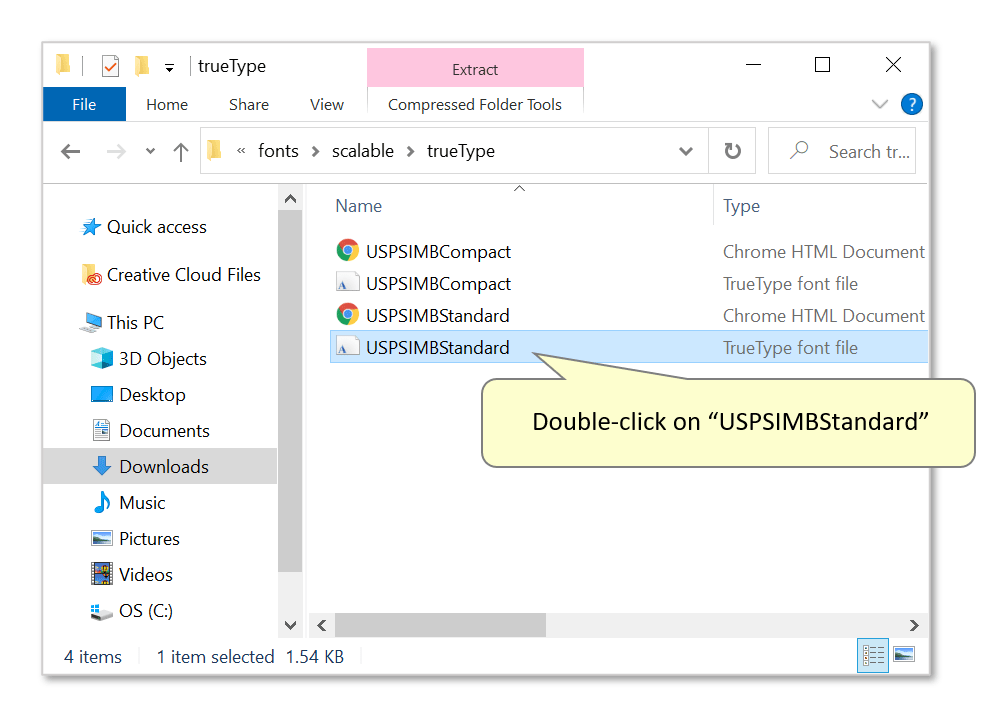
- Press “Install” on the font display window that opens. A dialog box showing a progress bar opens while the font is being installed.
- Step 3 - Add a 'Barcode' Field to a PDF Form
- Restart Acrobat, and open the PDF form that you want to use to create documents via the mail merge. In this example, we're using a mailing label template.
- Ensure that barcodes will be placed within the correct page location for your document's purpose. See this USPS mailpiece formatting link for detailed help on where mailers must place IM barcodes on letters.
- For example, USPS requirements state that IM barcodes can be placed above (as shown here) an address block, and must have at least 1/25 inch (1mm) clearance between them. The separation between bar codes and address blocks must not exceed 5/8 inch (16mm). The clearance between the leftmost and rightmost bars of the barcode and any adjacent printing (i.e.: the dotted line in this example) must be at least 1/8 inch (1mm). The clearance between the top of the barcode and the edge of the label must also be 1/25 inch (1mm).
- When using window envelopes to show IM barcodes printed on the contents, accounting for movement of the letter within the envelope is essential. The address/barcode block showing through the transparent area must always maintain: a clear space of at least 1/8 inch between the barcode and the left/right edges of the window; at least 1/25 inch between the barcode and the top edge of the window; and at least 3/16 inch (5mm) between the barcode/address block and the bottom edge of the window.
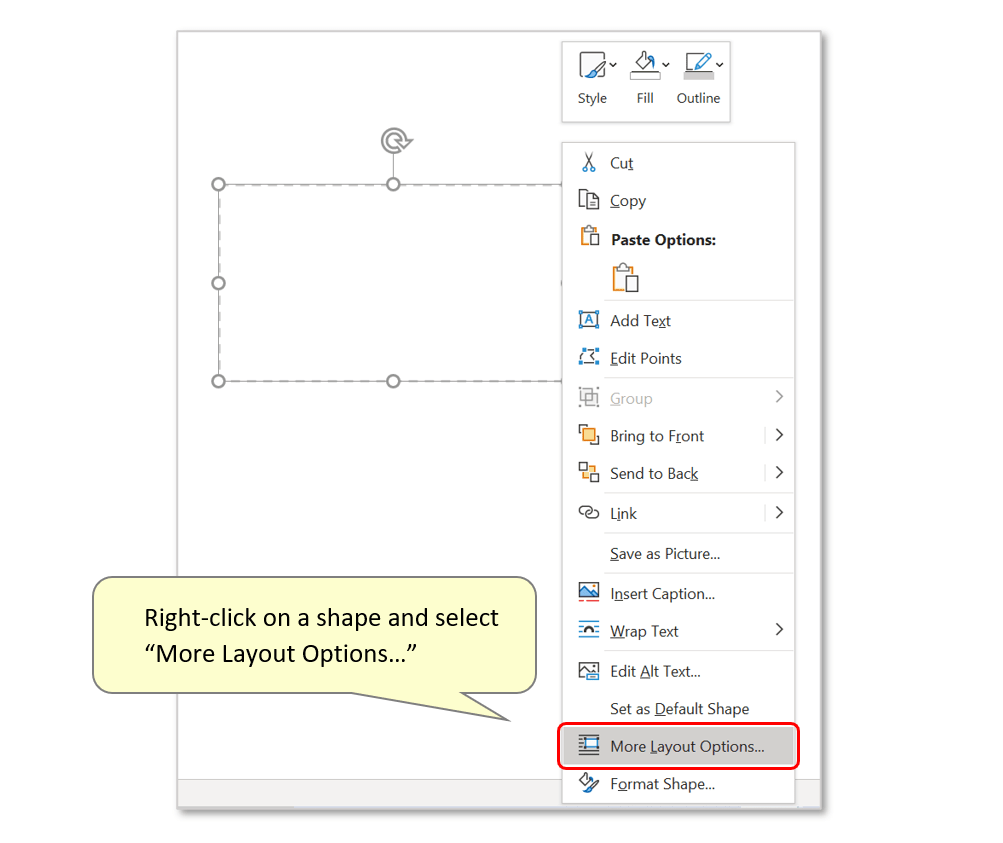
- The mailing label used here has been created in MS Word, and is specifically sized to display the IM barcode neatly inside it. To copy this template label shape, draw a box and resize it by right clicking on the shape and clicking on "More Layout Options...":
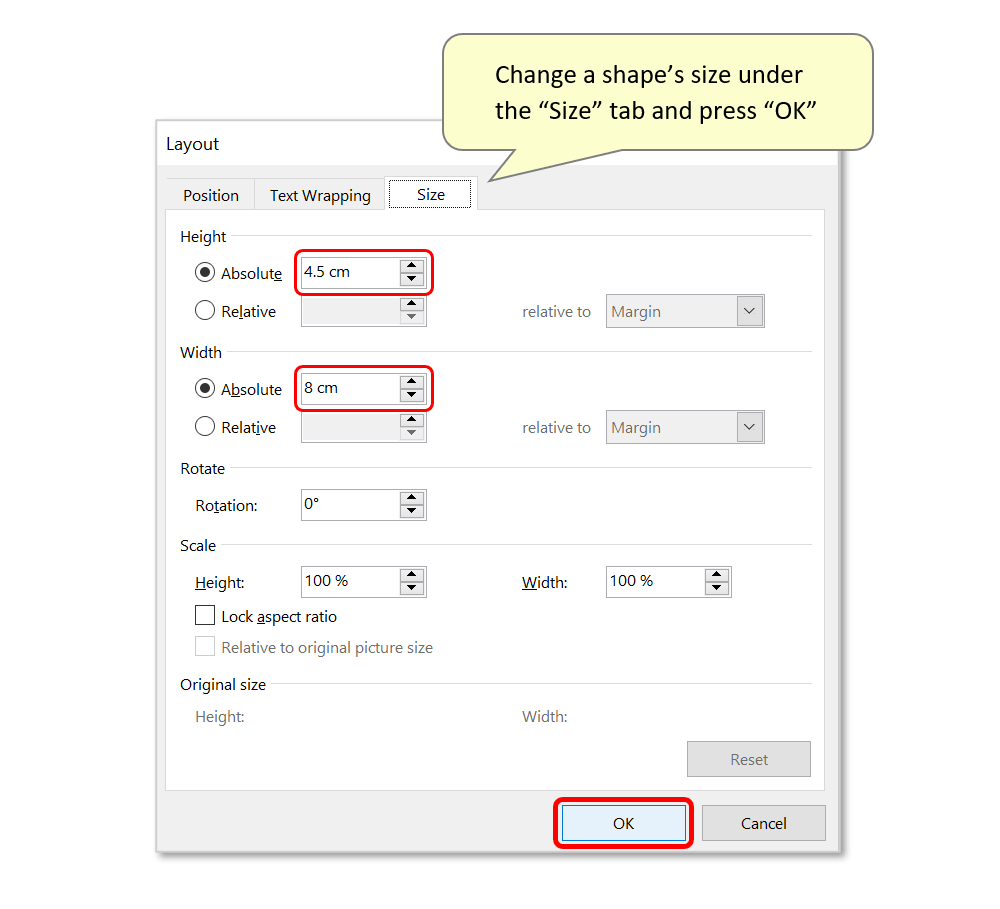
- Go to the "Size" tab in the "Layout" dialog that opens. In this example, the shape's size is set to 4.5cm x 8cm (height x width). For the specific font type and size used to create the IM barcode, this creates a mailing label with a barcode spaced inside it that's compatible with USPS requirements. Press "OK" to close these settings.
- Save the file as a PDF, and open it in Adobe® Acrobat® to add interactive form fields - use this separate tutorial for help with creating PDF forms.
- Open "Prepare Form" Tool (New Acrobat Interface)
- Prepare Form tool is used in Adobe® Acrobat® to create and edit interactive PDF forms. Use it to add text fields, checkboxes, buttons and other interactive elements to the PDF documents.
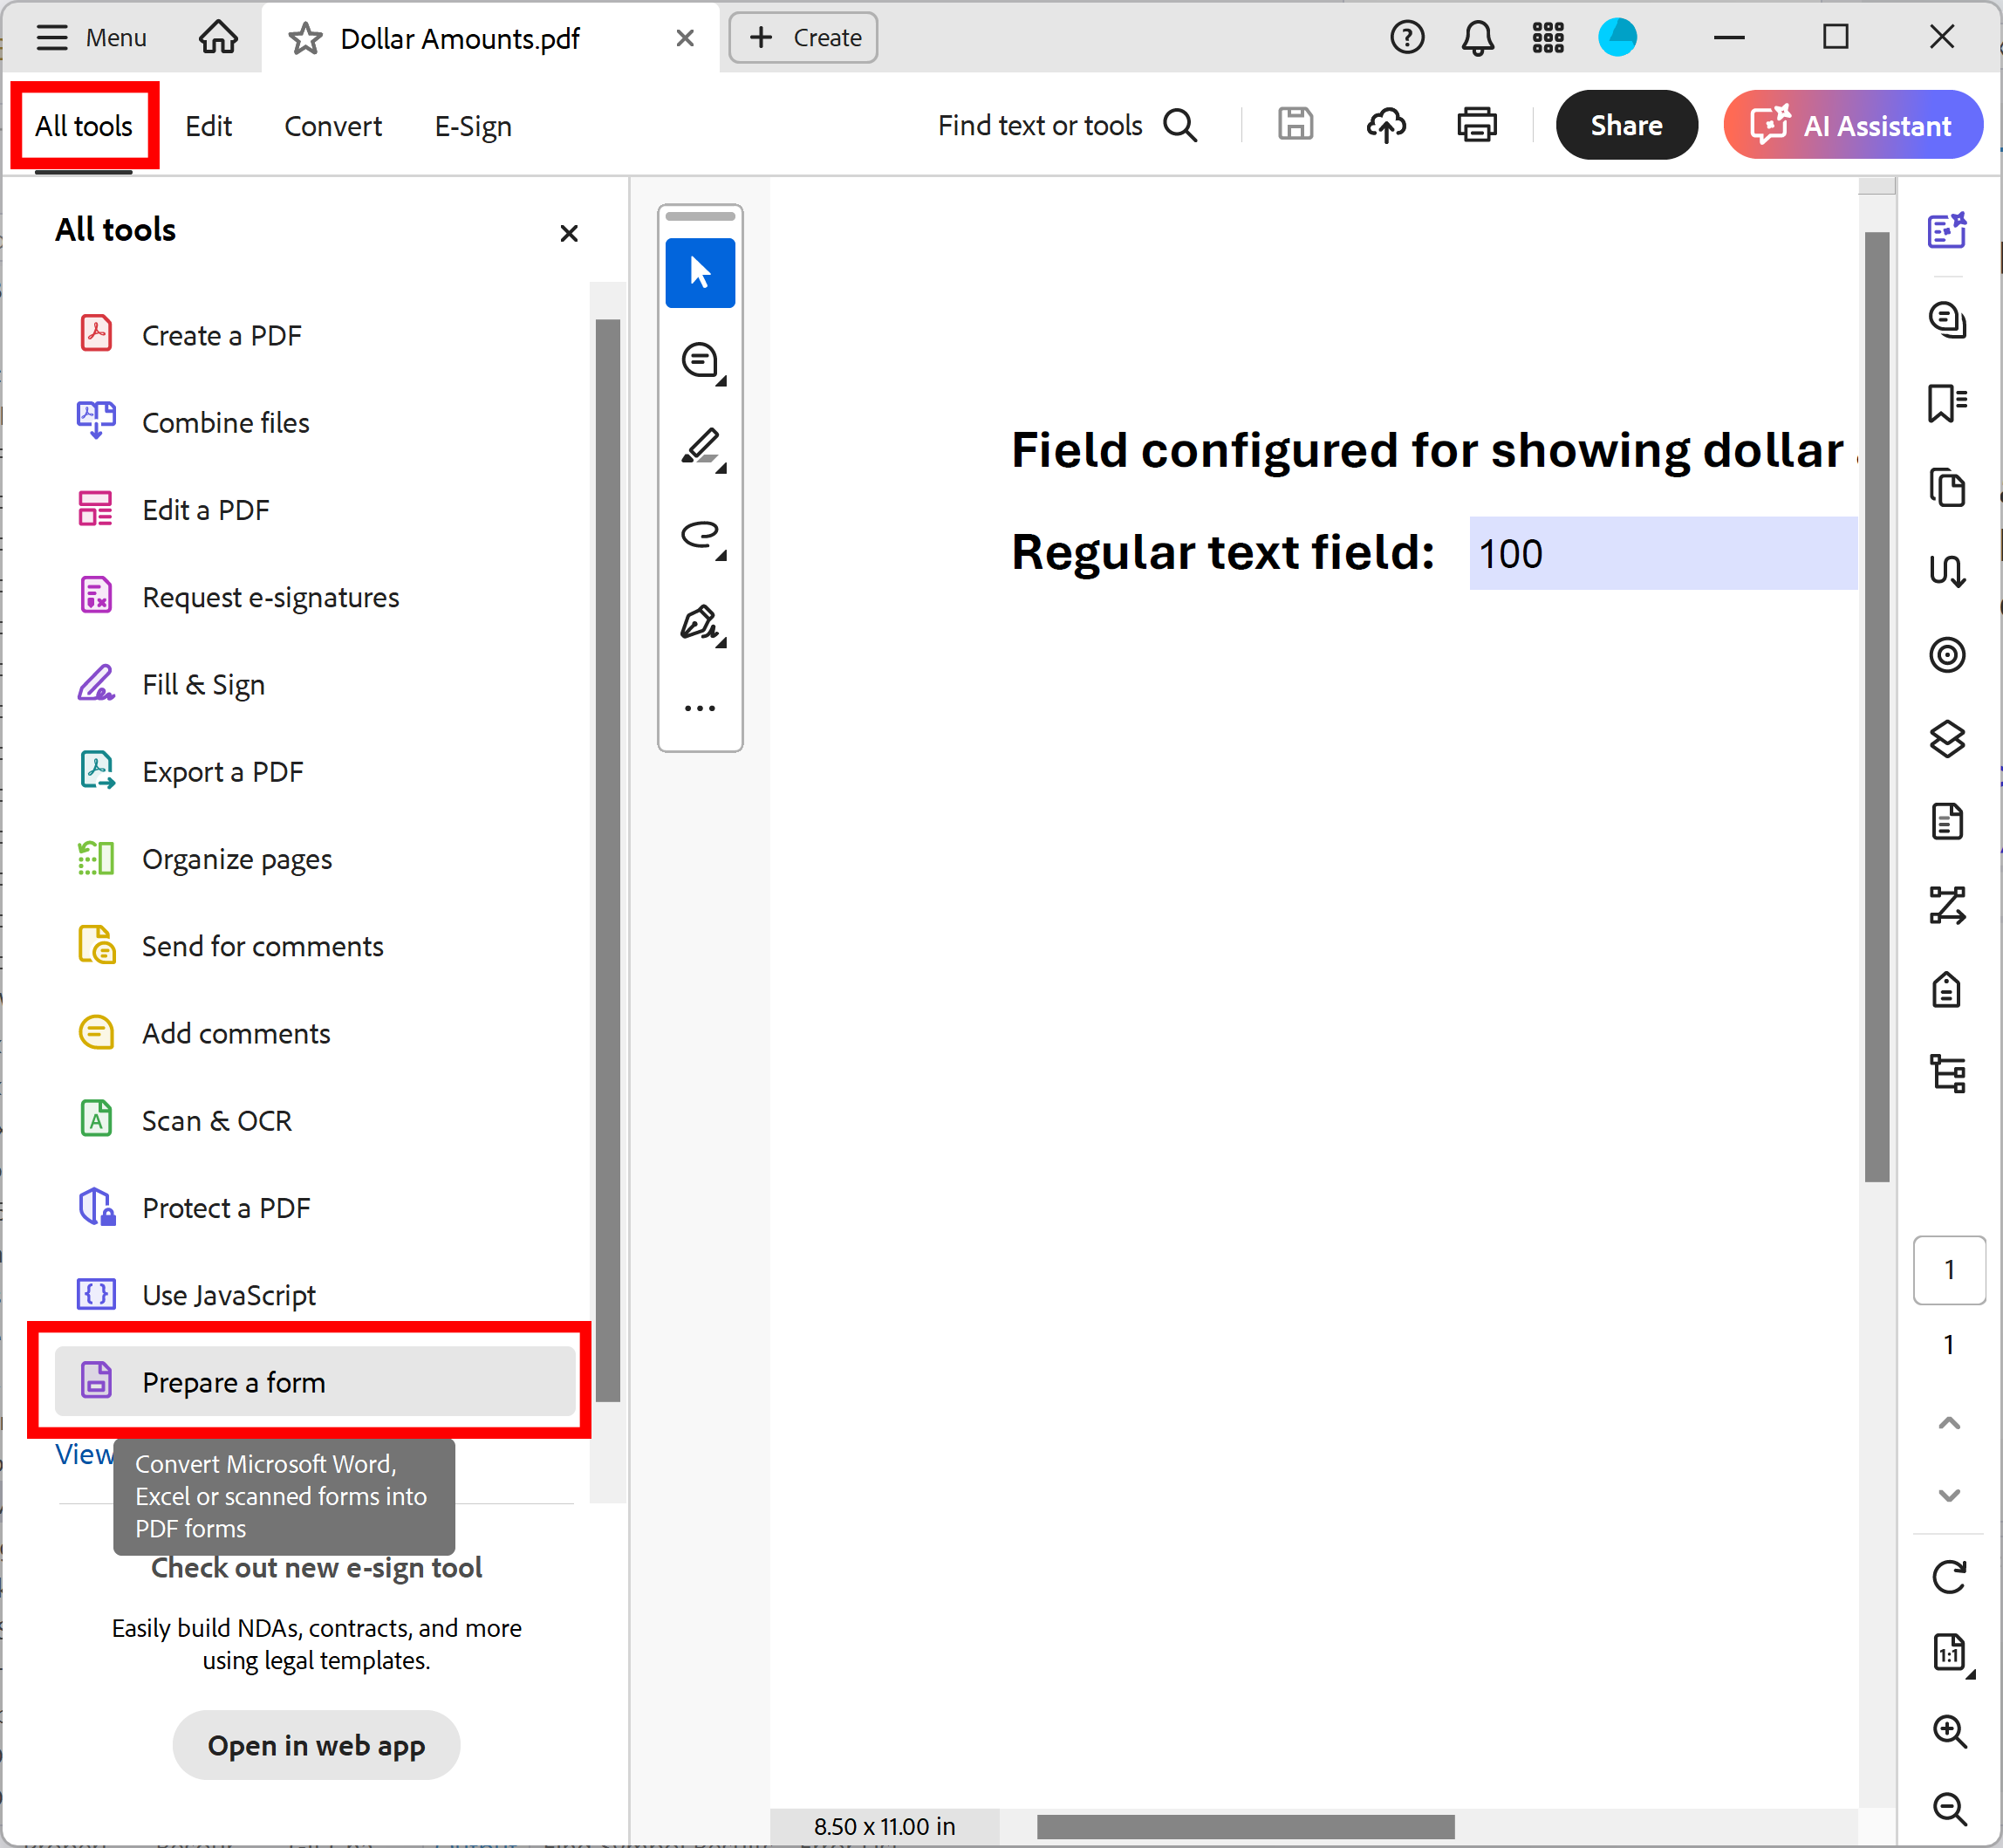
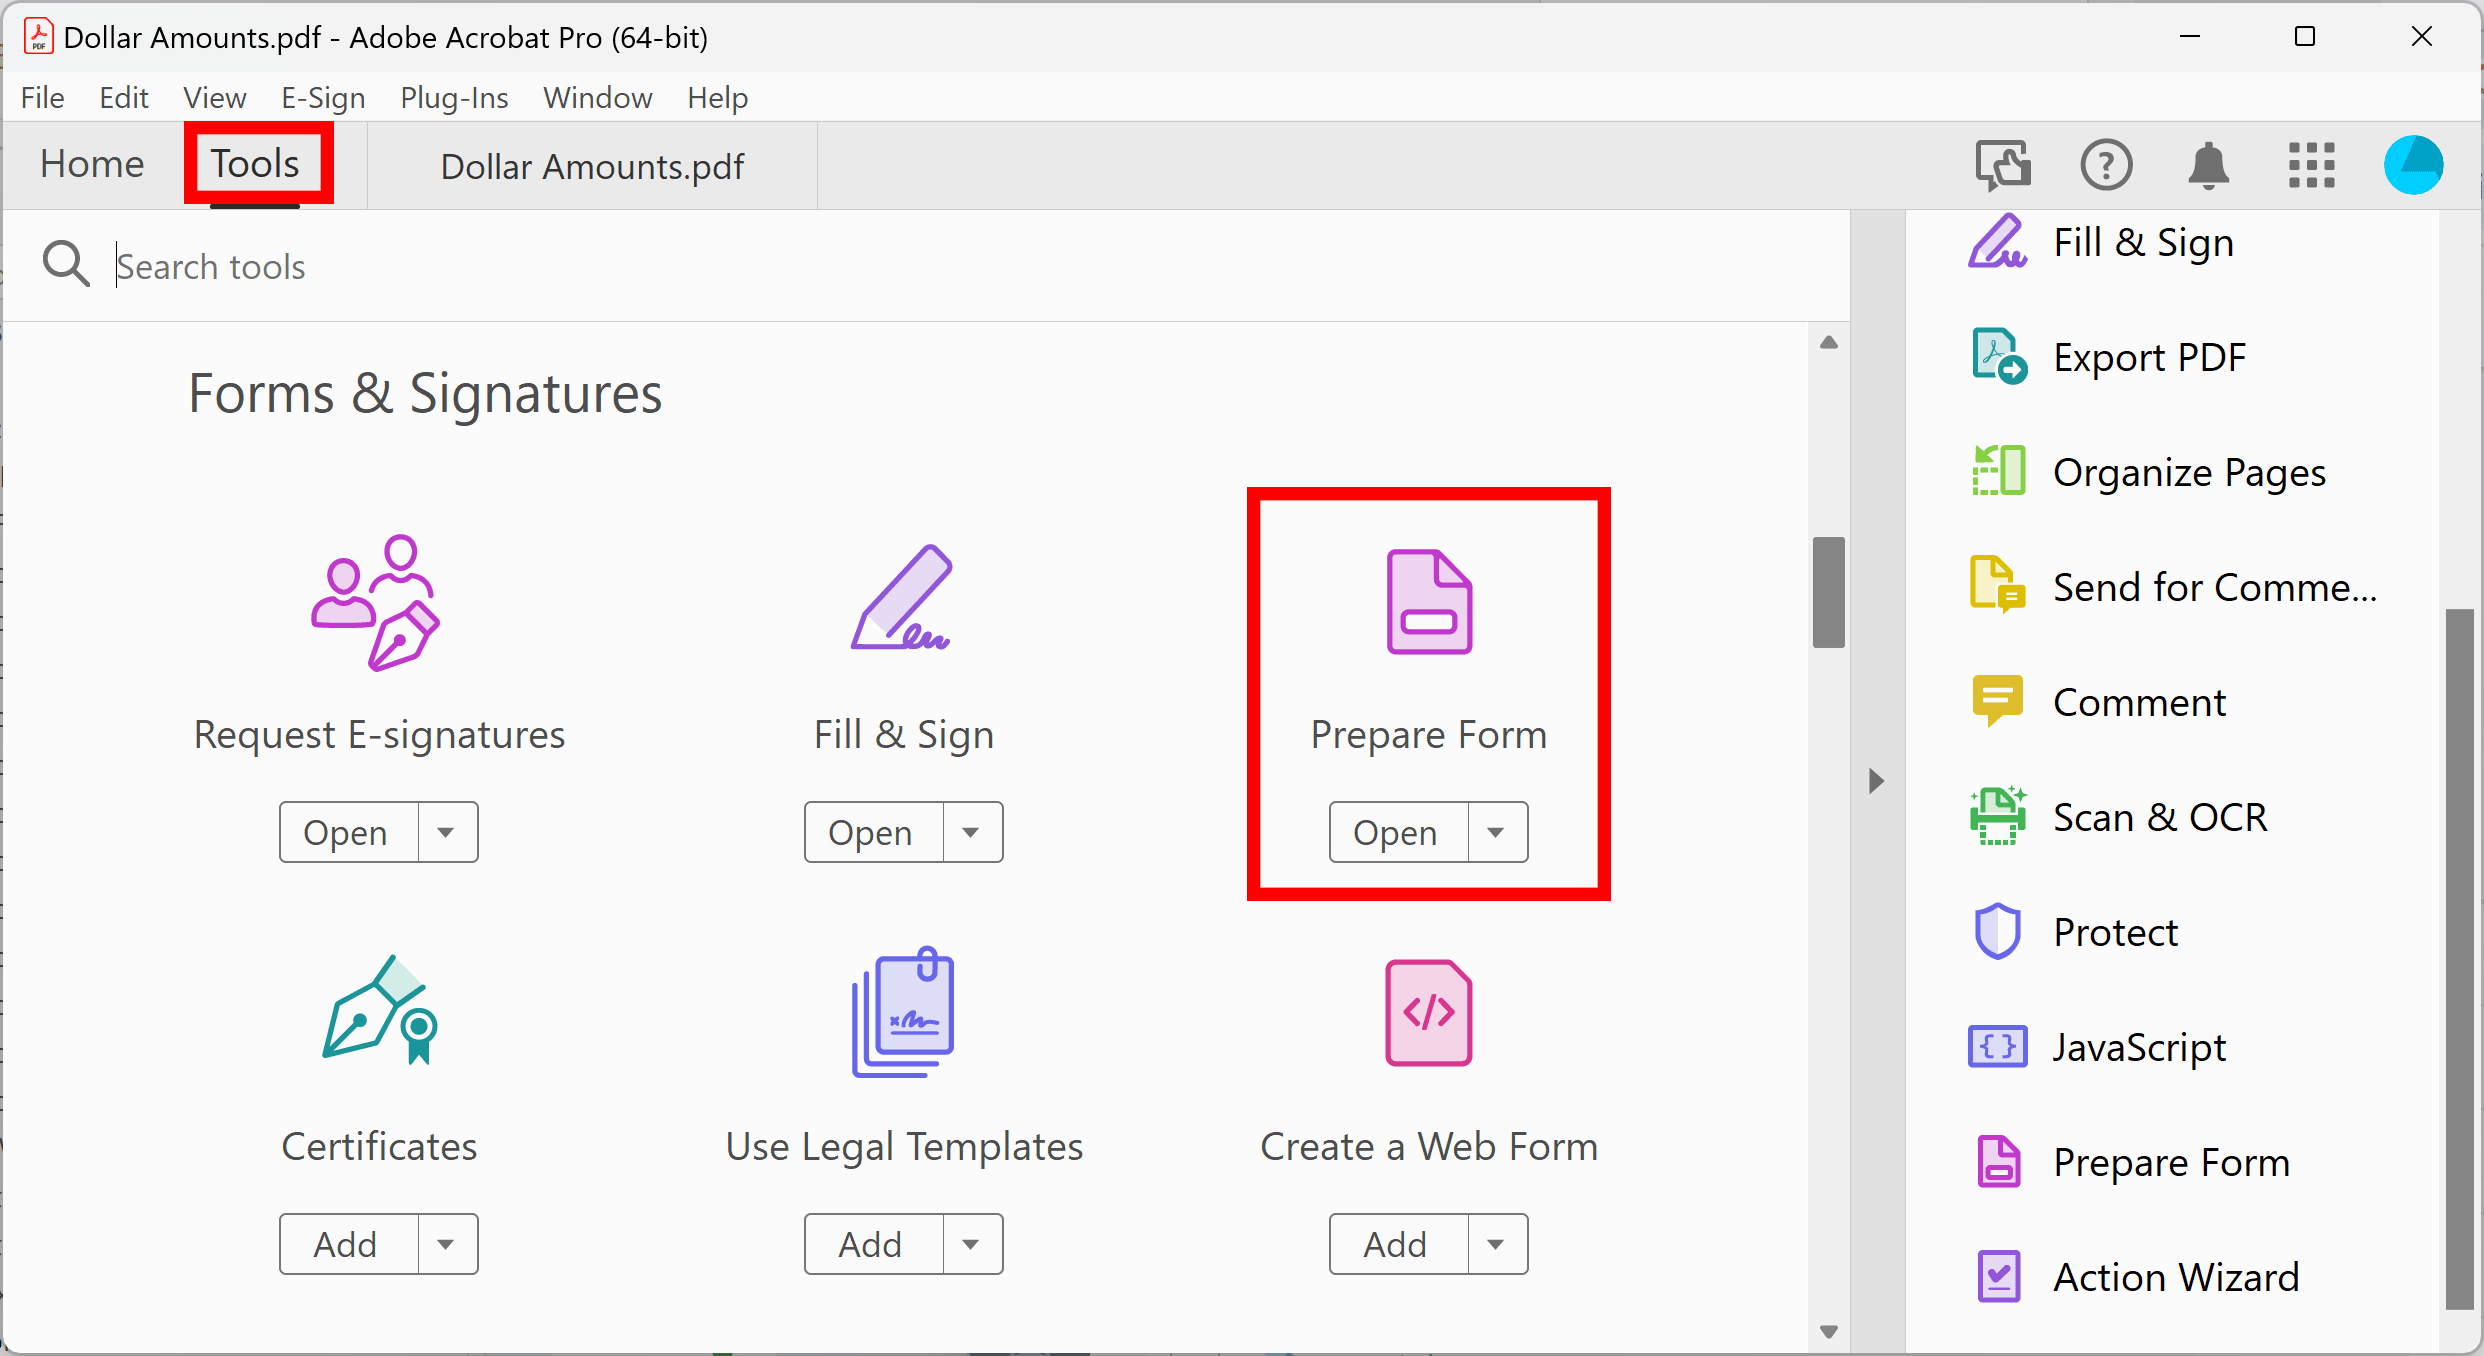
- If you are using a "new" Adobe® Acrobat® interface, then expand All tools and find Prepare Form tool located towards the bottom of the list. Depending on your screen size you may need to click on “View more” link to find it.
- Open "Prepare Form" Tool (Classic Acrobat Interface)
- If you are using a “classic” Adobe® Acrobat® interface, then expand Tools and find Prepare Form tool.
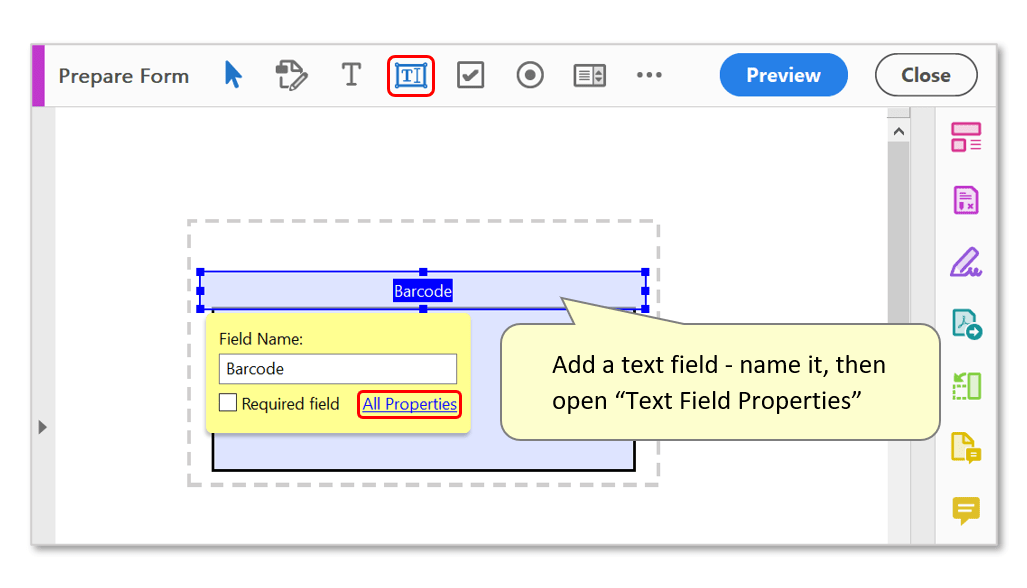
- The PDF used here already contains a multi-line field for showing 'Recipient' data. Now we'll add a single-line regular text form field above it for holding encoded barcode text. Click on the "Add a text field" icon on the toolbar, then click and drag to draw a rectangle where you want to place the field/barcodes (its position and size can be changed later).
- Give the field a suitable name - here we're using "Barcode".
- This field will be populated with data from the “Barcode” spreadsheet field during the mail merge. The output will be displayed using barcode symbology due to the font (downloaded in steps 1 & 2) and font size settings used. To edit these appearance properties, click on "All Properties" or double-click on the field.
- Step 4 - Edit the 'Barcode' Field's Text Font & Size
- Use the "Text Field Properties" dialog to configure the name, appearance and general functions of the field.
- Go to the "Appearance" tab and select the “USPSIMBStandard” font from the drop-down list. Then set the font size to 16 (this is according to USPS instructions).
- Press "Close" to close the properties dialog and save changes.
- Close the "Prepare Form" tool and save the document via the "Save" symbol or the "File > Save" menu in Acrobat.

- Note: To account for varying address length, the form field for displaying 'Recipient' text has its contents' font size set to "Auto" in the "Appearance" tab under "Form Field Properties". The text alignment is also set to "Left" under the "Options" tab.
- Step 5 - Open the "Mail Merge" Dialog
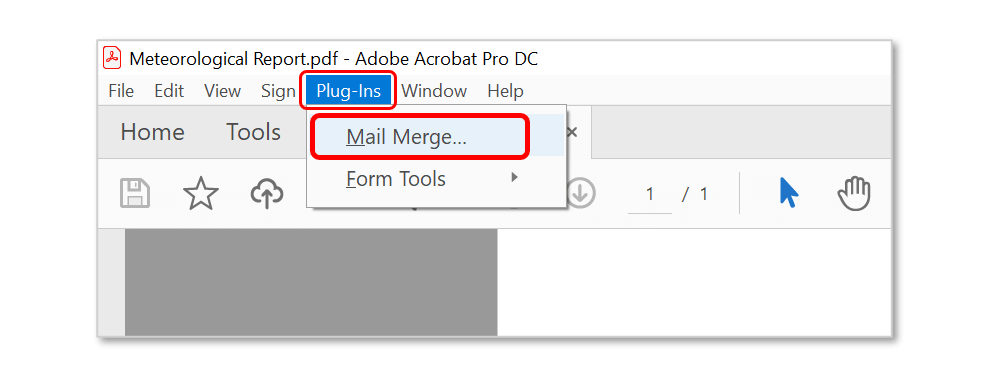
- Select Plugins > Mail Merge… to open the Mail Merge dialog.
- If you are using a new Adobe Acrobat interface, then you can locate Mail Merge menu here:

- Please see the following page for a short video tutorial on how to locate Plugins menu in the new Adobe® Acrobat® interface.
- If you are using a "classic" Adobe Acrobat interface (pre-2022), then you can locate Mail Merge menu here:
- Step 6 - Edit Mail Merge Settings
- Now we'll look at how to configure a basic mail merge procedure that utilizes this barcode field. For more detailed help with additional AutoMailMerge™ features, see this list of AutoMailMerge™ tutorials.
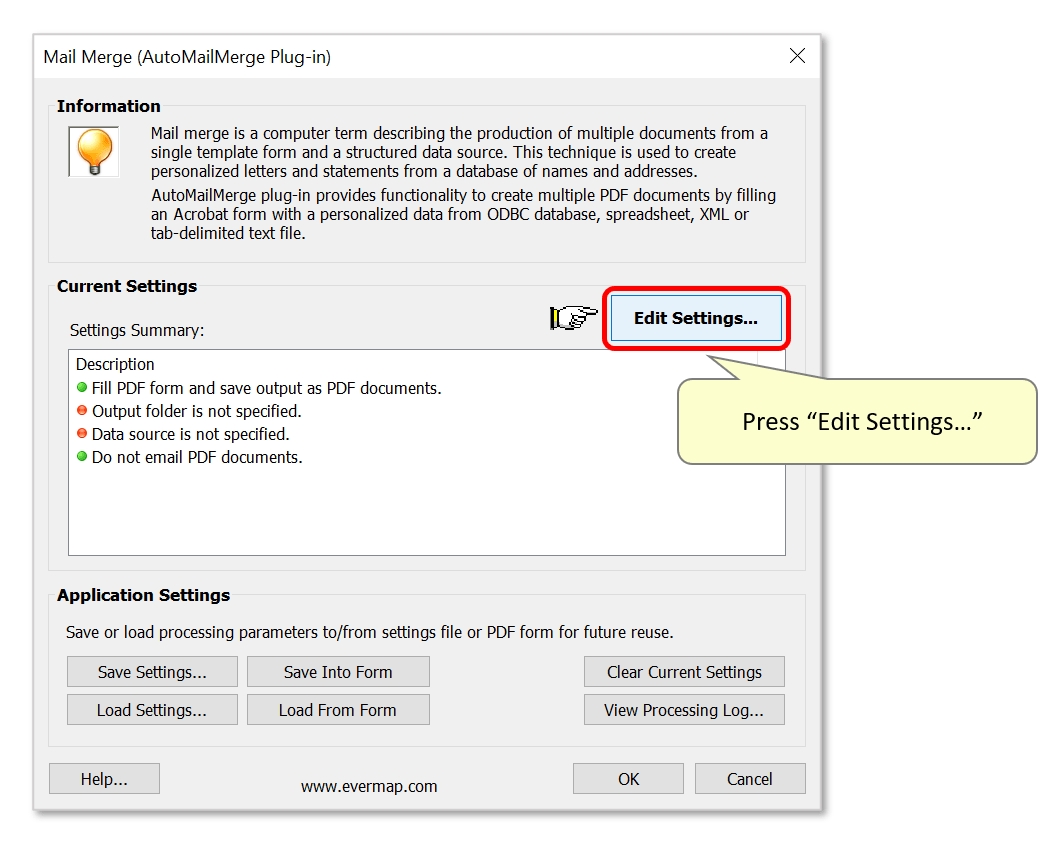
- If necessary, clear current settings and then press the "Edit Settings…" button.
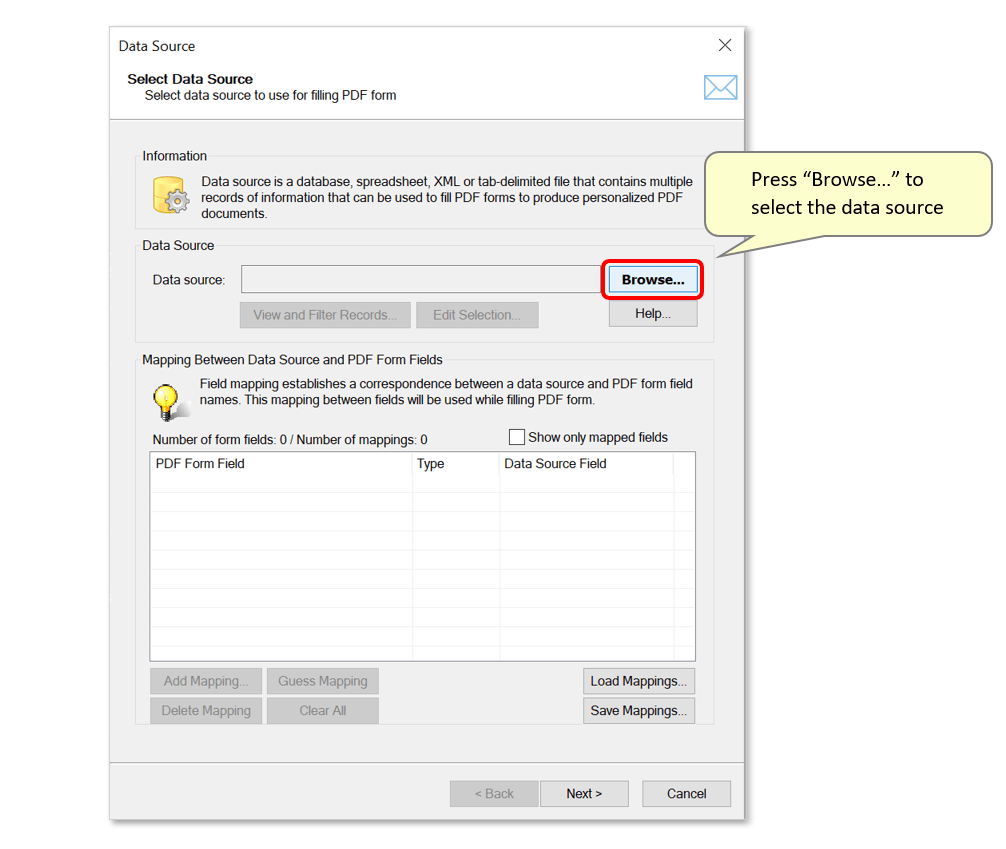
- Press the "Browse…" button in the "Data Source" dialog to select the input data file.
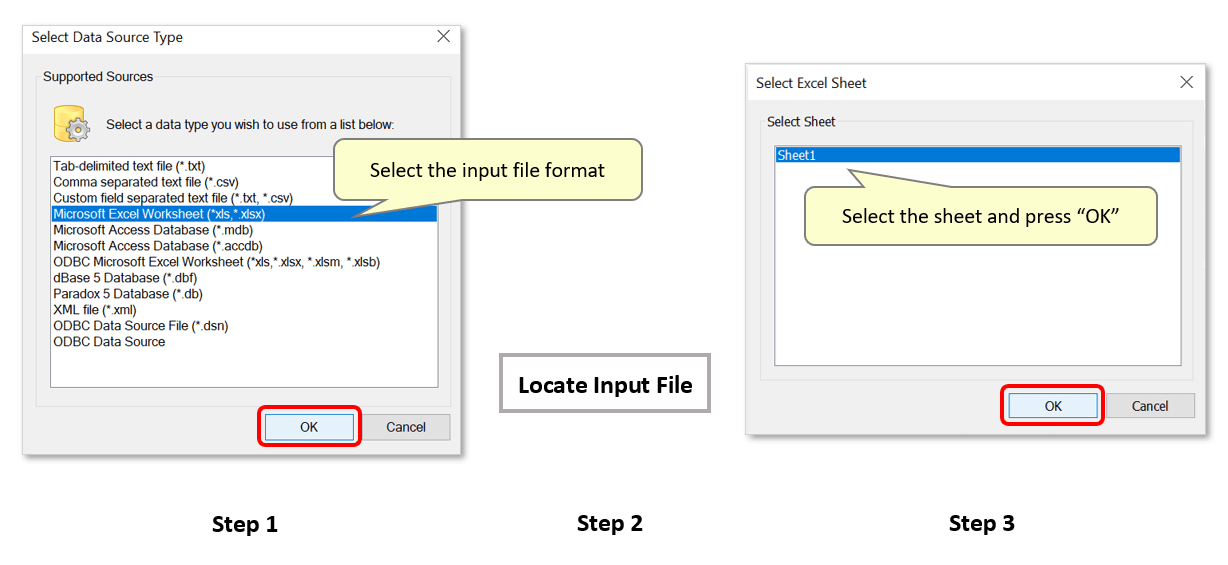
- Select a data type to use from the list (e.g.: Microsoft Excel Worksheet), then press "OK". Use the dialog that opens to locate and select the source file, then select the worksheet in the final dialog.
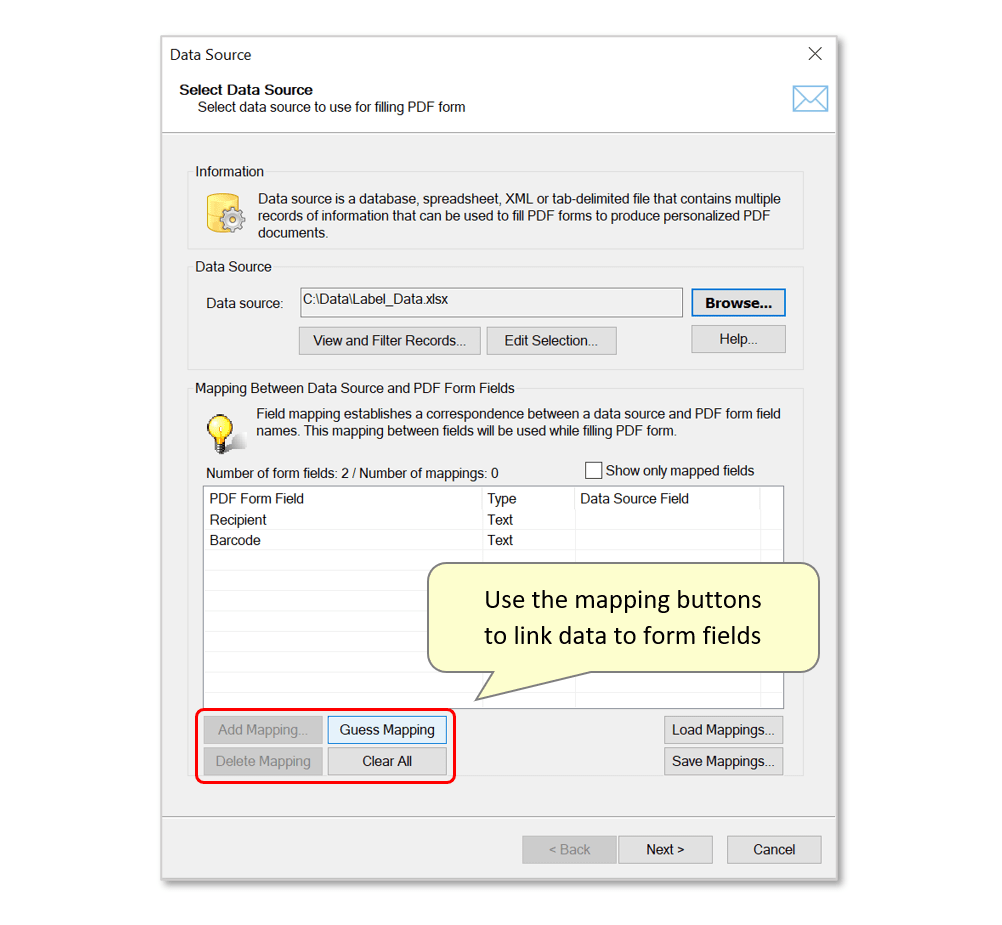
- Step 7 - Add Field Mappings
- Any fields in the PDF form will now be listed here. Use the buttons provided to assign correspondence between spreadsheet data fields and PDF form fields.
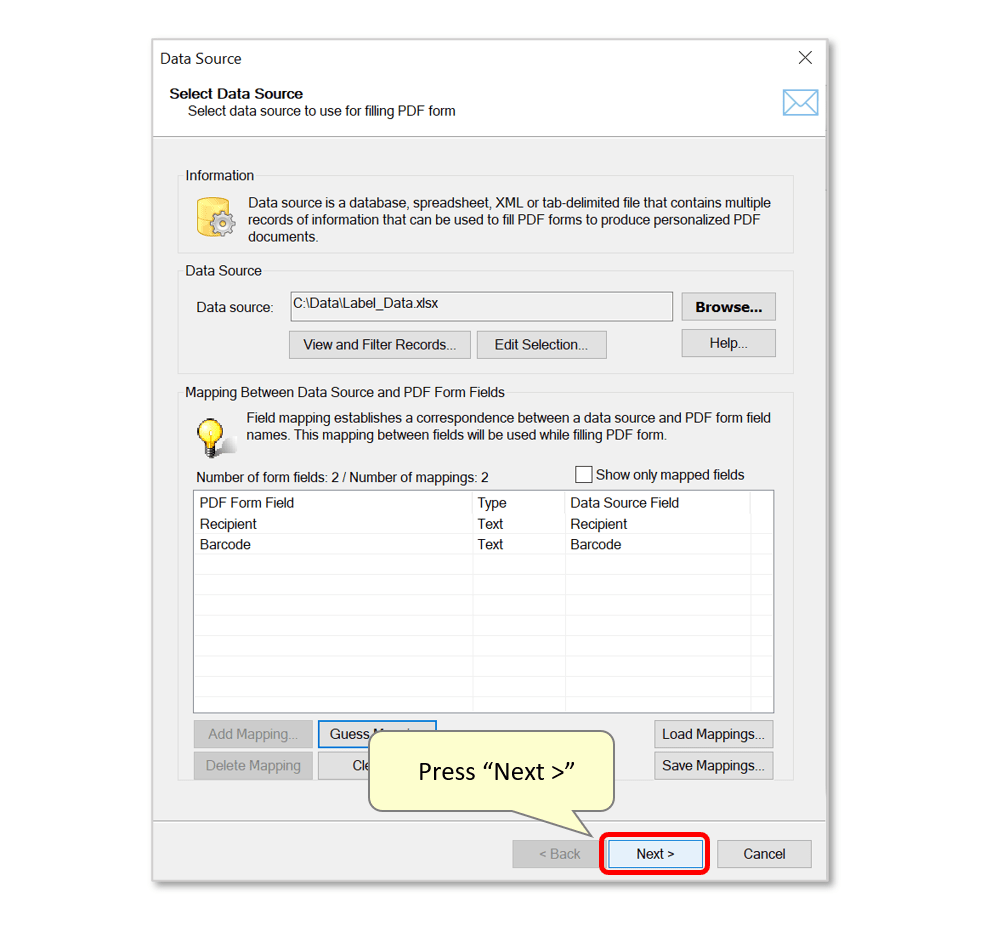
- We'll use the "Guess Mapping" button to automatically assign data fields to form fields as their names match.
- Optional: use the "Save Mappings..." button to save the current mapping configuration for future reuse. The "Load Mappings..." button can be used to load a saved configuration. If you're mapping particularly long or complex field names, consider using the visual field mapping tool tutorial to create a mapping profile that can be loaded in the same way.
- Press "Next >" to proceed.
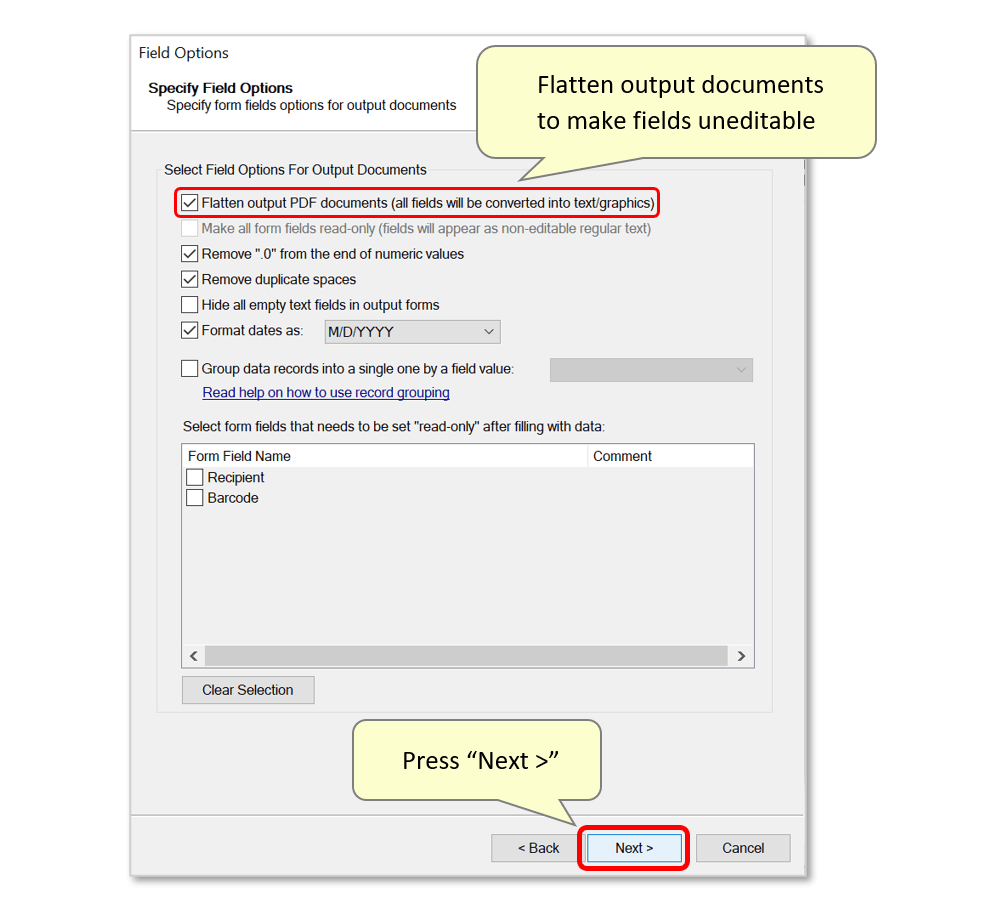
- Step 8 - Specify Field Options
- Use this dialog to configure form field options in output documents. Most importantly, use the "Flatten output PDF documents..." option to convert form fields into regular text in the output merged document(s) so that they are no longer "editable". If this option is unchecked, filled forms can still be manually edited after being created. Use the checkboxes in the lower section to manually set specific fields to "read-only" status.
- Press "Next >" to proceed.
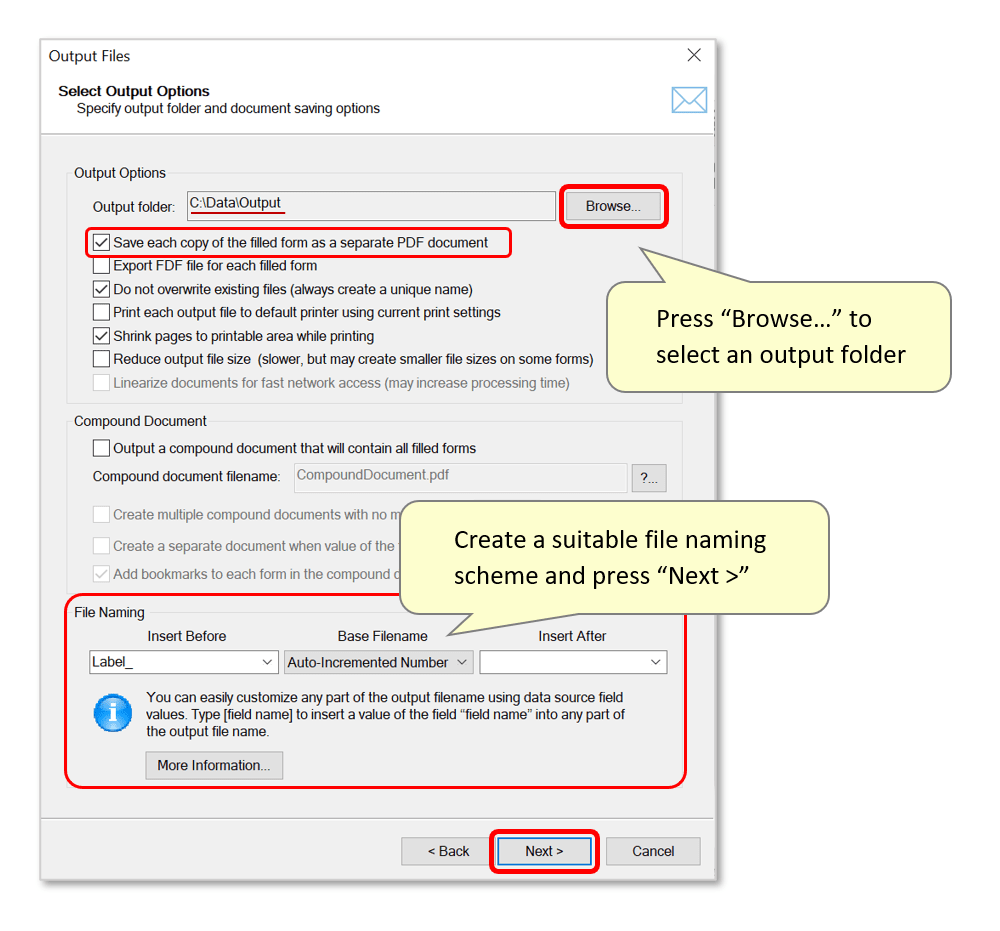
- Step 9 - Specify Output Options
- In the "Output Files" dialog, press "Browse..." to select an output folder for filled forms to be saved in. The file path will be displayed here - in this example, we'll use the "C:\Data\Output" folder.
- Ensure that the "Save each copy of the filled form as a separate PDF document" option is selected if you want individual filled forms saved in the output folder.
- Optional: use the 'Compound Document' feature to produce one file containing all filled forms.
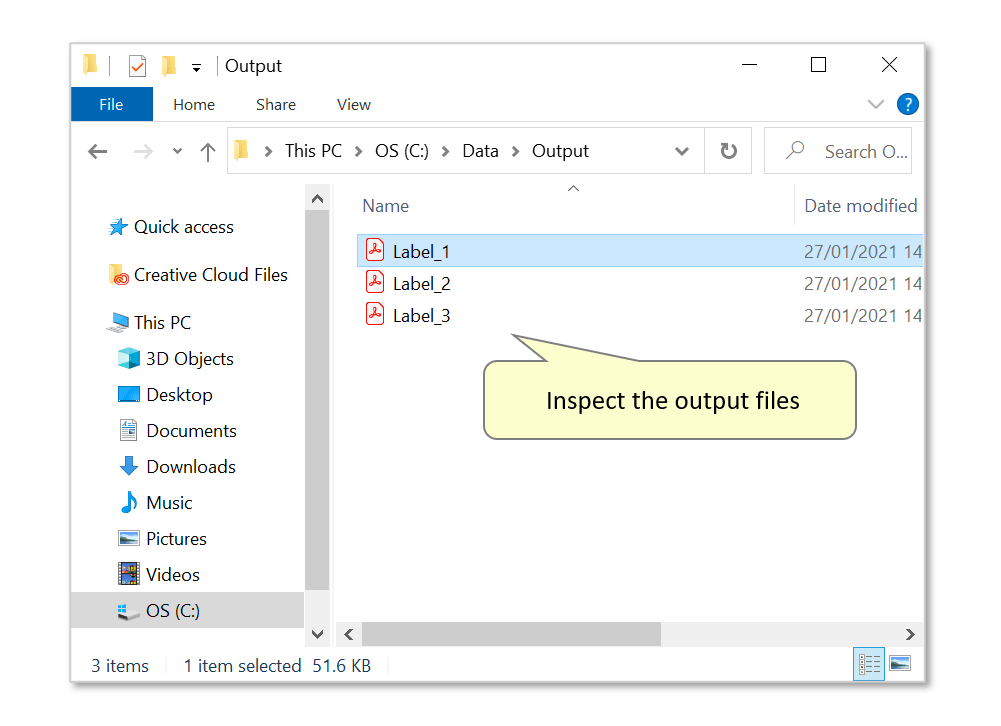
- Use the "File Naming" section to create a naming scheme for the output files. In this example, files will be named using "Label_" followed by an auto-incrementing number (e.g.: "Label_1/2/3.pdf").
- Press "Next >" repeatedly to proceed through the next screens if the remaining mail merge features are not required. The configuration is now ready to execute the mail merge.
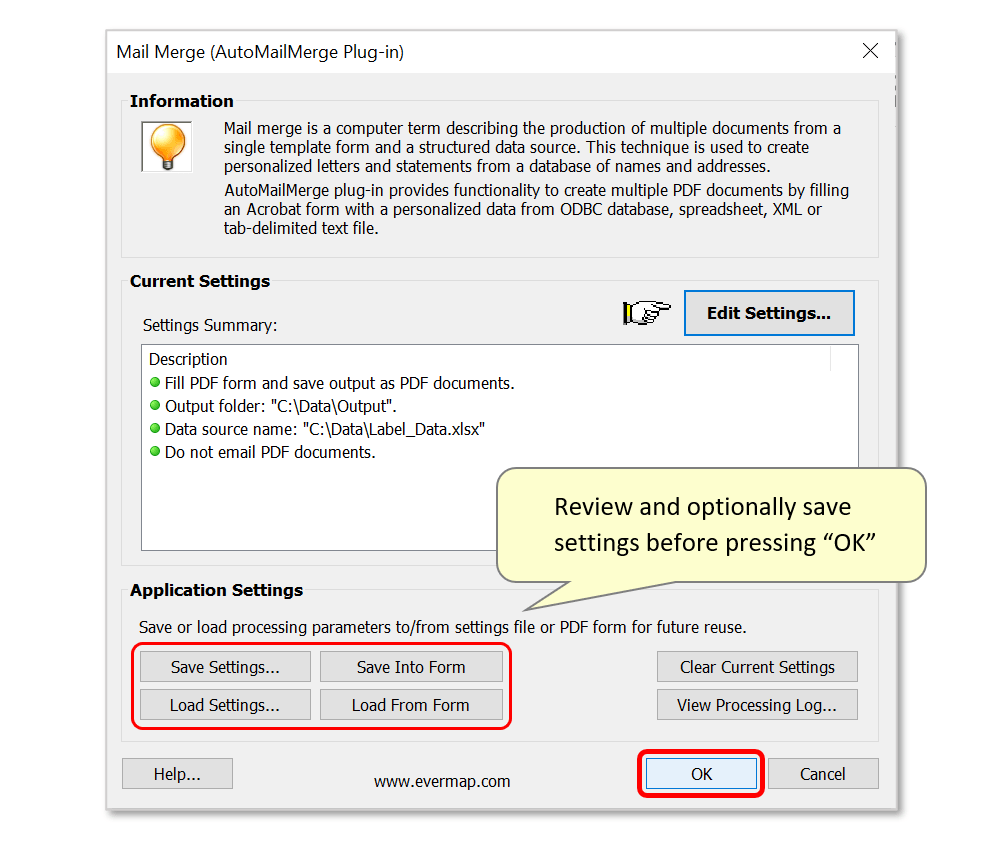
- Step 10 - Complete the Mail Merge
- Review the settings summary listed with green circles. Press "Edit Settings..." again to make any changes.
- Optionally save the configuration as an *.mms file for later reuse by pressing the "Save Settings" button - use "Load Settings" to load them. Settings can also be saved to the open PDF form by pressing "Save Into Form". They would then be auto-loaded the next time this form is used for a mail merge.
- Press "OK" to continue.
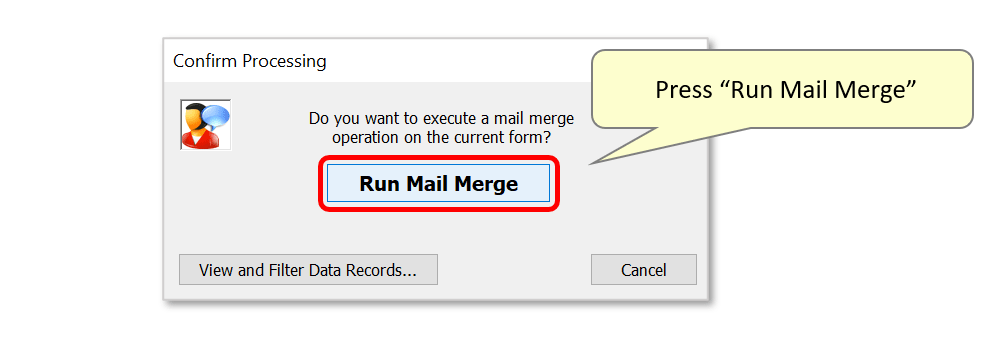
- Press "Run Mail Merge" to confirm.
- Step 11 - Open the Output Files
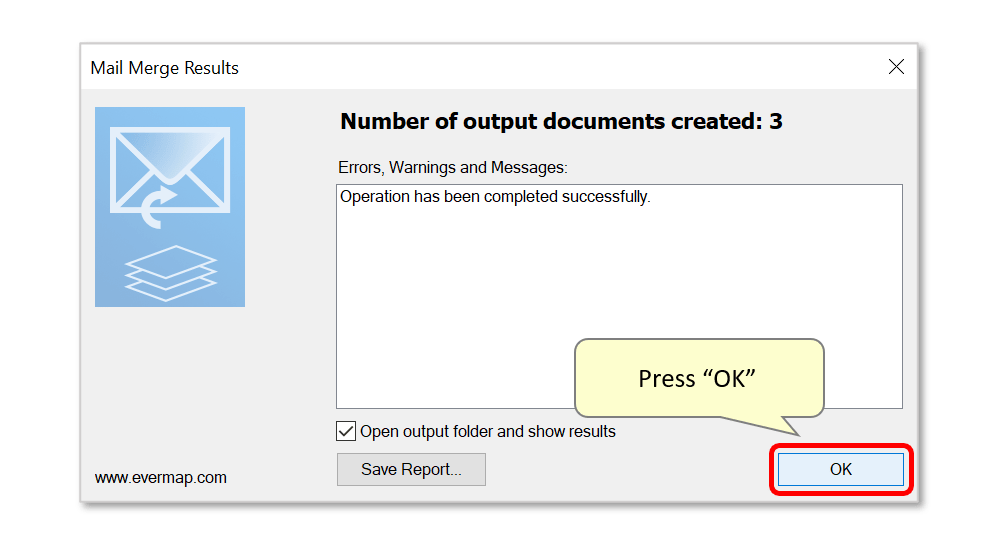
- A results box confirms the success of the operation. By default, pressing "OK" will open the selected output location.
- Open any output file(s) to inspect the filled forms.
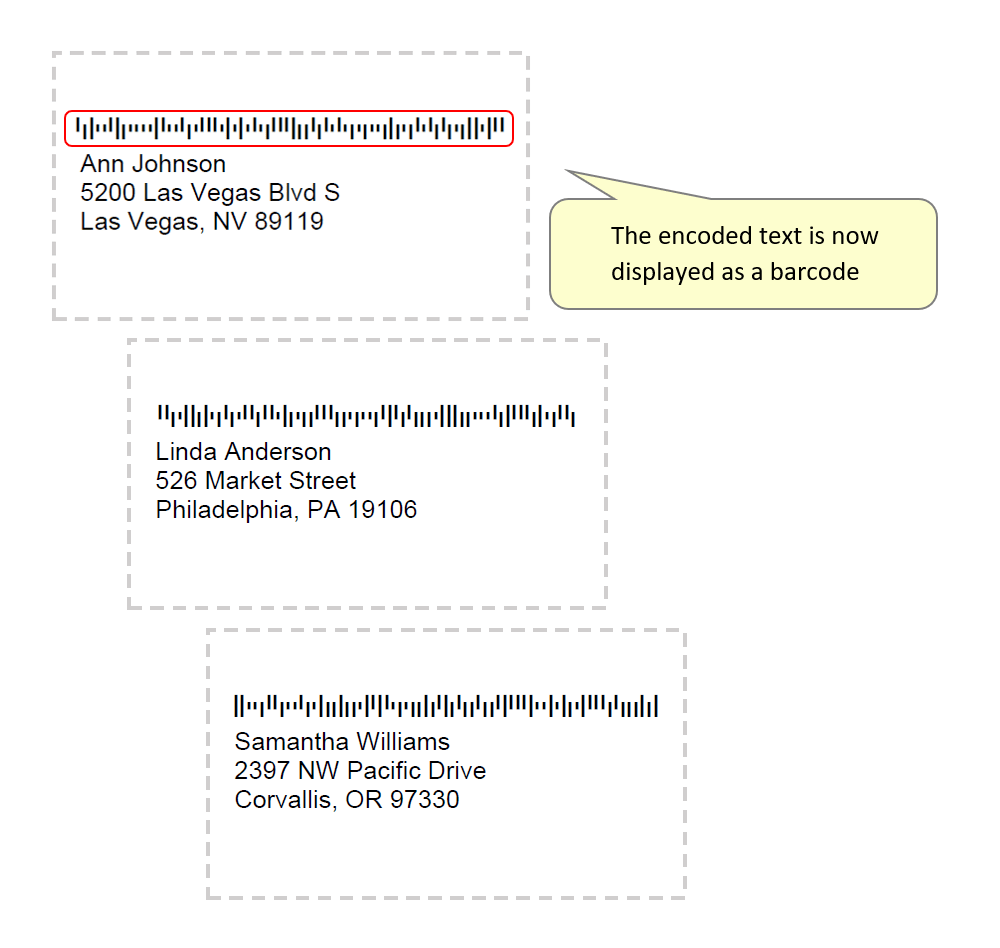
- The encoded text is now displayed as IM barcodes within each output mailing label.
- Click here for a list of all step-by-step tutorials available.