Naming Output Files Using Data Fields
AutoMailMerge plug-in for Adobe® Acrobat®
- Introduction
- The tutorial shows how to name mail merge output PDF files using text from the data fields. This tutorial applies to AutoMailMerge™ plug-in for the Adobe® Acrobat®.
- Tutorial Overview
- We are going to use the AutoMailMerge software to generate multiple W2 forms by filling a single PDF form template with data from a spreadsheet. Each output form will be automatically named using text from the "Last name" and "First name" data fields that are part of the sample Excel spreadsheet. The tutorial explains how to use any combination of custom text and data fields to create customized file names.
.png)
- Input Document Description
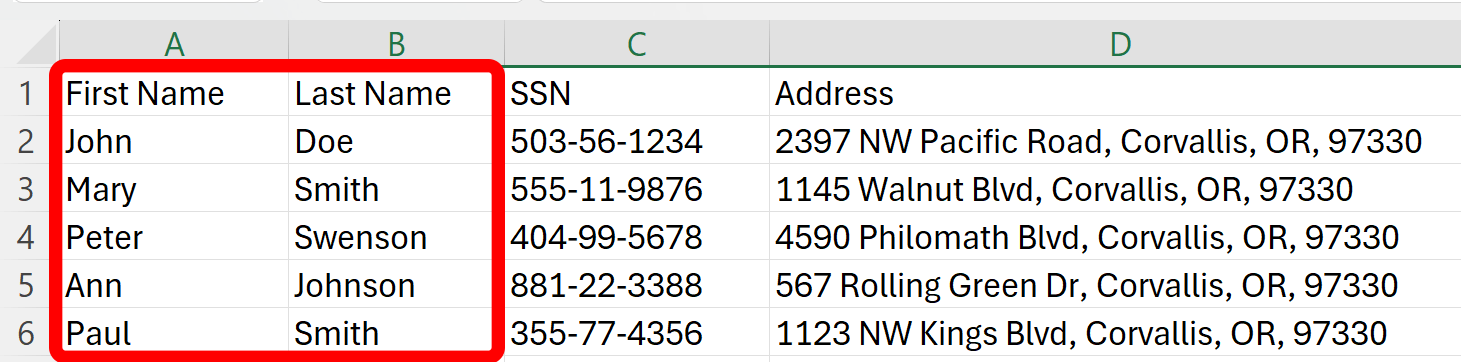
- The tutorial is using an Excel spreadsheet as a mail merge data source. The spreadsheet contains multiple rows of data with last name, first name, employee`s social security number (SSN) and an address. We are going to show how to use Last Name and First Name data fields to customize output file names.
- Here is the example of the input PDF form that is used in this tutorial. Use this link to learn how to create a fillable PDF form.

- Prerequisites
- You need a copy of the Adobe® Acrobat® (Standard or Professional) along with the AutoMailMerge™ plug-in installed on your computer in order to use this tutorial. You can download trial versions of both the Adobe® Acrobat® and the AutoMailMerge™. This tutorial can be also used for older versions of Adobe Acrobat.
- Step 1 - Open a PDF Form
- Start the Adobe® Acrobat® application and using "File > Open..." menu open a PDF form template that was prepared.
.PNG)
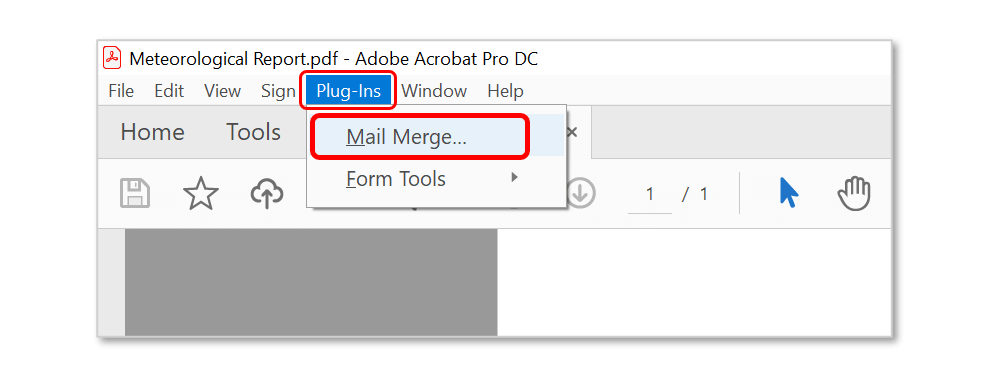
- Step 2 - Open the "Mail Merge" Dialog
- Select Plugins > Mail Merge… to open the Mail Merge dialog.
- If you are using a new Adobe Acrobat interface, then you can locate Mail Merge menu here:

- Please see the following page for a short video tutorial on how to locate Plugins menu in the new Adobe® Acrobat® interface.
- If you are using a "classic" Adobe Acrobat interface (pre-2022), then you can locate Mail Merge menu here:
- Step 3 - Edit Mail Merge Settings
- Press the "Edit Settings..." button to configure the mail merge parameters.
.PNG)
- Step 4 - Specify Data Source Settings
- Specify data source settings.
- Click the "Next >" to advance to the next screen.
.PNG)
- Step 5 - Specify Field Options
- Specify field options and click "Next >" to advance to the next screen.
.PNG)
- Step 6 - Specify Output Options
- Use the "Select Output Options" screen to control where and how to save output PDF documents. Check the "Save each copy of the filled form as a separate PDF document" option to create separate output documents for each data source record.
- Click "Browse..." to specify a folder where all output PDF files will be saved.
.PNG)
- Step 7 - Customize Output File Naming
- Use the "File Naming" section of the "Select Output Options" screen to specify output file naming. There are 3 selection fields - "Insert Before", "Base Filename" and "Insert After". Use these fields to create a desired file naming scheme. The "Insert Before" represents the first part of the output file name. The "Base Filename" - the middle and main part. The "Insert After" - the last part. However, it is not necessary to use all fields at once. They are provided just for the flexibility.
.PNG)
- The "Base Filename" field allows to select one of the automatic name bases: "Nothing", "Auto-Incremented Number", "Form Filename", "Form Filename + Number", and "Today`s Date". By default, the "Form Filename + Number" option is selected. This option will use the input file name and auto-incrementing number to automatically create names such as Form1.pdf, Form2.pdf, Form3.pdf and etc. Select the "Nothing" option to deactivate the "Base Filename" field and omit this part from the file naming process. Note that this field is non-editable.
.PNG)
- The "Insert Before" and "Insert After" fields could be used to specify a custom text as well as data field names. If any of these fields are left blank then it is omitted from the file naming process.
.PNG)
- The software allows to pick available data fields from a pulldown menus for both "Insert Before" and "Insert After" fields. However, it is possible to manually enter multiple field names into each field as well as custom text.
- Type [field name] to insert a value of the field "field name" into any part of the output file name. Important: data field names are case-sensitive. In our example, we are using "[Last name][First name]" to create file names that combine a value of "Last name" and "First name" fields. It will produce file names such as "DoeJohn", "SmithMary" and etc.
.PNG)
- Here is the example of the output file names for the following settings:
"Insert Before" -> [Last name]
"Base Filename" -> Nothing
"Insert After" -> [First name]
.PNG)
- The second example shows the output while using the following settings:
"Insert Before" -> [Last name][First name]Note that input file name is W2.pdf.
"Base Filename" -> Form Filename
"Insert After" ->
.PNG)
- The next example shows the similar settings as the previous one, but the field names are inserted after the "Base Filename":
"Insert Before" ->
"Base Filename" -> Form Filename
"Insert After" -> [Last name][First name]
.PNG)
- This example shows how to use custom text in the filenames:
"Insert Before" -> W2_2019_
"Base Filename" -> Nothing
"Insert After" -> [Last name][First name]
.PNG)
- More examples that show other possible combinations of the settings:
.PNG)
.PNG)
.PNG)
- Step 8 - Finish Customizing Process
- Click "Next >" once file names customizing process is finished. Skip the "Add Watermarks" and the "Security" screens by clicking the "Next >" button multiple times. Click "Finish" on the last "Advanced" screen.
.PNG)
- Step 9 - Start Processing
- Check settings summary in the "Mail Merge" dialog. Click "OK" to advance to the mail merge process.
.PNG)
- Press the "Run Mail Merge" button in the "Confirm Processing" dialog to start a mail merge process.
.PNG)
- The "Mail Merge Results" dialog will appear once a mail merge is completed. Click "OK" to close this dialog and open an output folder.
.PNG)
- Step 10 - Examine Output Files
- Open the output folder and check the file names.
.PNG)
- Click here for a list of all step-by-step tutorials available.