Securing Mail Merge Output PDF Files with Passwords
AutoMailMerge plug-in for Adobe® Acrobat®
- Introduction
- This tutorial shows how to limit access to output PDF files created during the mail merge process performed by AutoMailMerge plug-in. The document is access can be controled by setting passwords and by restricting certain features, such as copying, printing and editing. The AutoMailMerge™ plug-in provides ability to use either the same password for all output documents or assign an individual password for every file. The software can use text from the data source records to create individual passwords for each output PDF document.
.PNG)
- The tutorial also shows how to open a password-protected PDF file and how to remove security restrictions from a PDF document.
- A PDF file can have two kinds of passwords: a Document Open Password and a Permissions Password. When you set a Document Open Password (also known as a user password), anyone who tries to open the PDF must type in the password you specify. When you set a Permissions Password (also known as a master password), recipients will need a password to open the document, but they must type the Permissions Password to set or change the restricted PDF features. If the PDF is secured with both types of passwords, it can be opened with either password, but only the Permissions Password allows the user to change the restricted PDF features. Because of the added security, setting both types of passwords is preferable to setting just one.
- Prerequisites
- You need a copy of the Adobe® Acrobat® along with the AutoMailMerge™ plug-in installed on your computer in order to use this tutorial. You can download trial versions of both the Adobe® Acrobat® and the AutoMailMerge™.
- How to Password-Protect Output PDF Files
- Step 1 - Start the AutoMailMerge Settings Wizard
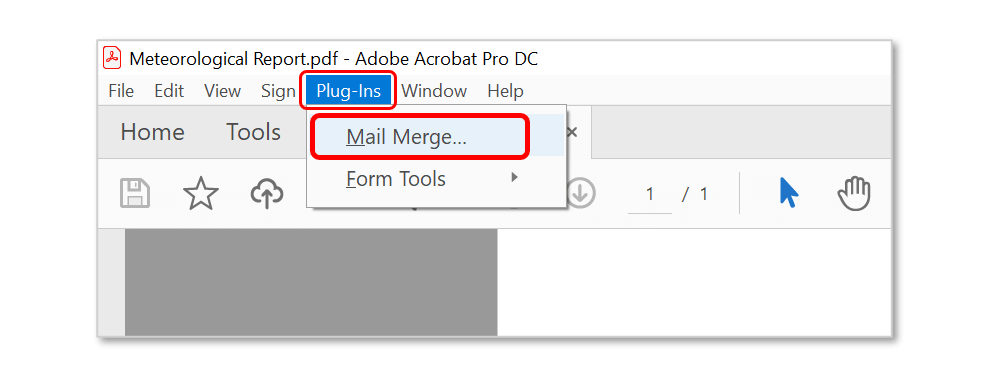
- Select Plugins > Mail Merge… to open the Mail Merge dialog.
- If you are using a new Adobe Acrobat interface, then you can locate Mail Merge menu here:

- Please see the following page for a short video tutorial on how to locate Plugins menu in the new Adobe® Acrobat® interface.
- If you are using a "classic" Adobe Acrobat interface (pre-2022), then you can locate Mail Merge menu here:
- Press the "Edit Settings..." button to configure the mail merge parameters. See other AutoMailMerge tutorials for details on how to configure a mail merge process. This tutorial only covers the security settings.
.PNG)
- Step 2 - Specify Document Security Settings
- Proceed to the "Security" screen in the mail merge settings wizard, but make sure to configure the input data source first.
- Check the "Require a password to open the document" option to password-protect all output documents. Type a case-sensitive password twice (for the verification purpose). Note that the same Document Open Password would be set to all output PDF files.
.PNG)
- Check the "Restrict editing and printing of the document" option to restrict certain PDF features, such as editing, copying and printing. Type a change permissions password twice (for the verification purpose). Note that the same Permissions Password would be set to all output PDF files.
.PNG)
- Check desired options to allow certain PDF features.
.PNG)
- Check the "Get password from data field" option if you want to assign individual passwords on file by file basis. Select a data source field that contains password text. The plug-in will retrieve password from this data field and use it to secure a corresponding output PDF document. The "Password" data field is used in the tutorial.
- Click "Next >" to finish configuring document security settings.
.PNG)
- Step 3 - Check the Settings
- Specify desired settings on the rest of the screens and click "Finish" on the last "Advanced" screen.
- Check the settings summary. Settings description should contain securing and restricting records. Click "OK" to advance to the mail merge process.
.PNG)
- Step 4 - Start Mail Merge
- Press the "Run Mail Merge" button in the "Confirm Processing" dialog to start a mail merge process.
.PNG)
- The "Mail Merge Results" dialog will appear once a mail merge is completed. Click "OK" to close this dialog and open an output folder.
.PNG)
- All PDF files have been secured with a document open password and most PDF features were restricted with a password according to the settings. If the "Get password from data field" option is checked, then the software would use passwords from the data source.
- How to Open a Password Protected PDF File and Remove Security Restrictions
- The security restrictions can be removed via the Adobe® Acrobat® application, by any user that knows both passwords. The password protection and security restrictions cannot be removed by the Adobe® Acrobat® Reader application.
- Start the Adobe® Acrobat® application and open secured PDF document. The dialog would prompt user to enter a Document Open Password.
.PNG)
- Select "File > Properties..." from the main Adobe® Acrobat® menu to open the "Document Properties" dialog.
.PNG)
- Alternatively, click "Permission Details" in the "Security Settings" tab of the left menu to open the "Document Properties" dialog.
.PNG)
- Select the "Security" tab. The security method shows the current security status for the PDF document. The document restrictions summary shows which PDF features are allowed/not allowed. Optionally, press the "Show Details..." to see detailed document security settings.
.PNG)
- Press the "Change Settings..." button to remove security restrictions.
.PNG)
- Enter a Permissions Password:
.PNG)
- The "Password Security - Settings" dialog would appear. Inspect it and click "OK" to proceed.
.PNG)
- Click "OK" to close the security message window that informs that new security settings will not be applied to the document until the document is saved.
.PNG)
- Check the document restrictions summary. Now all PDF security restrictions have been removed. You will be able to use all the Adobe® Acrobat® features until the document will be closed. Note that security settings will not be applied to the document until the document will be saved. Click "OK" to exit the "Document Properties" dialog.
.PNG)
- Select "No Security" in the "Security Method:" menu to remove document open password security for the PDF document.
.PNG)
- Click "OK" to confirm removing security from the PDF document.
.PNG)
- Click "OK" to exit the "Document Properties" dialog.
.PNG)
- Save changes to the PDF file. Now document password protection has been disabled.
.PNG)
- Click here for a list of all step-by-step tutorials available.