Convert a PDF Portfolio into a Single PDF Document
- Introduction
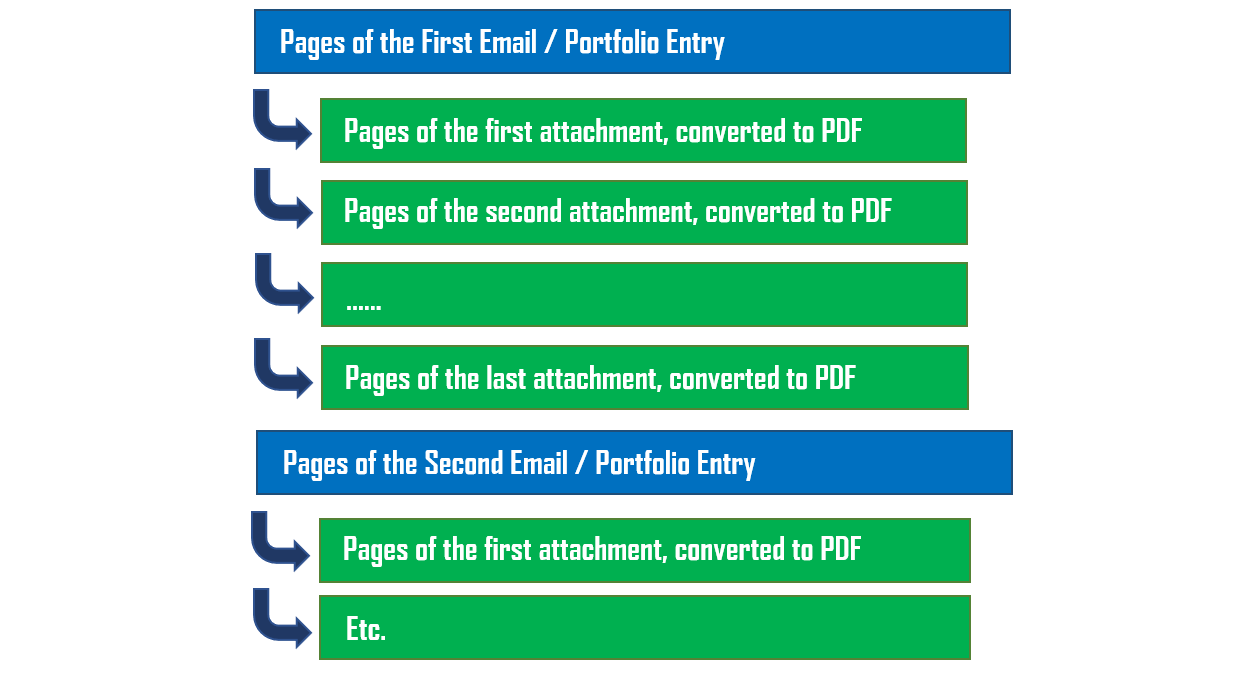
- Use this tutorial to take one or more PDF Portfolios and convert them into a regular "flat" PDF document. All portfolio attachments can also be converted to PDF format and appended directly after their parent portfolio item. All documents and attachments are then hierarchically bookmarked in the output PDF, and ready to be Bates stamped if necessary. MSG and ZIP files are automatically extracted and processed, to be included within the output PDF.
- Also use this method to process portfolio entries associated with emails sent between specific dates, or people. The metadata and page index file is also exported into a number of spreadsheet-ready formats. If an attachment cannot be converted into PDF format, a stub page is generated and inserted into the output file.
- What is a PDF Portfolio?
- A PDF Portfolio contains multiple files assembled into an integrated PDF unit. For example, it can include text documents, e-mail messages, spreadsheets, CAD drawings, and PowerPoint presentations etc. The original files retain their individual identities but are assembled into one PDF Portfolio file. In this tutorial, the sample Portfolio we'll use is an entire Microsoft Outlook inbox of emails, extracted into a Portfolio file to include all corresponding attachments. See the tutorial on how to extract Outlook emails as a Portfolio file here.
- It is important to understand that a PDF Portfolio is not a PDF document. It is an archive of files stored inside a single document, with a PDF extension. PDF portfolios are commonly used for storing emails exported from Microsoft Outlook.
- Every file inside a PDF Portfolio may contain associated metadata information. In the case of emails, it can include "From", "To", "Subject", "Sent", "Description", "Attachments" and other fields. The list of fields depends on the type of the email messages and may vary. The metadata fields may be absent from the portfolio if it was not exported from Outlook, and instead created directly in Adobe Acrobat.
- Prerequisites
- You need a copy of Adobe® Acrobat® along with the AutoPortfolio™ plug-in installed on your computer in order to use this tutorial. Both are available as trial versions.
- Step 1 - Opening the Tool
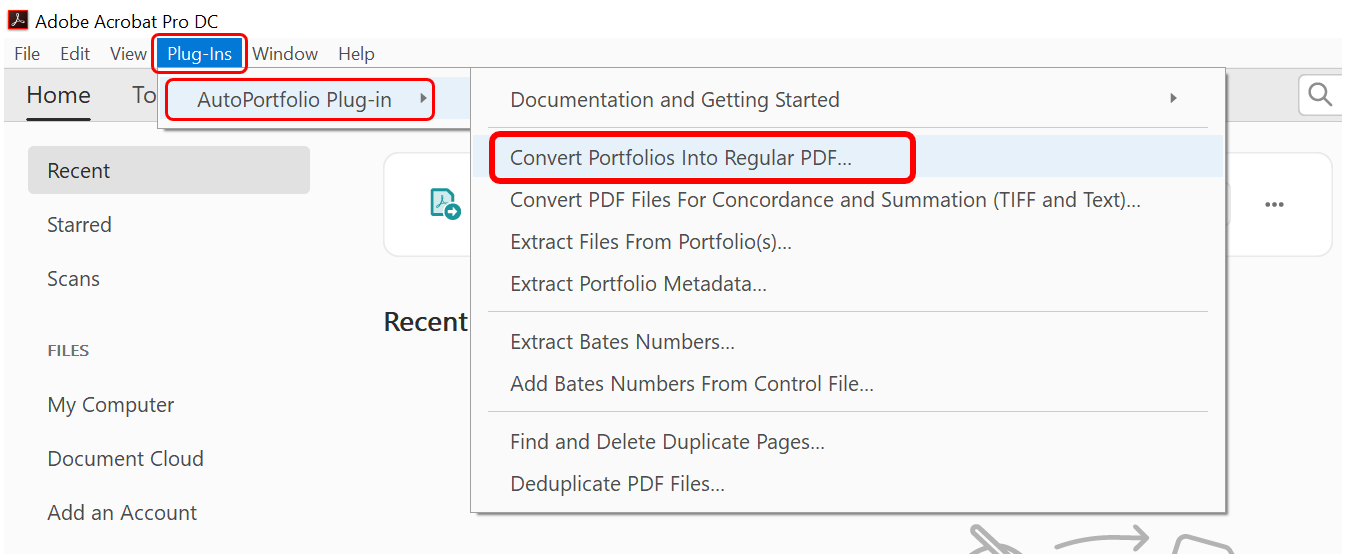
- Start Adobe® Acrobat® and select “Plug-ins > AutoPortfolio Plug-in > Convert Portfolios into Regular PDF” from the main Adobe Acrobat menu to open the conversion dialog. Do not open a portfolio directly in Acrobat.
- Step 2 - Select Input Files
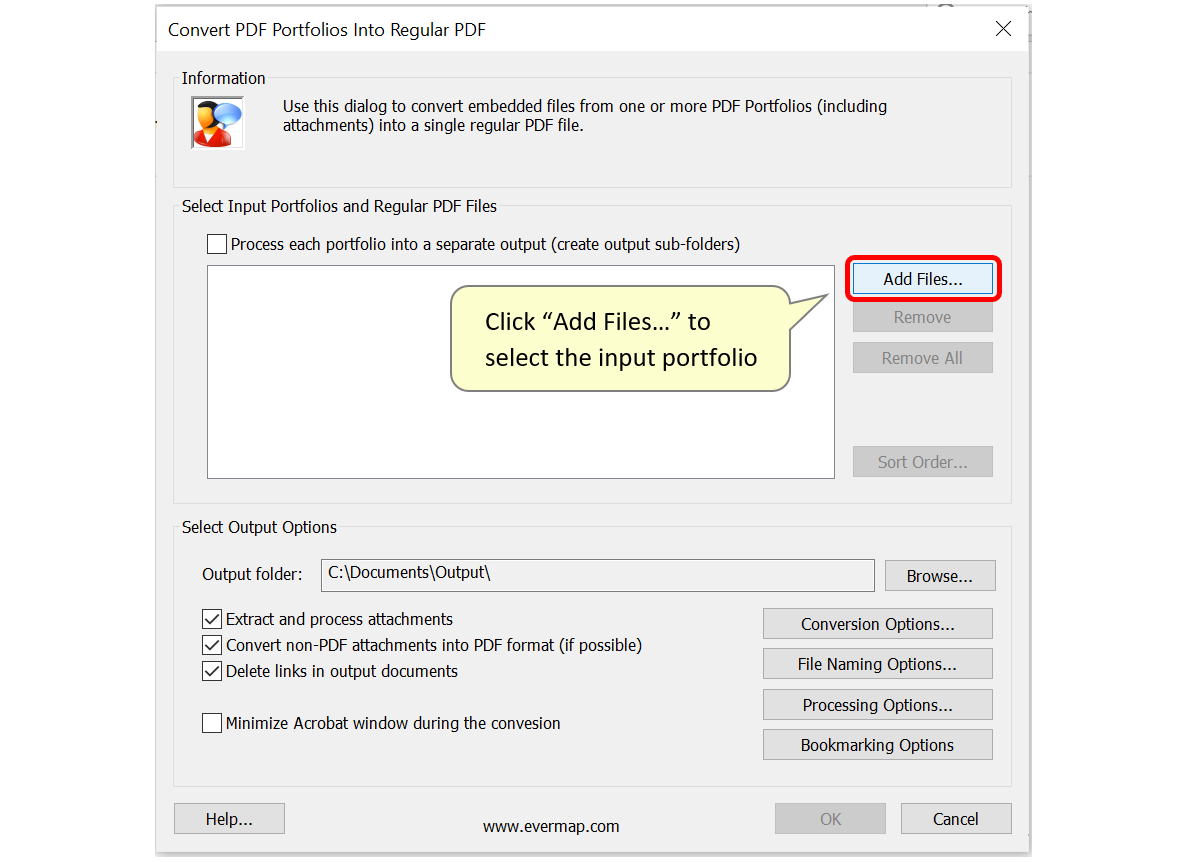
- Press the “Add Files…” button to select the input PDF portfolio for processing.
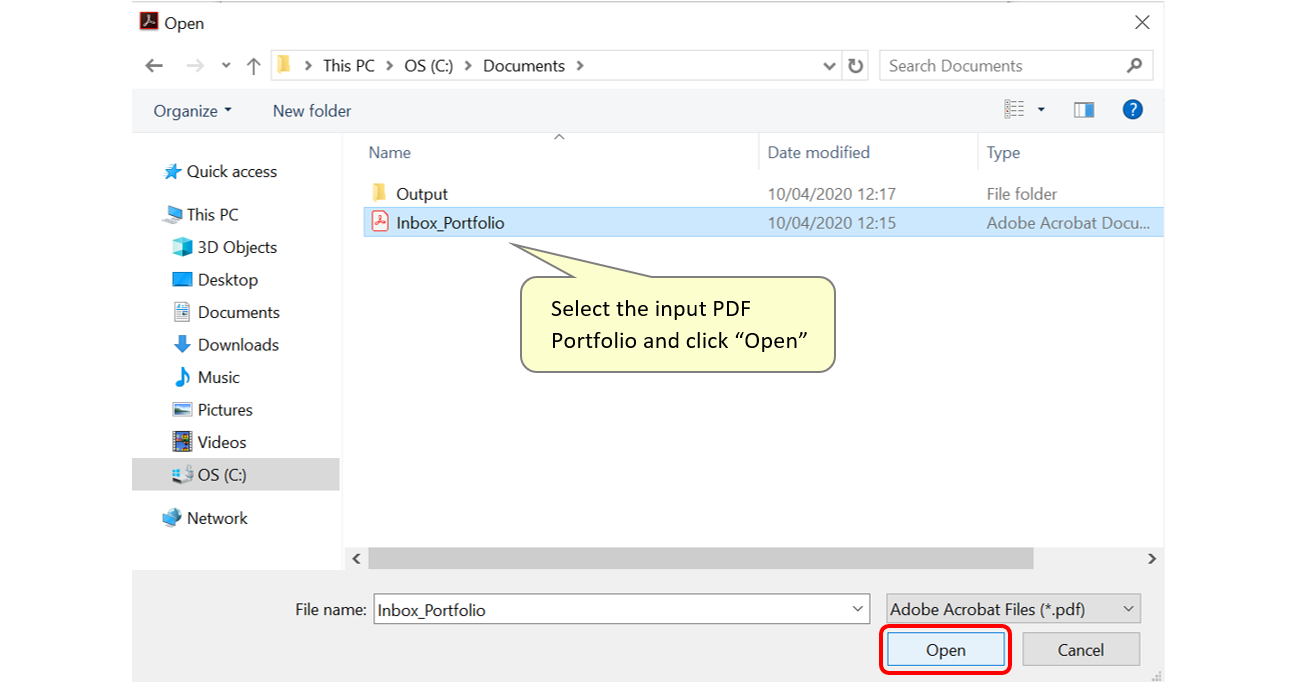
- Select the required input PDF Portfolio file and click "Open".
- Step 3 - Select Portfolio Components for Processing
- Use the “Specify Sort Order” dialog to select the parts of the PDF Portfolio that are to be processed. Do this manually via the check boxes in front of each record. Return to default by using the "Select All" button, or use "Toggle Selection" to de-select all entries, and manually select fewer necessary entries with the checkboxes. Alternatively, click "Select by Search..." to perform a text search which can be used to select/unselect all corresponding entries.
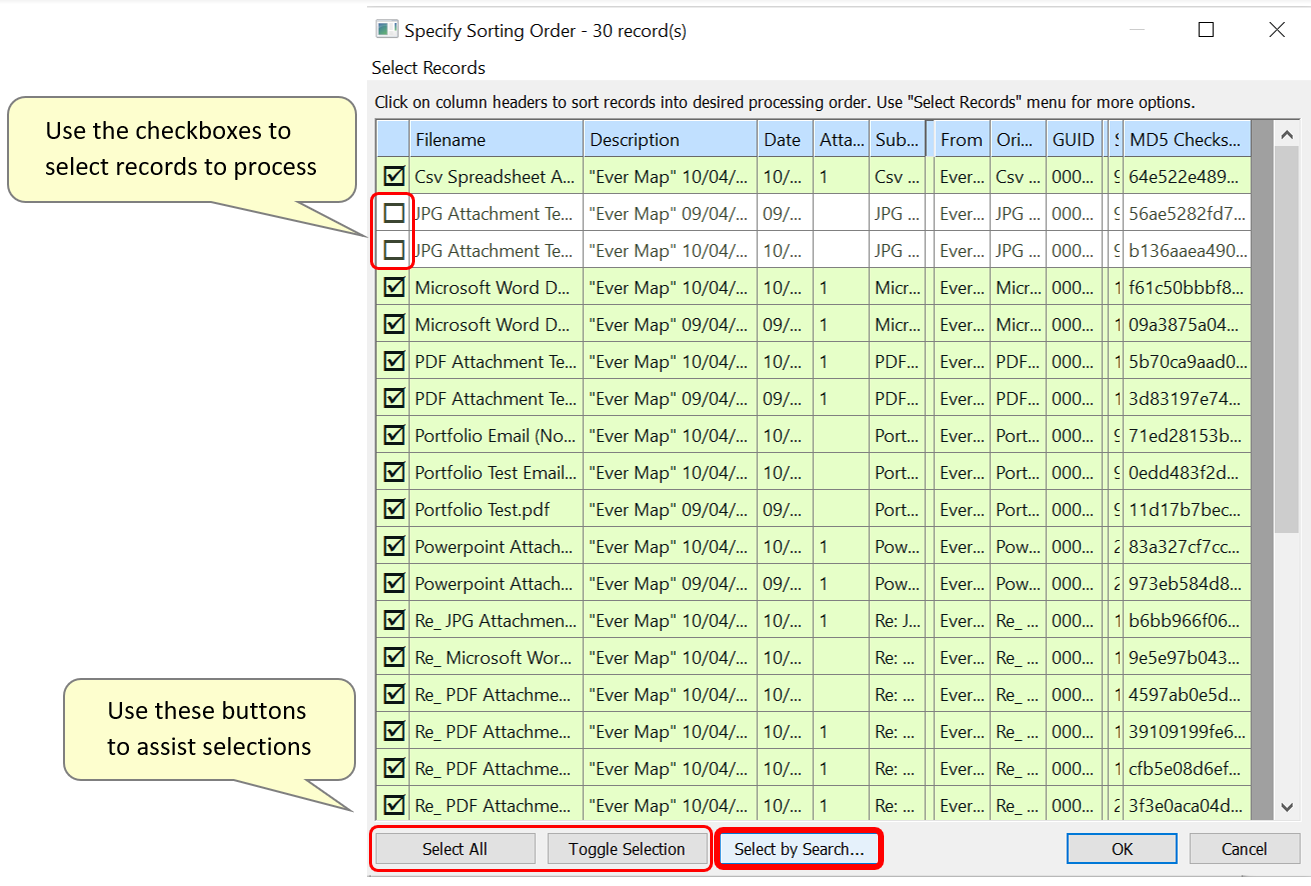
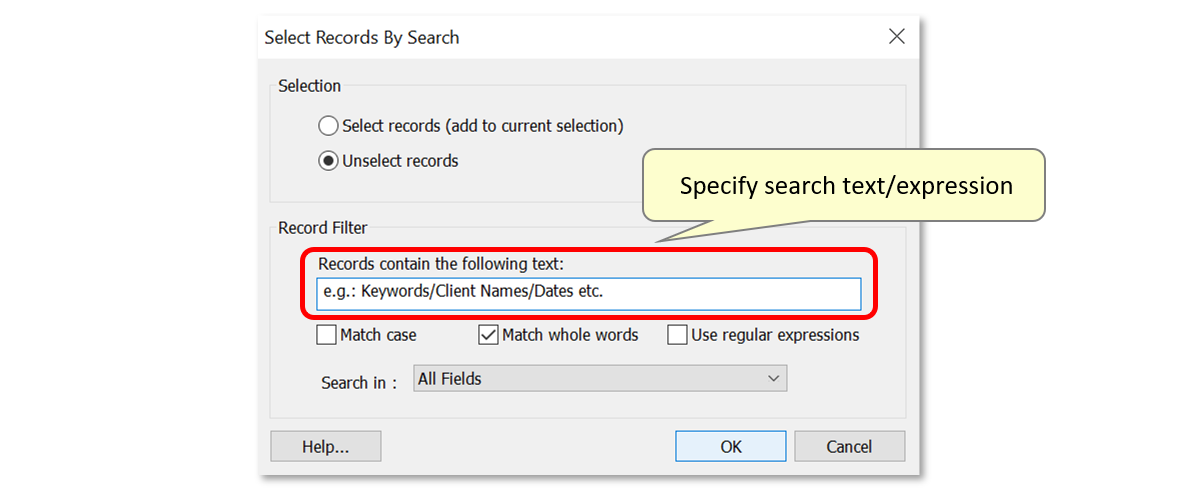
- If used, this button opens the "Select Records by Search" dialog. First, select how the text search will be used - either to select or unselect records. Then specify the text to search for in the entry box. Search expressions can also be used via regular expression syntax. To do this, ensure that "Use regular expressions" is checked. Make other necessary selections ("Match text case/whole words"), as well as where to search; search within specific fields by using the drop down list. By default, the text search would search all fields.
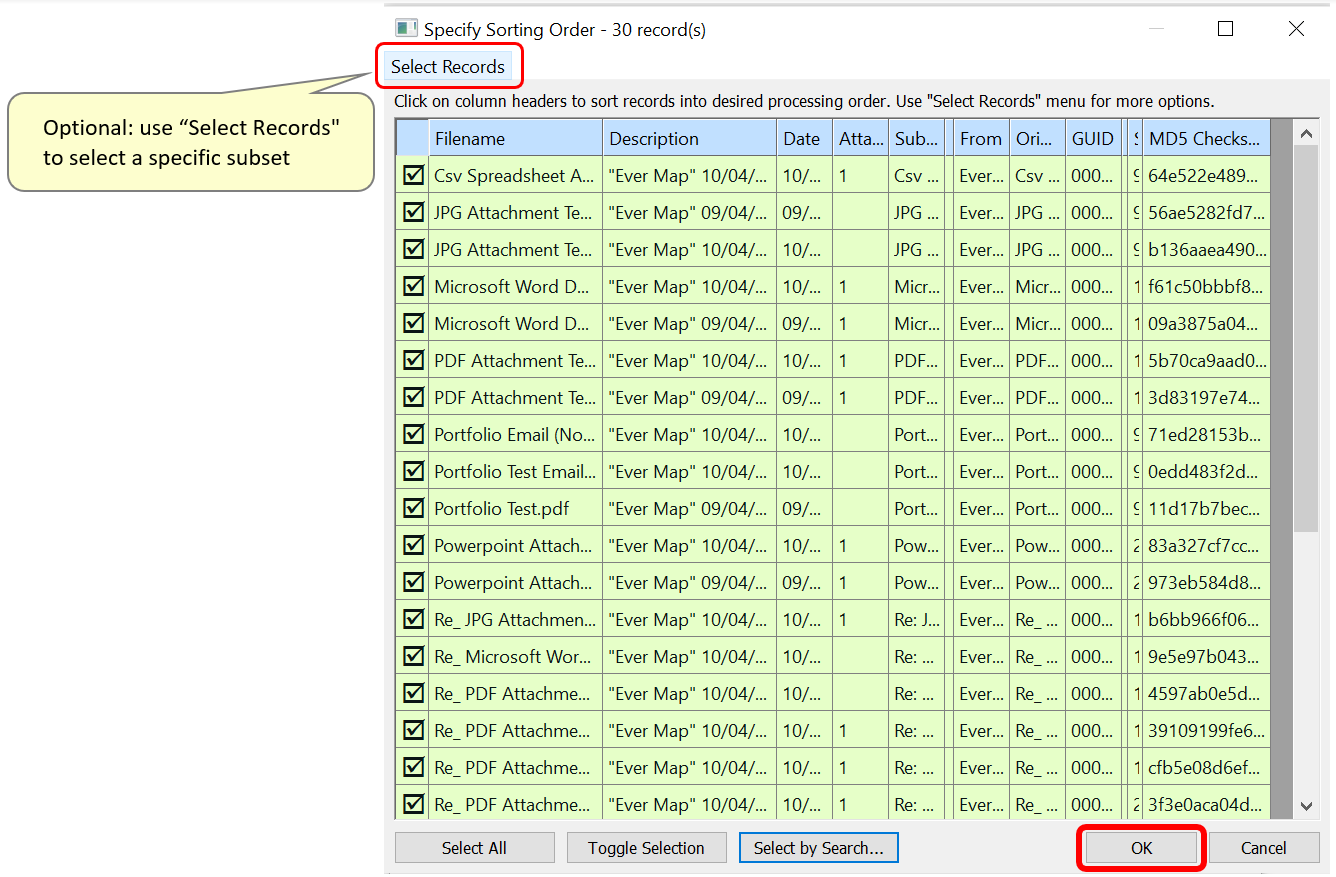
- Step 4 - Confirm Selections
- Optionally, use the “Select Records" menu to manipulate the current selections. Use the listed features to select a specific subset of Portfolio entries. Click "OK" on the “Specify Sort Order” dialog to confirm selections.
- Step 5 - Select an Output Location
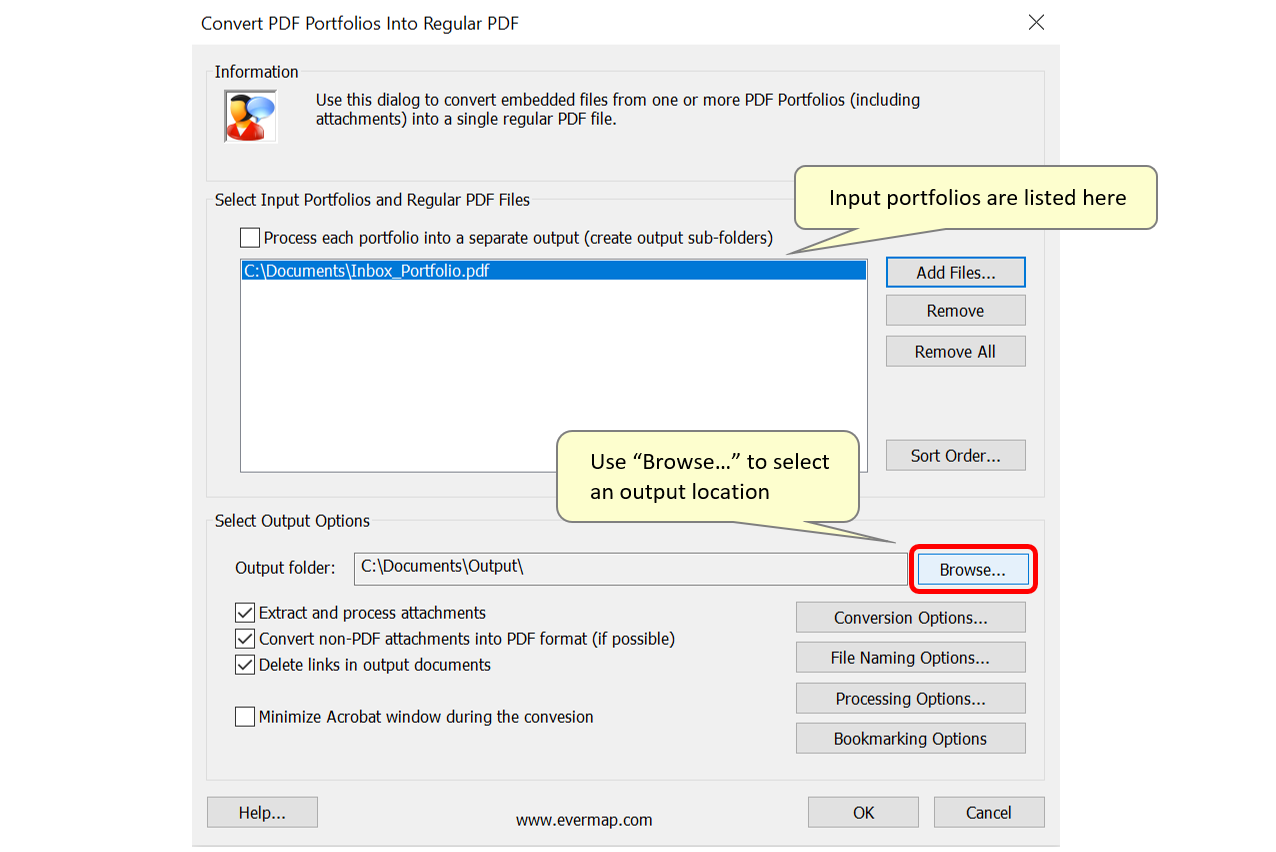
- The input Portfolio file is now added to the processing list. Repeat this procedure using the "Add Files..." button to process multiple Portfolio's at the same time. Note that all Portfolio's will be processed and placed in one output PDF document.
- Now select an output folder by pressing the “Browse…” button. It's ideal to select an output path as short as possible (like c:\Data\) and located on the local hard drive for better performance.
- Step 6 - Select Output Options
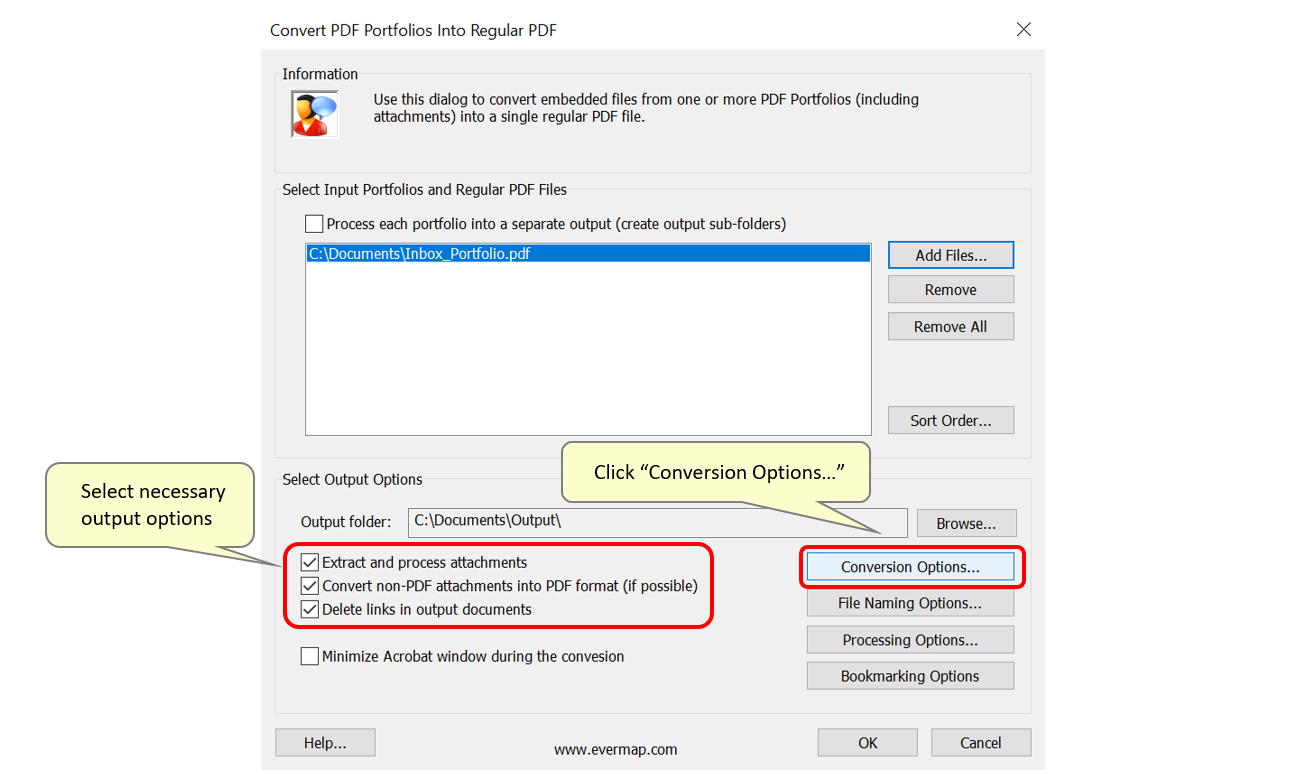
- Check the “Extract and process attachments” option if you want to process file attachments for each portfolio entry. For example, if the Portfolio file was created by exporting emails from Microsoft Outlook, this option will convert email attachments into PDF format and append them right after each corresponding parent email. All attachments will be hierarchically bookmarked for easy navigation and preservation of the original document structure.
- Also select the “Convert non-PDF attachments into PDF format” option. By default, if a certain attachment can’t be converted into PDF format (for example, it's password-protected or has editing restrictions etc.), a stub-page will be inserted into the output file stating the conversion failure, as well as the attachment’s name and file size. This feature can be removed via "Conversion Options."
- Check the “Delete links in output documents” option if you want to completely remove links to file attachments in their native formats (as they are originally stored within the PDF Portfolio). For example, if an email contains a Microsoft Word attachment, then in the output file, the link to the MS Word document will be removed. The attachment will only be available in its PDF representation (if the “Extract and process attachments” option is selected). The output file size may be significantly decreased if this option is used, as all attachments are not going to be stored twice (in the native and PDF formats).
- Click the “Conversion Options…” button to open the “File Conversion Options” dialog.
- Step 7 - Save Unconverted Files in a Specific Location
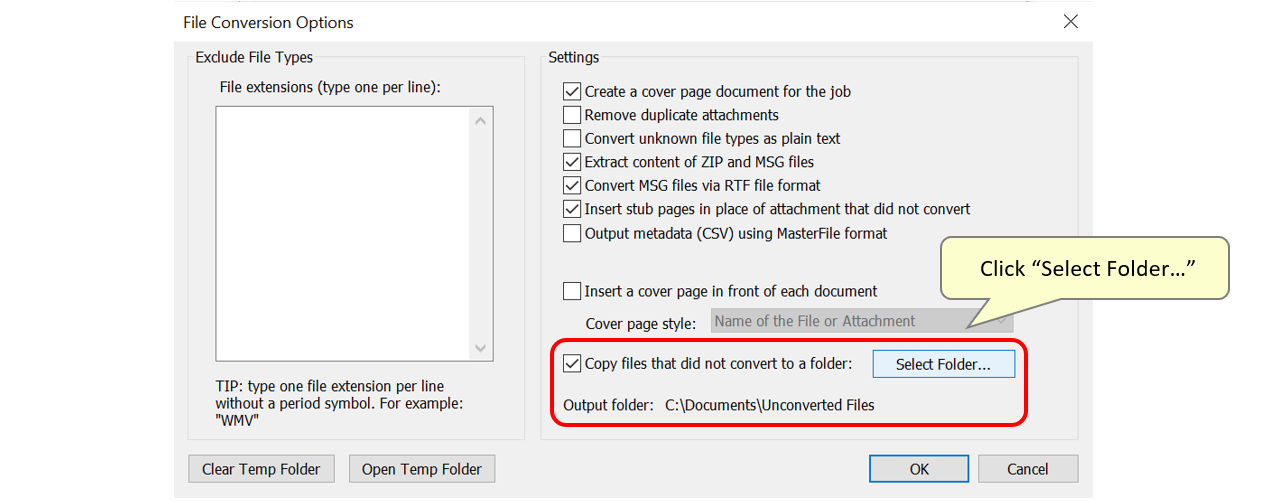
- This dialog features options that affect how certain non-PDF files are converted into PDF format. Use the checkboxes to modify the default settings (e.g.: insert stub pages in place of attachments that do not convert).
- Under the “Copy files that did not convert to a folder” option, click “Select Folder…” to specify a location to save copies of attachments that fail to convert in. This option is useful for more detailed inspection of the conversion results, and provides a way to preserve documents that cannot be converted into PDF format. Press” OK” to close the dialog.
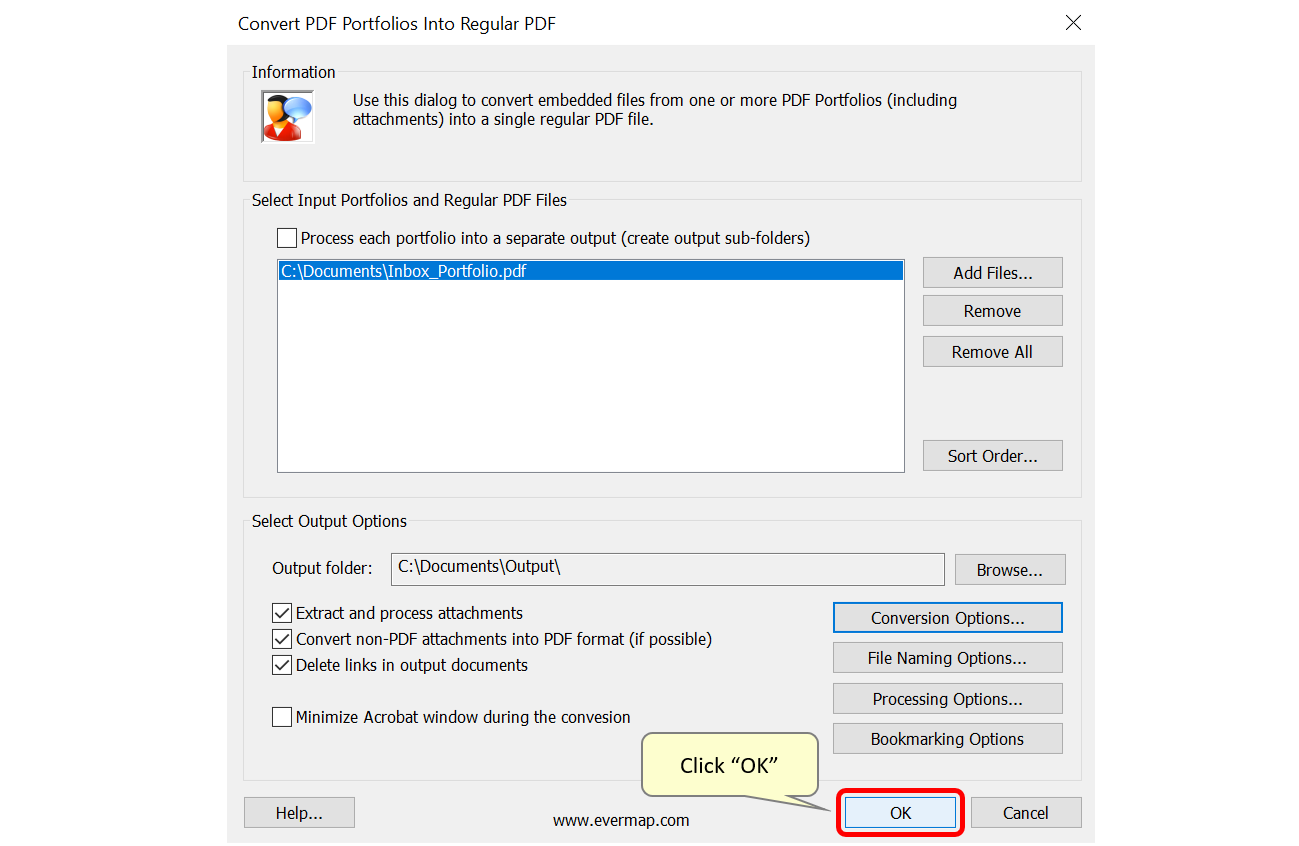
- Step 8 - Confirm Settings
- When the conversion is fully configured, click “OK” to start processing.
- Step 9 - Process Files
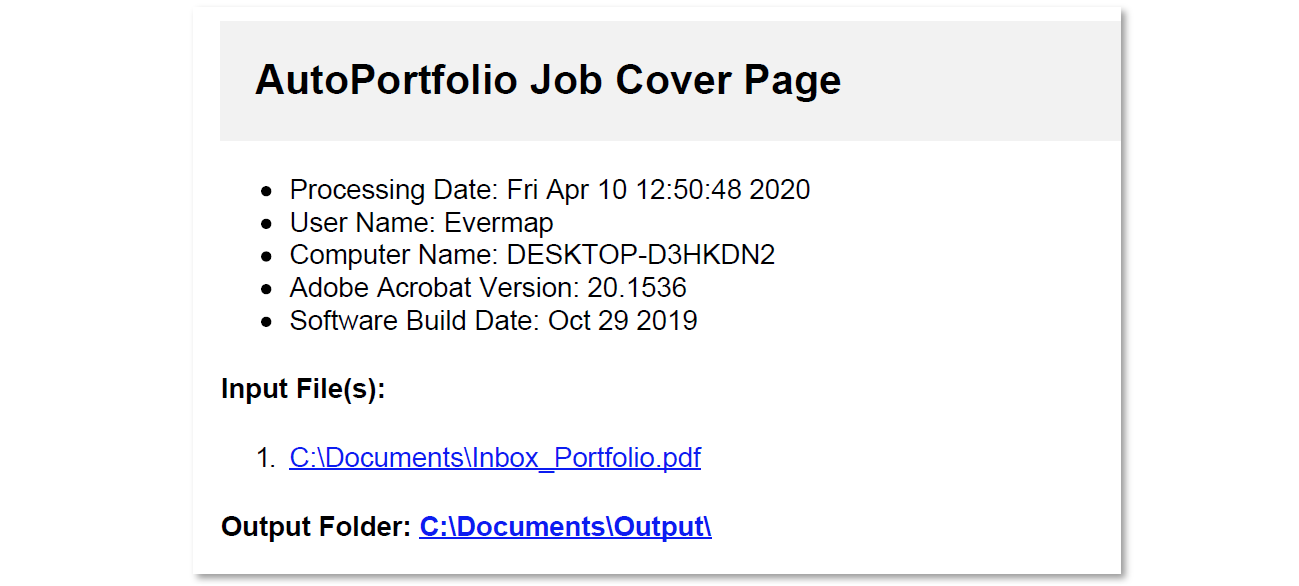
- The “PDF Portfolio Extraction Cover Page” document is automatically created for each job and displayed on the screen during the procedure. Note that the conversion process may take a considerable amount of time depending on the size of the input portfolio, so it is generally a good idea to process smaller portfolios. During this time, the standard Acrobat progress dialog is displayed in the lower-right corner of the screen.
- Step 10 - Check the Processing Report
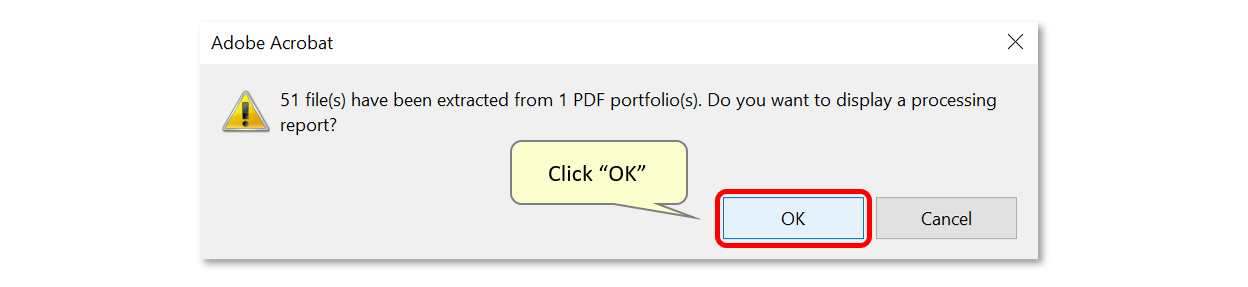
- Once processing is completed, a report message appears on the screen prompting to display a detailed HTML processing report that the plug-in has created. Click “OK” to open it in your default web browser.
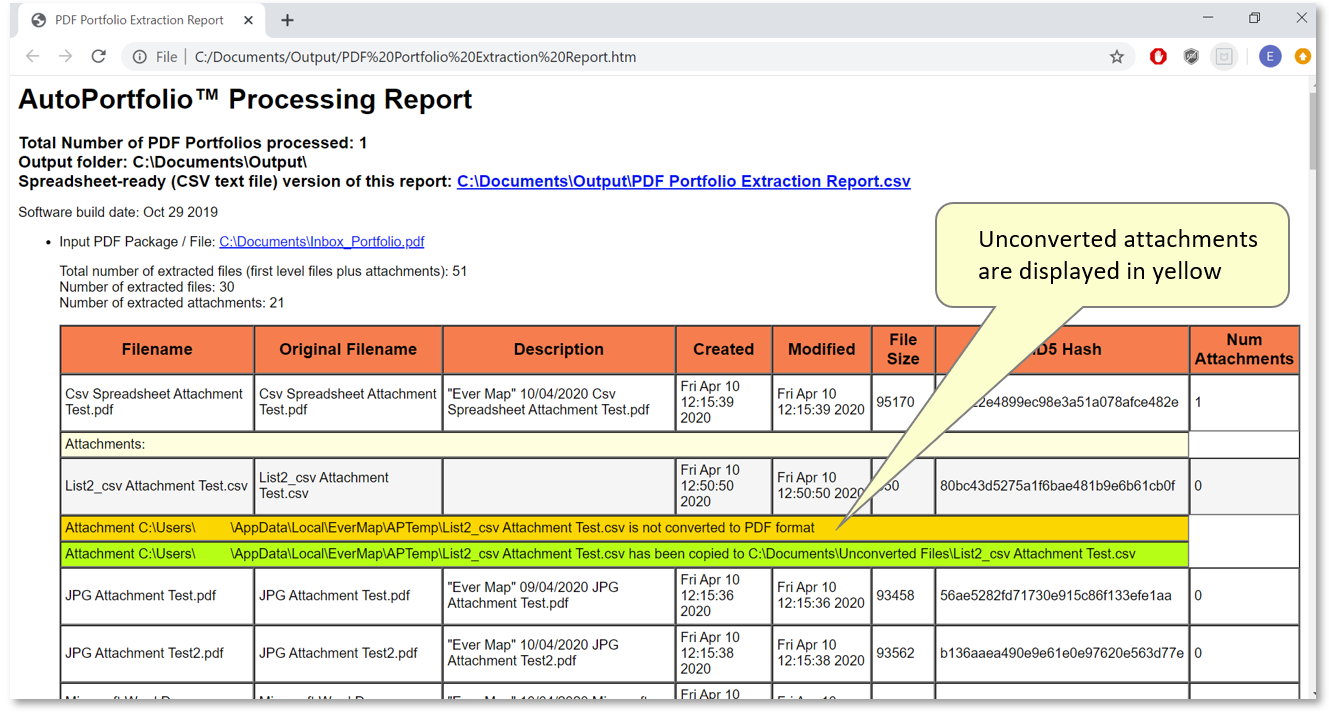
- Here is an example of a processing report listing all processed files. The report lists the file name, description (from a metadata field), creation and modification dates, file size in bytes, number of attachments, and MD5 hash values etc. A spreadsheet-ready version of the report in CSV file format will also be stored in the specified output location.
- It’s a good idea to inspect the report and see if there are any file attachments that were not converted into a PDF file format. These will be displayed within a yellow line in the table. A green line confirms that a copy of the unconverted file was saved in the pre-specified folder, if the option to do so was previously selected (see step 7).
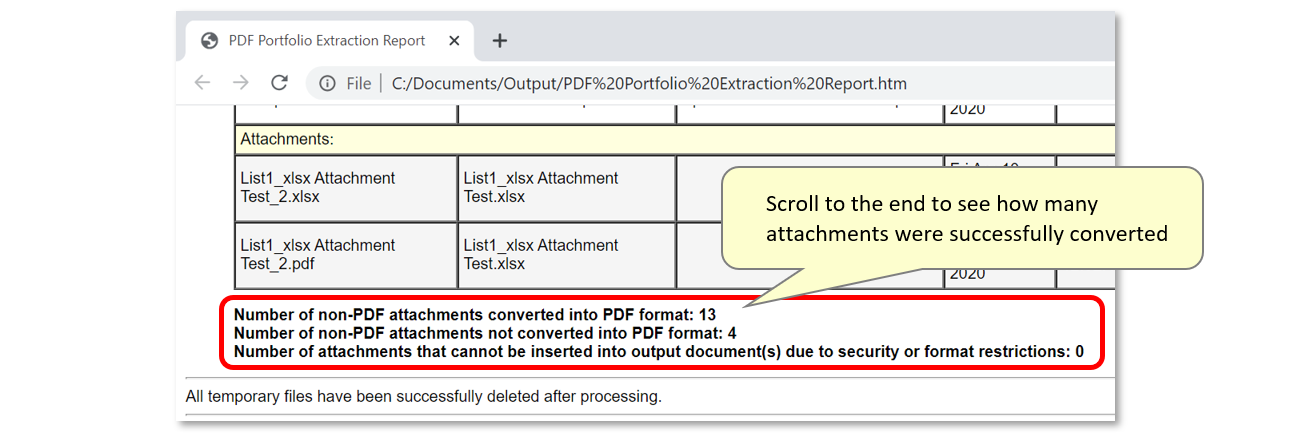
- Scroll down to the end of the report to see the total count of non-PDF file attachments that were successfully converted (or not) into a PDF format.
- Step 11 - Check the Results
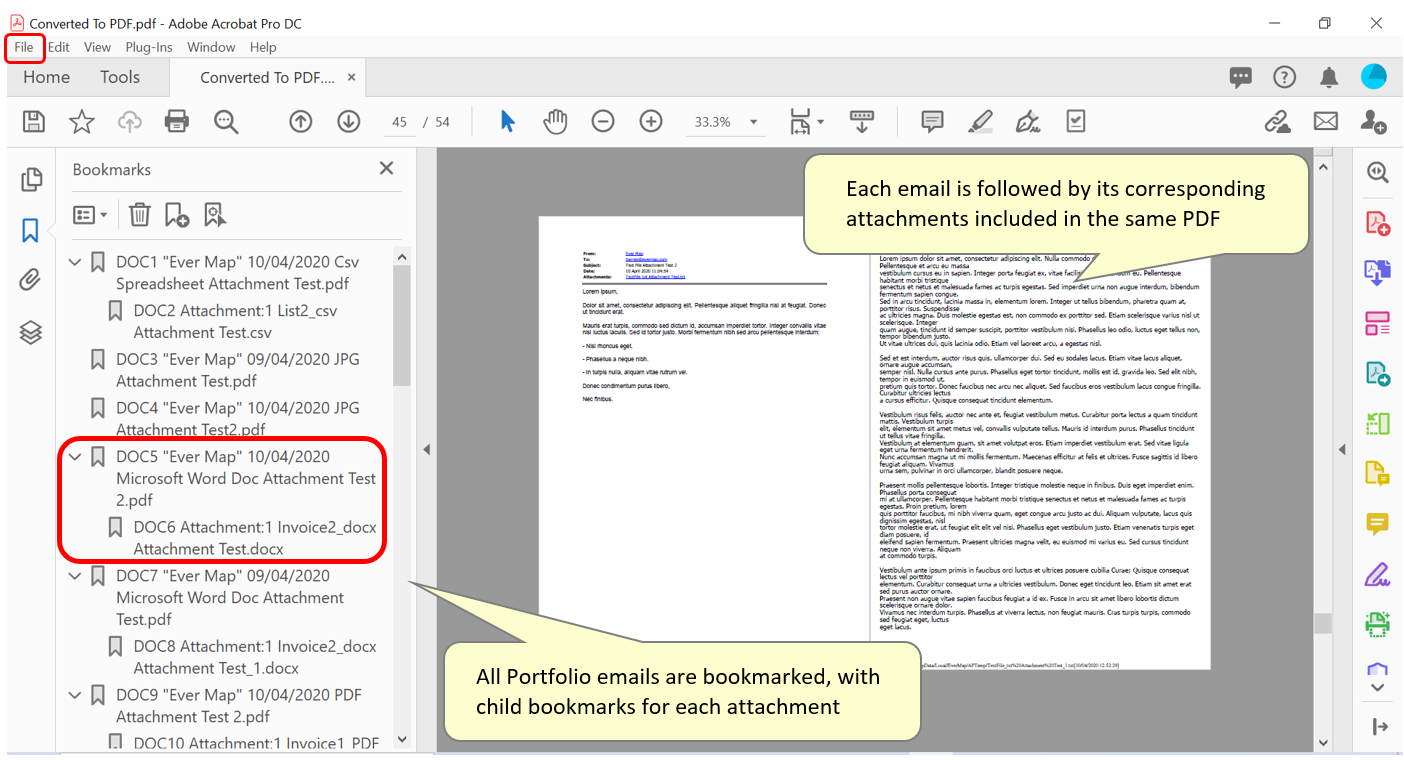
- The output PDF document will automatically open in Acrobat once created. All individual PDF portfolio entries are now stored here as a single PDF document that can be processed using the standard Adobe Acrobat tools. Each file (email) is bookmarked with child bookmarks pointing to corresponding file attachments. Each bookmark title begins with an auto-incrementing prefix ("DOC1", "DOC2" etc.), followed by data from the “Description” metadata field.
- The output document will automatically be named “Converted To PDF.pdf" and is now ready to be Bates-stamped and/or printed if necessary. Use the “File > Save As…” menu to save this document under a custom filename or location.
- Step 12 - Inspect the Contents of the Output Folder
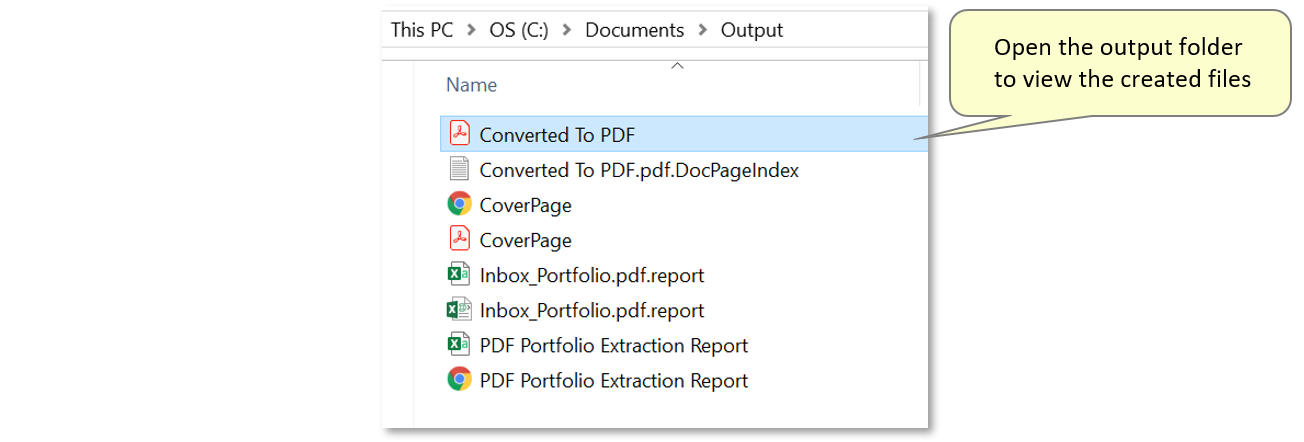
- The specified output folder will contain additional files created during the procedure. Open this folder to inspect them.
- Converted To PDF.pdf - the main output PDF file that contains all entries from the input portfolio as a single, “flat” PDF document.
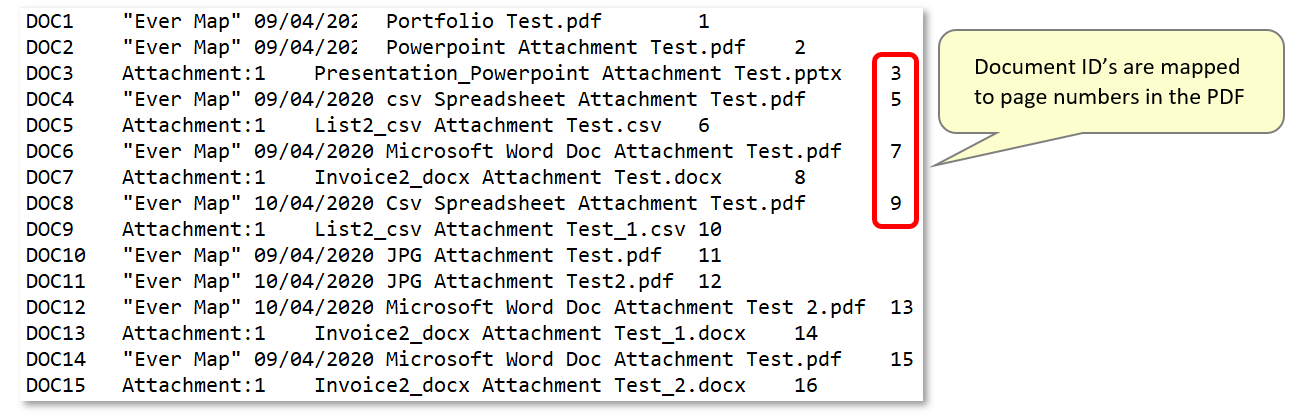
- Converted To PDF.pdf.DocPageIndex.txt - a tab-delimited plain text file that maps document ID's to a page number in the output document.
- CoverPage.pdf – a cover page document that contains information about who ran the processing and when.
- CoverPage.htm – as above, but in HTML format
- Inbox_Portfolio.pdf.report.csv – A plain text CSV spreadsheet (can be opened directly in Microsoft Excel) that contains all metadata for all PDF Portfolio entries. In the case of the email portfolio, this file will contain “To”, “From”, “Subject” and other similar fields. This file also lists document ID’s that are used for bookmarking and in the page index file.
- PDF Portfolio Extraction Report.csv – a plain text CSV spreadsheet (can be opened directly in Microsoft Excel) that contains a processing report listing all files that have been processed and converted.
- PDF Portfolio Extraction Report.htm – a HTML version of the processing report.
- Here is an example of the "Converted To PDF.pdf.DocPageIndex.txt page index file:
- IMPORTANT: Note that all file format conversions are done by Adobe® Acrobat® itself using the default PDF conversion preferences. Select “Edit > Preferences…” from the Acrobat menu to edit these preferences. Select the “Convert to PDF” category, then select a file format to edit and click the “Edit Settings…” button. You may want to make changes to the default settings for Microsoft Excel conversions to allow the processing of all worksheets in the file. By default, Adobe Acrobat will only convert the first worksheet in the spreadsheet.
- Password-protected PDF documents (you need to remove passwords before merging)
- Password-protected or encrypted MS Office files
- PDF documents with security restrictions that prevent document merging
- PDF documents with security restrictions that do not allow printing
- MS Office files with access/editing restrictions
- Certain PDF forms created by Adobe LiveCycle Designer form editor
- You can find more AutoPortfolio™ tutorials here.
The output folder will contain:
There are certain kinds of PDF and Microsoft Office documents that can't be merged by Adobe Acrobat into a single PDF document: