Appending Pages from Multiple PDF Files into a Single Document
AutoSplit plug-in for Adobe® Acrobat®
- Introduction
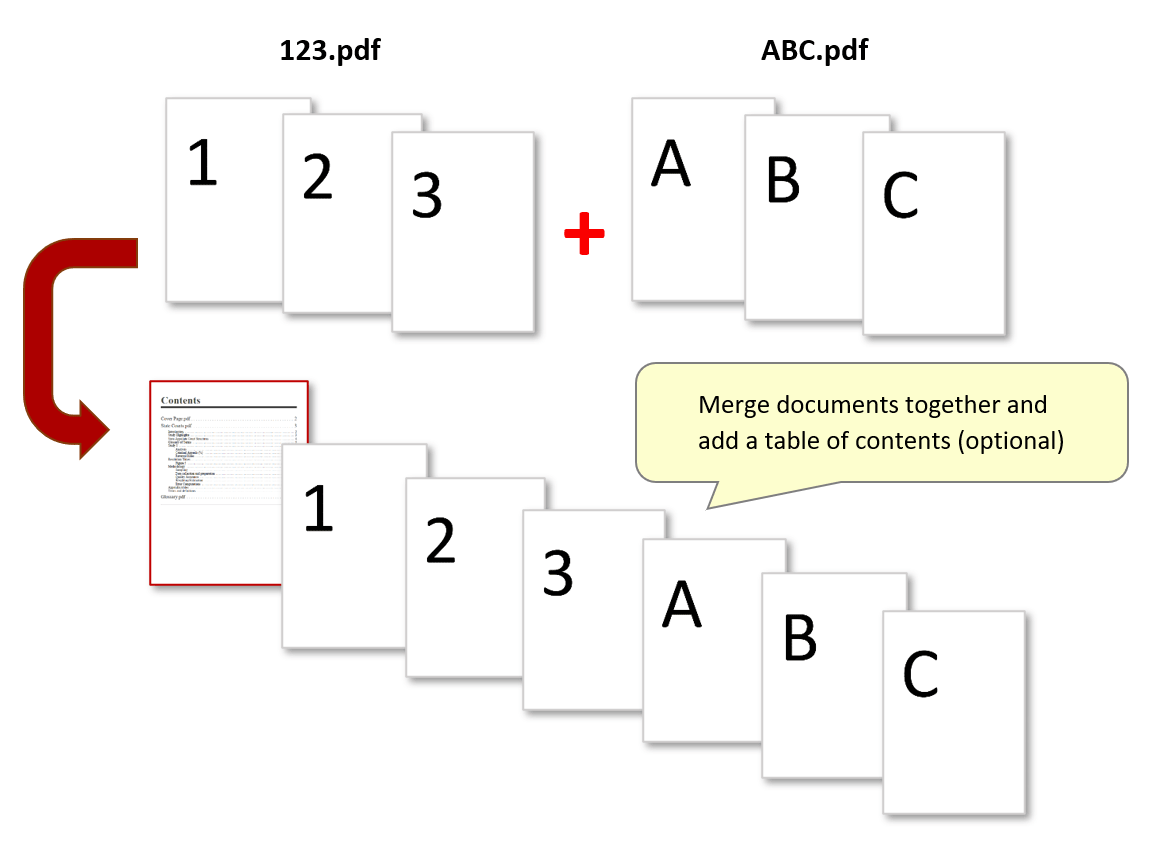
- Manually combining the pages of various PDF files together using built-in Acrobat tools can be a slow, multi-step process. This tutorial explains how to quickly merge multiple documents together into a single document with the AutoSplit™ plug-in. When merging documents into a single file, the plug-in offers two merge operation types: “Append Pages” and “Interleave Pages”. The steps below demonstrate how to combine multiple input documents using the “Append Pages” option. Any number of documents can be merged together using this method.
- This operation also features an option to create a table of contents (TOC) using bookmarks from all merged files, and insert it into the output. In this tutorial, we will add a hyperlinked TOC to the output merged files that can be used as a navigational aid.
- The goal is to combine a collection of files together, and add an additional TOC page at the beginning of the new output file. A document merge configuration can also be saved as a settings file to process similar files in the same way in the future. This may be useful for archiving records or regularly sending unique collections of files to others - such as monthly statements, reports, or payroll documents.
- Input Document Description
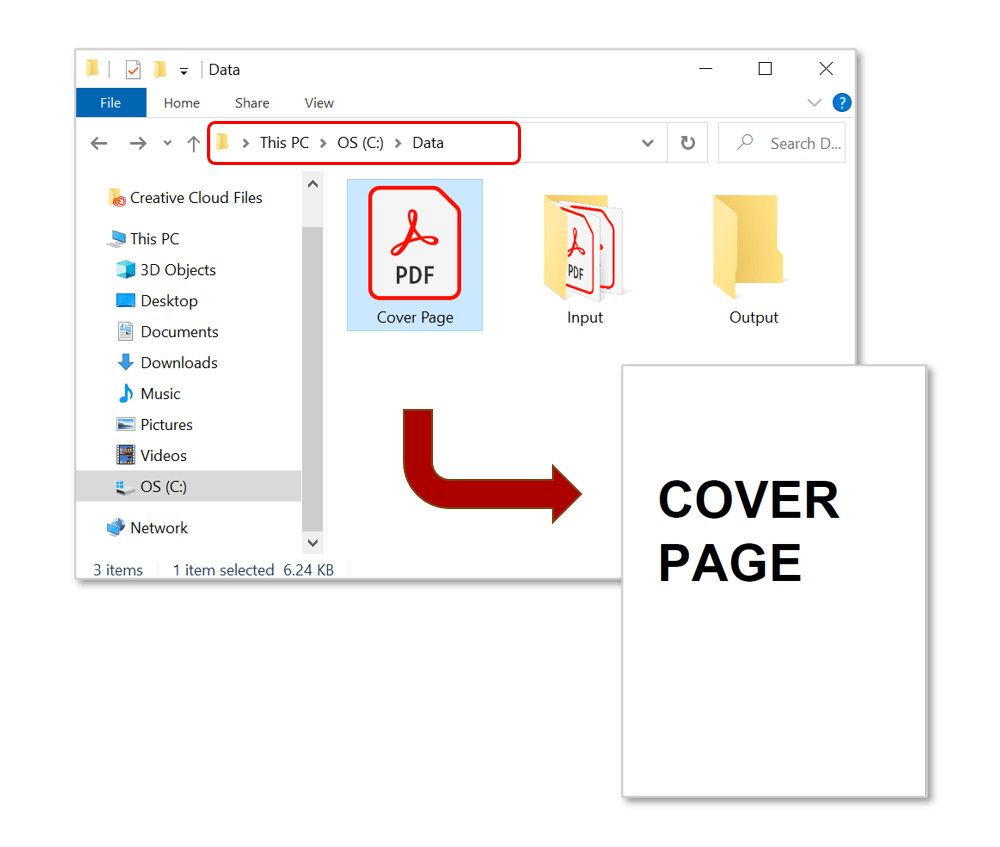
- The input documents being merged together in the steps below include "CoverPage.pdf" - a single-page file that will be inserted before additional files in the output document:
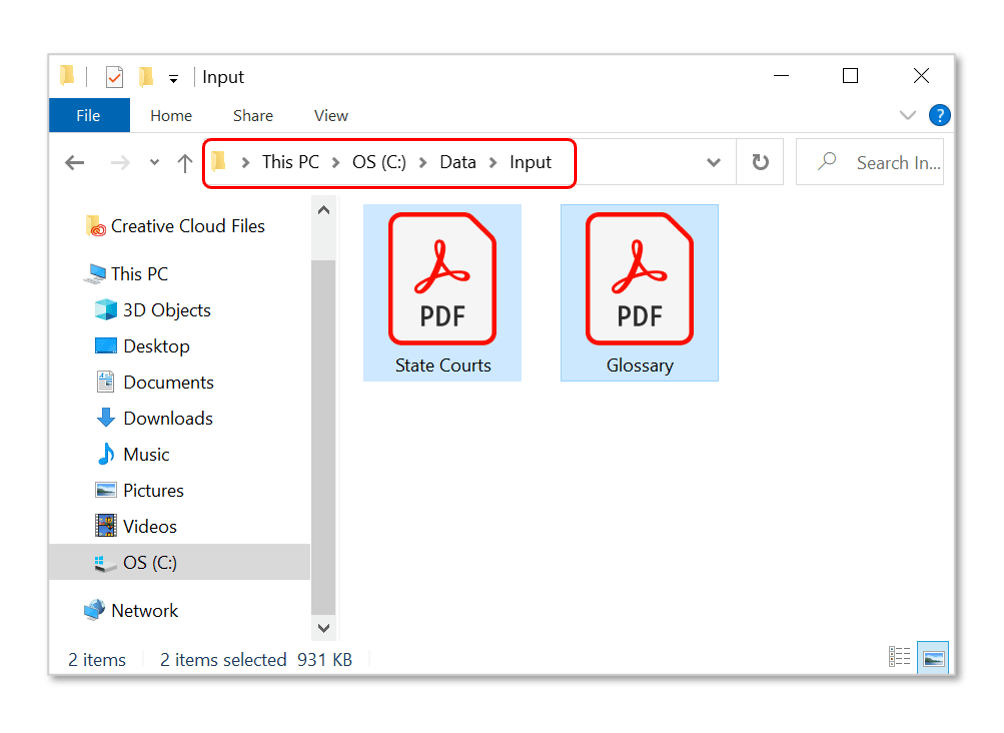
- We will configure the document merge to combine this cover page with the contents of the entire "Input" folder (see image above). This folder contains two documents - a larger sample PDF containing multiple bookmark trees (State Courts.pdf), and another single-page glossary file (Glossary.pdf). The goal is to have a single output file containing all of these pages combined, along with a table of contents at the beginning.
- Prerequisites
- You need a copy of Adobe® Acrobat® along with the AutoSplit™ plug-in installed on your computer in order to use this tutorial. Both are available as trial versions.
Step-by-Step Tutorial
- Step 1 - Open the "Merge Documents Settings" Dialog
- In Adobe Acrobat, select "Plug-Ins > Merge Documents > Merge Documents into Single Document..."
from the main menu to open the "Merge Documents Settings" dialog.
[⚡ How to locate Plugins menu in Adobe® Acrobat® ⚡] - Step 2 - Add an Input Document
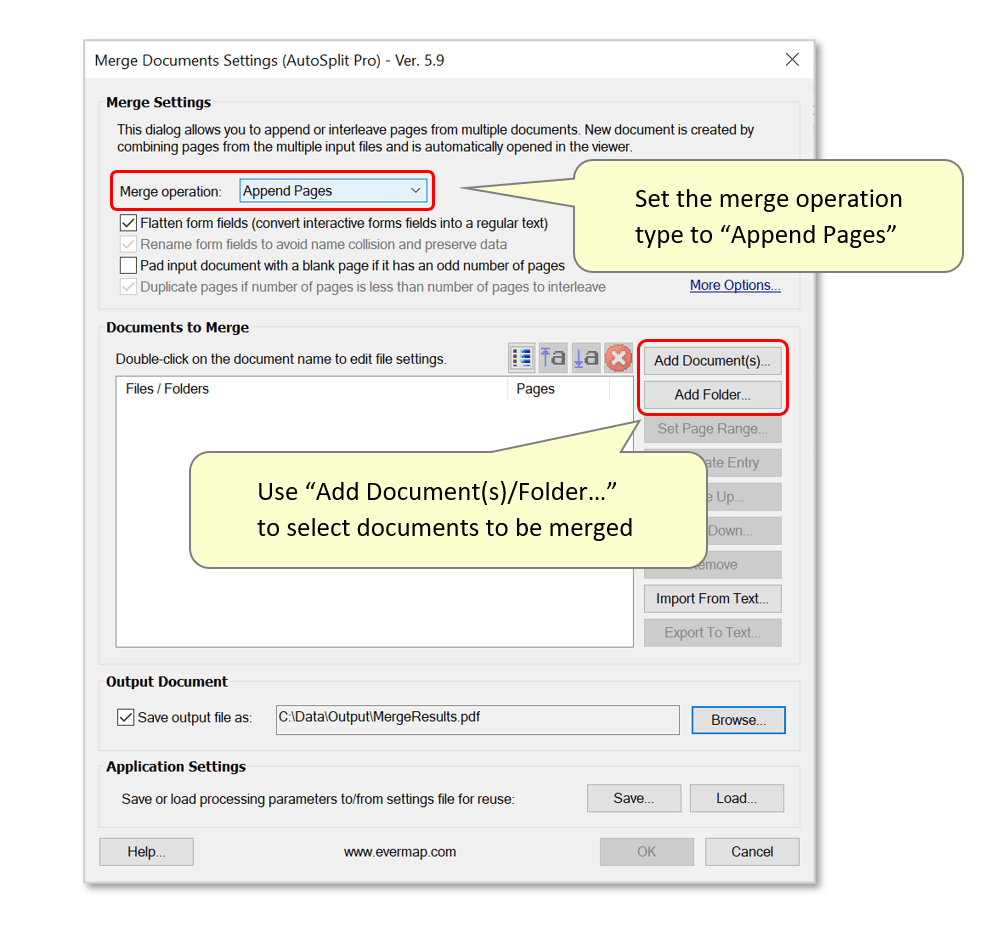
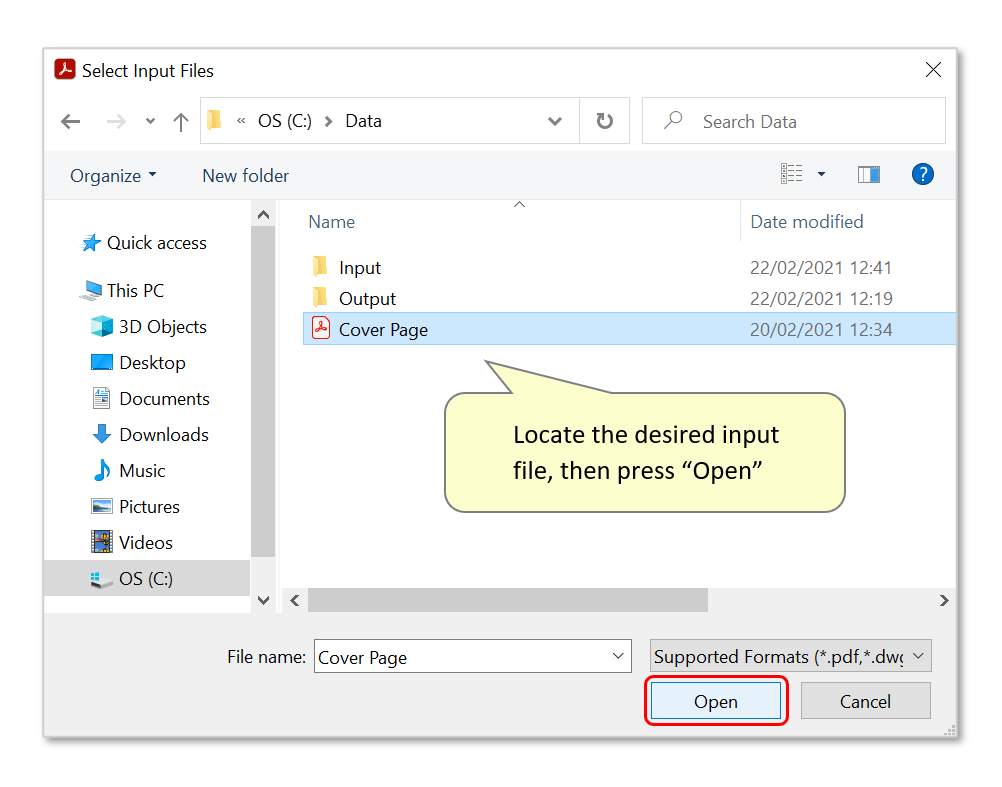
- First, select the "Append Pages" merge operation type, then use the "Add Document(s)/Folder..." buttons to select the documents that are to be merged together. In this example, we'll use "Add Document(s)..." to select the single "CoverPage.pdf" document.
- Use the dialog that opens to select the desired document, and press "Open".
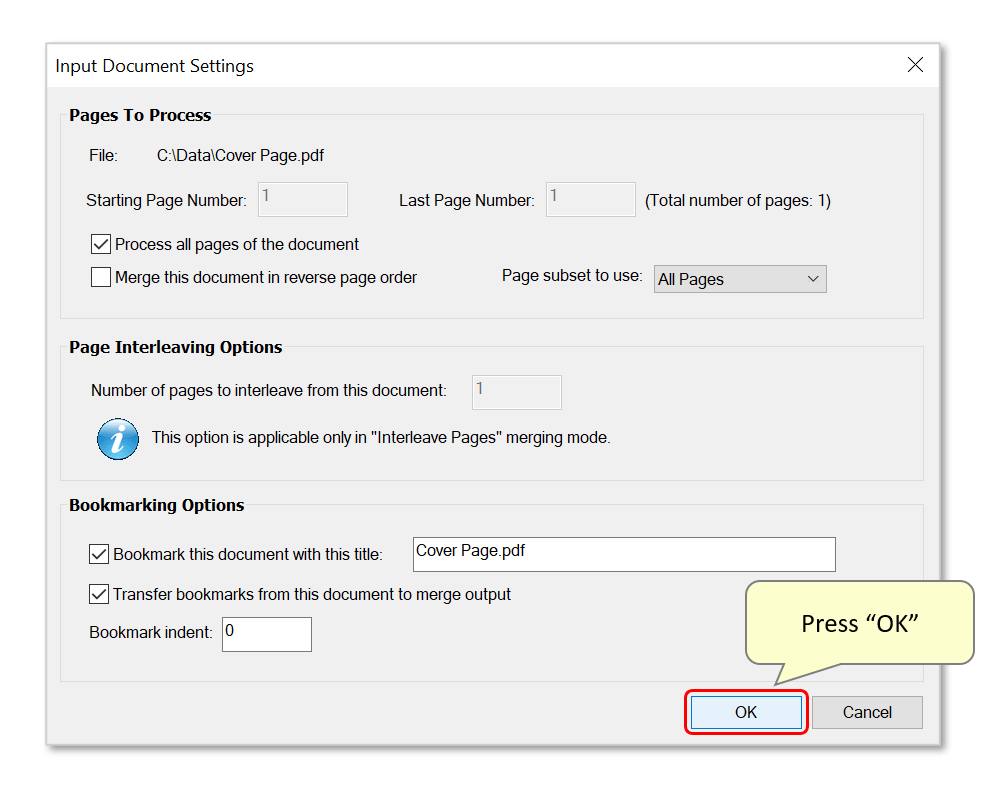
- The "Input Document Settings" dialog will now appear. Use it to modify file processing settings - press "OK" to confirm them.
- Step 3 - Add an Input Folder
- Documents added to the merge operation will be listed in the white box. Double click on them at any time to re-open the "Input Document Settings" dialog.
- Note: the order of documents/folders here corresponds to the order of merged pages in the output. Select an entry and use the "Move Up/Down..." buttons to rearrange them.
- Press the "Add Folder..." button to select an entire input folder.
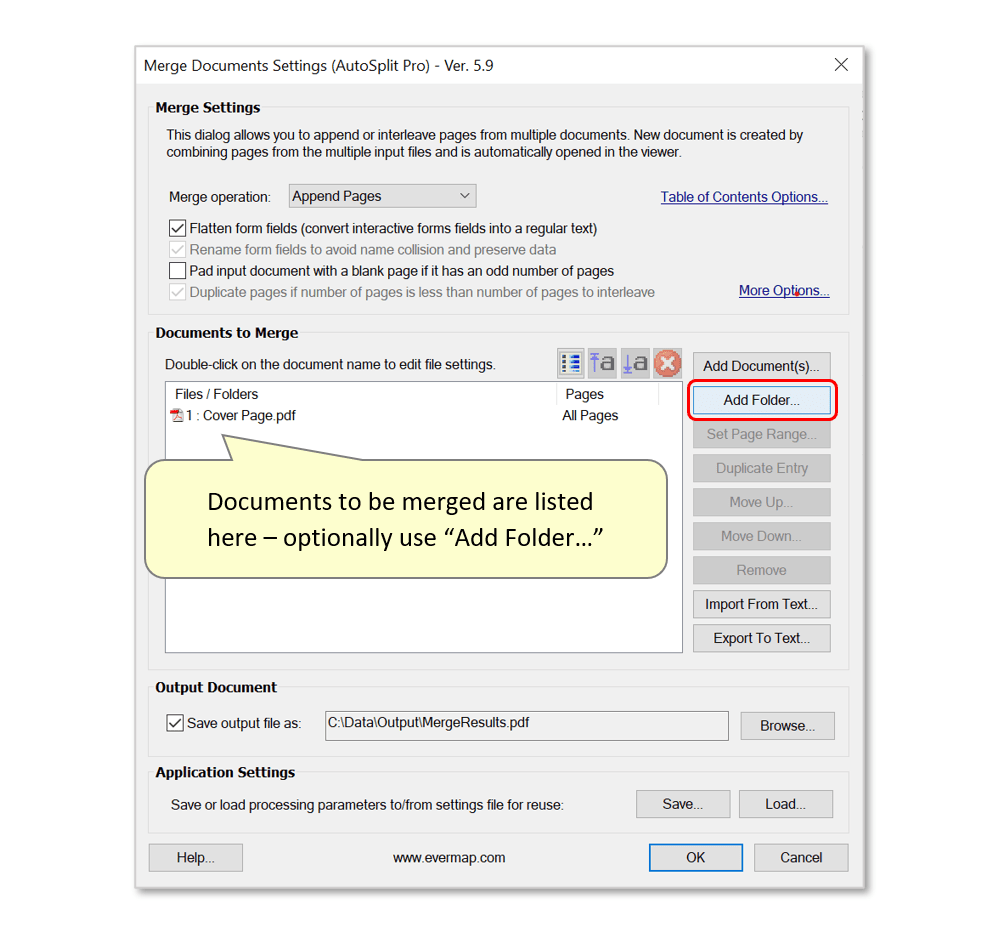
- Locate it and press "Select Folder" - here we will add the "Input" folder containing x2 PDF's to be merged with "Cover Page.pdf".

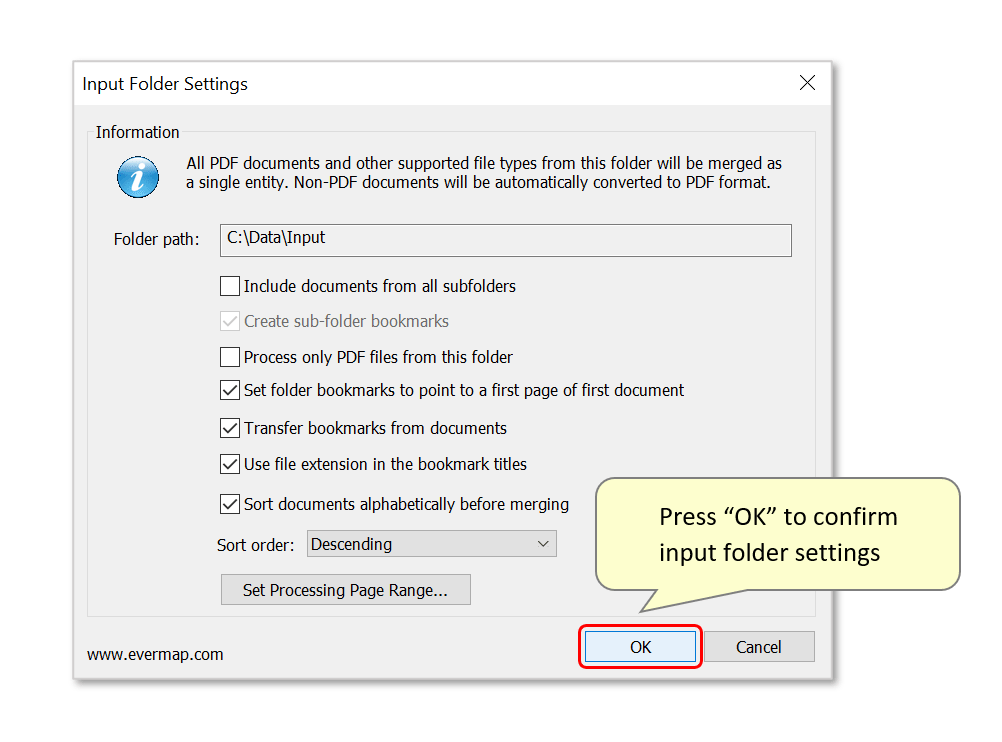
- The "Input Folder Settings" dialog will now appear. Use it to modify file processing settings - press "OK" to confirm them.
- Note: the (alphabetical) "Sort Order:" used here is set to "Descending" so that "State Courts.pdf" is placed in the output before "Glossary.pdf".
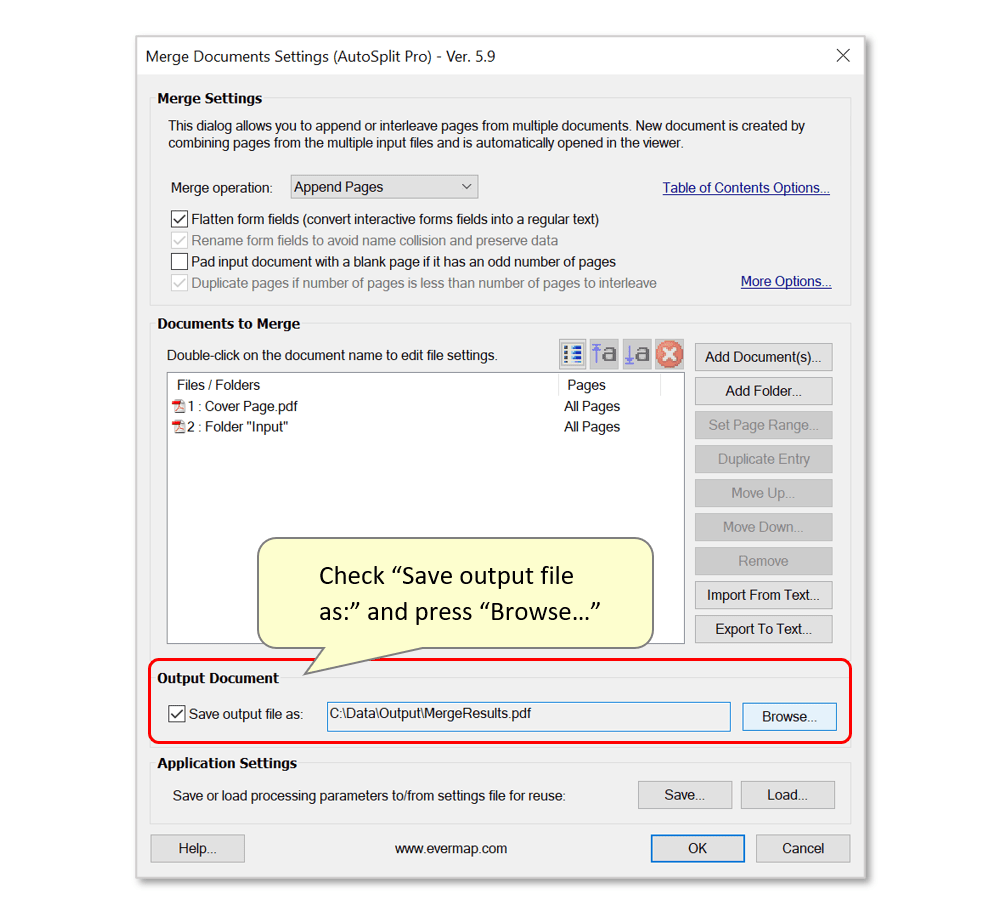
- Step 4 - Optional: Save the Output File
- After executing the merge, the output document will be opened in Acrobat and can be saved manually via "File > Save As...". There is also the option to configure a specific folder to automatically save the merged files in after processing. To do this, check "Save output file as:" and press the "Browse..." button to select a folder.
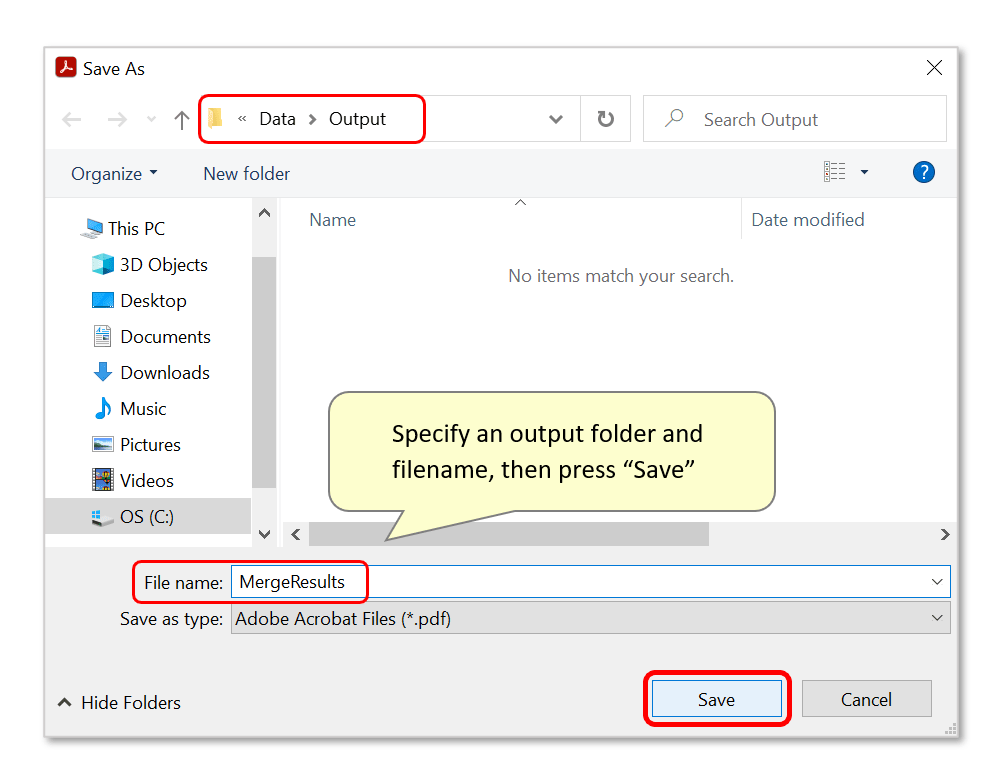
- Use the "Save As" dialog to select an output folder. The default filename is "MergeResults.pdf" - this can be edited before pressing "Save".
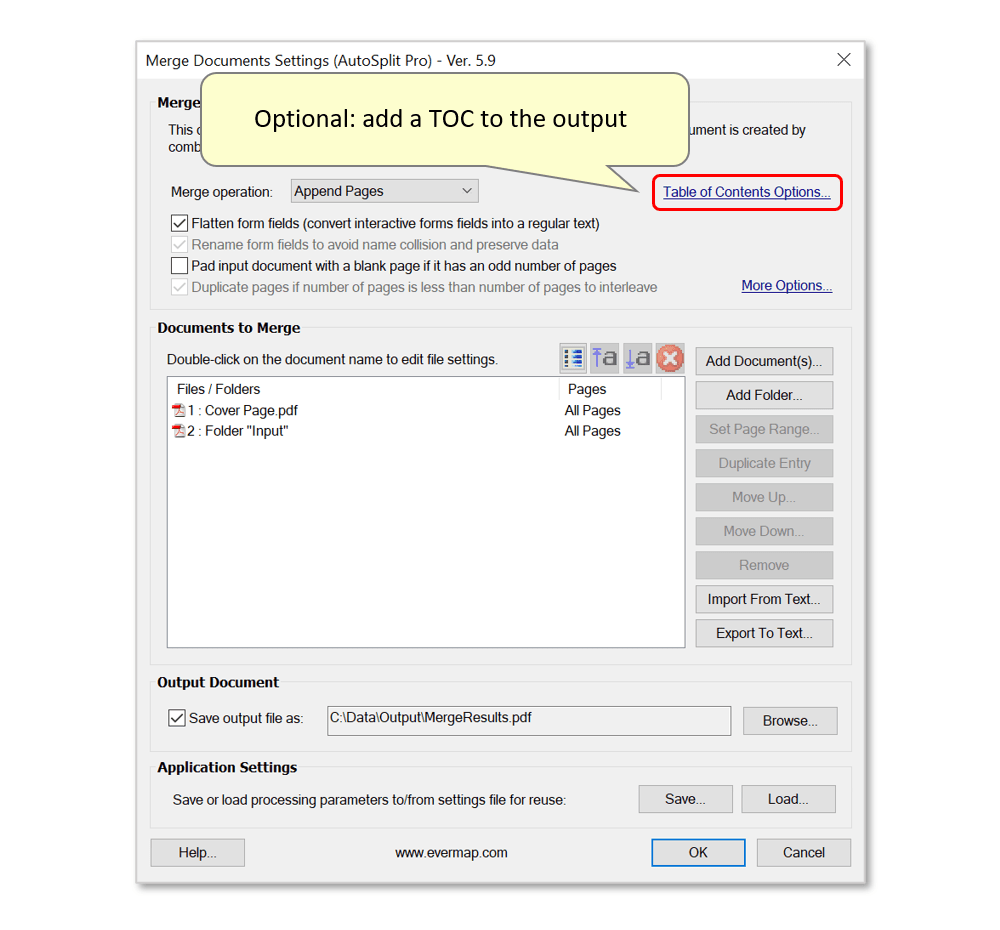
- Step 5 - Optional: Add a Table of Contents
- To automatically generate a table of contents page and insert it into the output, press "Table of Contents Options..." at the top of the dialog.
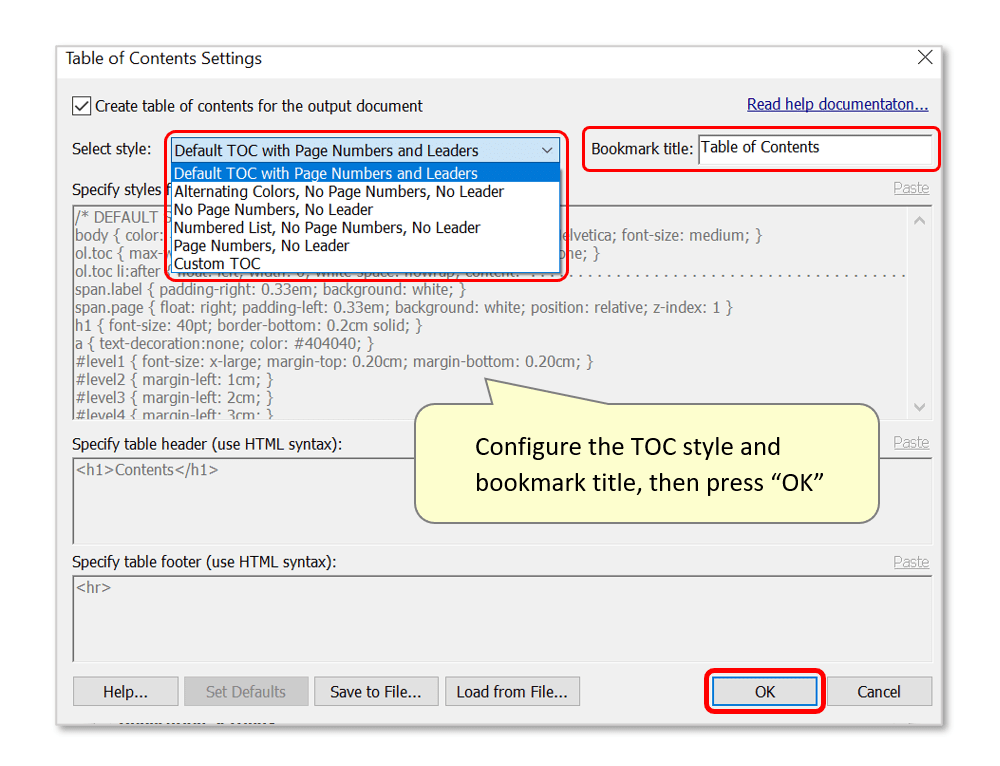
- Check the box next to "Create table of contents for the output document", then use the drop-down list next to "Select style:" to select one of the style presets available. To create a custom design, select the "Custom TOC" option - this unlocks the boxes below where the CSS/HTML code that generates the output TOC can be manually edited.
- Optionally edit the "Bookmark title" text - this will be displayed as a bookmark title for the TOC page(s) inserted into the output. The default title is "Table of Contents".
- Press "OK" to confirm TOC settings.
- It is possible to add custom settings to the list of available presets. Configure the custom settings, test them and then save them into a file by pressing “Save to File…” button. By default, the Save dialog will open in application data folder (AppData\Roaming\EverMap\AutoSplit). All *.tocmerge files saved into this folder will be automatically loaded into presets menu next time this dialog is open.
- Step 6 - Merge the Documents
- Optionally save these processing parameters as an *.ams settings file for future reuse via the "Save..." button. Use "Load..." to load a saved configuration.
- Press "OK" at the bottom to merge the documents together.
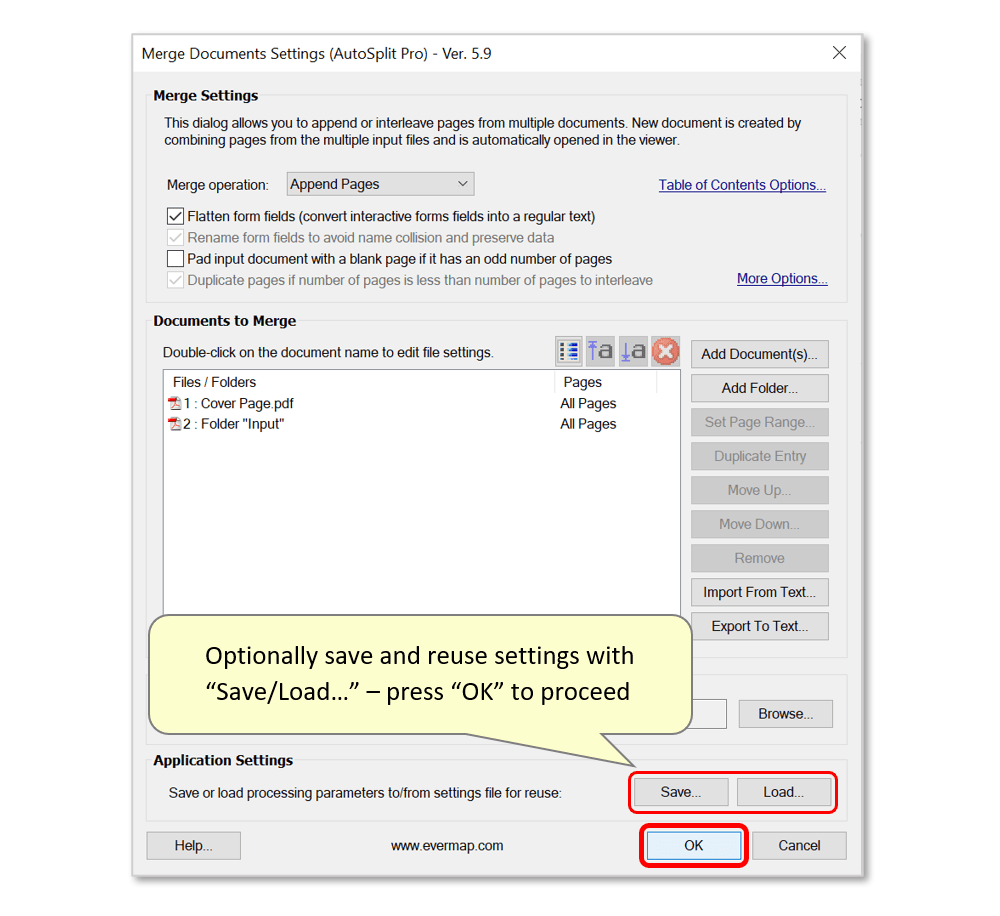
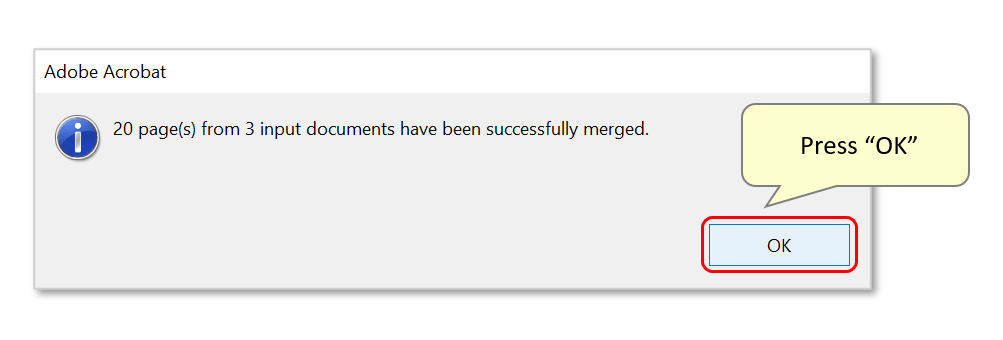
- A report box will display the success of the operation. Press "OK" to close it.
- Step 7 - Check the Results
- The merged documents will be opened in Acrobat. Check that all pages have been merged in the desired order - bookmarks have been added for each merged file (see "Input Document/Folder Settings" dialog images above).
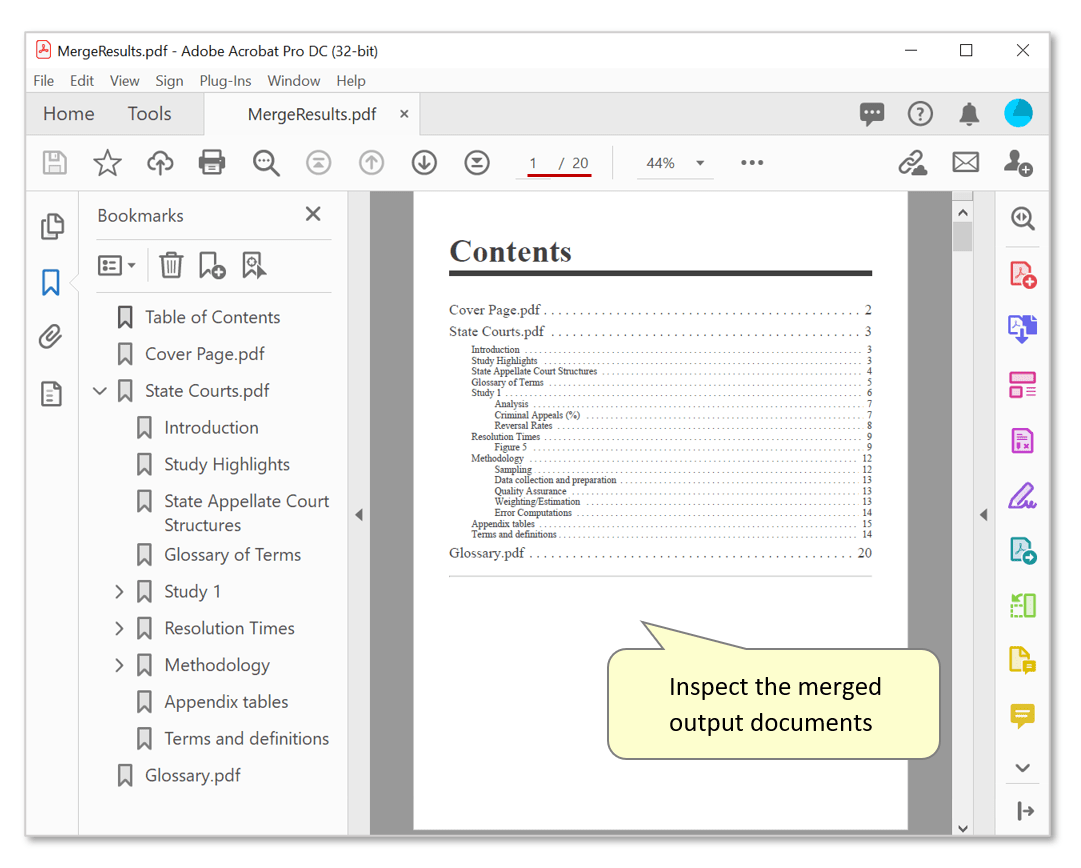
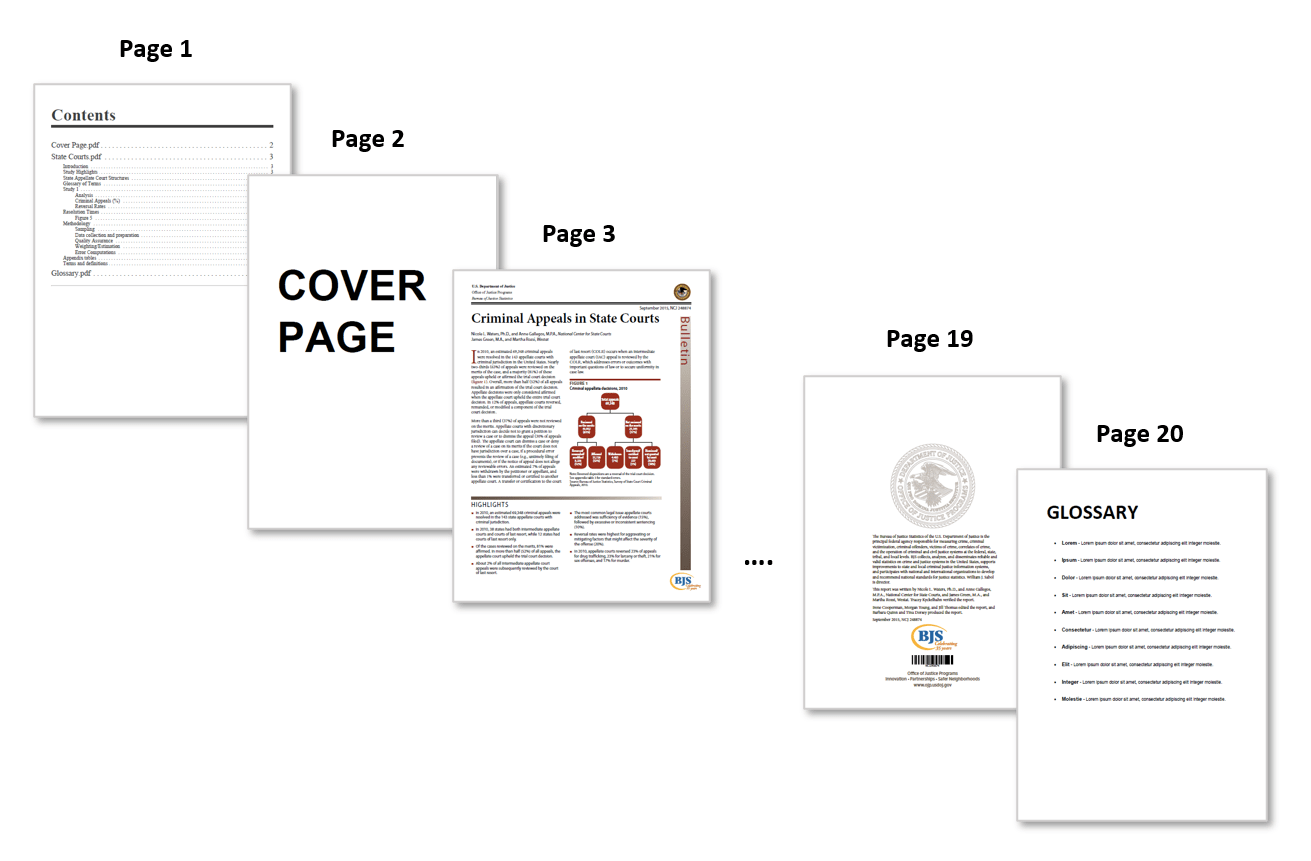
- The output file features the contents of the "Input" folder appended after the "CoverPage.pdf" document, and the table of contents page.
- Batch Processing
- This operation is available as a command in the Action Wizard tool and can be also executed from a command-line BAT file. Batch processing functionality requires AutoSplit Pro plug-in.
- Click here for a list of all step-by-step tutorials available.