Automatically Rename PDF Files
AutoSplit plug-in for Adobe® Acrobat®
- Introduction
- PDF file names are often either non-informative or do not reflect the actual content of the documents. Typically, files need to be named based on account numbers, client names or using some kind of date info from the document itself. It could take a lot of time to manually rename multiple files to make them more useful for the further processing. AutoSplit™ plug-in for Adobe® Acrobat® can automatically rename PDF files by using document text or metadata information. The following tutorial is going to provide step-by-step instructions on how to rename existing PDF files using text from the first page of each document.
- This tutorial is also available as a video.
- Input Documents Description
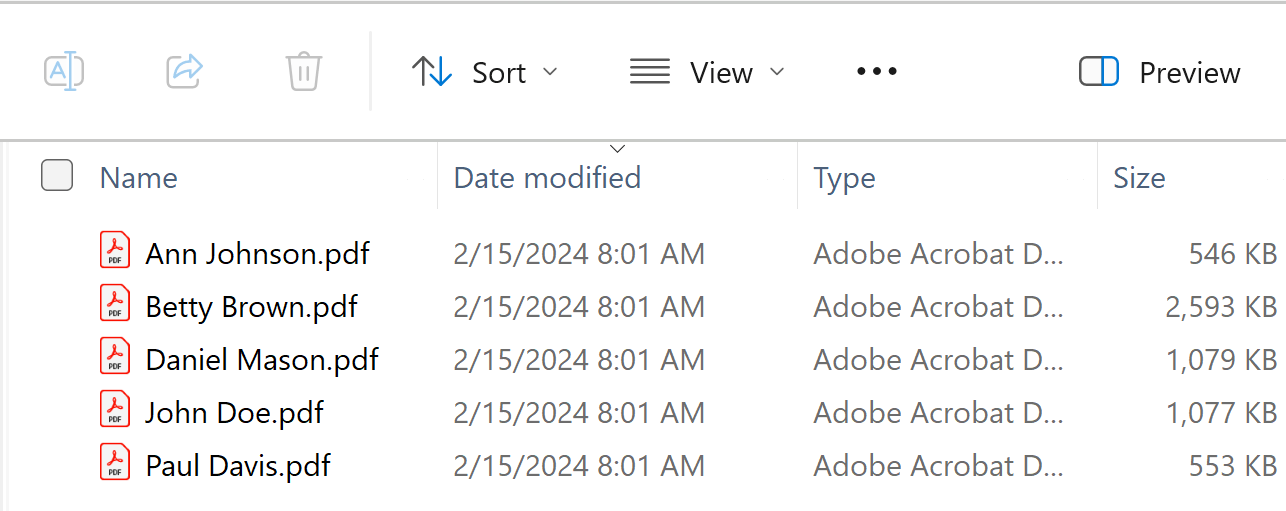
- This tutorial explains how to rename multiple PDF files by using text from the documents. The files are invoices and are named by client names. The goal is to rename these PDF files by "Invoice Number" and "Client ID". Both numbers are located on the first page of each document. Such file names would be more meaningful when used by an accounting department.
- Renaming Approach
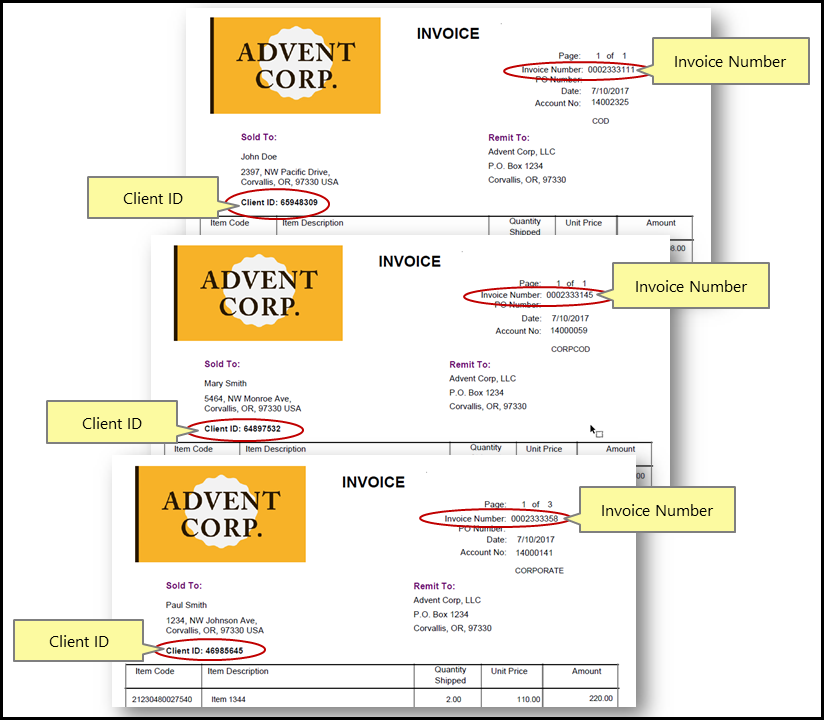
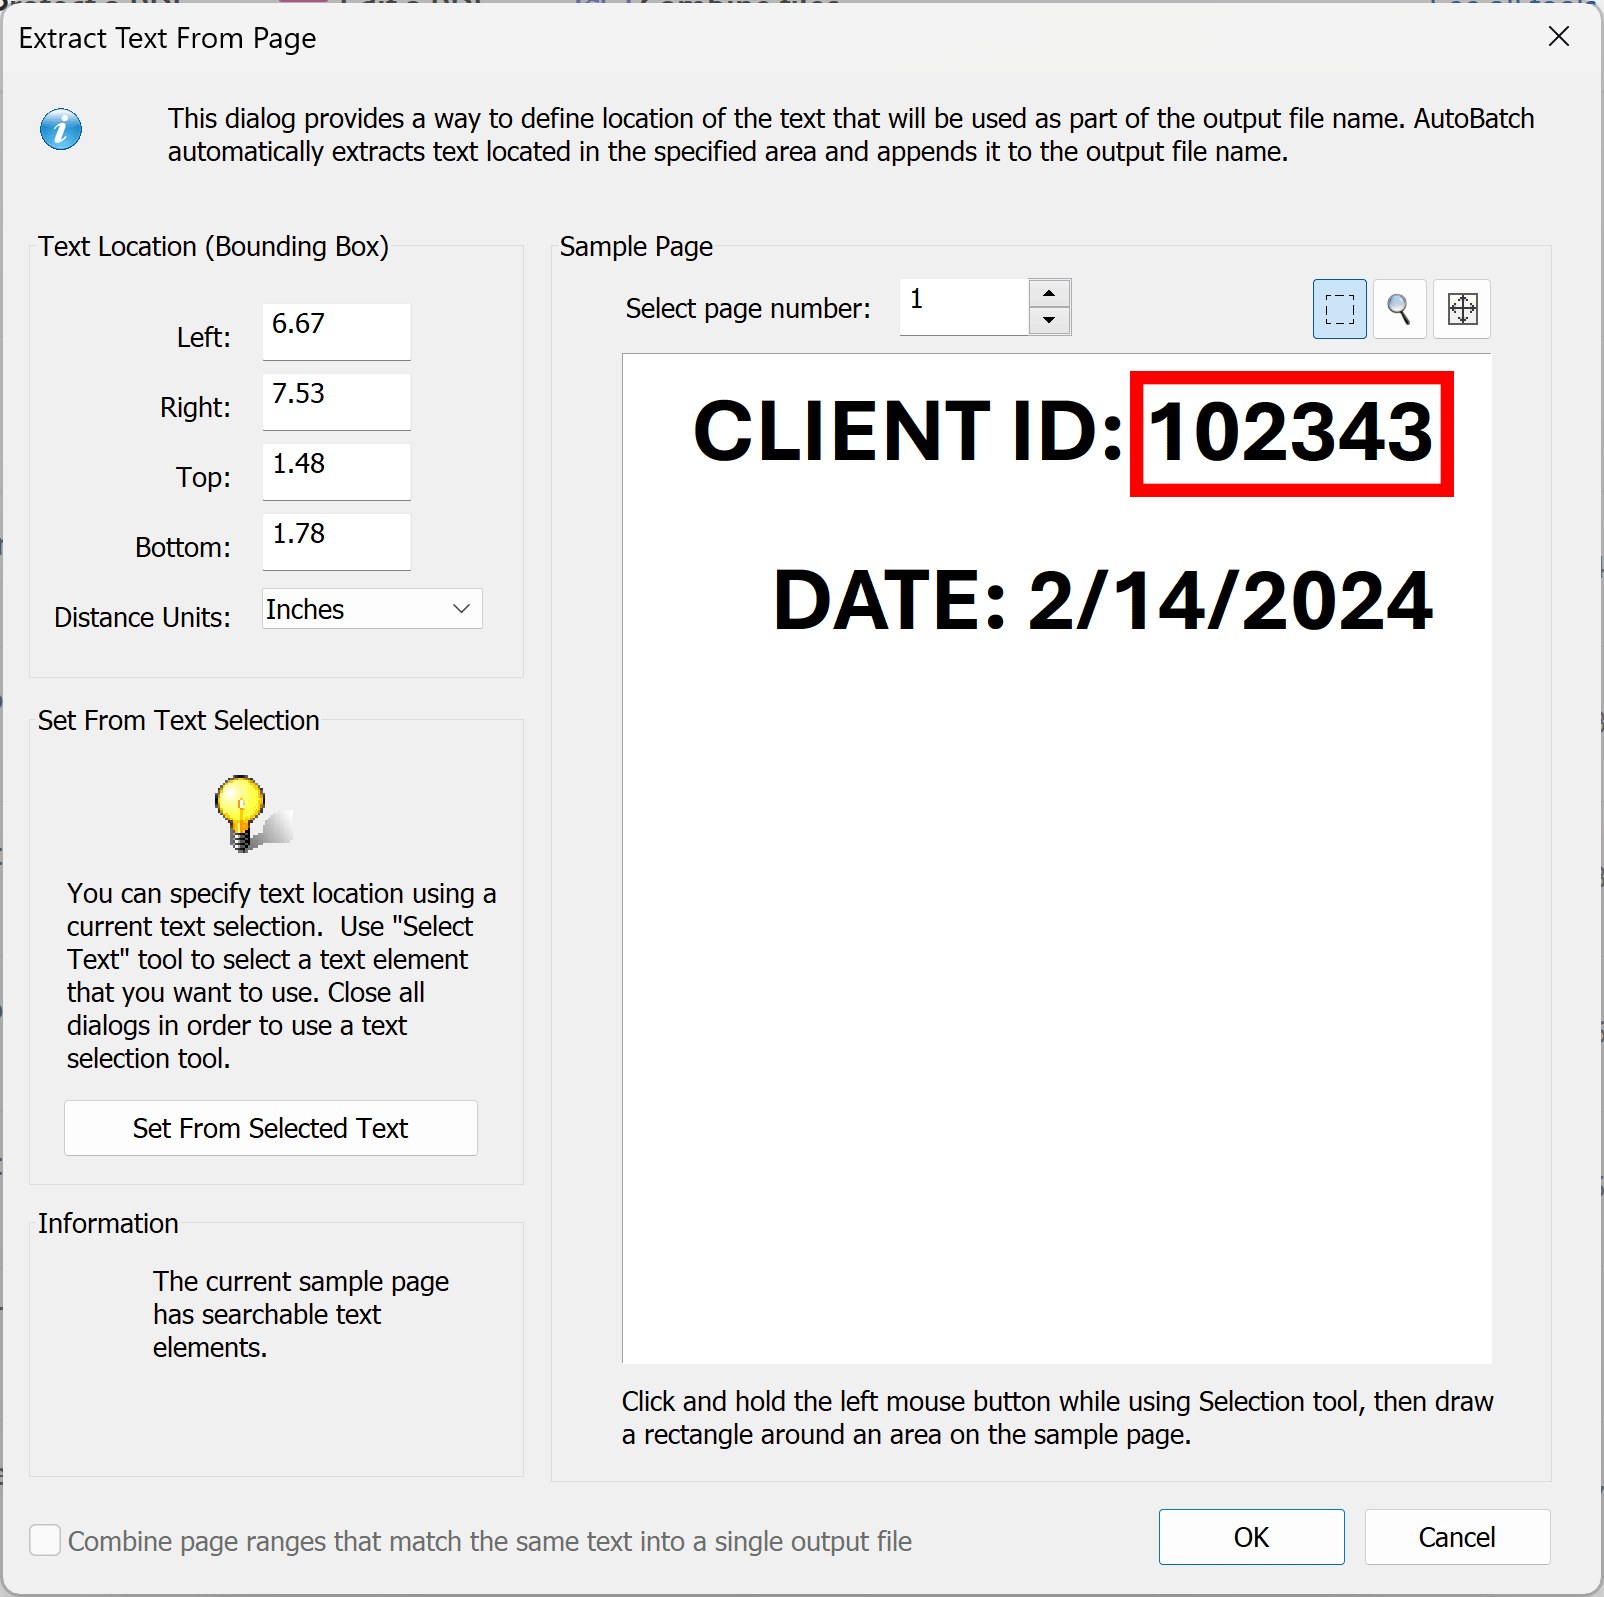
- Each invoice has a number and client ID printed in the upper-right corner of the first page. The application will search each document for “Invoice number” and “Client ID” numbers and combine them along with some static text to create a resulting file name. The text is going to be extracted from pre-determined page areas that we are going to define based on the sample invoice. Use this method when text that needs to extracted is always located in the same page area. The resulting files are going to be named as "Invoice Number_XXXXXXX_Client ID_XXXXXXX.pdf", where X represents a digit.
- Prerequisites
- You need a copy of Adobe Acrobat Standard or Professional along with AutoSplit™ plug-in installed on your computer in order to use this tutorial. You can download trial versions of both Adobe Acrobat and AutoSplit™.
- Are my PDF documents searchable?
- The very first step is to verify that input PDF documents do contain a searchable text. If you are working with scanned paper documents, make sure that the text recognition operation has been applied to the files. See Recognize Text in Scanned PDF Documents tutorial for detailed instructions.
Step-by-Step Tutorial
- Step 1 - Open the “Auto-Rename PDF Files” Menu
- Close all open PDF documents to avoid possible file access conflicts. Start Adobe® Acrobat® and select “Plug-ins > Auto-Rename PDF Files…” from the main Acrobat menu.
- [⚡ How to locate Plugins menu in Adobe® Acrobat® ⚡]
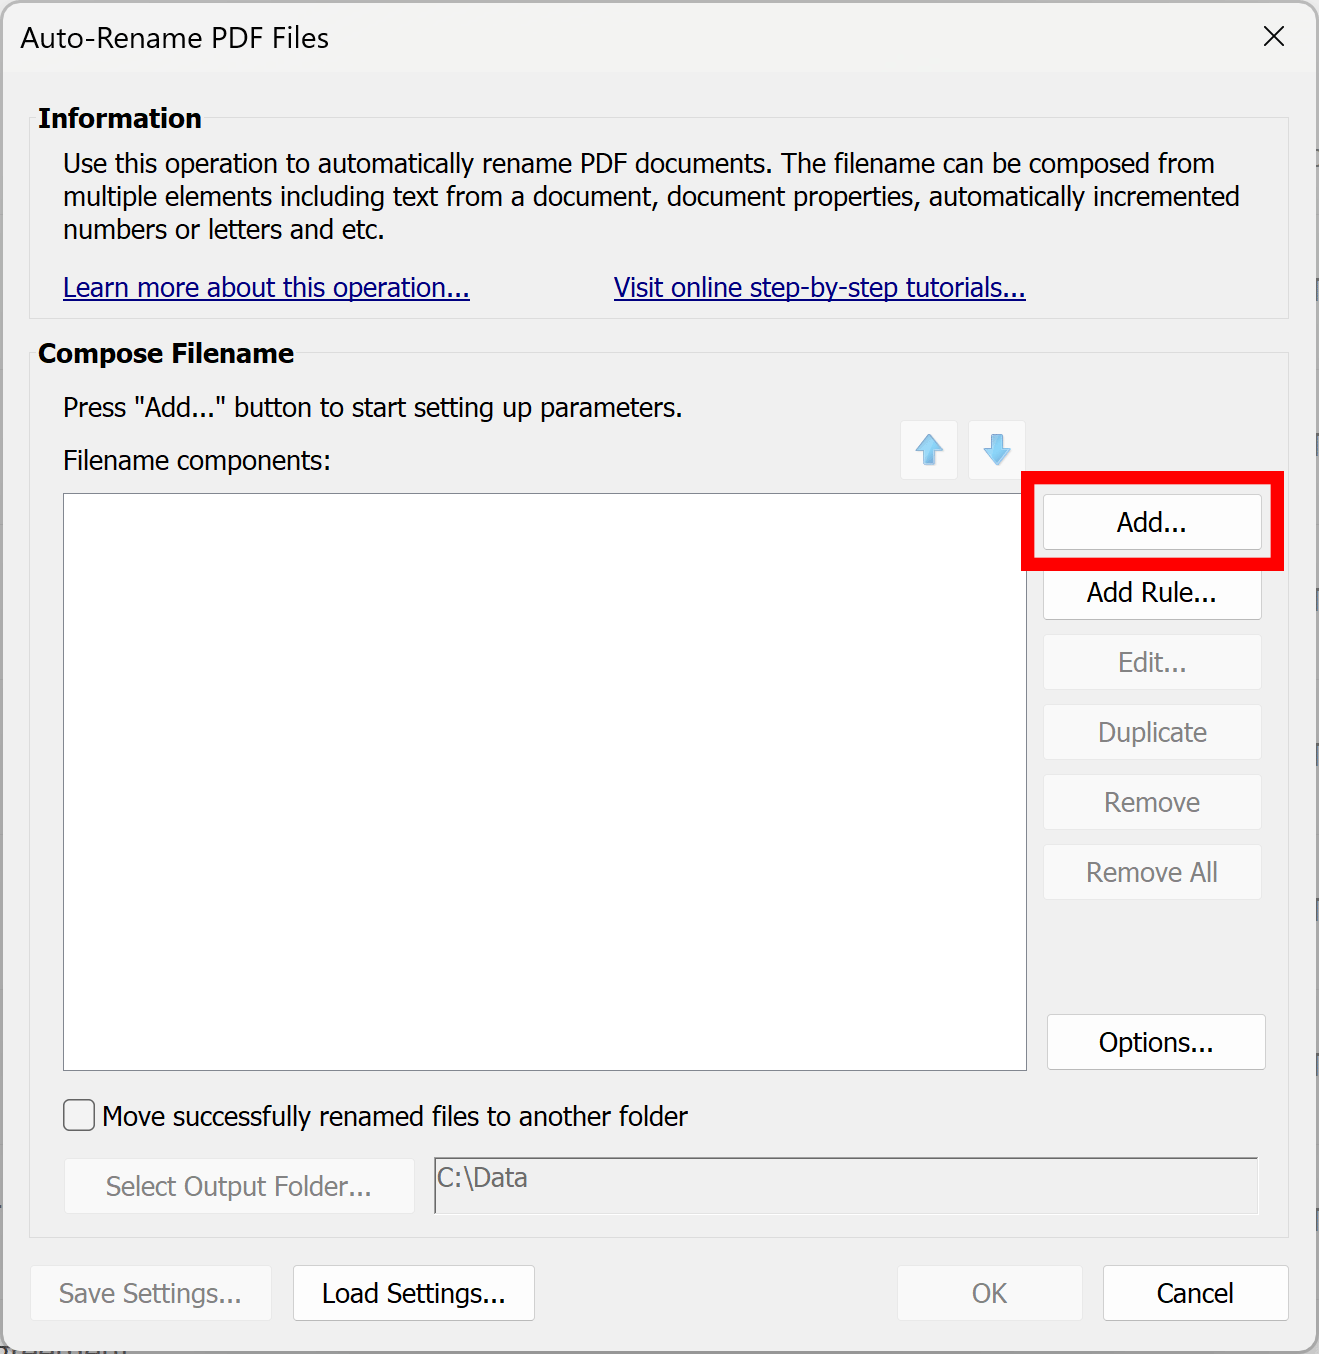
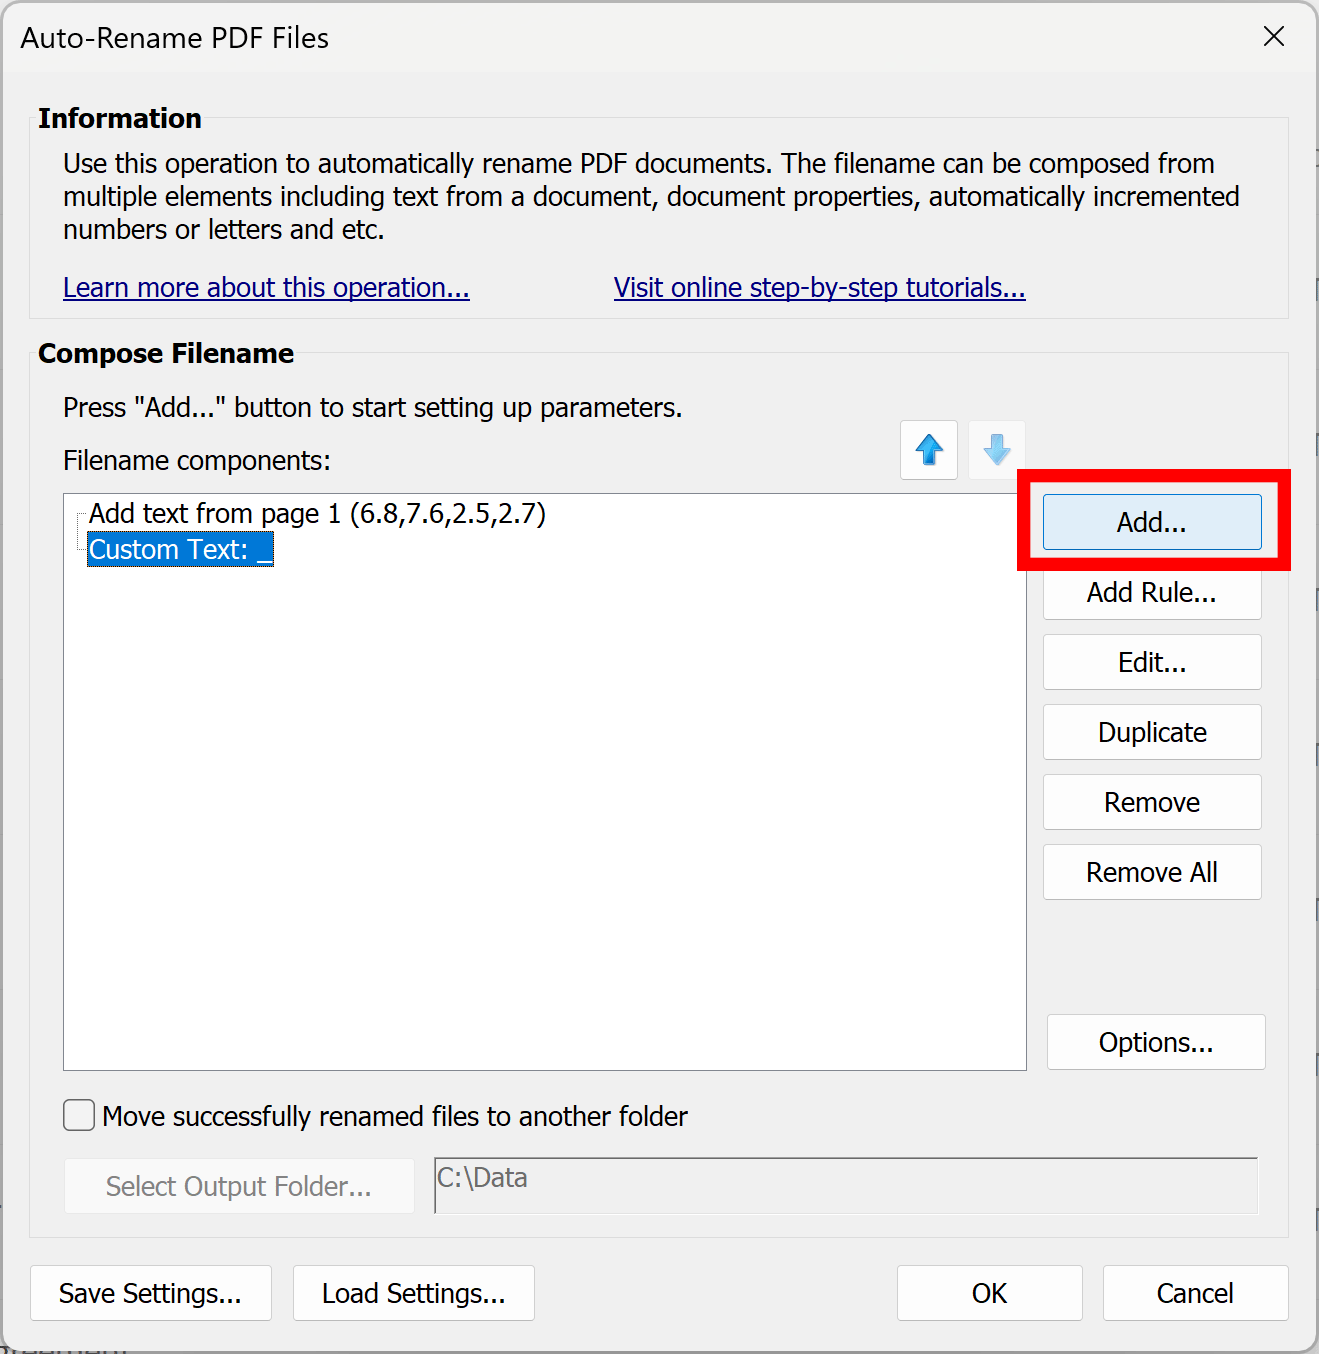
- Step 2 - Add "Invoice Number"
- Press “Add…” to add a first naming component to the output file name.
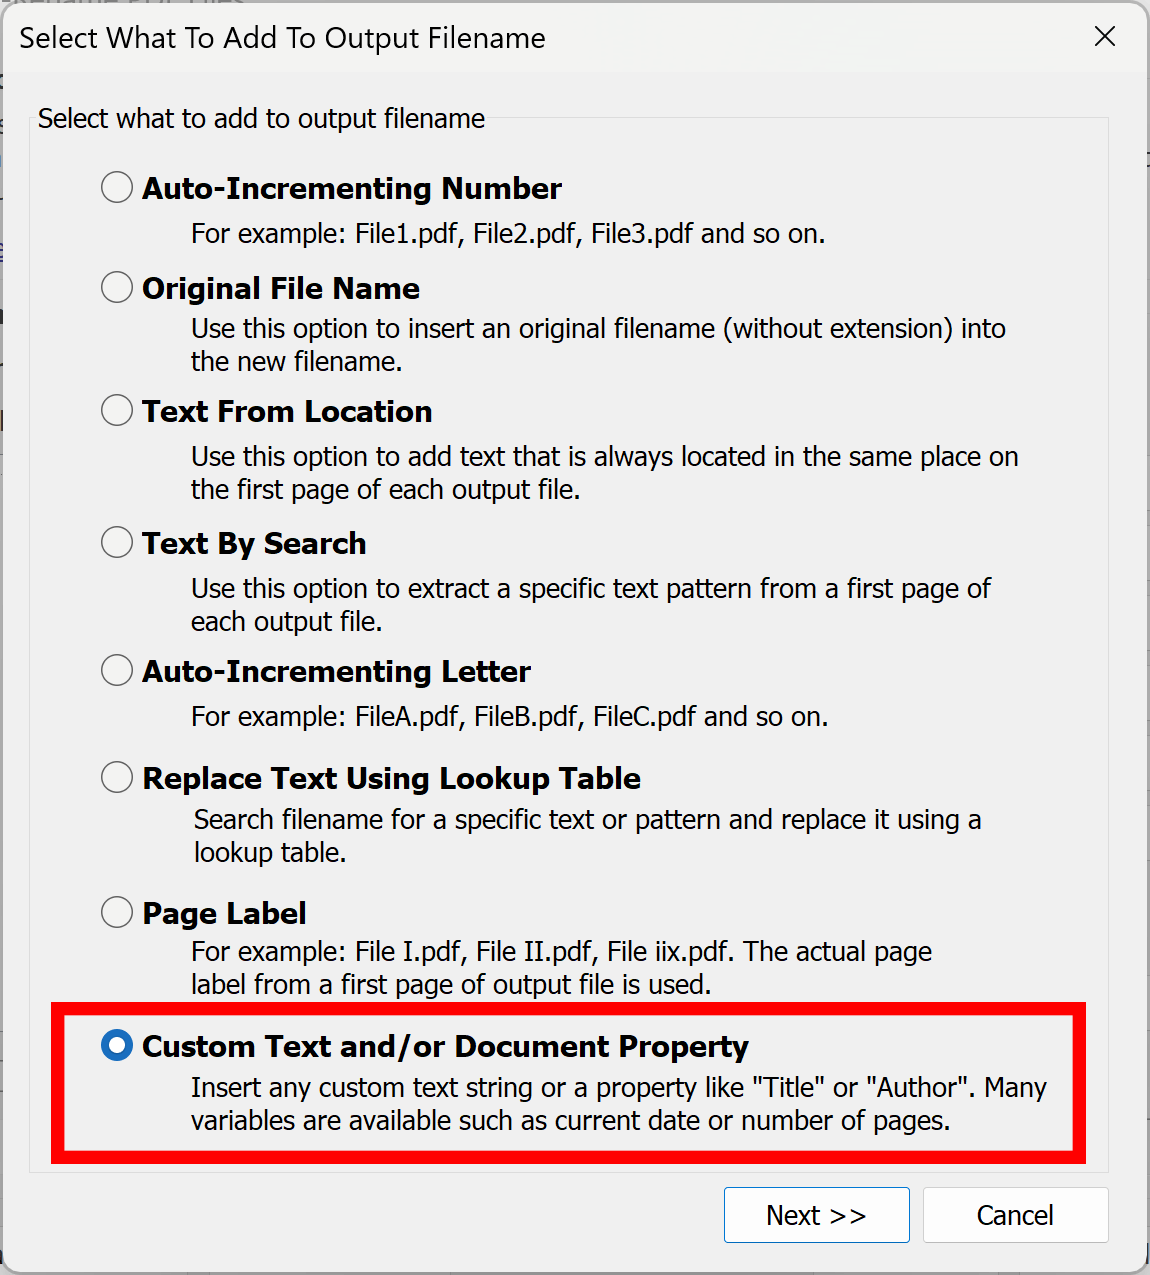
- Step 3 - Select File Naming Option
- Select the “Text From Location” option and click “Next” to enter parameters.

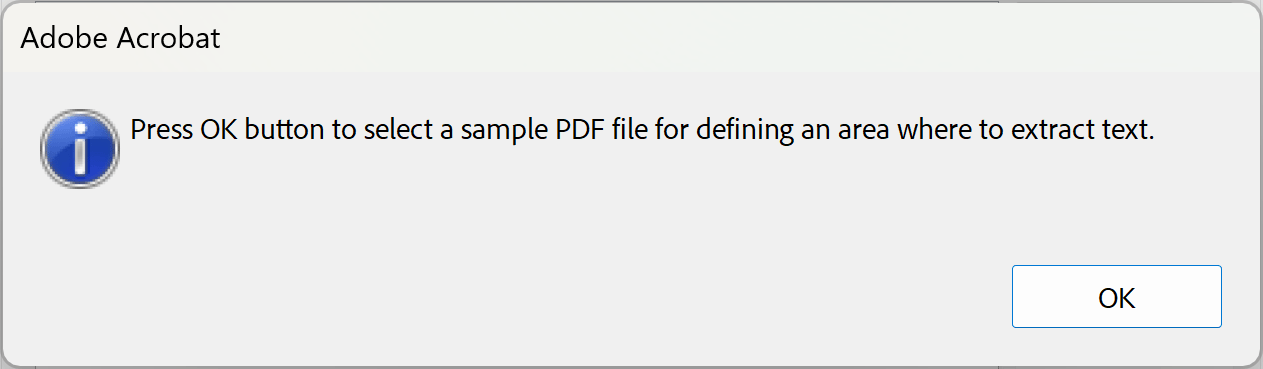
- Step 4 - Select a Sample File to Define the Text Location
- Click “OK” in the dialog box to proceed.
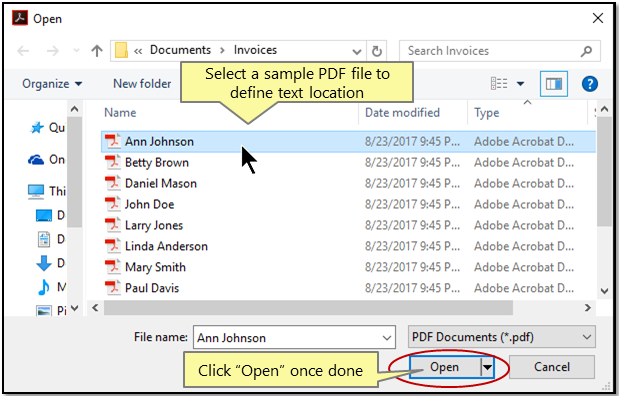
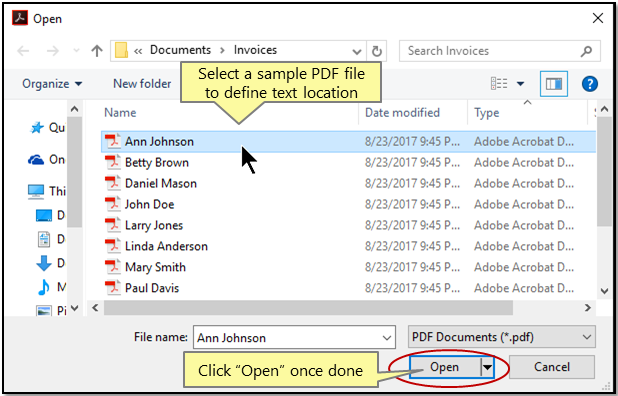
- Select a sample PDF file for defining a page area where to extract an "Invoice Number". Click “Open” once done.
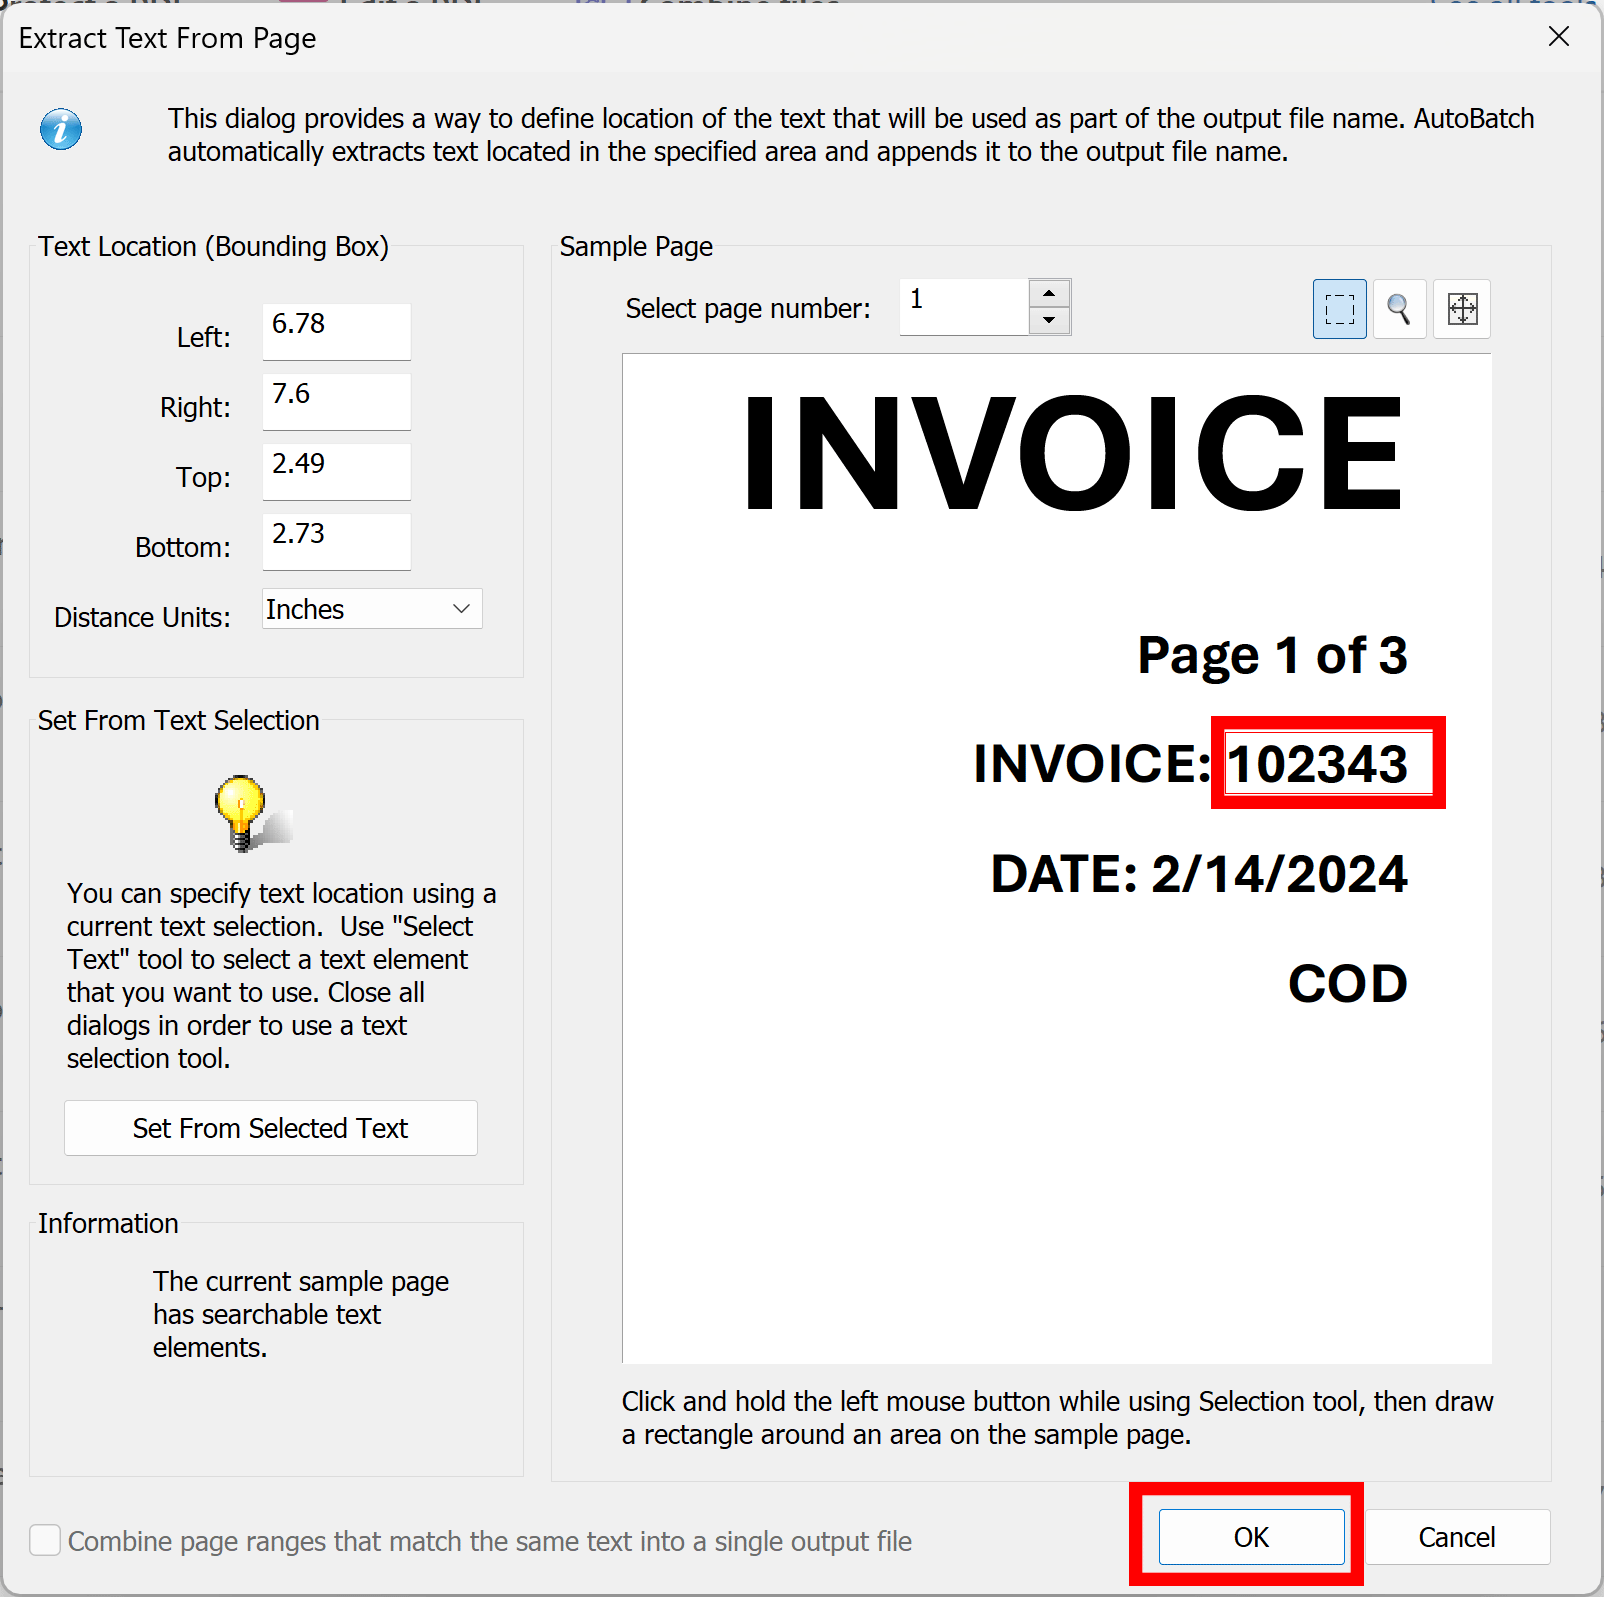
- Step 5 - Define the Page Area Where to Extract Text From
- Draw a box around text that needs to extracted to record its position on the page. All text within this box will be used as a part of the file name. Click "OK" once done. A new entry would appear in the "Filename components" list.
- Step 6 - Add Underline
- Press the "Add..." button to add an underline character that will serve as a separator between"Invoice Number" and "Client ID".
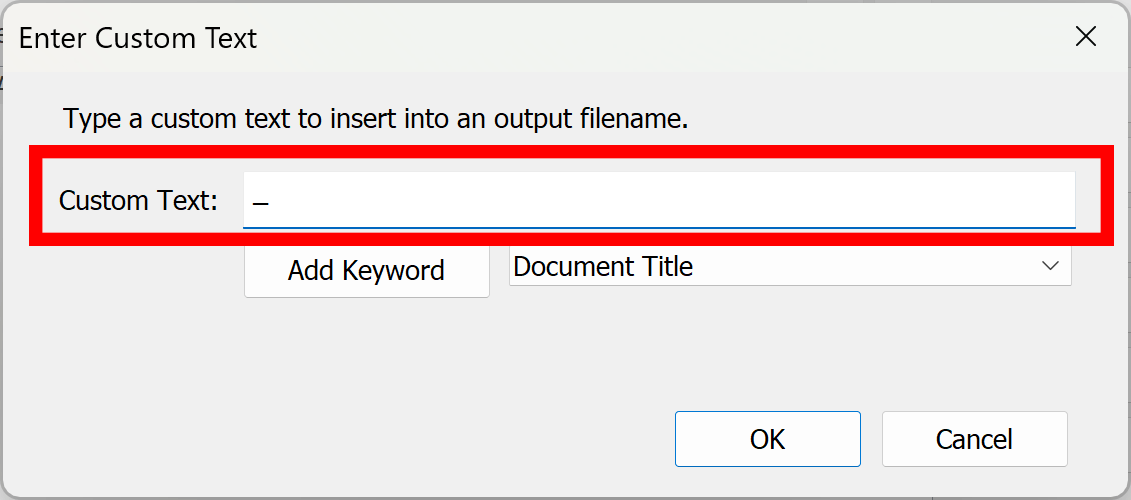
- Step 7 - Select Custom Text Option
- Select the “Custom Text and/or Document Property" option and press the "Next>>" button.
- Step 8 - Enter Custom Text
- Type _ into the "Custom Text:" entry box. This is going to be a separator between "Invoice Number" and "Client ID" in the file name. Click “OK” once done. Now you should see a new entry in the "Filename components" list.
- Step 9 - Add "Client ID"
- Press “Add…” button again to add "Client ID" to the file naming scheme.
- Step 10 - Select File Naming Option
- Select “Text From Location” and click “Next” to enter parameters.
- Step 11 - Select a Sample File to Define the Text Location
- Click “OK” in the dialog box to proceed.
- Select a sample PDF file for defining a page area where to extract the "Client ID". Click “Open” once done.
- Step 12 - Define Page Area Where To Extract Text From
- Draw a box around text that needs to extracted to record its position on the page. All text within this box will be used as a part of the file name. Click "OK" once done. A new entry would appear in the "Filename components" list.
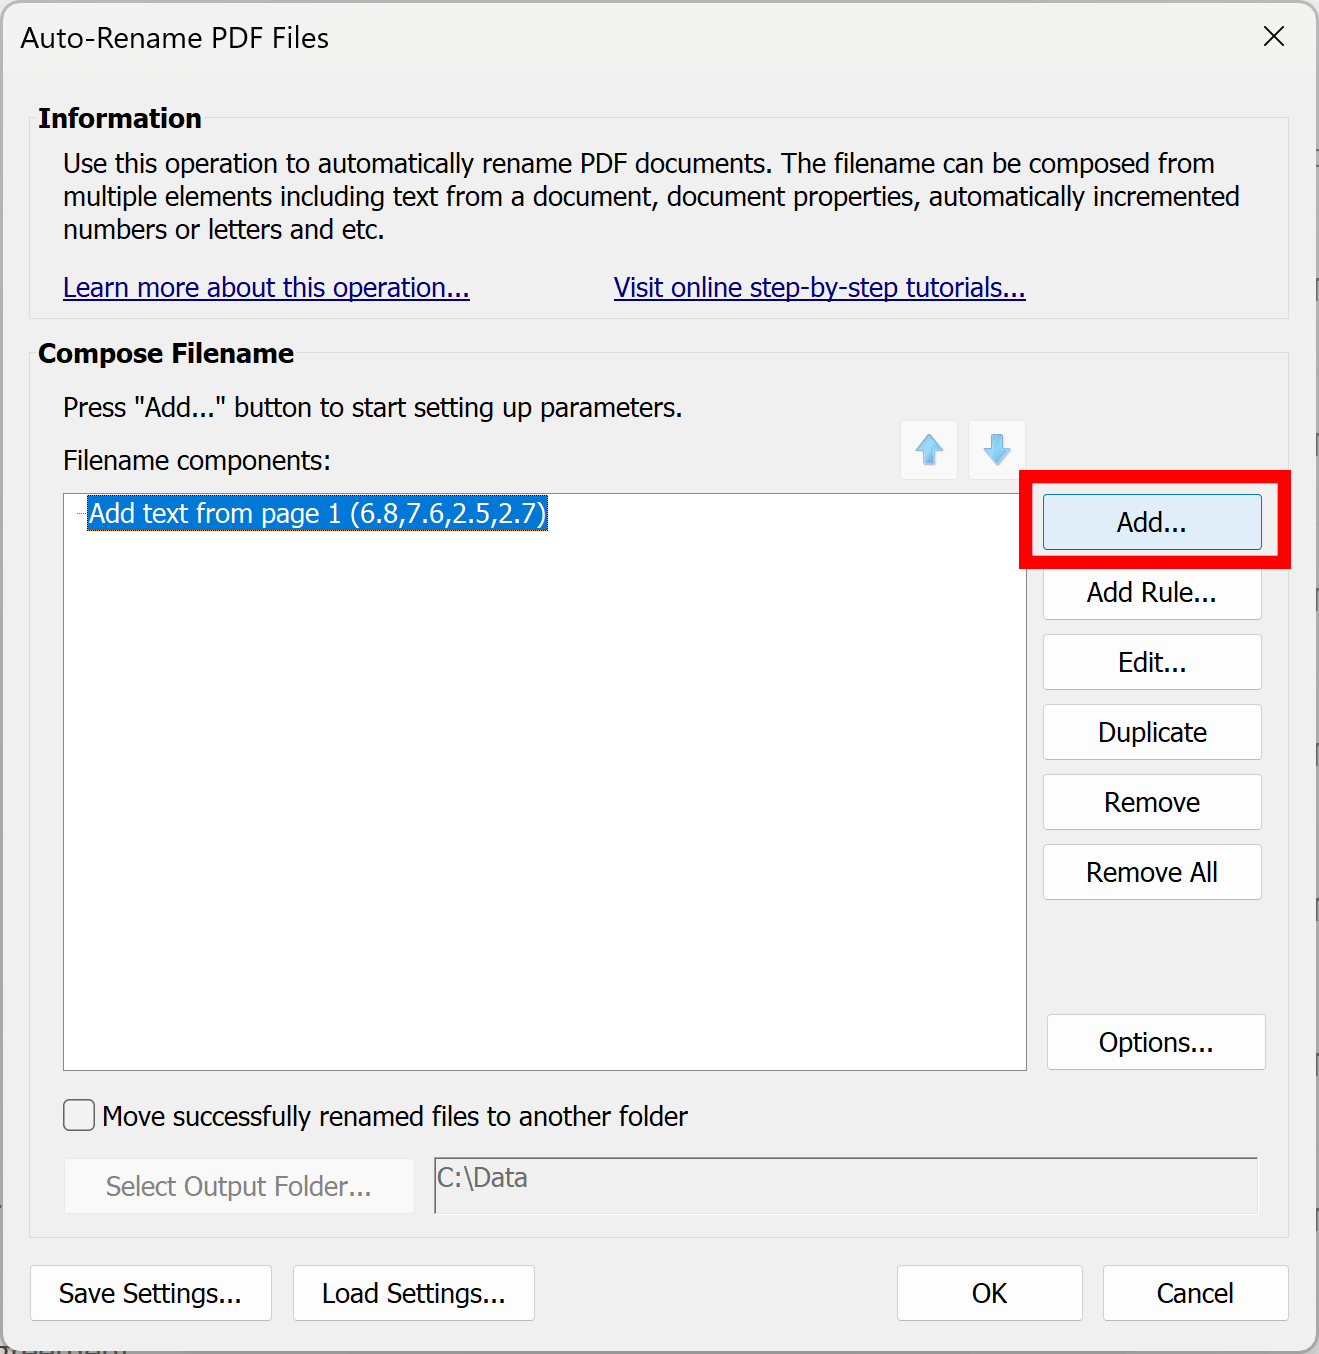
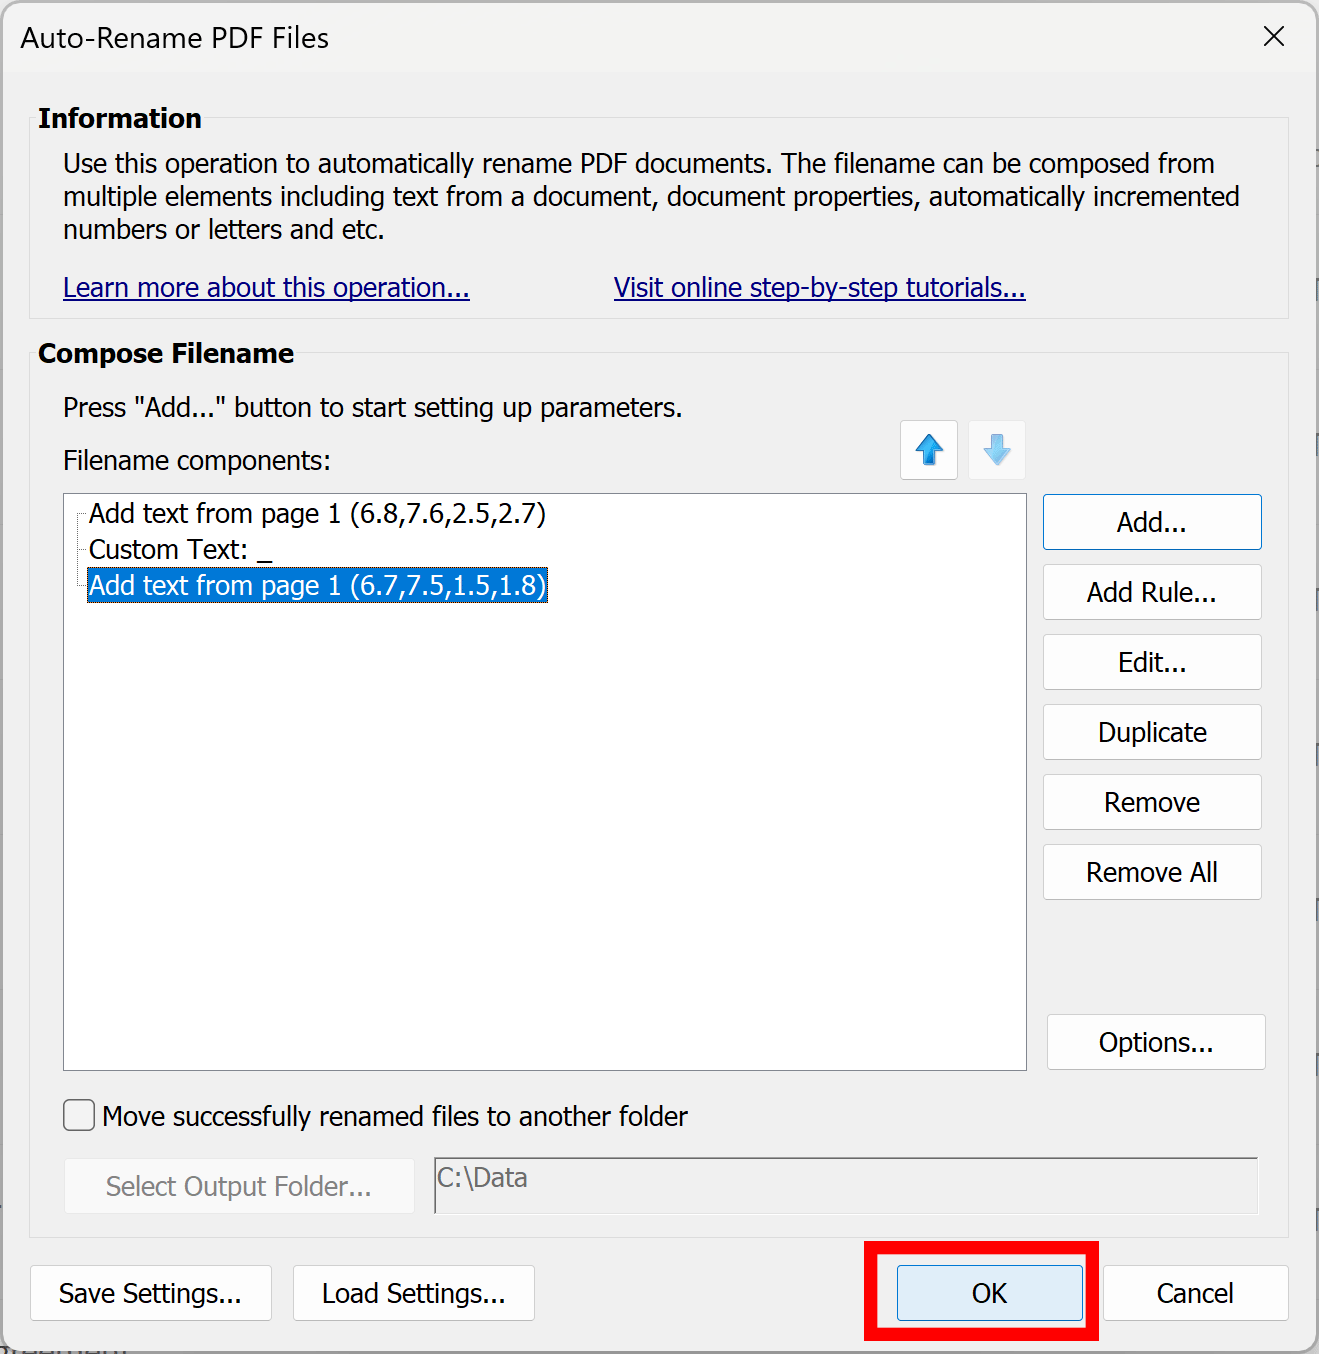
- Step 13 - Confirm Renaming Files Options
- Now there are 3 entries in the "Filename components" list. Optionally, press the "Save Settings" button to save parameters into a settings file (*.docren extension). You can load these settings later by pressing the "Load Settings" button. Optionally, check the "Move successfully renamed files to another folder" option and select a "Success" folder to specify where to place resulting files. Press the "OK" button to move to the next step.
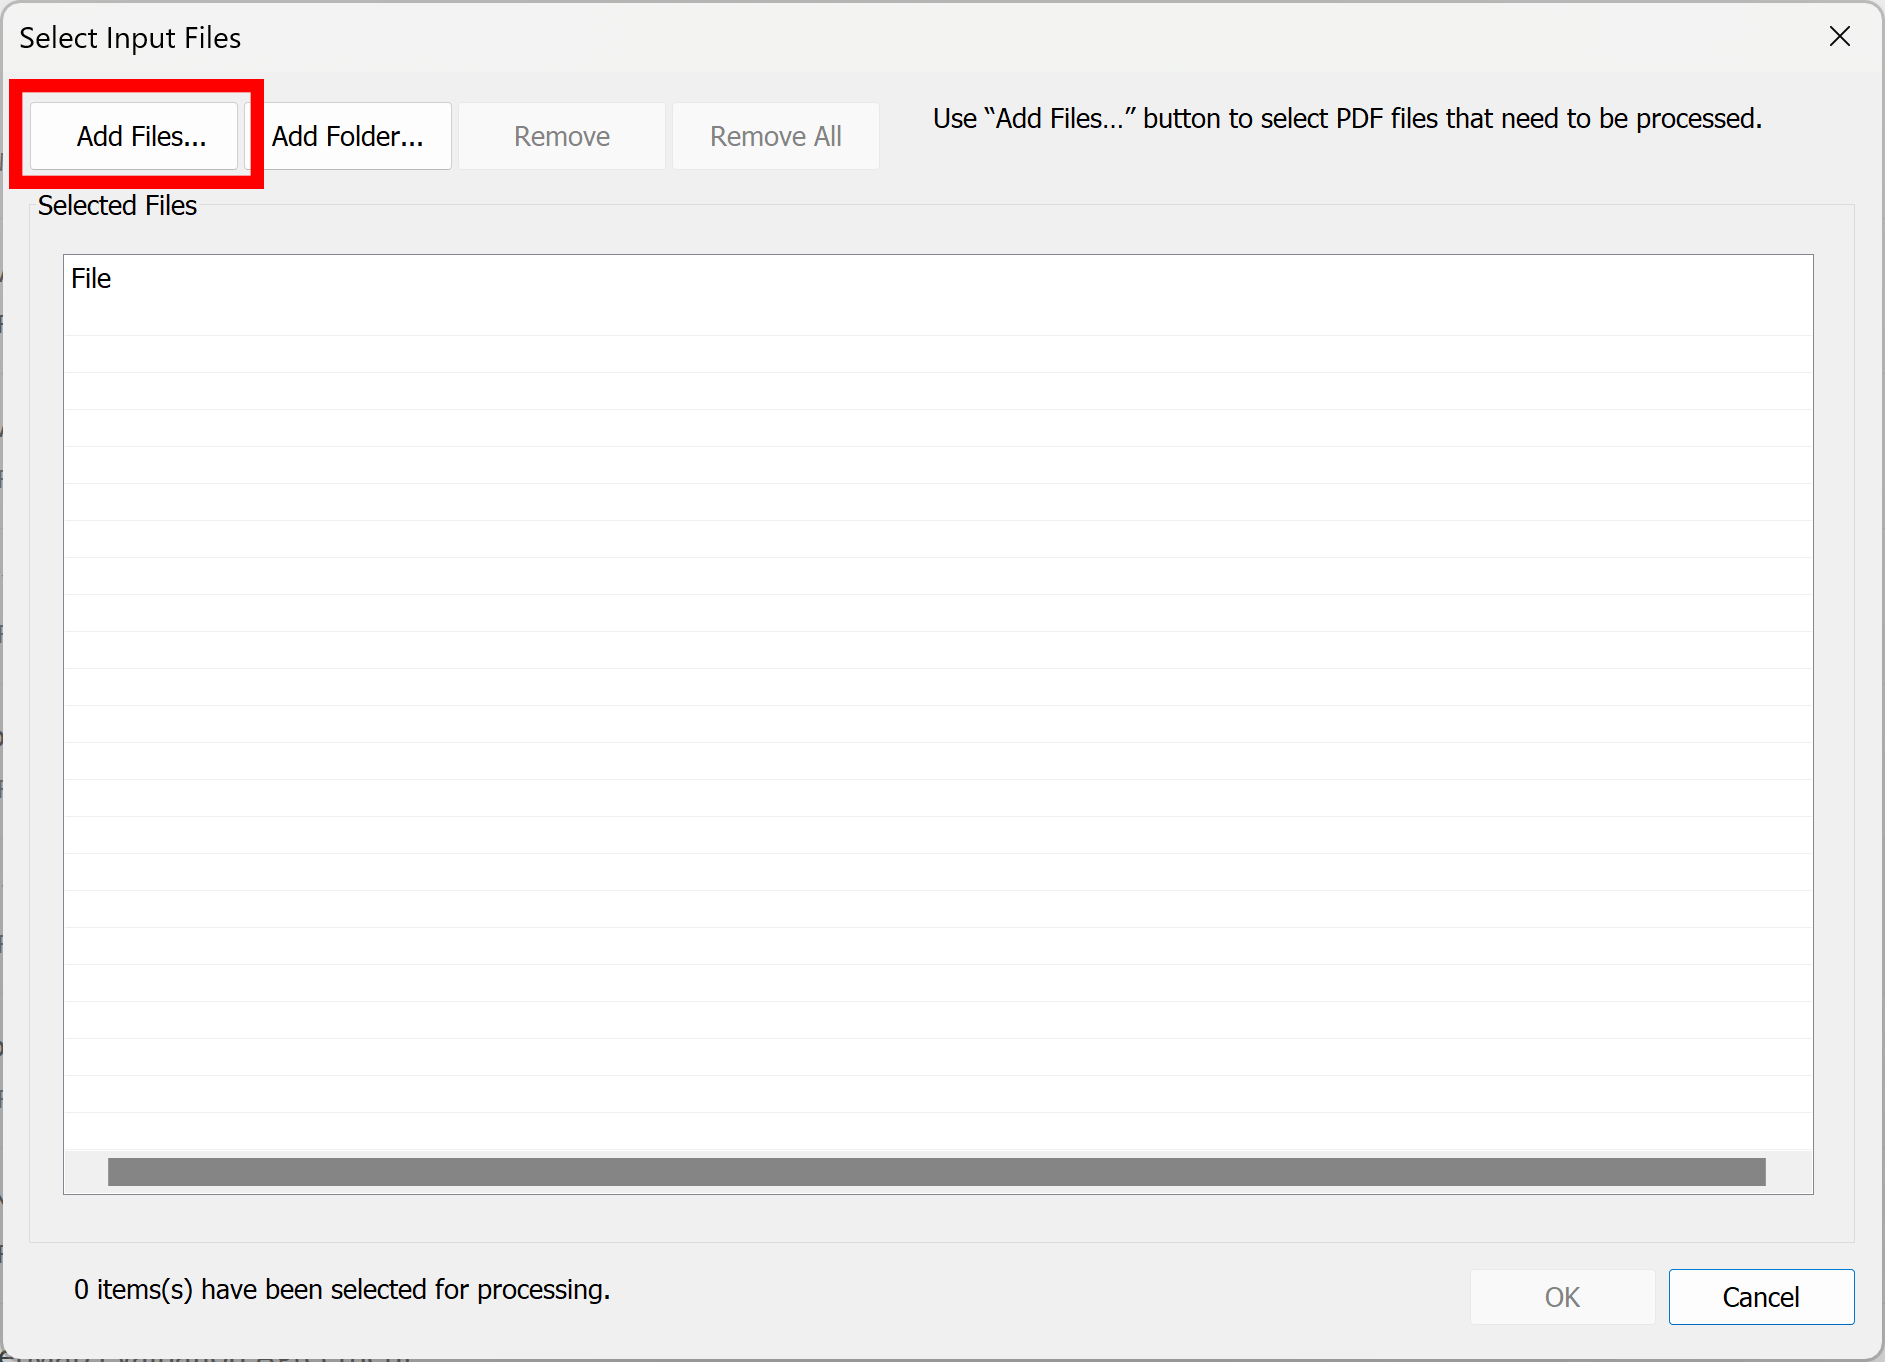
- Step 14 - Add Files For Renaming
- Press the “Add Files…” button located in the “Select Input Files” dialog to choose files that need to be renamed. It is always a good idea to make backup copies of the input files.
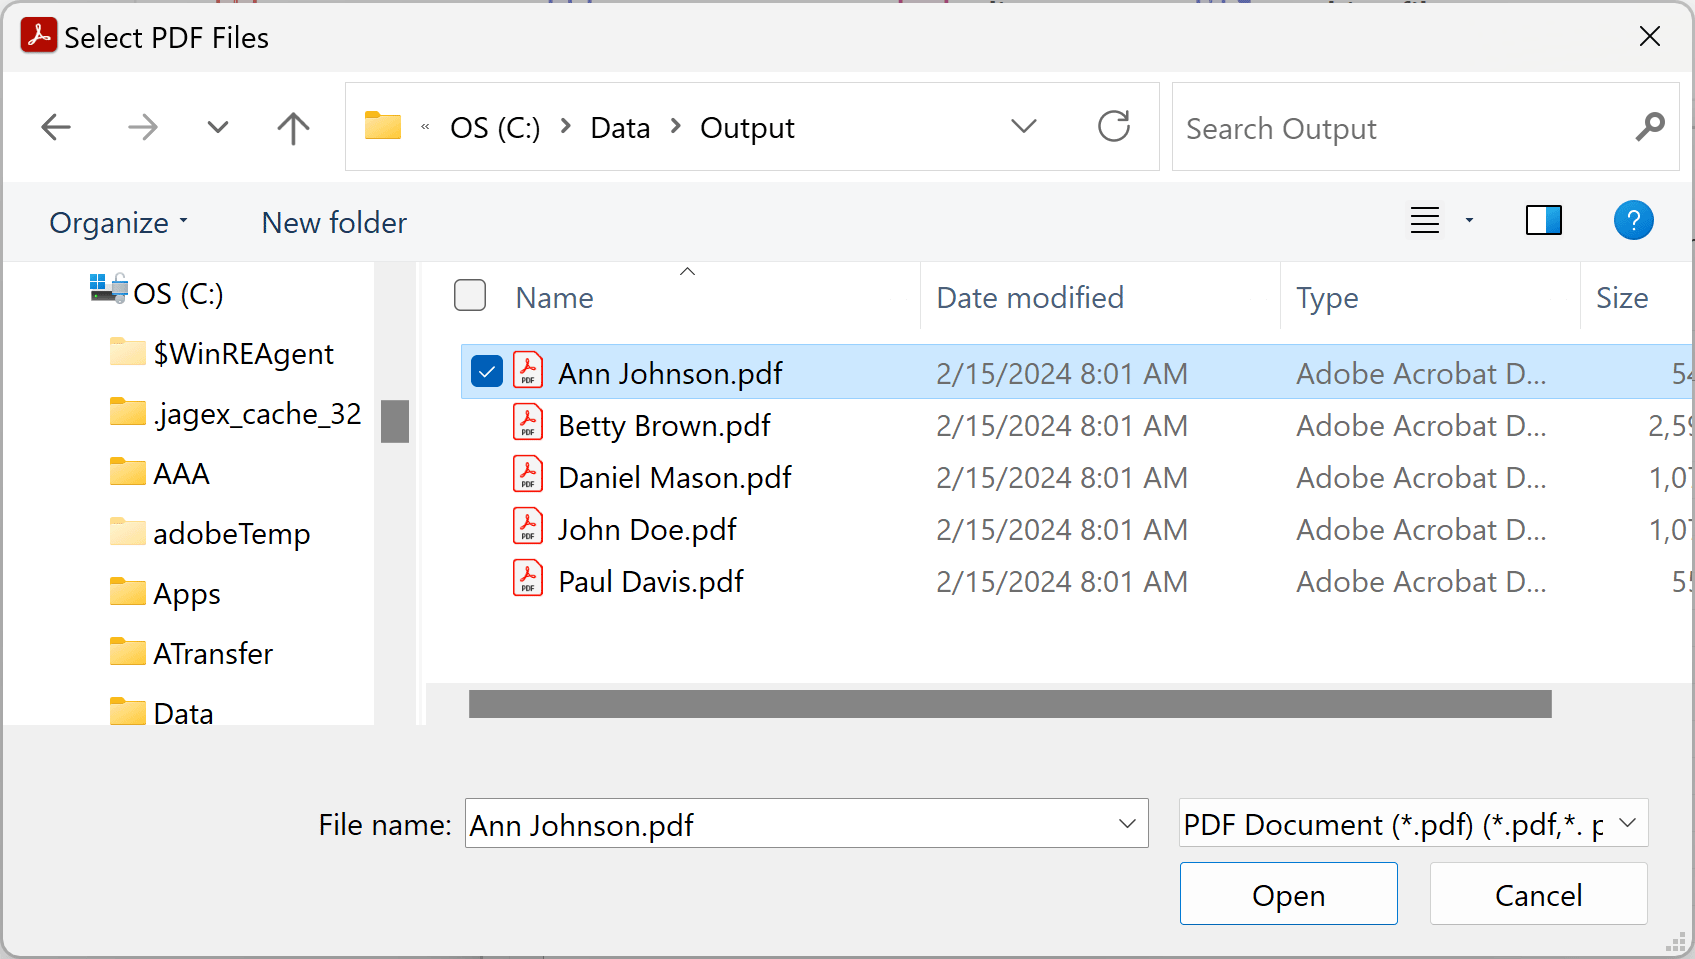
- Step 15 - Select Files For Renaming
- Select PDF files that need to be renamed. Click "Open" once done.
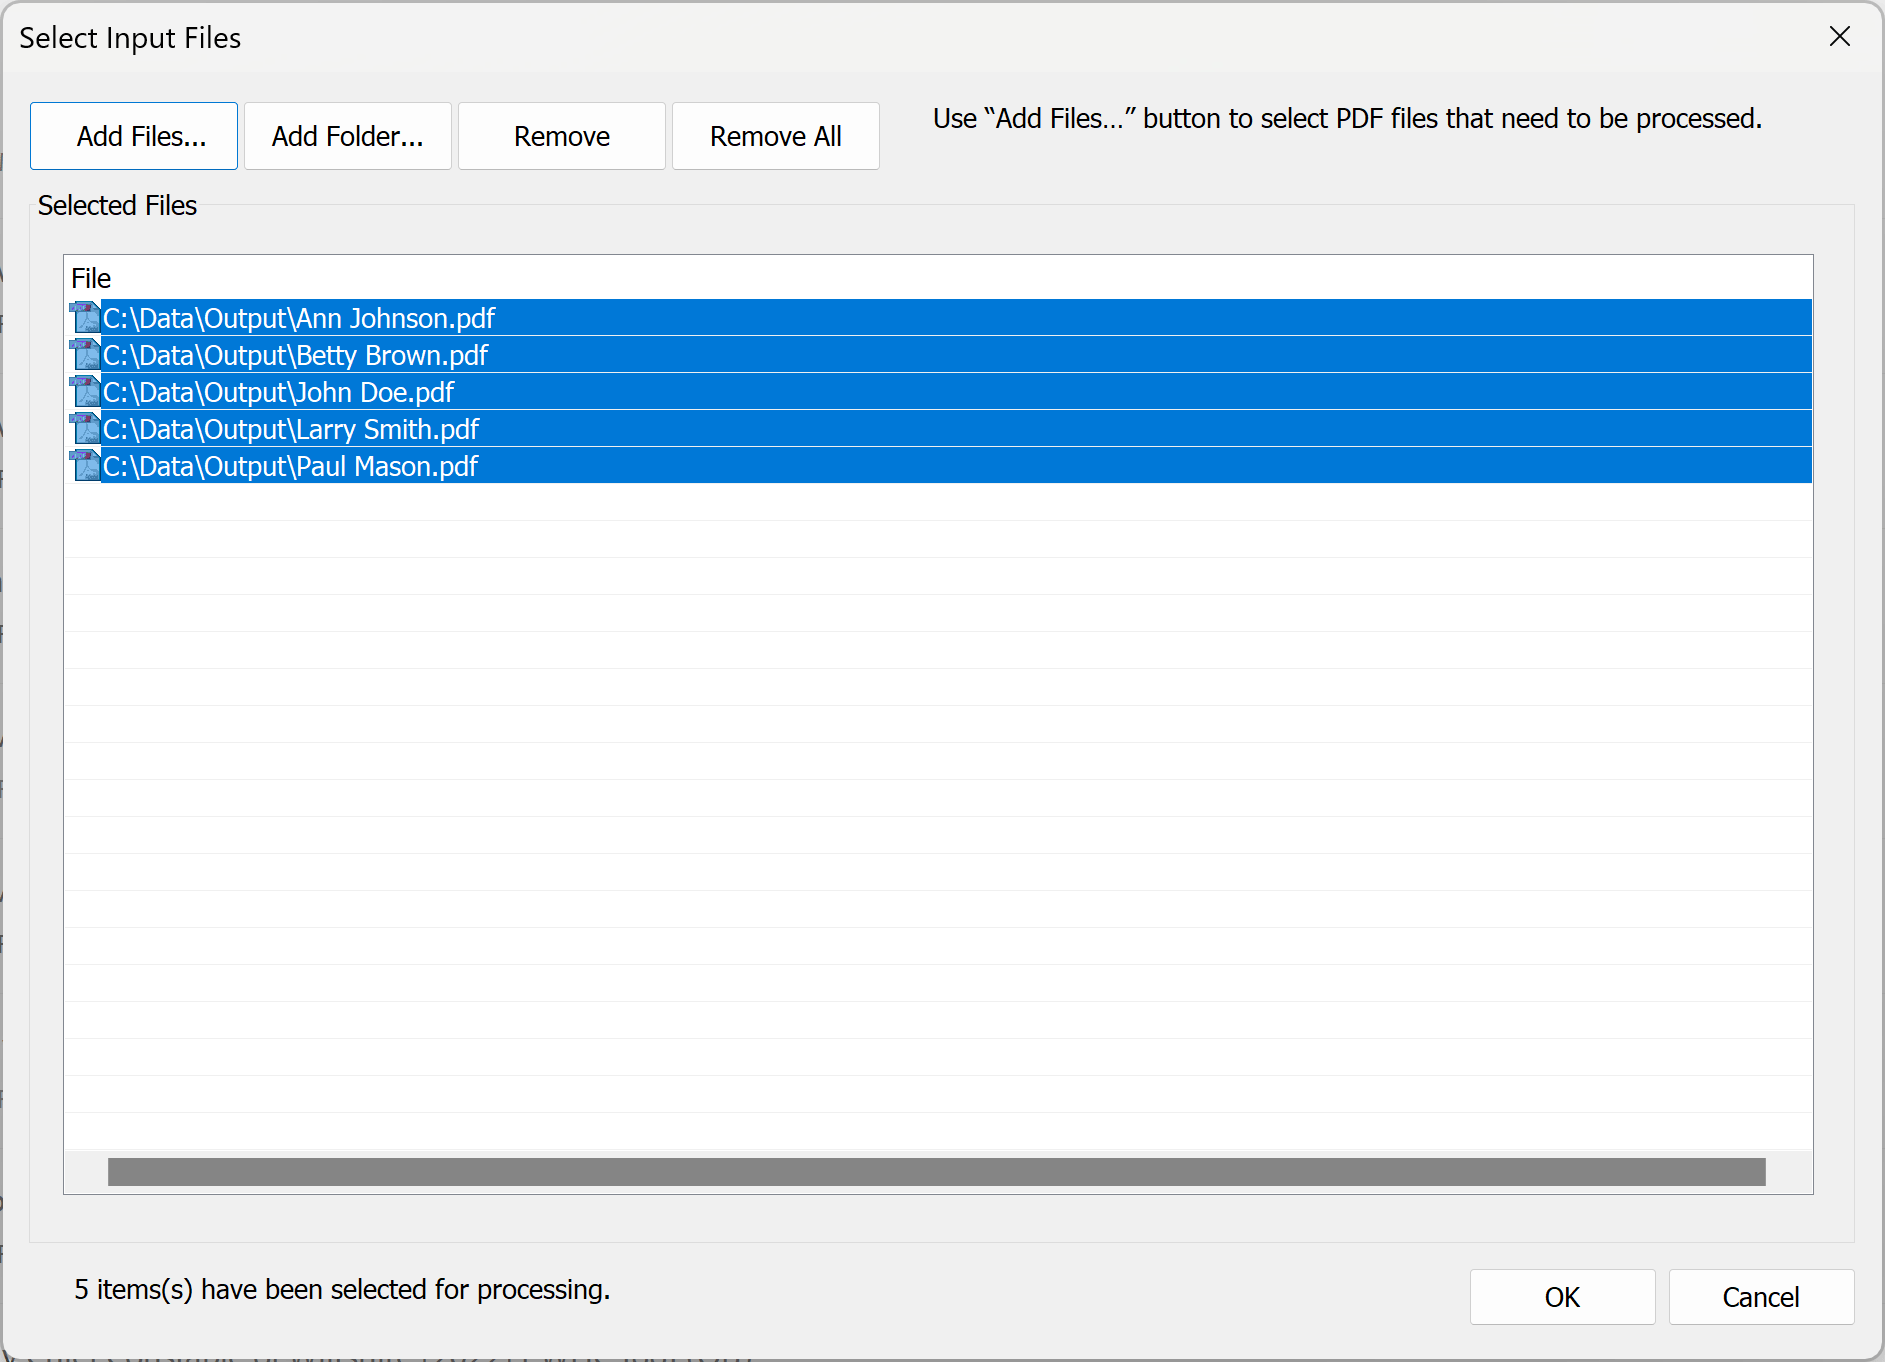
- Step 16 - Confirm Input Files Selection
- Selected PDF files would appear in the list. Press "OK" once all input files have been selected.
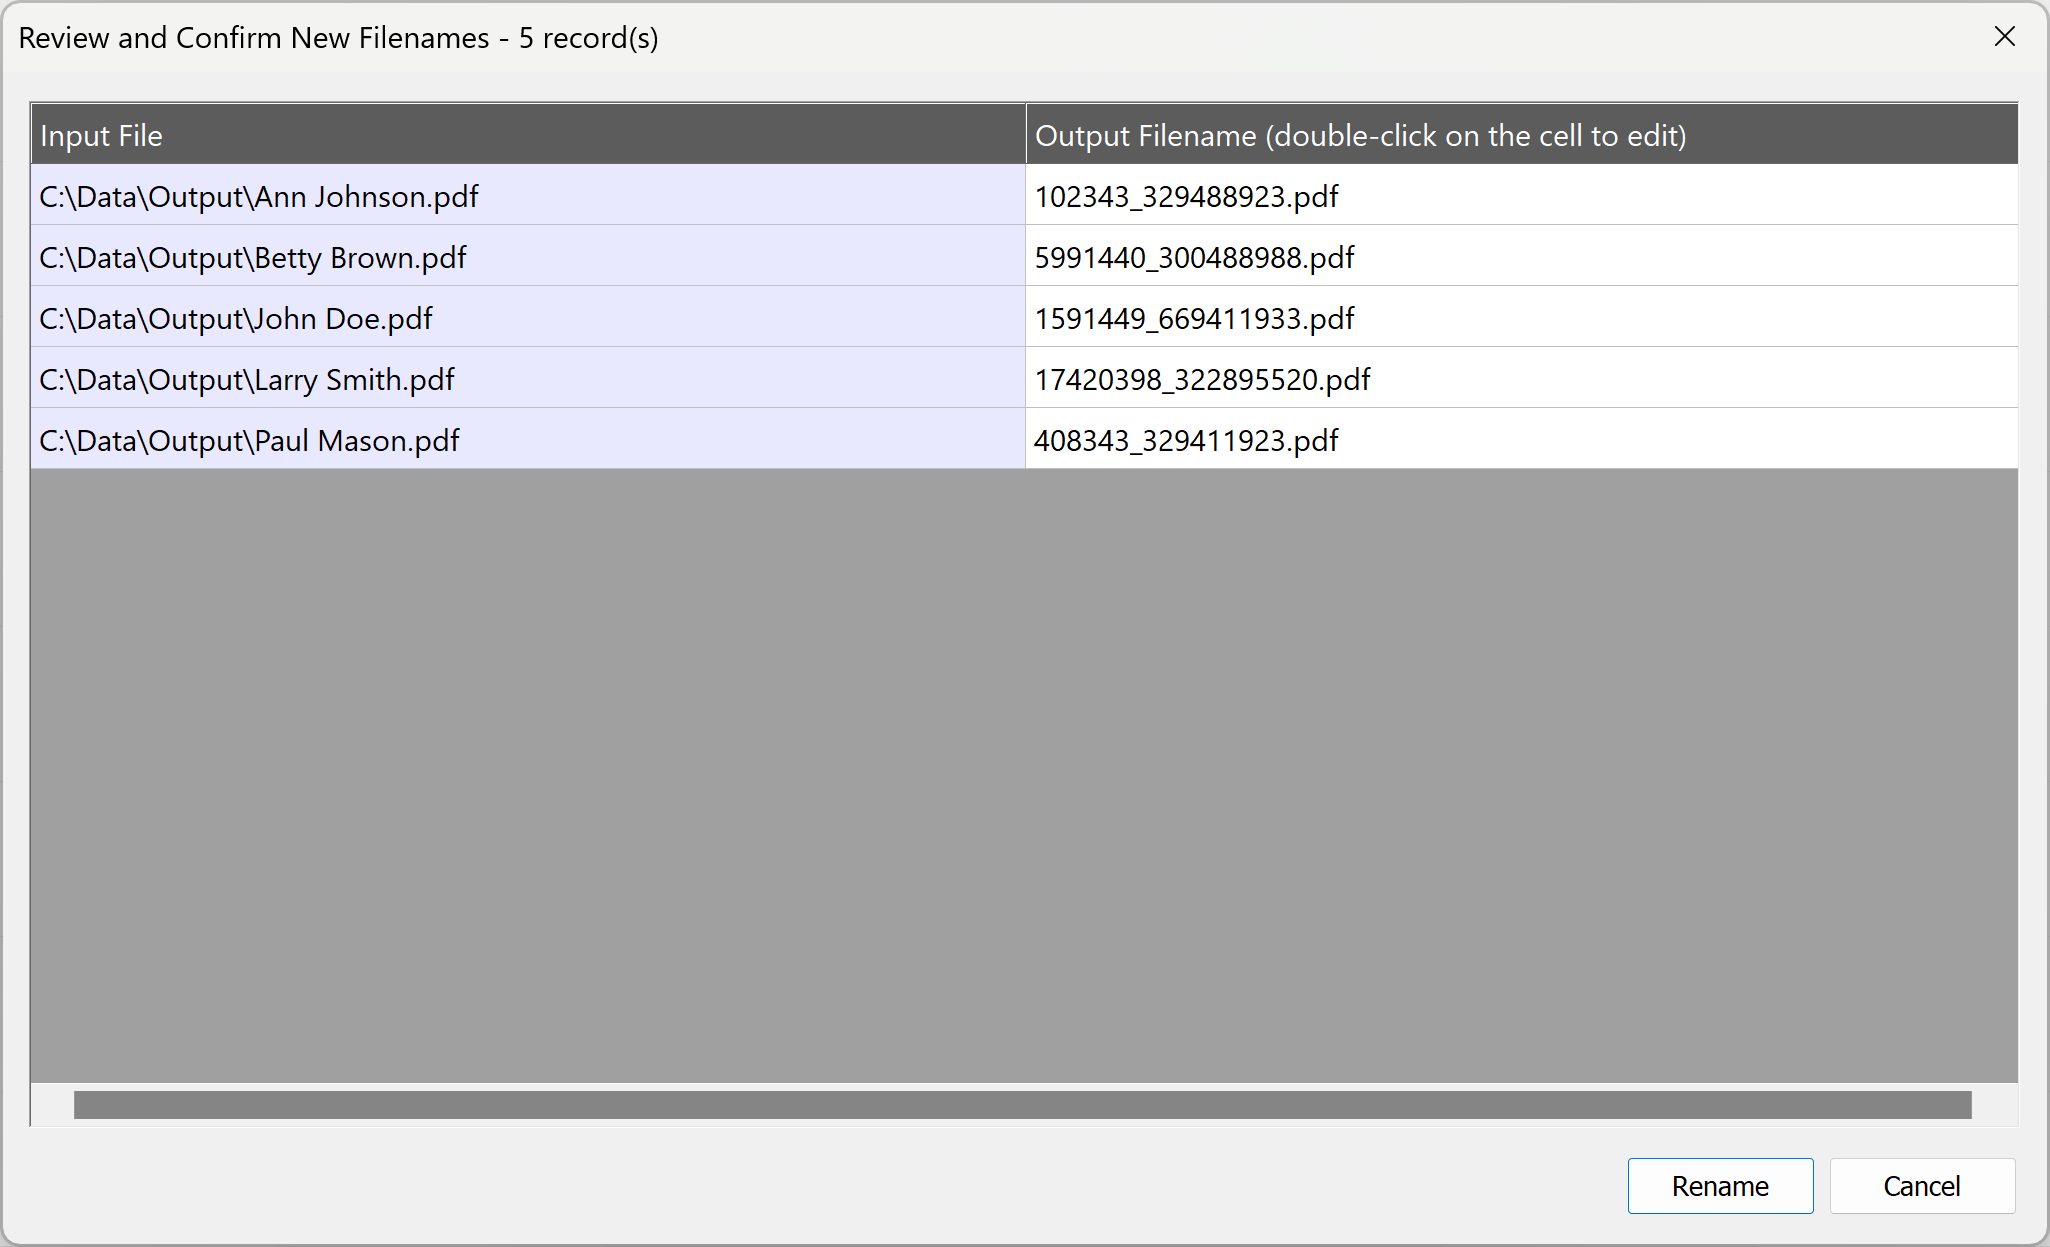
- Step 17 - Review and Confirm New File Names
- The software will process input files without renaming them yet and present "computed" file names in the "Review and Confirm New Filenames" dialog. No files are renamed at this step. Review file names that have been generated and make edits/adjustments if necessary. Double-click on an output filename to edit. No files have been renamed at this point yet. Click “Rename” to start the renaming process.
- Step 18 - Review Processing Report
- Check the renaming statistics. Click “OK” to open a processing report.
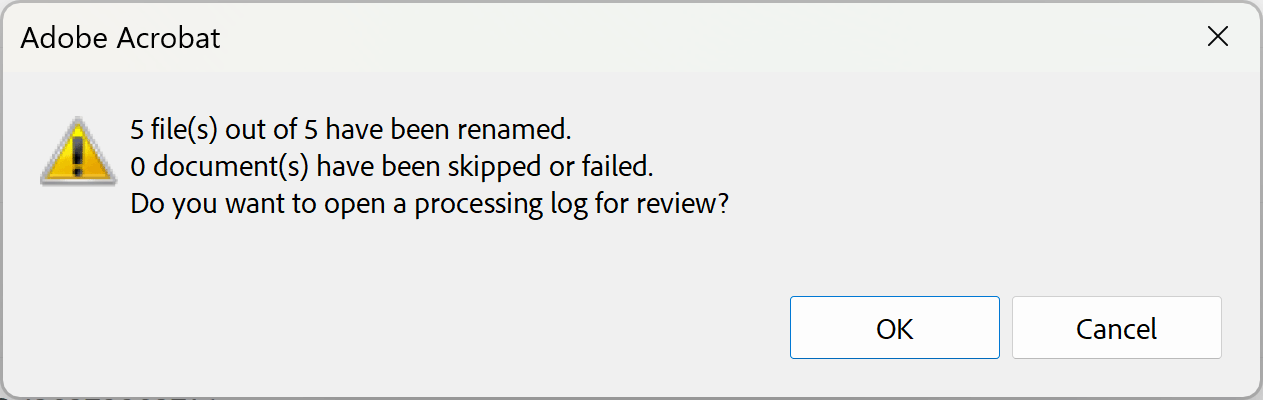
- The processing report shows detailed information on how many files have been renamed or failed along with input/output file names for each document.

- Click here for a list of all step-by-step tutorials available.