Automatically Rename PDF Files using Guided Actions
AutoSplit Pro for Adobe® Acrobat®
- Introduction
- The Adobe® Acrobat® Pro offers a powerful way to automate repetitive tasks. This functionality is called Guided Actions and is also known as "Action Wizard" in previous versions of Adobe® Acrobat® (prior to version X). It allows you to apply a series of PDF processing commands with user-specific settings to one or more PDF files without user interaction. The "action" can then be executed on multiple files at once or on the entire contents of a folder(s). Once an action is created, it can be executed either manually from the Adobe® Acrobat® toolbar or from a command-line batch file using the AutoBatch™ plug-in.
- This tutorial explains how to create a batch processing action that can be used to automatically rename PDF documents via Action Wizard using the AutoSplit Pro plug-in .
- Prerequisites
- You need a copy of Adobe® Acrobat® along with the AutoSplit Pro plug-in installed on your computer in order to use this tutorial. You can download trial versions of both Adobe® Acrobat® Pro and AutoSplit™ Pro.
Step-by-Step Tutorial
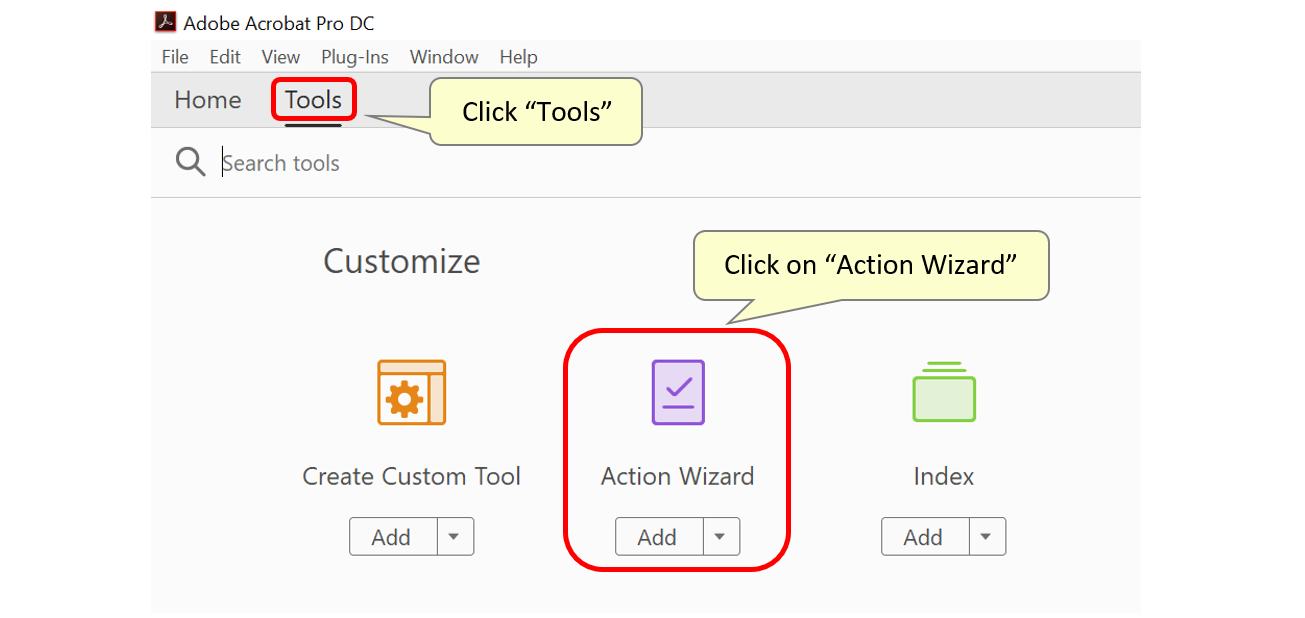
- Step 1 - Open Guided Actions Tool (Action Wizard)
- If you are using "new" Adobe Acrobat, then show all tools and double-click on "Use Guided Actions" tool icon to open tool controls.


- If you are using "classic" Adobe Acrobat, then double-click on "Action Wizard" tool icon to open tool controls.
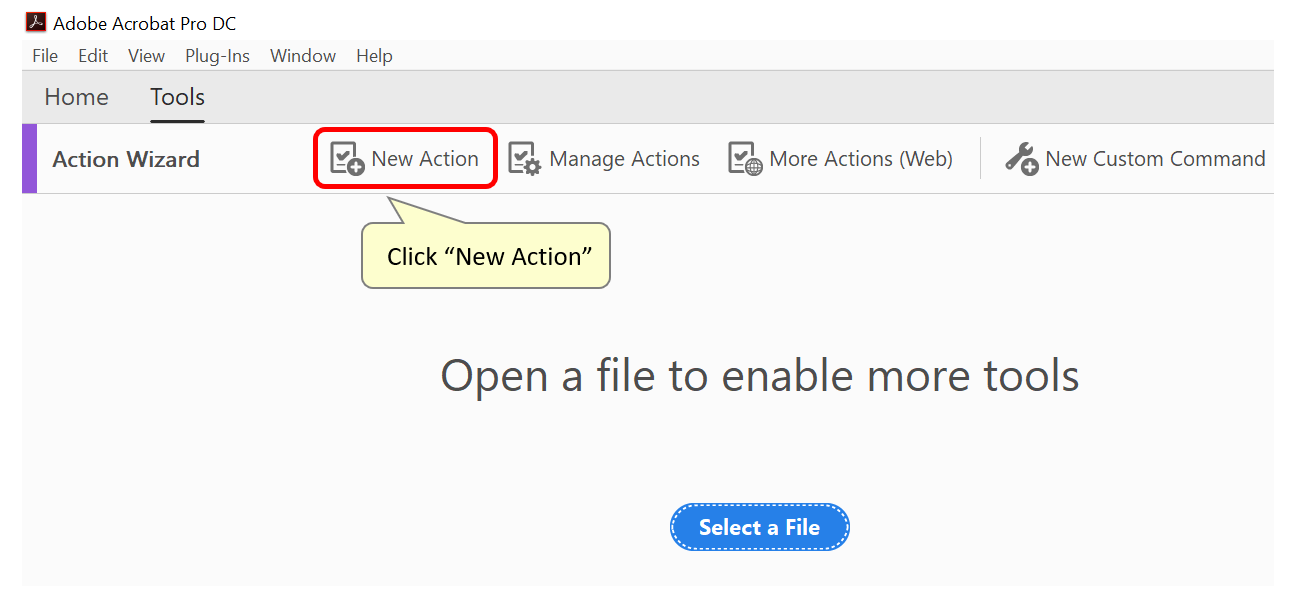
- Step 2 - Create a New "Action"
- If you are using "new" Adobe Acrobat, then click on the "New Action" icon to create a new "action".

- If you are using "classic" Adobe Acrobat, click on the "New Action" icon on the "Action Wizard" toolbar to create a new batch processing "action".
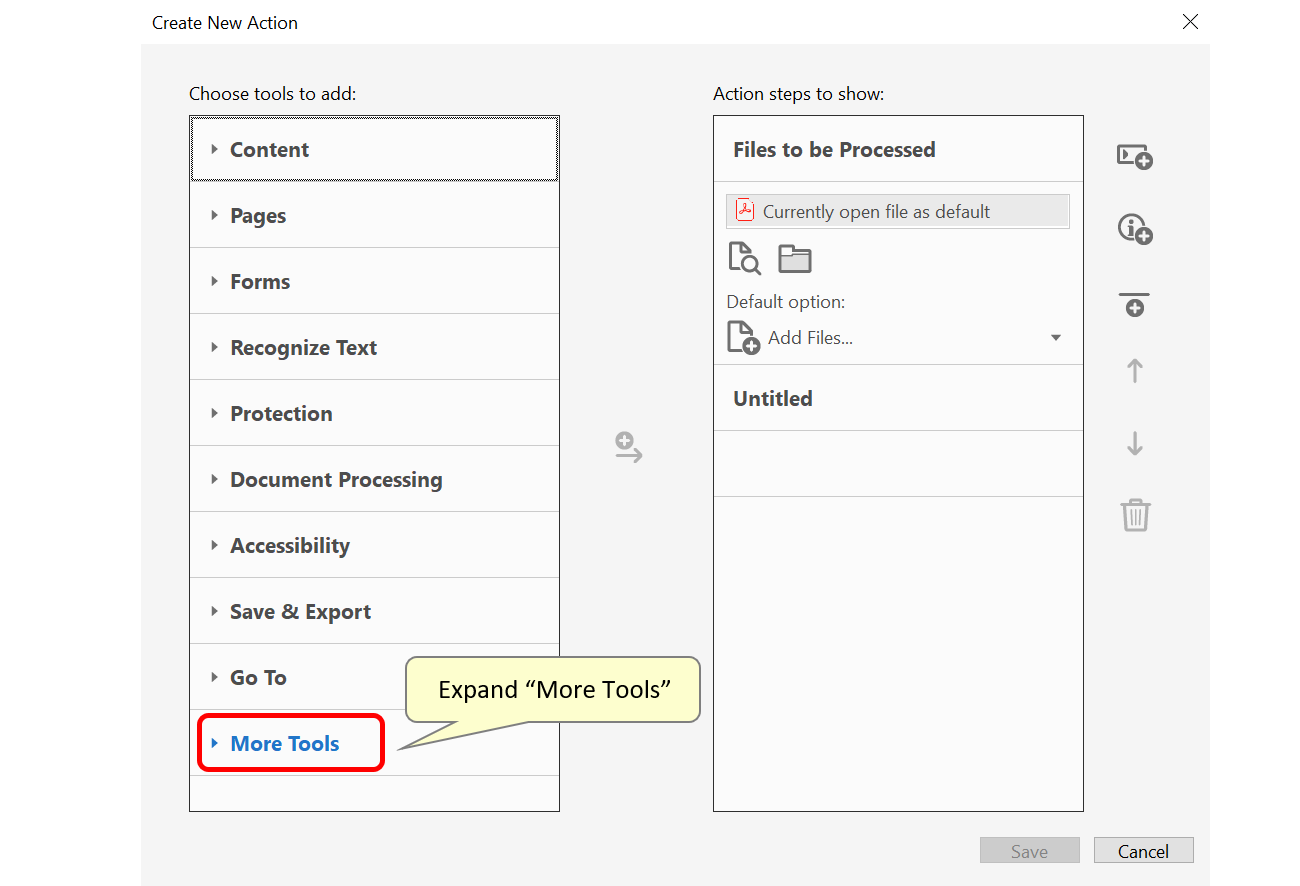
- Step 3 - Expand the “More Tools” Category
- Click on the “More Tools” category to see the list of available commands.
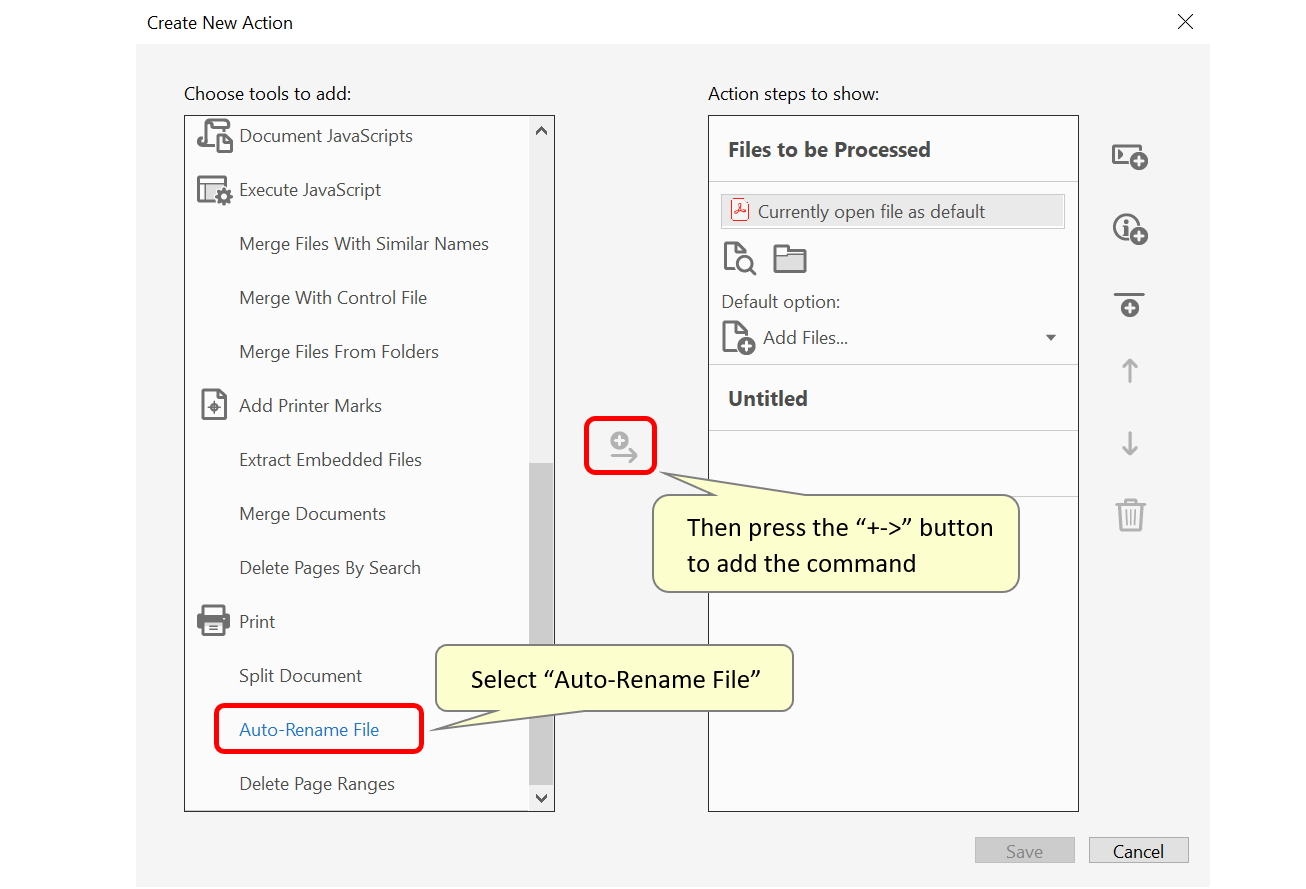
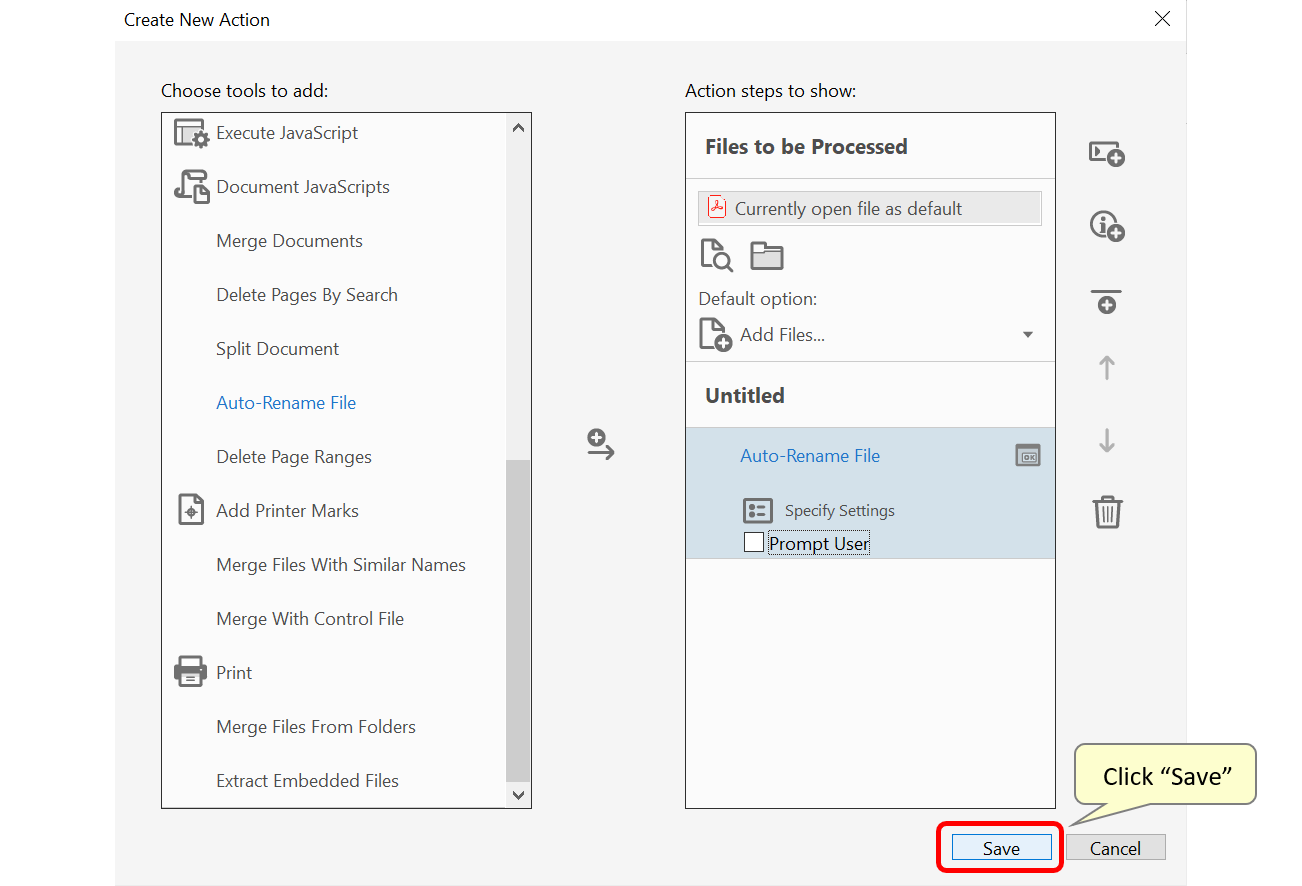
- Step 4 - Add the "Auto-Rename File" Command to the Action Steps
- Double-click on the "Auto-Rename File" command or press the "+->" button to add it to the list of action steps.
- Step 5 - Specify Settings
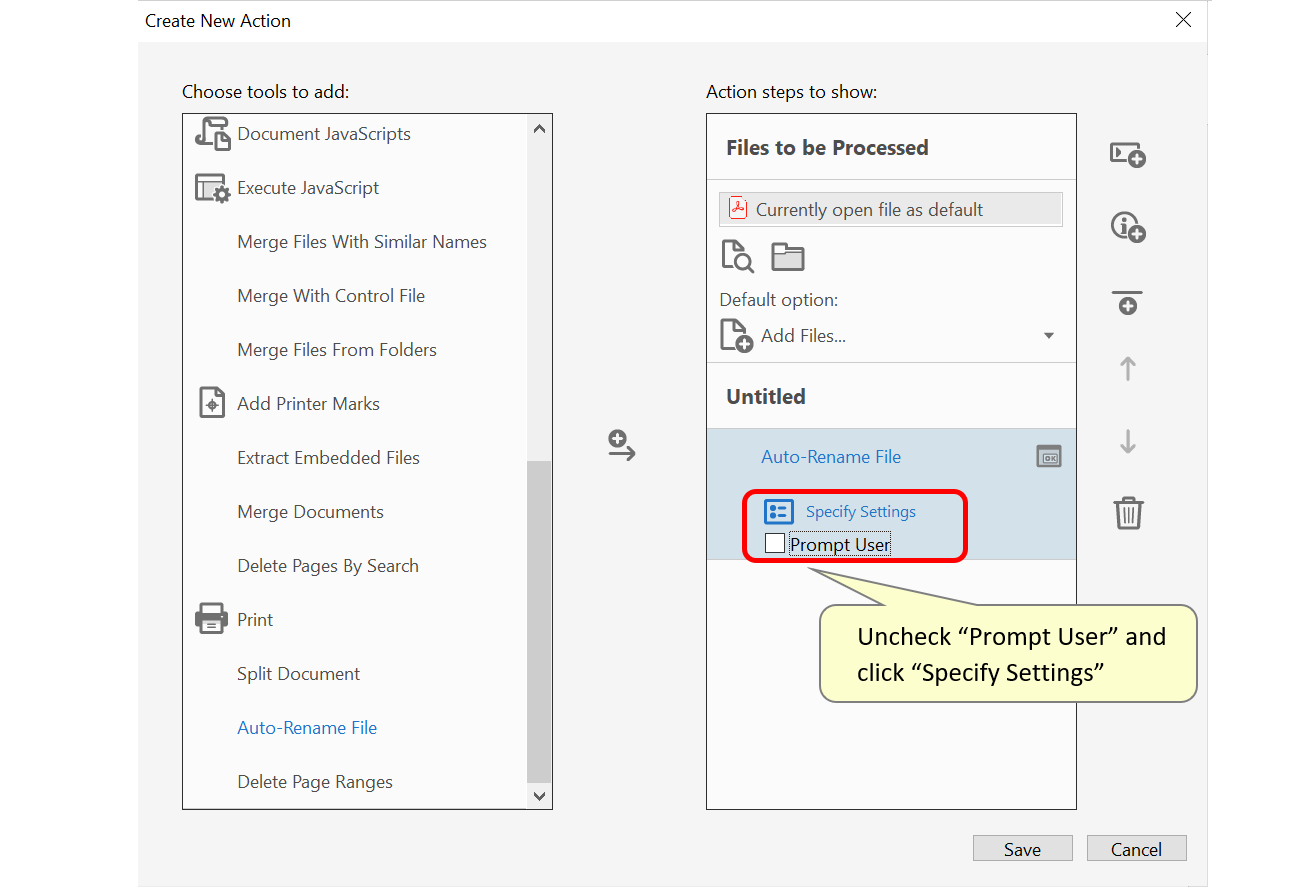
- Uncheck the "Prompt User" option to avoid the command always prompting confirmation of settings when executed. Then press the "Specify Settings" button.
- Step 6 - Configure Renaming Instructions
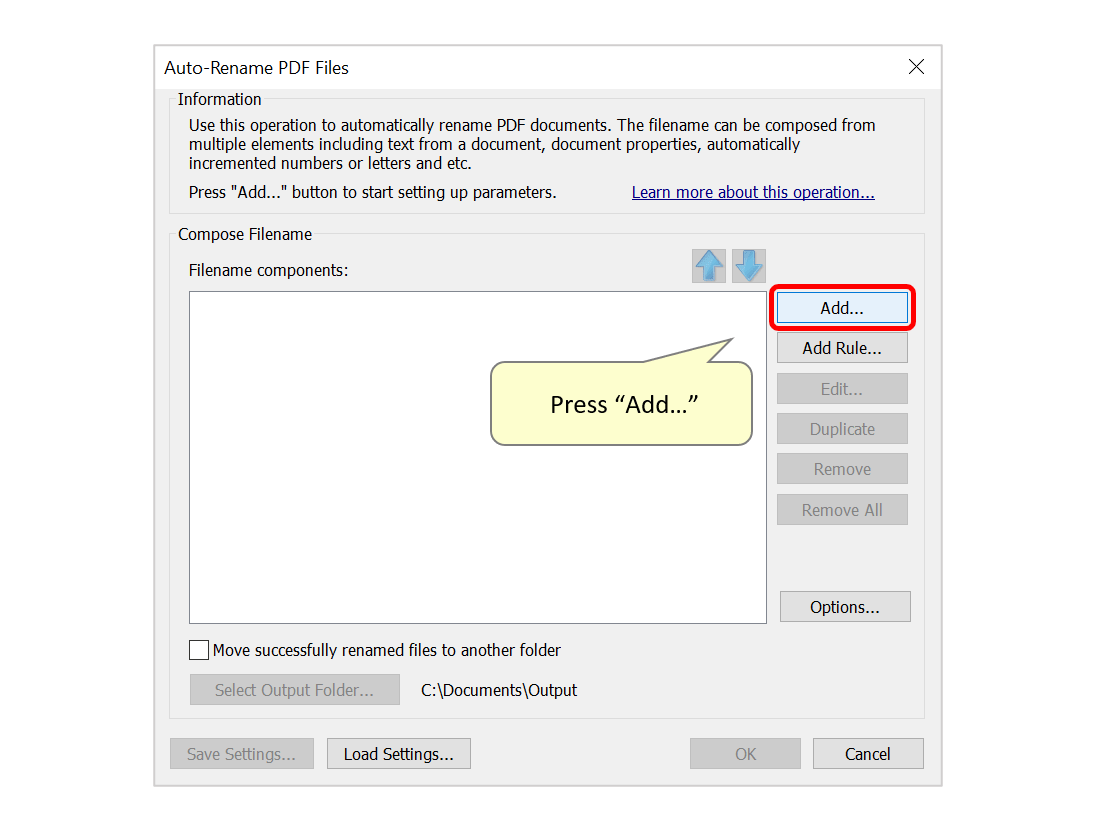
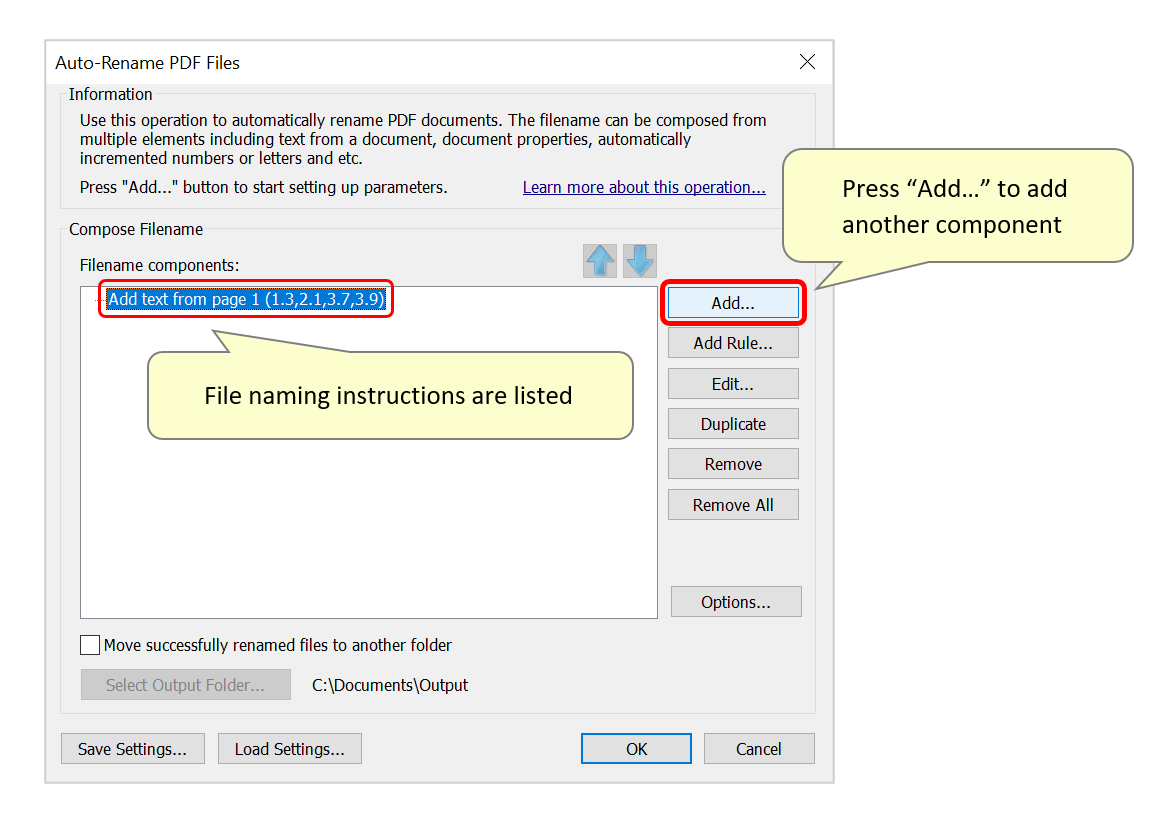
- The "Auto-Rename PDF Files" dialog is used to specify new filename components for files to be renamed.
- Click "Add..." to add a new component to the re-naming configuration.
- Step 7 - Select a Renaming Method
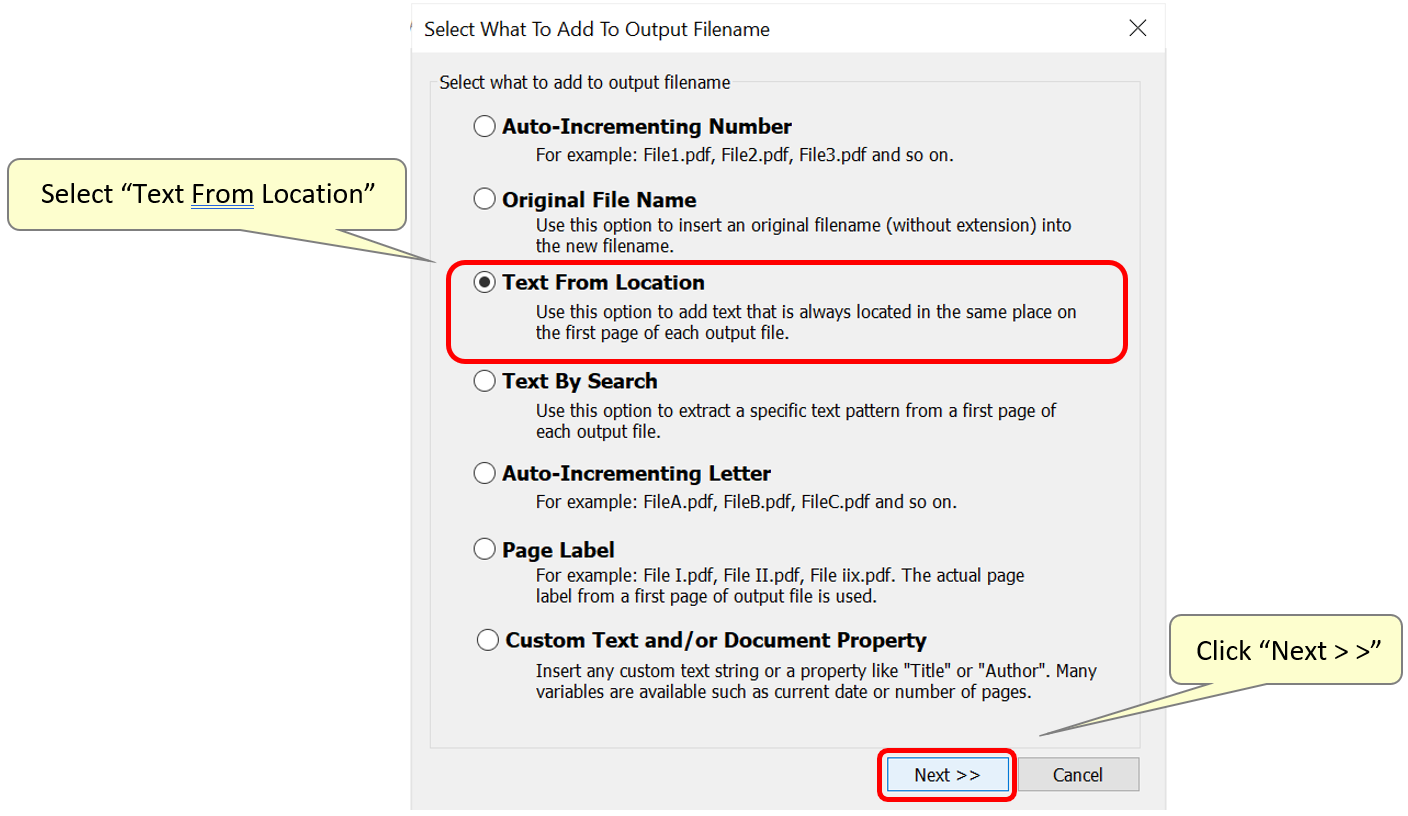
- Select a suitable method for renaming documents according to user requirements.
- In this example, we will rename invoices using text that features within each document. This text must always be located in the same place, and can be anything such as names, dates, or ID numbers etc. To do this, select the "Text From Location" option and click "Next > >".
- Step 8 - Select a Sample PDF
- Press "OK" on the dialog prompting a document selection.

- Select a sample PDF with the same format as all documents to be renamed. This sample document will be used to mark the page location that contains the text for new filenames.
- Click "Open" once done.

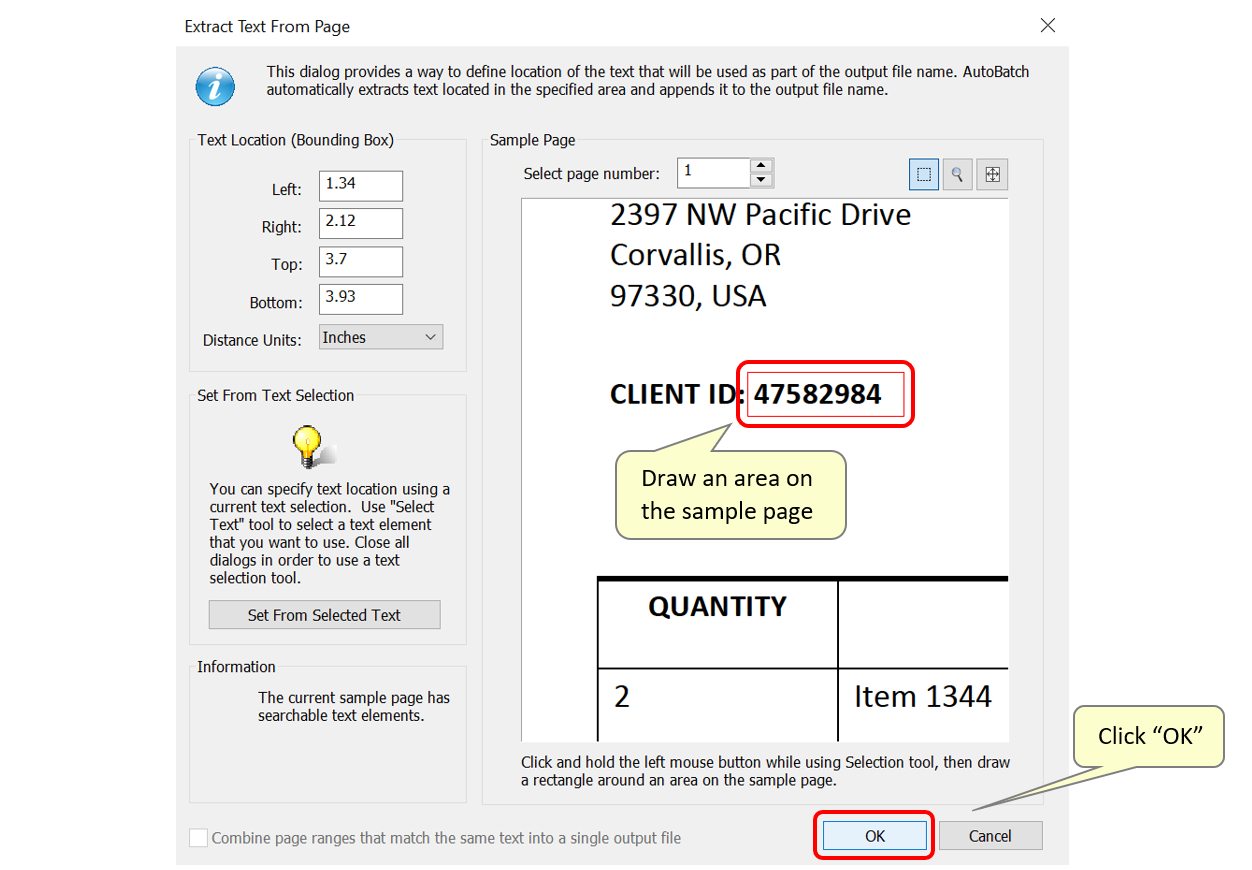
- The "Extract Text From Page" dialog provides an interface for defining an area on the page to extract text from. The user can either type in coordinates (left, right, top, bottom) or use the selection tool to draw an area on the page. Use the "Zoom" tool to enlarge part of the page for a more precise selection.
- In this example, we will use "Client ID" numbers to rename multiple invoices. This sample document has the same format as all documents to be renamed, with the client ID number located in the same place.
- Click and hold the left mouse button whilst using the selection tool, then draw a rectangle around an area on the sample page. All text located here in each document will be extracted and used as a new filename component. Click "OK" once done.
- Step 9 - Repeat the Procedure
- The newly-added file re-naming instruction will be listed in the "Filename Components" list.
- Click "Add..." again to repeat the procedure and add more components.
- Step 10 - Add More Components
- Select a required method from the list. In this example, we'll add some custom text to each filename in addition to the client ID numbers. To do this, select the "Custom Text and/or Document Property" option, and click "Next > >".

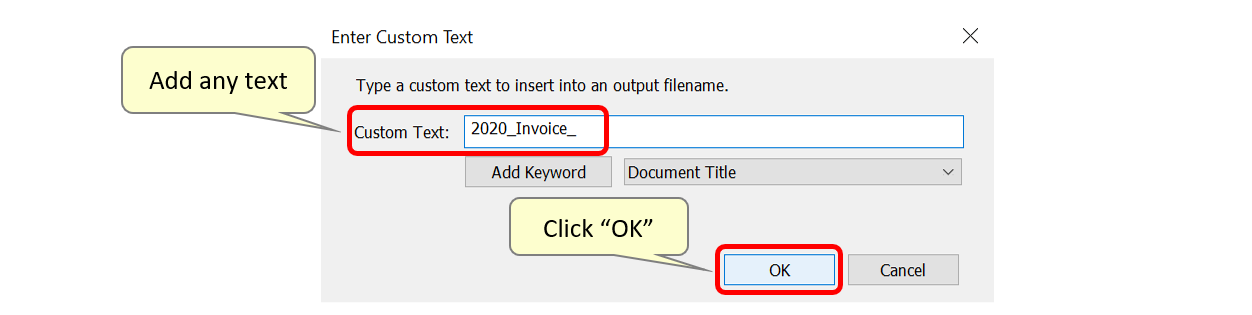
- Step 11 - Enter Custom Text
- Enter custom text into the entry box. Click "OK" once done.
- Step 12 - Edit Output Settings
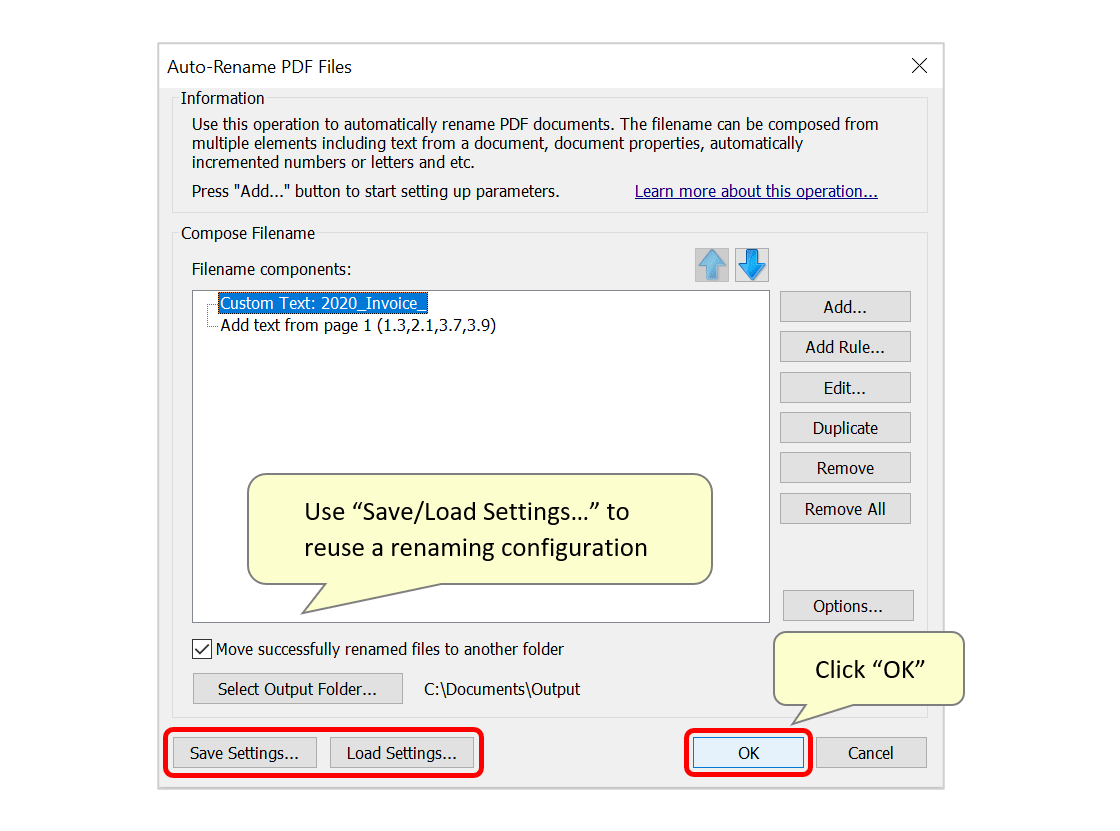
- All new filename components are listed. Select one and use the blue arrow buttons to re-order the components (e.g. : here the custom text will be placed before the corresponding client ID).
- Use the Edit.../Remove/Remove All" buttons to make changes to existing components, or remove them.
- There is also the option to save renamed files in a separate location, instead of replacing existing files. To do this, check the "Move successfully renamed files to another folder" option. This activates the "Select Output Folder..." button. Press it to specify an output folder for the renamed files.

- Step 13 - Save/Load Settings
- Use the "Save Settings..." button to save this configuration as a *.docren settings file for future re-use. This can be loaded via the "Load Settings..." button.
- Click "OK" to proceed.
- Step 14 - Press "Save"
- Press "Save" to proceed.
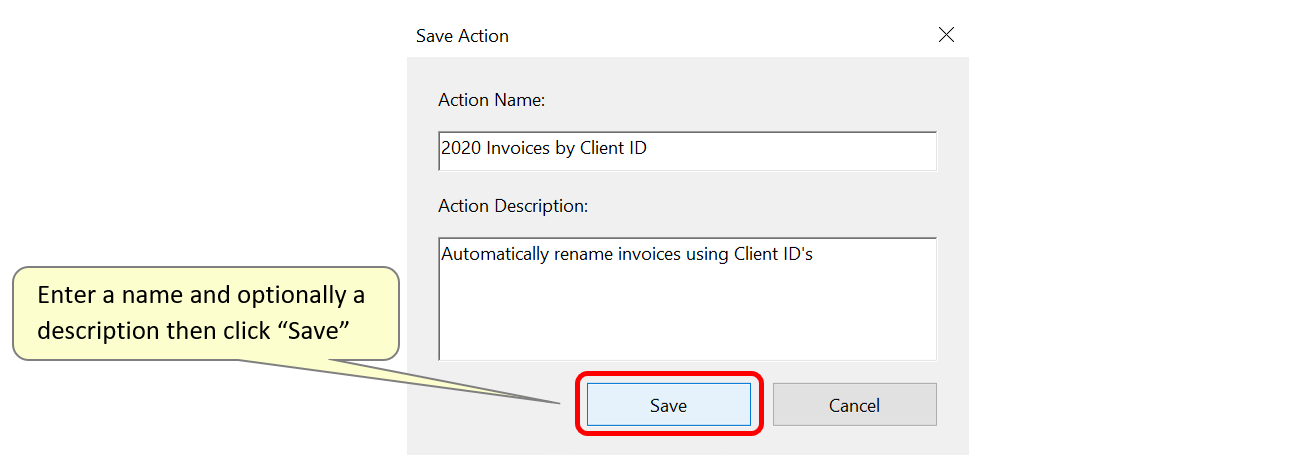
- Step 15 - Add an Action Name and Description
- Type a desired "Action Name" and, optionally, type a description into the "Save Action" dialog.
- Press "Save" to save the action.
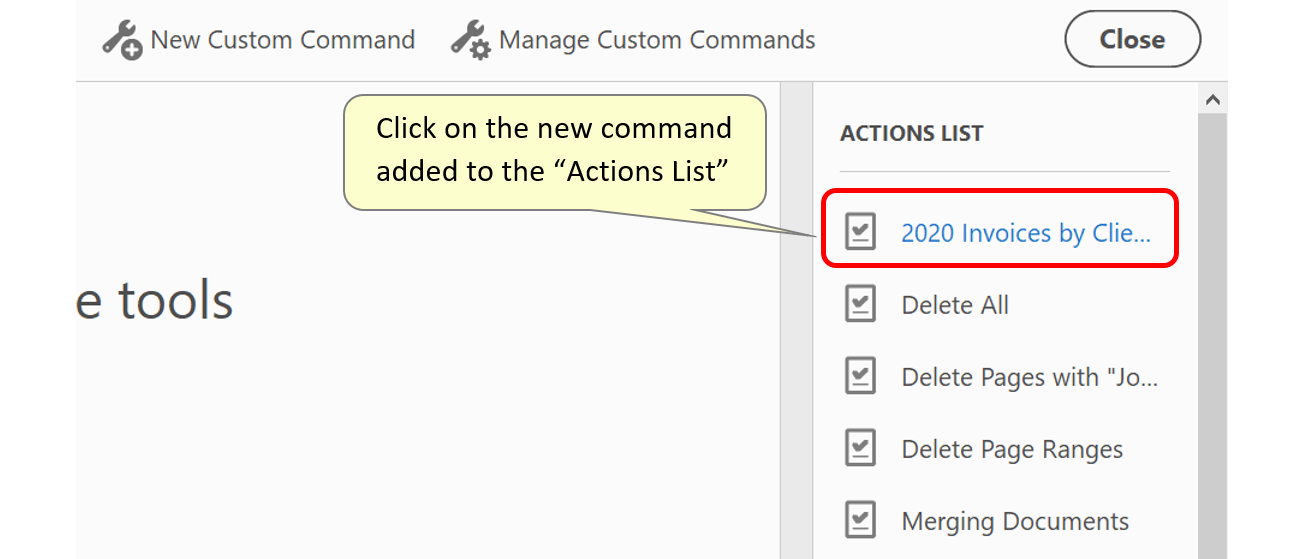
- Step 16 - Using the Action
- This new action will have been added to the "Actions List" in the tool's pane.
- Click on the action to execute it.
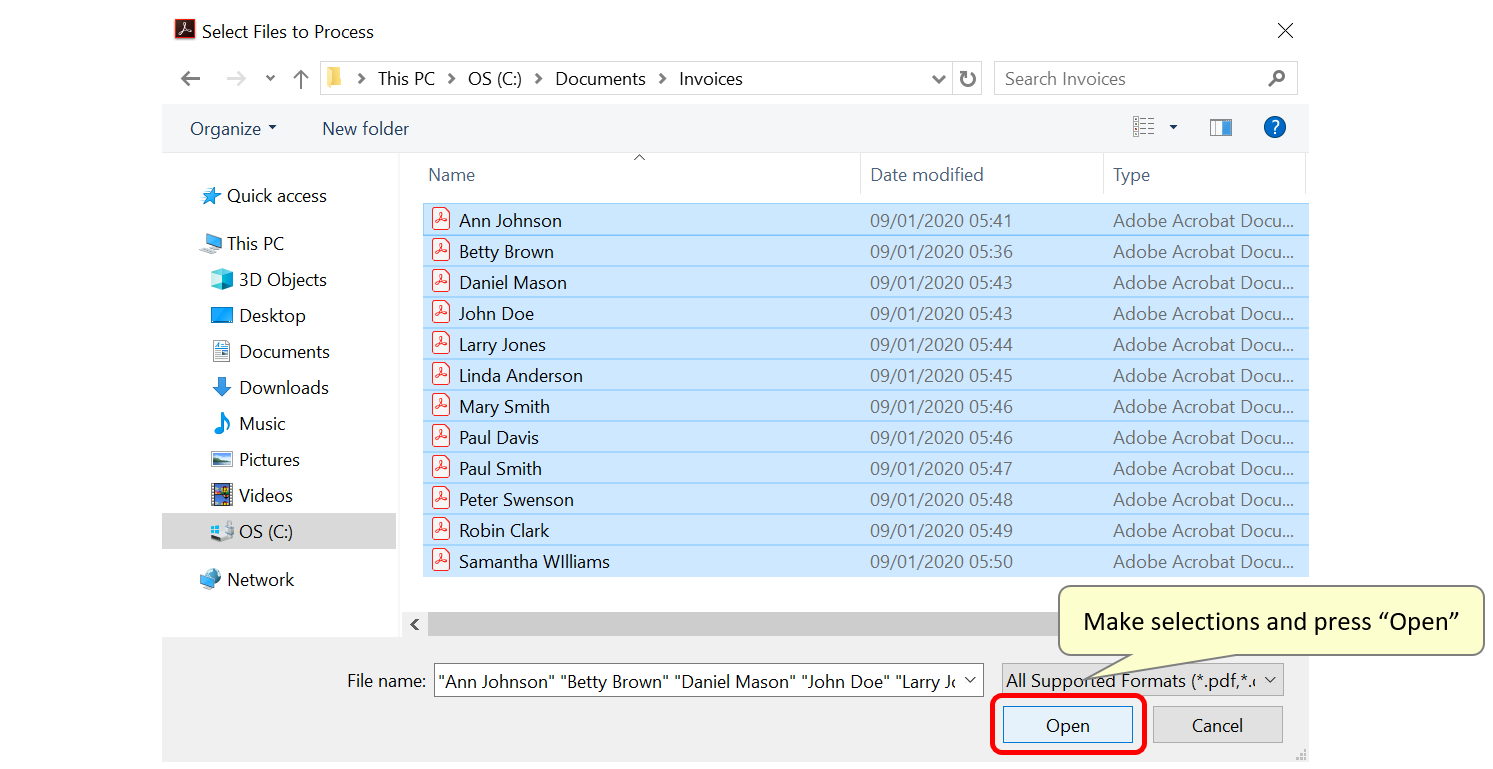
- Step 17 - Add Files to be Renamed
- Use the "Add Files..." button to select files to be renamed using this action.

- Select the required files and press "Open". If necessary, repeat this procedure multiple times to add files from different folders.
- Step 18 - Start the Action
- Selected files will be listed in the "Files to be processed:" box.
- Press the "Start" button to run the action.

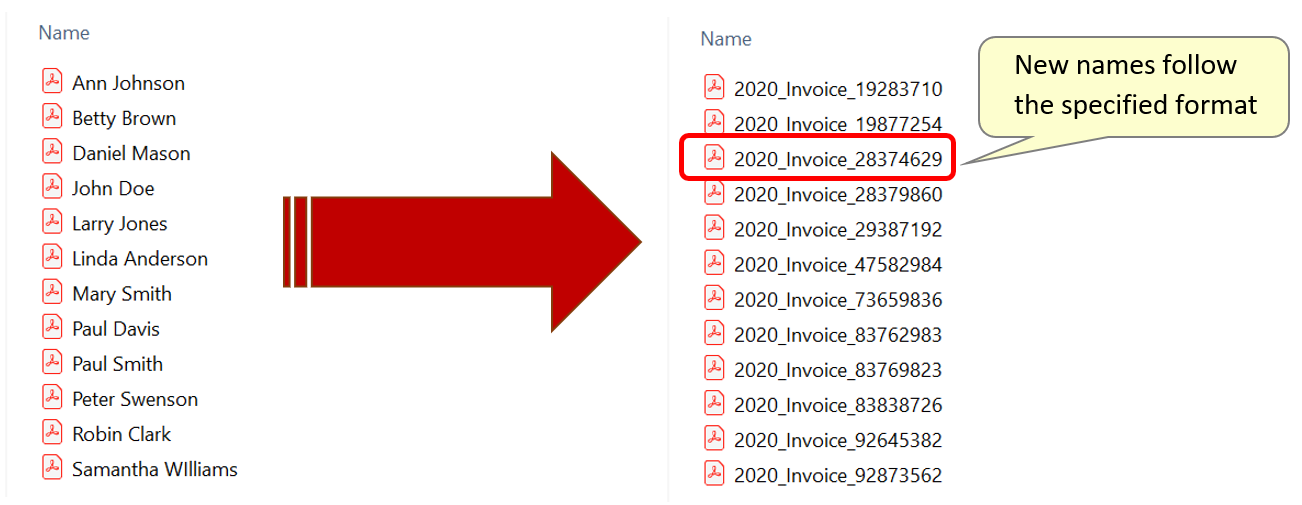
- Step 19 - Check the Results
- Inspect the renamed files - or output files if they have been placed in an alternative folder. They will have been renamed according to the configured settings.
- Renaming Files from a Command-Line BAT File
- Please see the following tutorial on running this operation from a Command-Line BAT file or another application.
- You can find more AutoSplit tutorials here.