Attaching Extra Files to Mail Merge Emails
AutoMailMerge for Adobe® Acrobat®
- Recipient-specific vs Common File Attachments
- The AutoMailMerge plug-in is generally used to perform mail merges that generate personalized PDF forms or documents, which can optionally be emailed to recipients.
- In many cases, however, you may also need to attach additional files to each email. These attachments do not have to be PDFs. Some files may be recipient-specific, such as customer agreements, invoices, or tax documents, while others may be the same for every recipient, such as general terms and conditions or informational materials.
- AutoMailMerge supports two distinct approaches for attaching files to your mail merge emails:
- Common Attachments: To send the same file to every recipient, use the built-in, easy-to-use file attachment selection option.
- Recipient-Specific Attachments: To send personalized files to individual recipients, create a dedicated field in your data source and list the specific file paths for each recipient row.
- Accessing AutoMailMerge Settings
- First, open the PDF form that you want to fill in Acrobat.
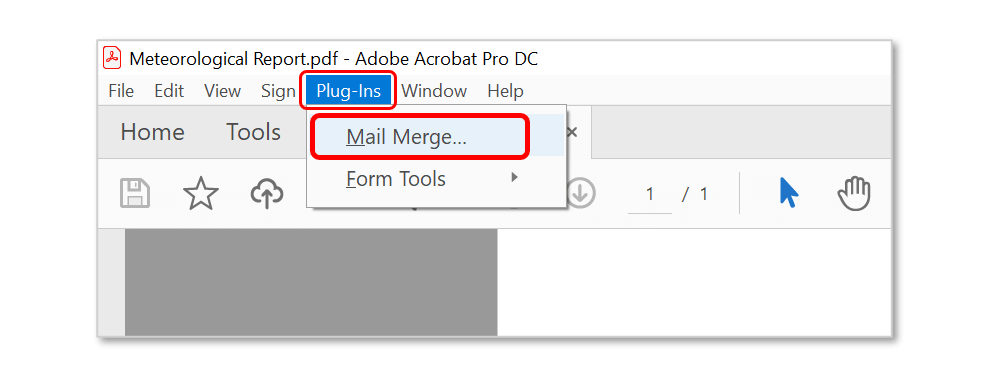
- Select Plugins > Mail Merge… to open the Mail Merge dialog.
- If you are using a new Adobe Acrobat interface, then you can locate Mail Merge menu here:
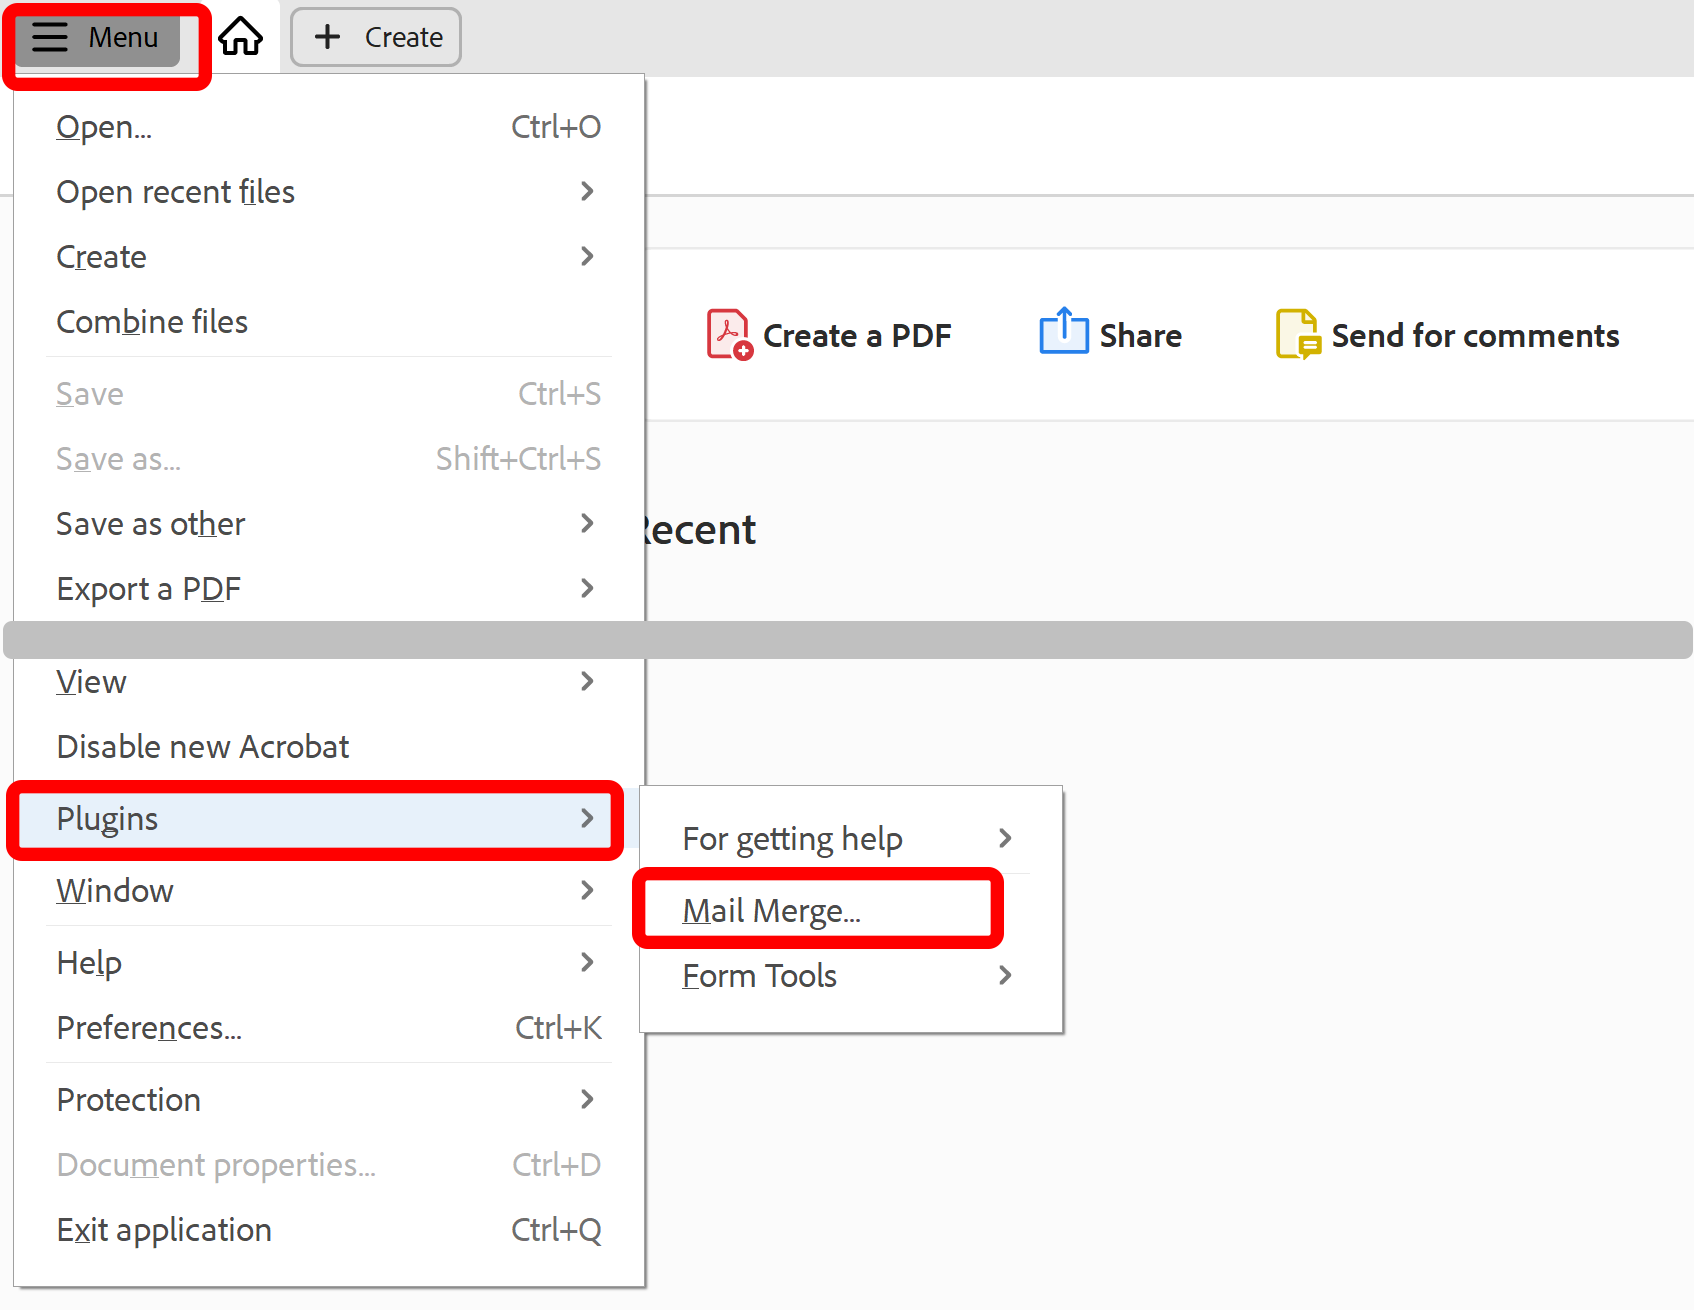
- Please see the following page for a short video tutorial on how to locate Plugins menu in the new Adobe® Acrobat® interface.
- If you are using a "classic" Adobe Acrobat interface (pre-2022), then you can locate Mail Merge menu here:
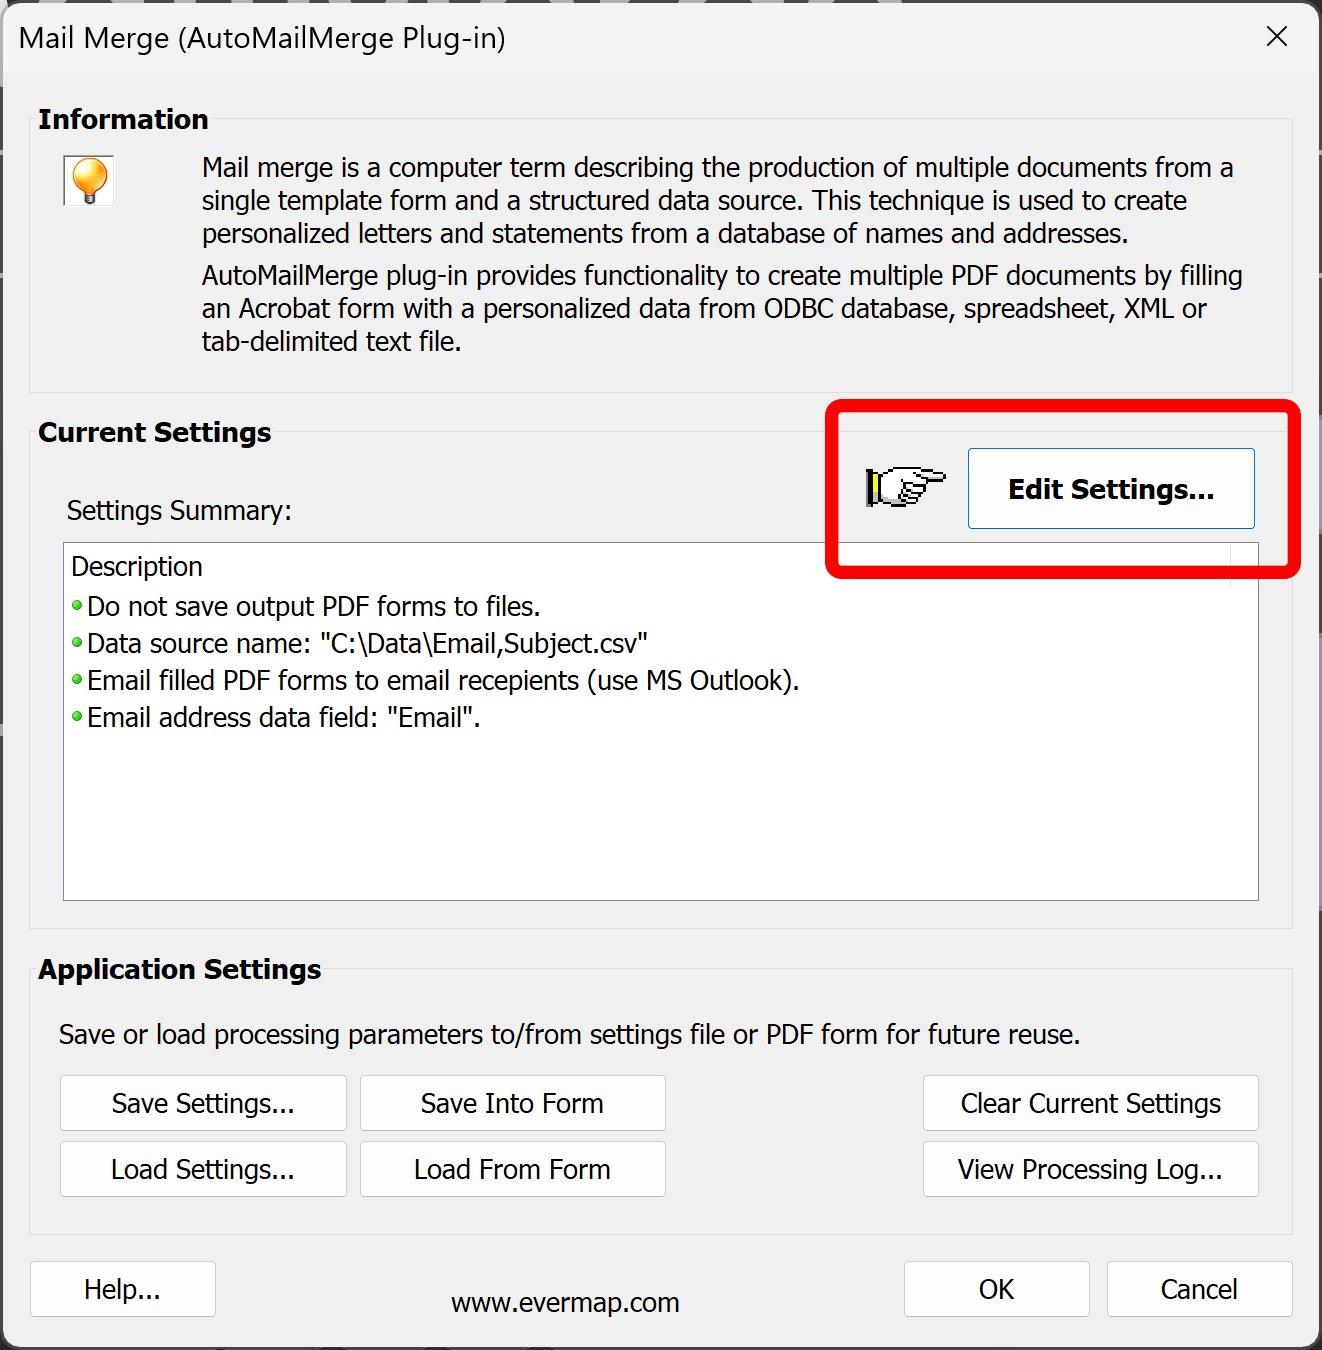
- Press Edit Settings... button. Press Next>> button multiple times until you reach Email Options screen.
-
- Selecting Common File Attachments
- You can select common file attachments by pressing Add/Edit Files... button located at the bottom of Email Options settings screen:
-

- Press Add File... button to select a file. The selected file(s) will be attached to every email processed using this mail merge settings configuration.
-

- Assigning Recipient-Specific File Attachments
- If you need to attach different files for each recipient, then it can be easily managed by using a designated field in your data file or Excel spreadsheet. The field can contain one or more file paths, or it can be left empty when no additional attachments should be sent to a particular recipient.
- To specify the attachments, enter the full path to each file in the designated field. If multiple files need to be attached, separate their paths with a semicolon (;).
-
For example:
C:\Documents\Customer_397071.pdf;C:\Documents\EULA.pdf - Finally, in the AutoMailMerge processing settings, select this field as the **field containing extra file attachments**. During the mail merge, AutoMailMerge will use the file paths specified for each recipient and attach the corresponding files to their email.
- Create a column in the Excel spreadsheet (of a field in the database table) that you are using for the mail merge. In this example, we have created a column named Attachments. Note that the first row in the spreadsheet contains field names.
- Enter full paths to the file attachments into this column for each recipient. Use copy/paste to speedup data entry. Use semi-colon when entering more than one file. The screenshot below shows that each recipient gets two files. First file is different for each recipient while the second file is the same.

- Select this data field (Attachments in our example) in the Email Options settings screen:
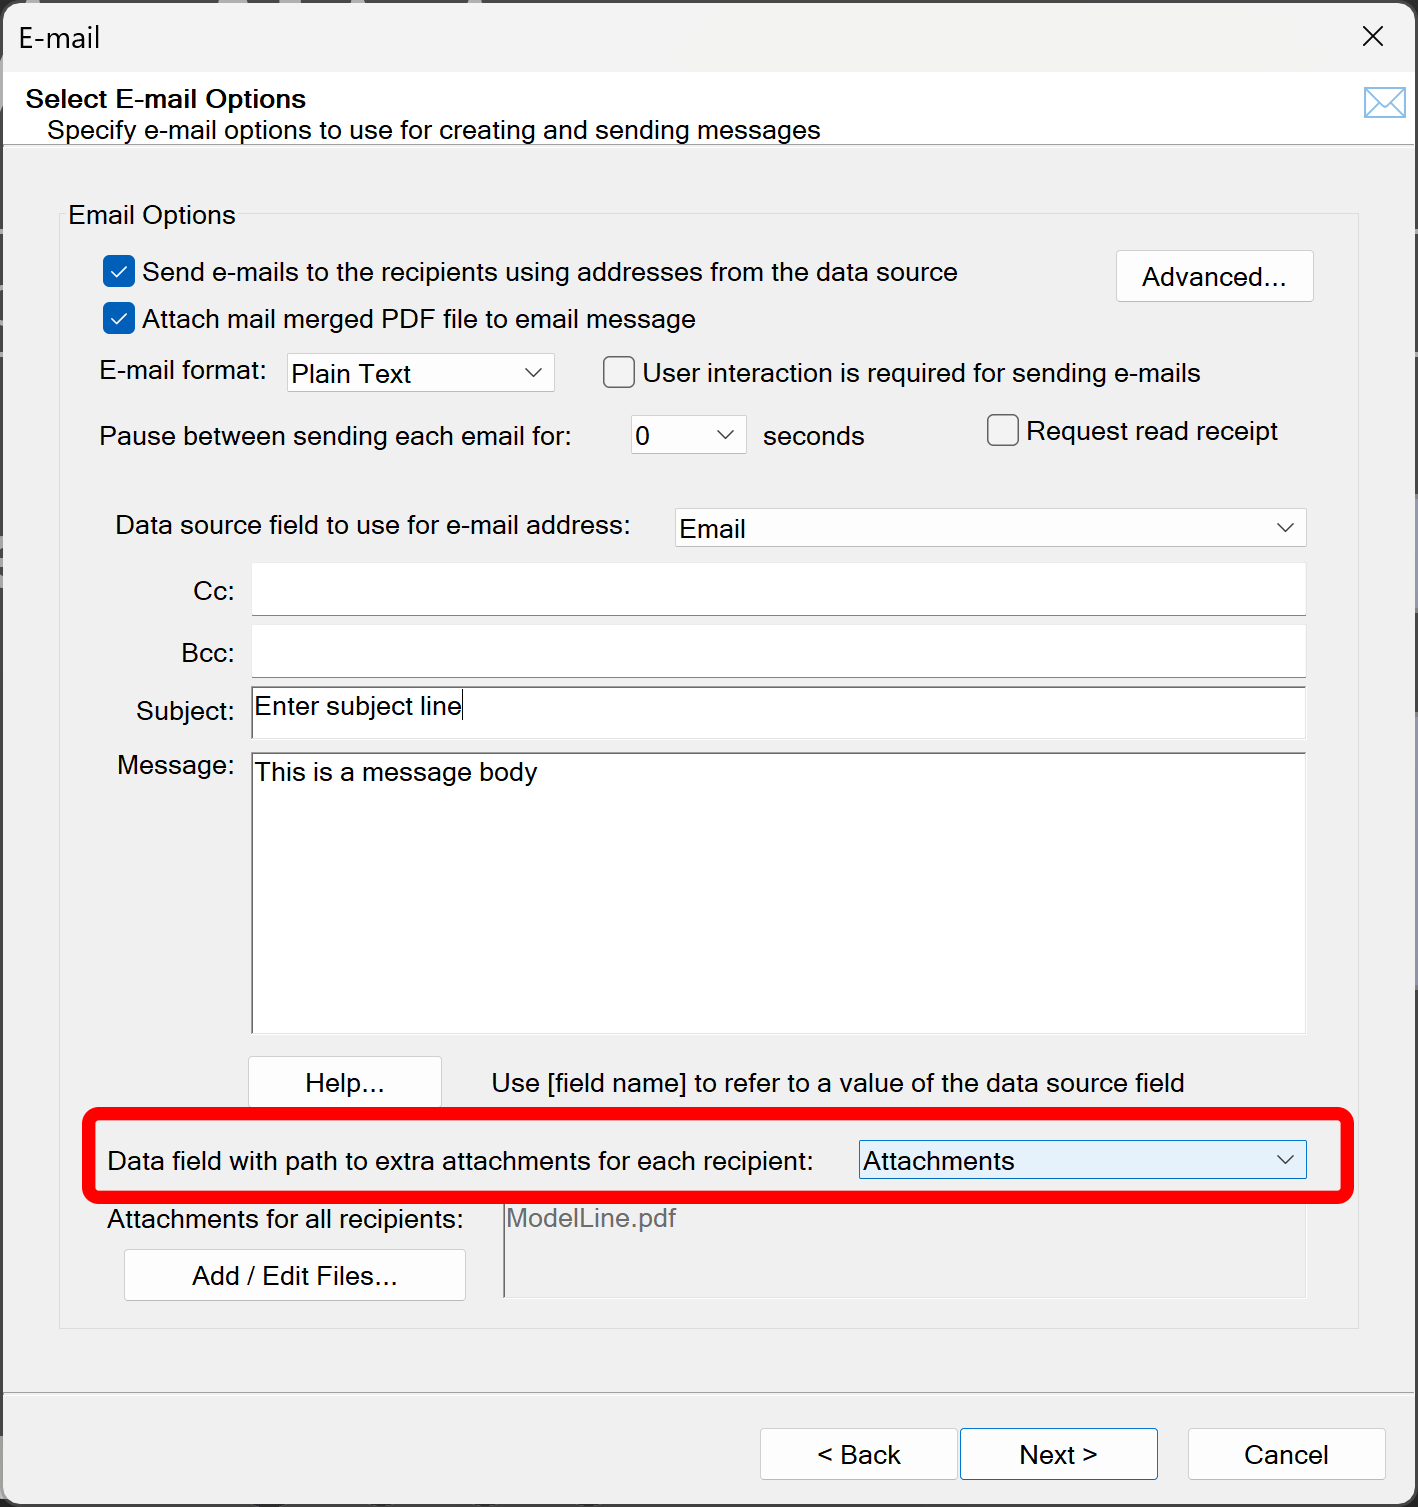
- Each recipient will get the files listed in the data field and all common file attachments.