Using a Keyword-to-Password Mapping Table to Password-protect Emailed Attachments
- Introduction
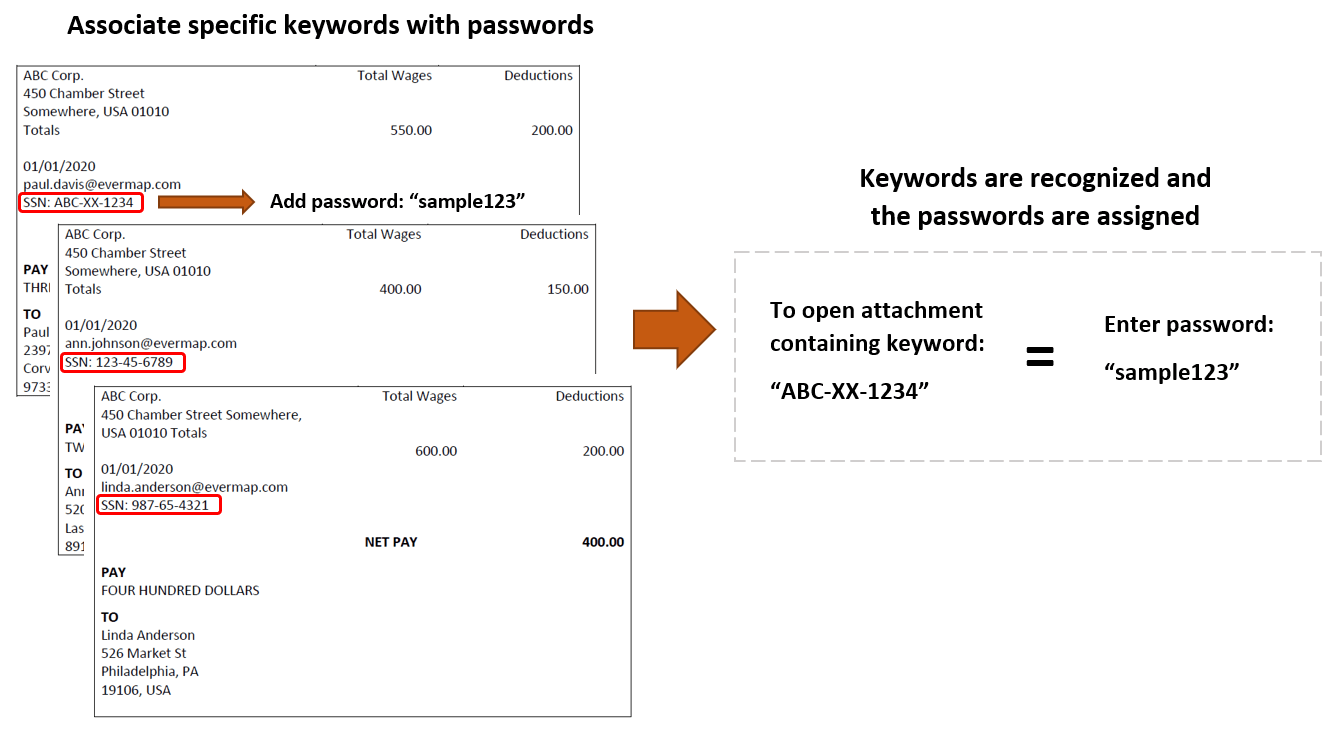
- This tutorial demonstrates one way to password-protect email attachments sent using the AutoDocMail™ plug-in. This method works by associating unique keywords that feature within documents, with user-specified passwords. This creates a set of passwords linked to each file, known as a keyword-to-password 'map'. The plug-in recognises these keywords, then encrypts each document with the corresponding password before sending it. It also means that the PDF documents do not need to be modified in any way.
- This configuration can then be saved so that similar files that are repeatedly emailed to the same recipients (weekly/monthly etc.) can be opened with the same password. For example, documents sent that contain the same social security (or any unique identification number), will always be encrypted with the same password as this ID number is extracted as a ‘keyword’.
- Sample Documents Description
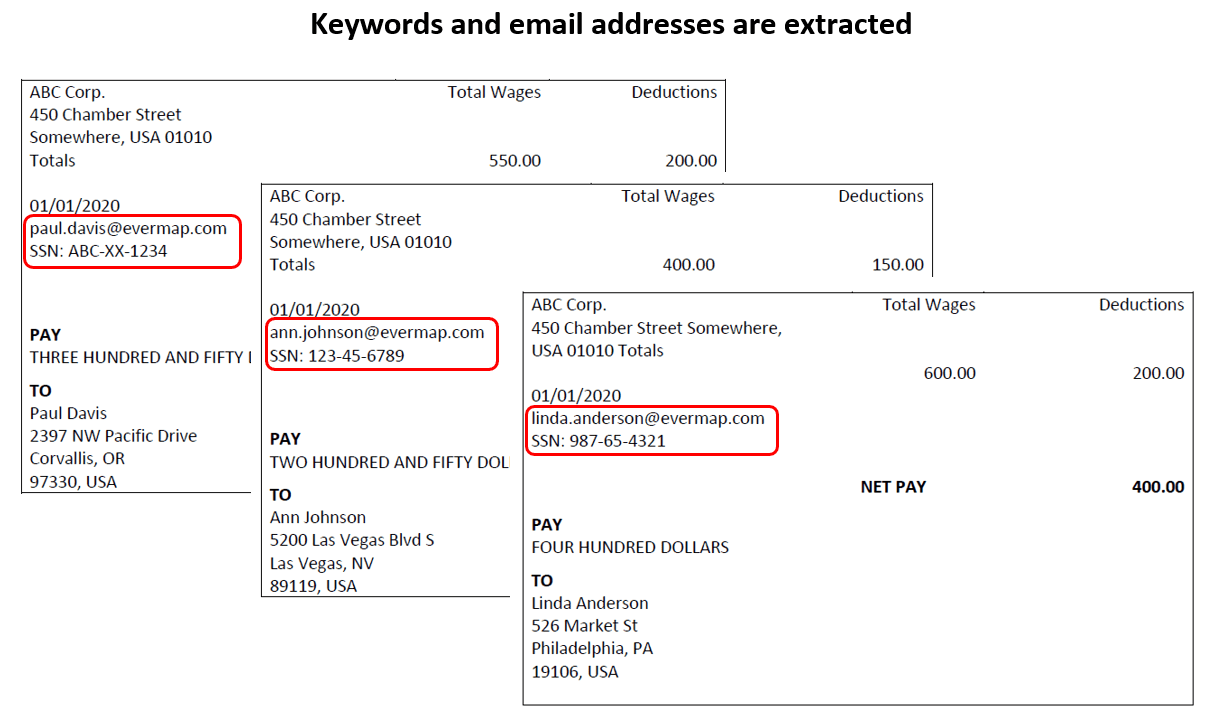
- The documents being distributed in this tutorial are single-page PDF pay stubs, combined into one source PDF file. The plug-in will split this into separate files to be emailed to the email address that features in each one. Each pay stub contains a sample social security number. These unique numbers will be identified as 'keywords' and will be mapped to specific passwords via the 'keyword-to-password' map. Passwords will be assigned according to the keywords present.
- Prerequisites
- You need a copy of Adobe® Acrobat® (Standard or Pro) along with the AutoDocMail™ plug-in installed on your computer in order to use this tutorial. Both are available as trial versions.
- Step 1 - Open the "Auto-Email Documents" Dialog
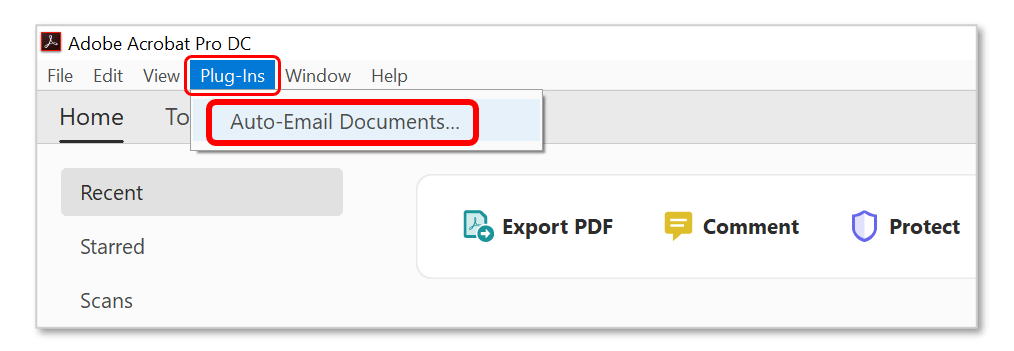
- Start the Adobe® Acrobat® application. Now select “Plug-ins > Auto-Email Documents…” from the main Acrobat menu.
- Step 2 - Open the Email Settings
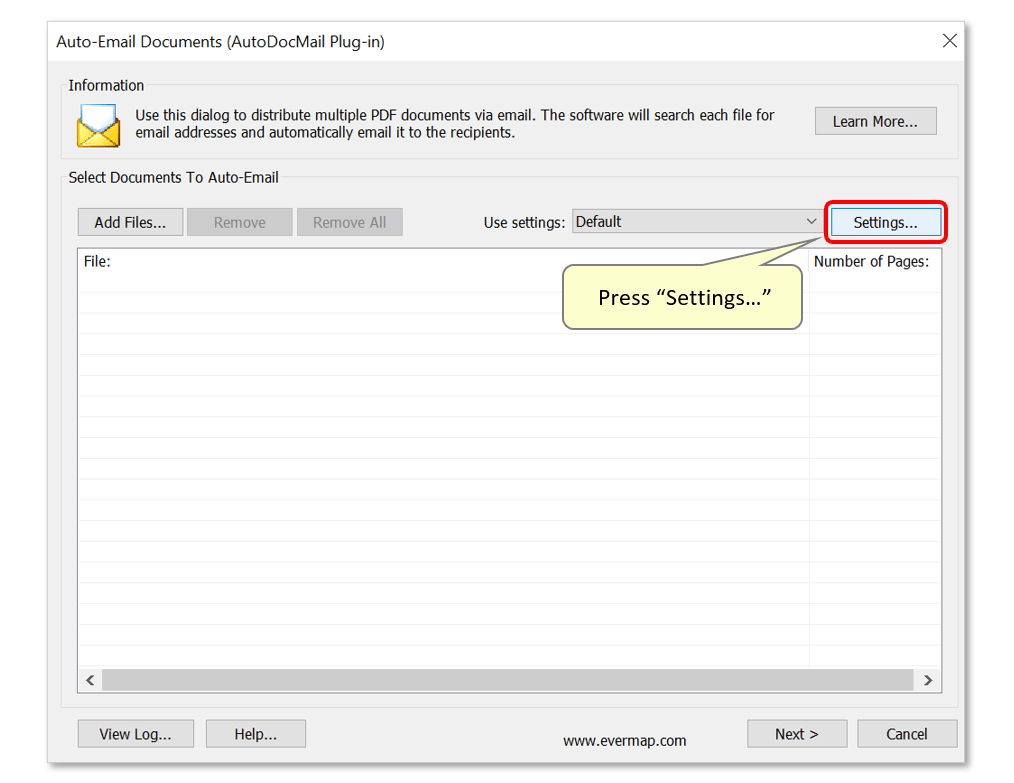
- In the "Auto-Email Documents" dialog, press the "Settings..." button.
- Step 3 - Edit Settings
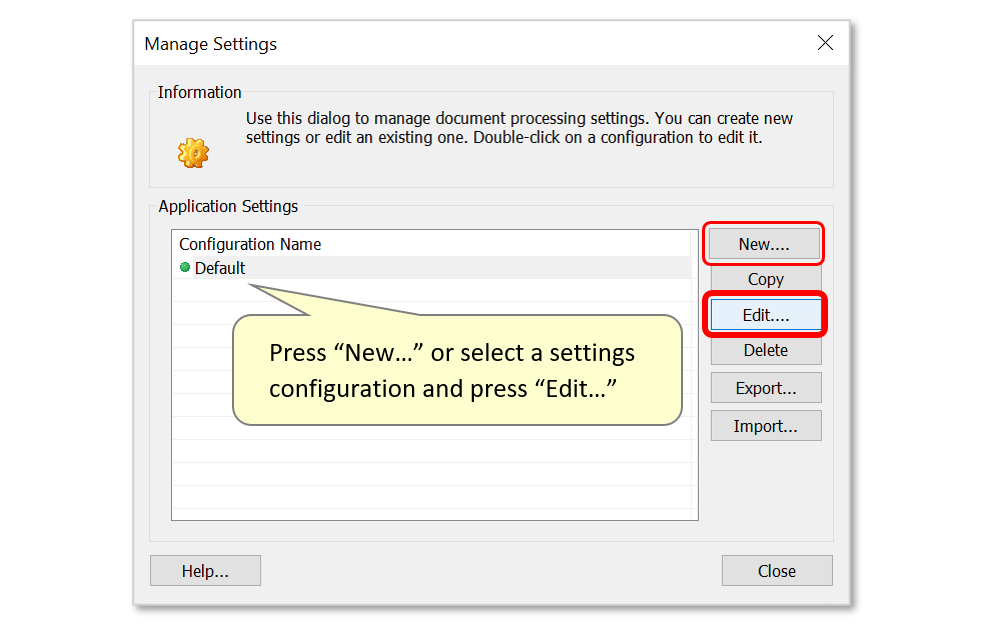
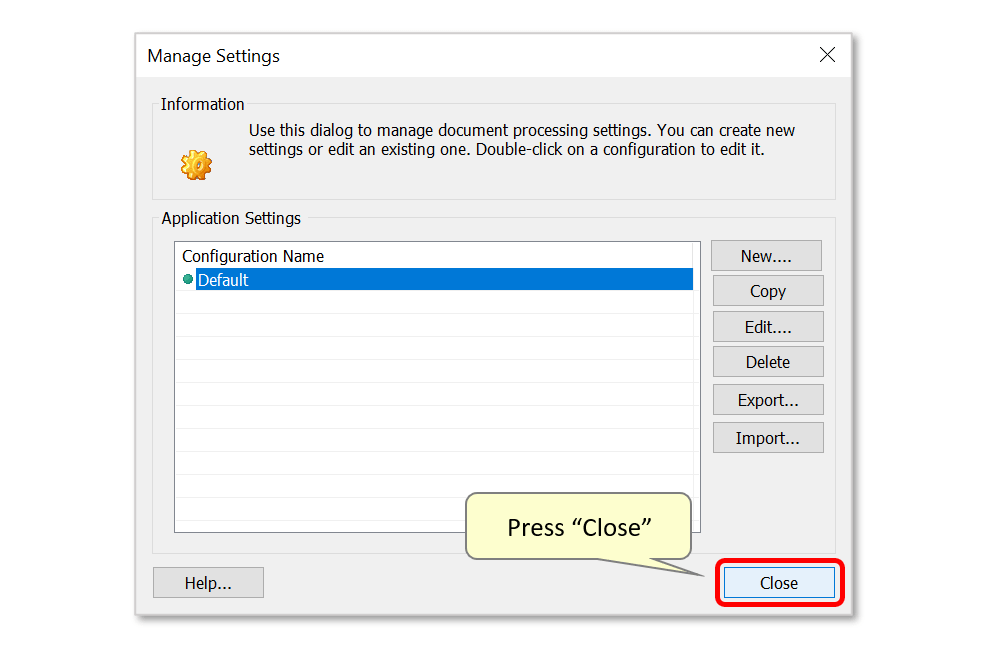
- This opens a dialog showing a list of saved settings configurations. Either click the “New…” button to configure new settings, or double-click on “Default” settings to modify these. The default settings can also be changed by selecting "Default" and pressing the "Edit..." button.
- Step 4 - Configure Required Settings
- This tutorial will focus on password-protecting emailed attachments. Click here for more detail about configuring general AutoDocMail™ settings.
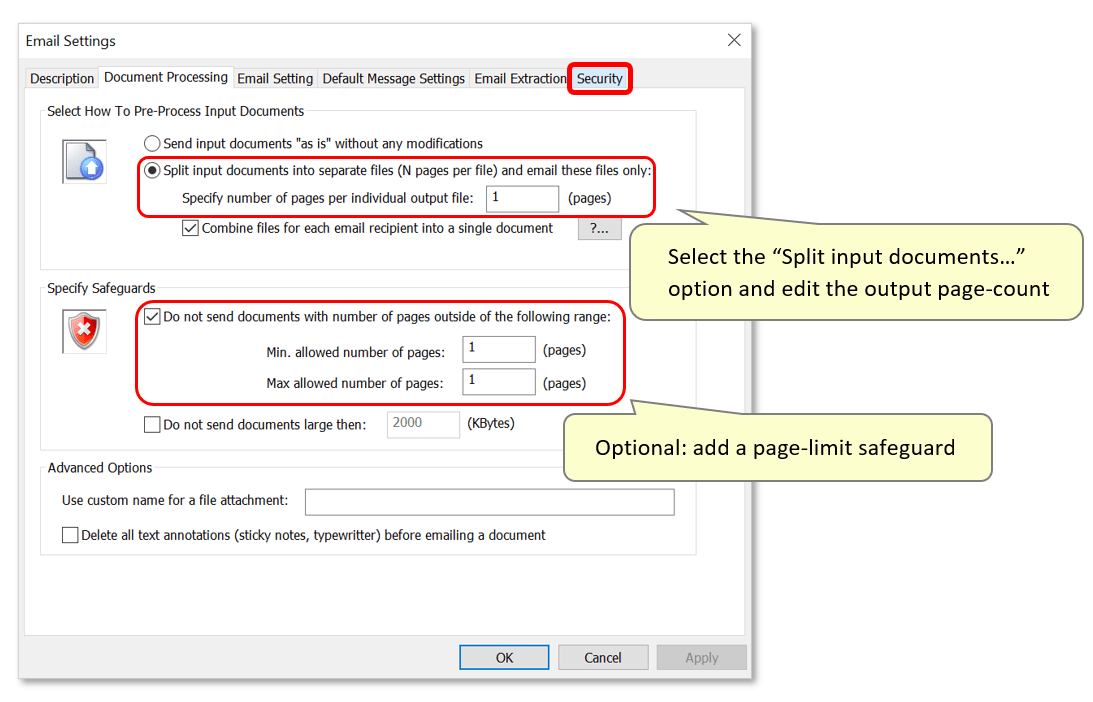
- In this example, we will be sending individual PDF attachments to multiple recipients. The plug-in is used to 'split' a source file containing all pay stubs combined as one file. To instruct the plug-in to do this, some settings must first be configured. Proceed to the "Document Processing" tab by selecting it in the settings bar.

- Ensure that the "Split input documents into separate files..." option is checked. Optionally specify a number of output file pages in the entry box below. In this example, single-page documents are being sent ("1"). The user can also set an additional safeguard using the settings below to ensure that documents of a specific length are emailed to recipients. (If you are sending documents that are already separated for each recipient, simply leave the "Send input documents ‘as is’…” option selected).
- To access the security settings for creating passwords, open the "Security" tab.
- Step 5 - Open 'Keyword-to-password' Settings
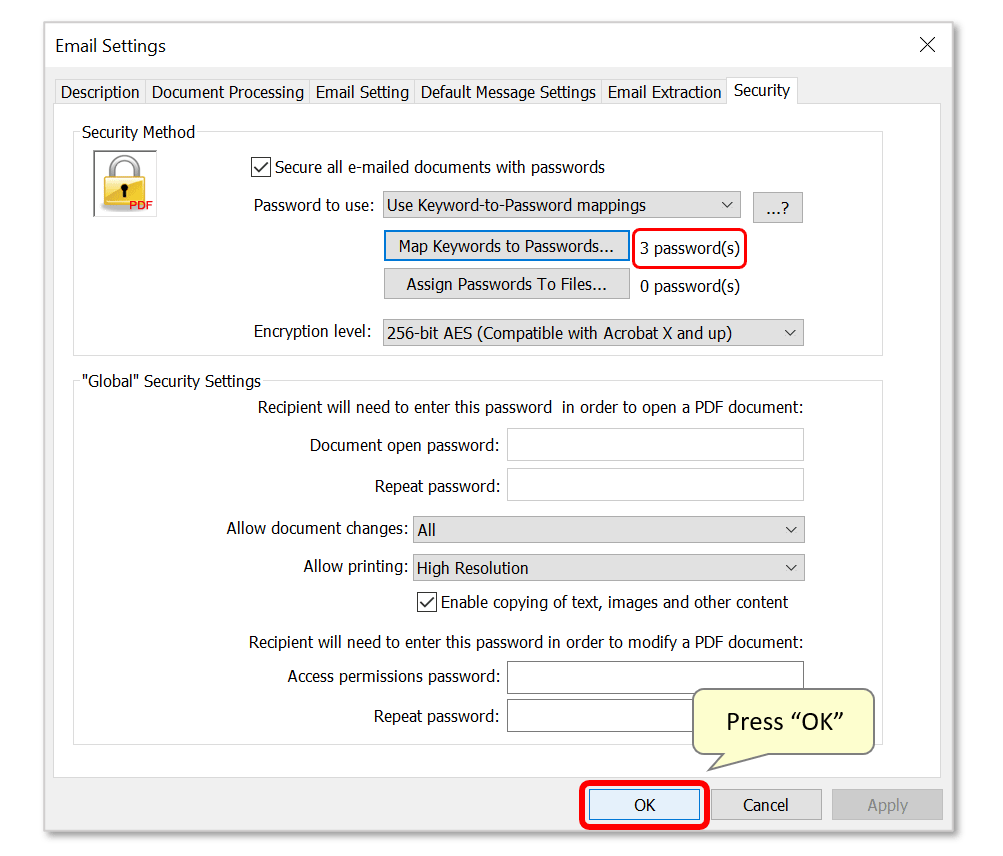
- On this screen, check the “Secure all e-mailed documents with passwords” option, and select “Use Keyword-to-Password mappings” from the drop-down list below.
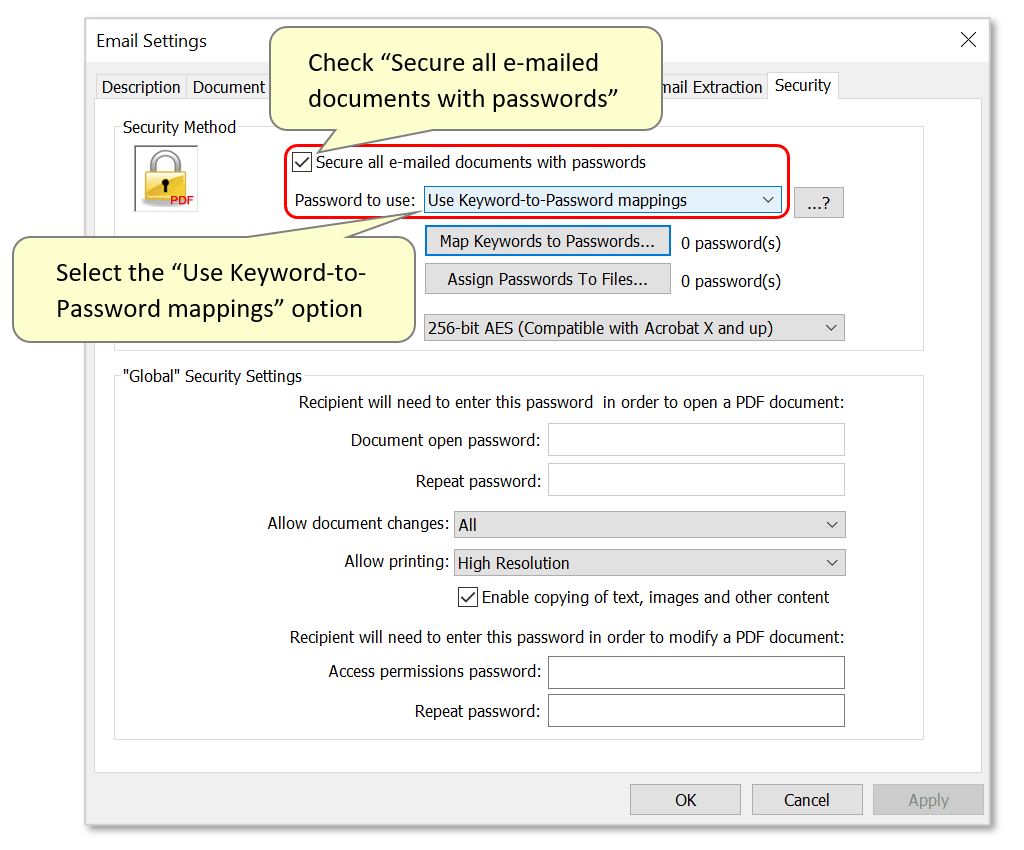
- Now press the “Map Keywords to Passwords…” button.

- Step 6 - Map Keywords to Passwords
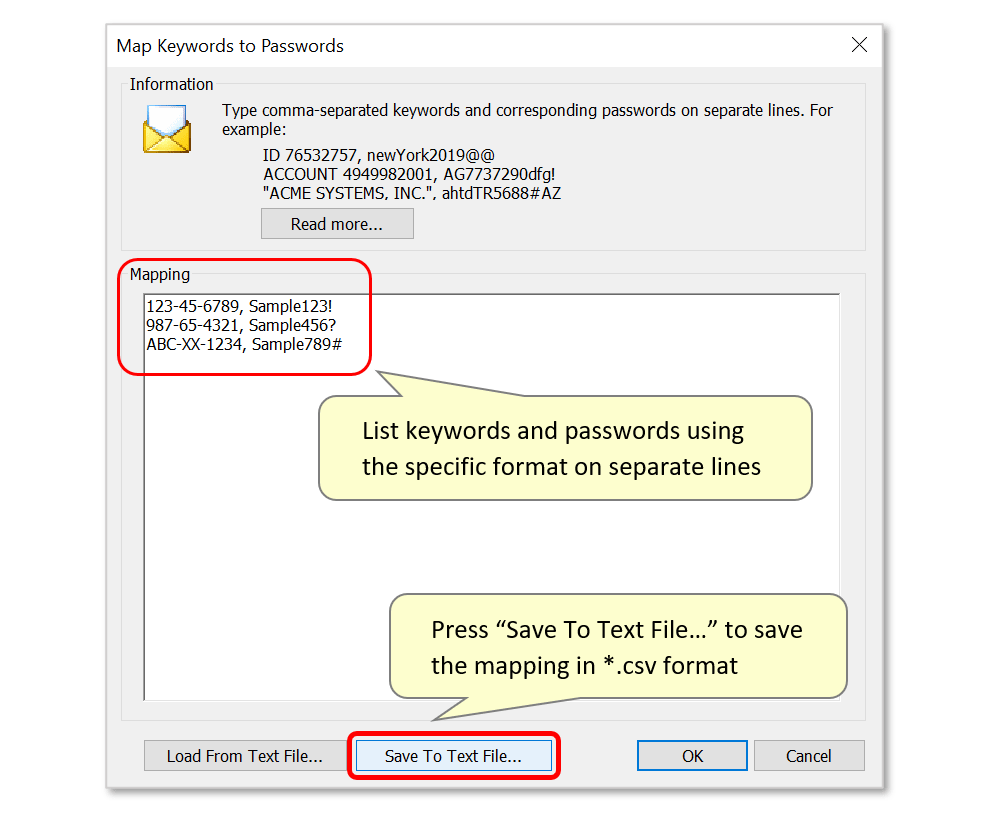
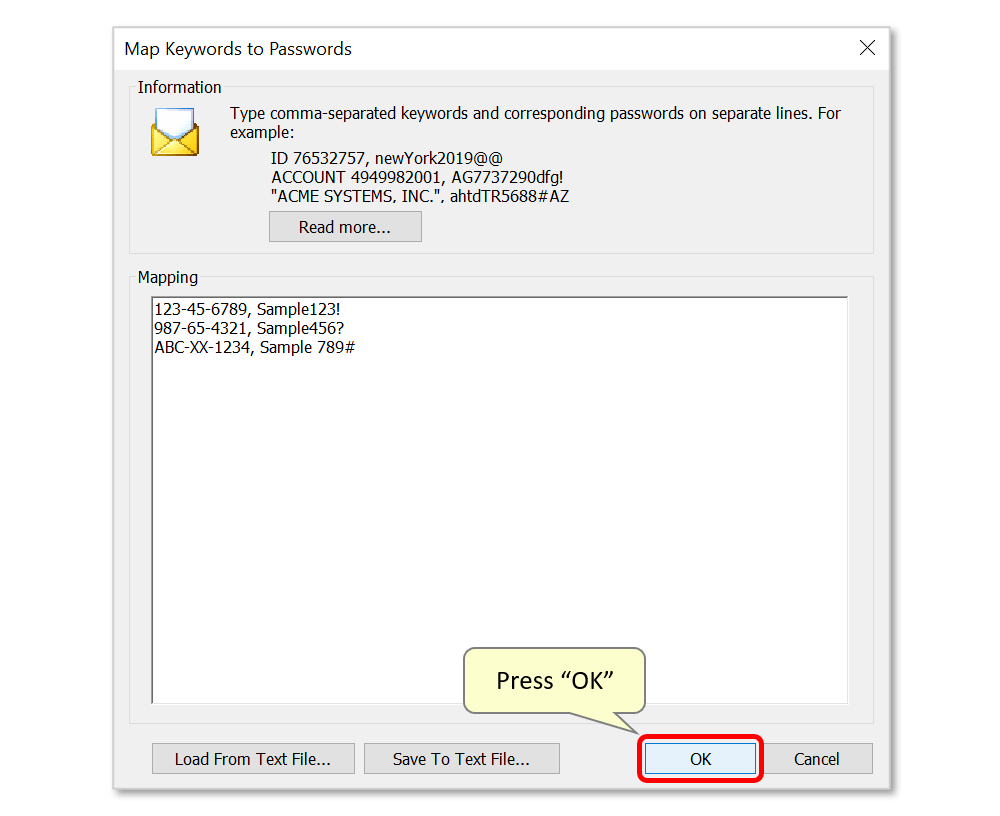
- Use this screen to create the mapping table, by adding entries one-per-line. These associate files containing each keyword with a specific password. Type the required keyword(s), followed by a comma, followed by a suitable password. In this example, the three social security numbers (SSNs) are entered, followed by a sample password to be assigned to each file.
- For the passwords, consider using a combination of lower and upper case letters, digits, and symbols (@!#$%^&*?) to strengthen them. The most reliable passwords are at least 8 characters long - these examples are simplified for clear demonstration.
- IMPORTANT: Do not use comma's in either the keywords or in passwords, as they may conflict with the software's ability to identify the correct data.
- Optionally press "Save to Text File..." to save this mapping configuration in *.csv format. This could later be loaded via the "Load from Text File..." button to use the same mapping under a different AutoDocMail settings configuration - or be given to another user to process documents in the same way.
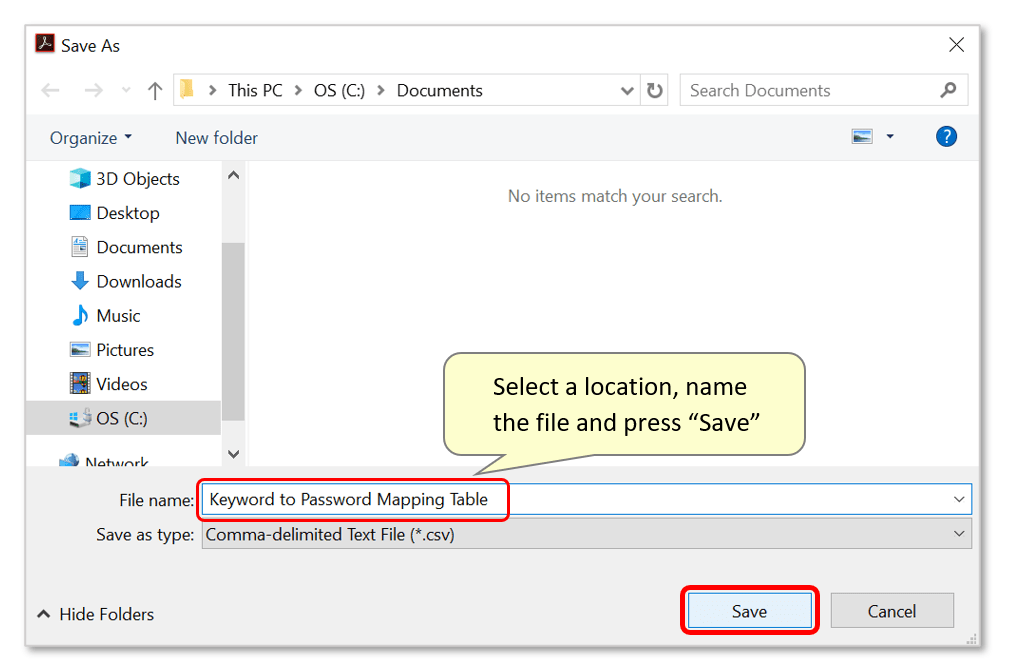
- Select a suitable location to save this file. Optionally edit the default file name "Keyword to Password Mapping Table" before pressing "Save".
- Step 7 - Save and Exit Settings
- Once the mapping is complete, press "OK" to exit this window.
- The number of passwords assigned to files containing specific keywords is now written next to the “Map Keywords to Passwords…” button. Press "OK" again.
- Press "Close" to proceed to processing your documents.
- Step 8 - Select the Files to be Sent
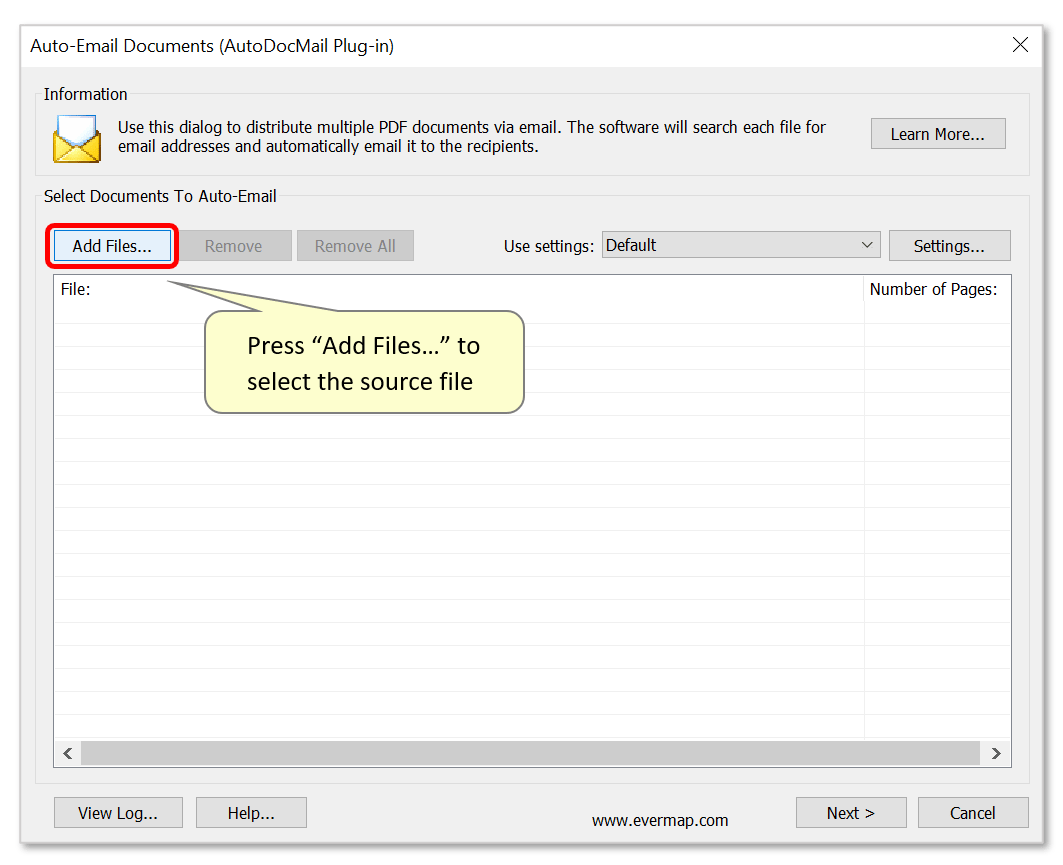
- In the "Auto-Email Documents" dialog, press the "Add Files..." button to select the PDF file(s) that need to be distributed. In this example, these are the PDF pay stubs containing keywords that were mapped to passwords in step 6.
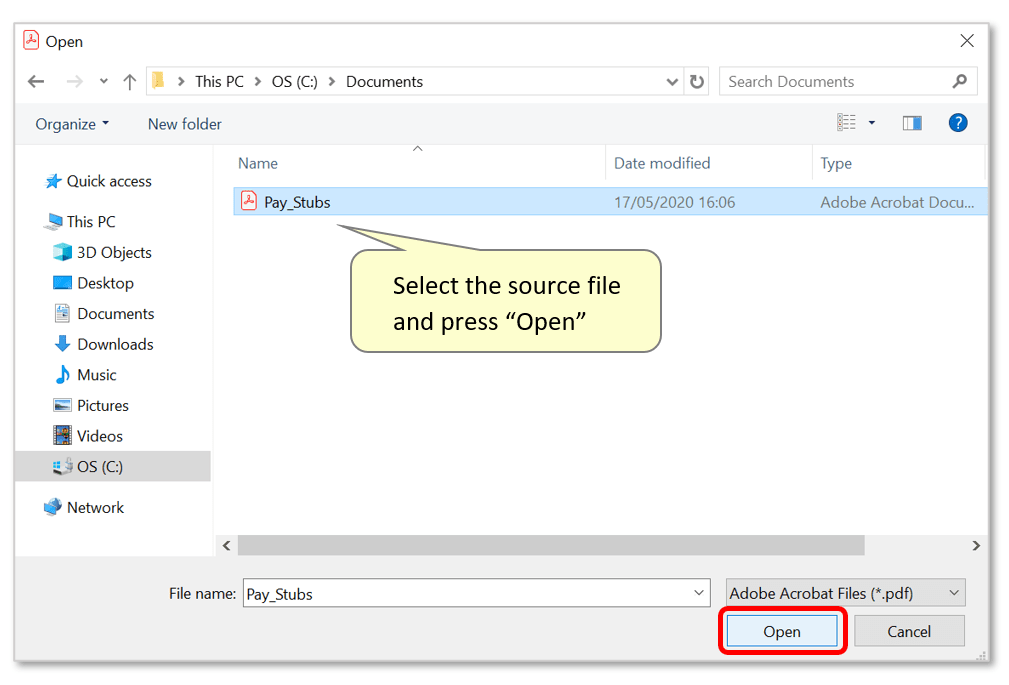
- Locate the file(s), select it, and press "Open".
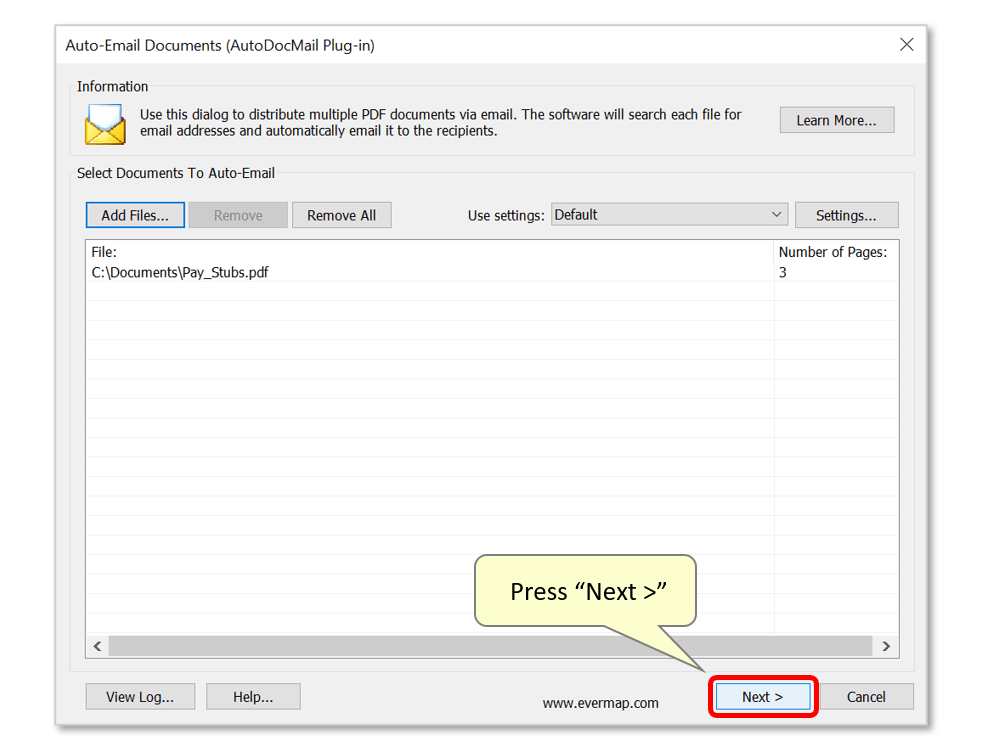
- The input file paths and total numbers of pages will now be listed in the dialog. Press "Next >" to proceed.
- Step 9 - Review Email Recipients
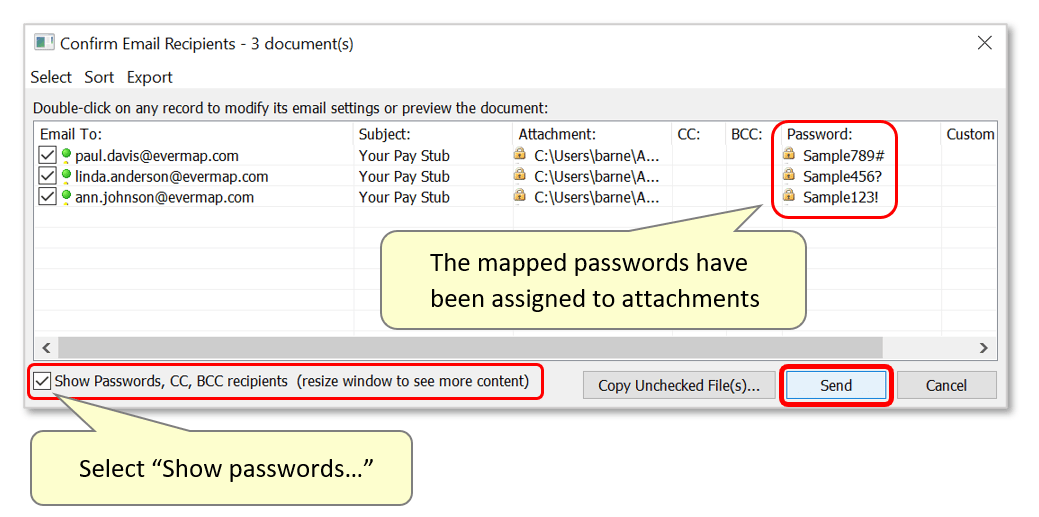
- Once the documents have been processed, the “Confirm Email Recipients” dialog opens. The plug-in will have extracted the email addresses and assigned the emails under "Email To:" on the left.
- Select the “Show Passwords…” option on the lower left to display the extracted passwords. You can scroll through the parameters using the horizontal scroll bar when this dialog size is minimized. Re-size the window and expand columns to view all the necessary data clearly.
- The plug-in will have extracted the listed keywords and assigned the corresponding password to each email/file attachment according to the earlier mapping.
- Double-click on a record to preview the attachment and/or manually edit the email message for this recipient (this is not essential, but recommended to verify that any sensitive documents were assigned to the correct recipients).
- Use the checkboxes to control which recipients will receive emails/attachments. Press "Send" to proceed to sending the documents.
- Click here for a list of all step-by-step tutorials available.