Deleting PDF Pages By Text Search
- Introduction
- This tutorial shows how to delete pages by text search within a PDF document by using the AutoSplit™ plug-in for the Adobe® Acrobat®. The software searches a PDF document for pages matching user-specified search list and deletes them from the document. Matching pages can be either completely deleted from the document or replaced with stub pages with "This page has been deleted" text. Both text patterns (using regular expressions syntax) and plain text strings can be used in the search list.
- Sample Case
- The sample input PDF document that is used in this tutorial contains multiple invoices. Each invoice contains a client name or a client ID (or both) on each page. In the example 1, the goal is to delete pages that contain invoices for John Doe only. Not all invoices contain the name. We are going to search for both text strings "John Doe" and "CLIENT ID: 00340957" (that is John Doe`s Client ID) in order to make sure that all pages with invoices of John Doe are found and deleted.
- Each invoice contains "Page: N of M" text pattern (Page 1 of 3, Page 2 of 3 and etc.). In the example 2, the goal is to delete every 3rd page of the invoice. To do that we are going to use regular expression "Page 3 of \d+".
.PNG)
- Prerequisites
- You need a copy of the Adobe® Acrobat® along with the AutoSplit™ plug-in installed on your computer in order to use this tutorial. You can download trial versions of both the Adobe® Acrobat® and the AutoSplit™ plug-in. This function is available both in AutoSplit Standard and Professional.
- Are the PDF documents searchable?
- The very first step is to verify that input PDF documents do contain a searchable text. If you are working with scanned paper documents, then make sure that text recognition operation has been applied to the files. See Recognize Text in Scanned PDF Documents tutorial for detailed instructions.
- Step 1 - Open a PDF File ↑overview
- Start the Adobe® Acrobat® application and open a PDF document that need to be processed using "File > Open…" menu.
- Step 2 - Open The "Find And Delete Pages with Matching Text" Dialog ↑overview
- Select "Plug-Ins > Split Documents > Delete Pages By Text Search" from the menu.
[⚡ How to locate Plugins menu in Adobe® Acrobat® ⚡] - Step 3 - Specify Text Searching Options ↑overview
- Type one or more search strings into the text search box, one item per line. Check necessary option boxes. Click "OK" to execute searching.
- Check the "Match text case" option to match text case exactly as it entered into the search window. Check this option if it is necessary to match words exactly as they typed.
- Check the "Match whole words" option to match text that represents a complete word. Use this option to avoid partial matching.
- In the example 1, "John Doe" and "CLIENT ID: 00340957" text strings are entered on the separate lines and the "Match text case" option is checked. The software will search for the exact text match of these strings.
.PNG)
- Check the "Use regular expressions" option to search for patterns, not for exact text. Use regular expression syntax to search for social security numbers, phone numbers, account numbers and etc. For example, to find all pages with social security numbers (SSN is using the following pattern 123-45-6789) enter the following regular expression: \d{3}[-]\d{2}[-]\d{4}.
- In the example 2, Page 3 of \d+ text pattern is entered and the "Use regular expressions" option is checked. The software will search for the pages that contain "Page 3 of XXX" text pattern in the text. For example, using this search pattern will delete pages that contain "Page 3 of 10" or "Page 3 of 365" text.
.PNG)
- Examples of the regular expressions:
- (invoice|memo|quotation) - find and delete pages that contain at least one of the listed alternatives - "invoice", "memo" or "quotation".
- \b503\d{7}\b - find and delete pages that contain a 10 digit numbers that starts with 503.
- \b\d{7,10}\b - find and delete pages that contain numbers that are 7 to 10 digits long.
- \b[A-Z]{3}\d{5}\b - find and delete pages that contain a 3-letter combination that is followed by 5 digits.
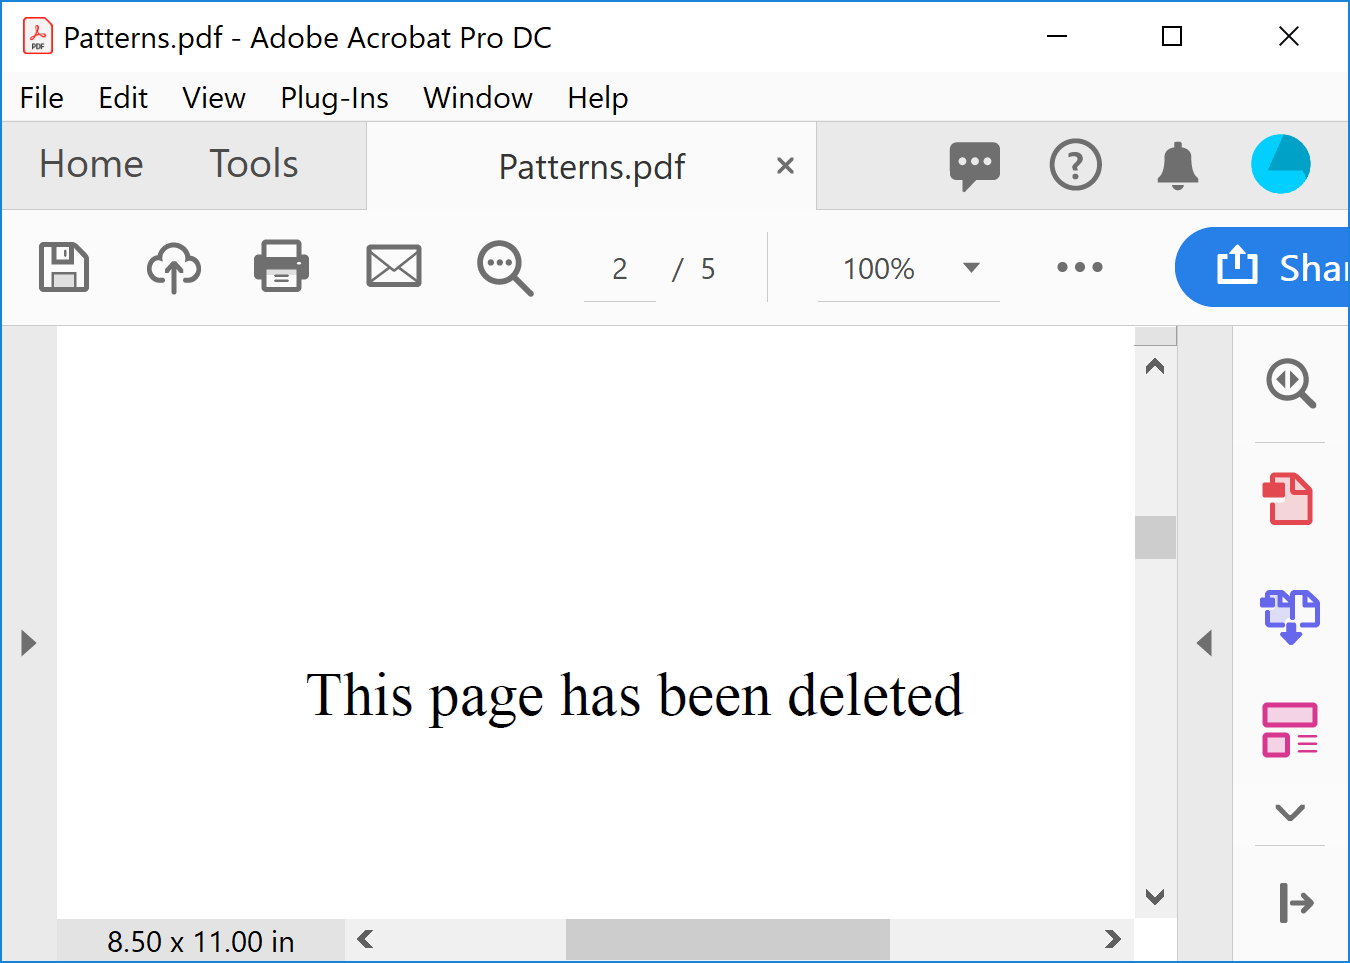
- Optionally, Check "Replace deleted pages with a stub page" option to replace pages that need to be deleted with a stub page with the following text: "This page has been deleted". This option will keep the number of pages in the document unchanged. All bookmarks, links, named destinations and links from external documents that pointed to these pages will continue to function. Use this option when it is necessary to preserve pages, but remove all their content. This option is available starting with AutoSplit version 5.4.2.
![Check the [Replace deleted pages with a stub page] option](AutoSplit/T15/ReplaceWithStub.png)
- Here is an example of the stub page:
- Step 4 - Select Pages for Deletion ↑overview
- The list of matching pages is displayed once the search is completed. Use checkboxes to select/unselect pages from the deletion list. Click on the item in the list to display a corresponding page in the document window.
- Click "Delete Pages" to delete all checked pages from the PDF document.
.PNG)
- The dialog will appear with a number of deleted pages. Click "OK" to close it.
.PNG)
- Step 5 - Examine the Results ↑overview
- In the example 1, the software searched for "John Doe" and "CLIENT ID: 00340957" text strings and deleted pages with the matching text from the PDF document.
.PNG)
- In the example 2, the software searched for "3 of M" text pattern (where any M is any number) and deleted all matching pages.
.PNG)
- Using Action Wizard to Process Multiple PDF Documents ↑overview
- The Adobe Acrobat Pro comes with a powerful batch processing tool called "Action Wizard". It is also known as "batch processing" in the older versions of Adobe Acrobat. The AutoBookmark Pro plug-in adds most of its functionality as batch commands to the Action Wizard. Use the following tutorial to learn how to use Action Wizard to create powerful batch actions. The Action Wizard makes possible to process multiple files at once without the need to manually open the files and use menus and dialogs. Many different types of processing can be completely automated with the help of Action Wizard. Once a processing action is created, it can be re-used with a single click.
- Here is a brief tutorial on using "Delete Pages By Search" command with Action Wizard.
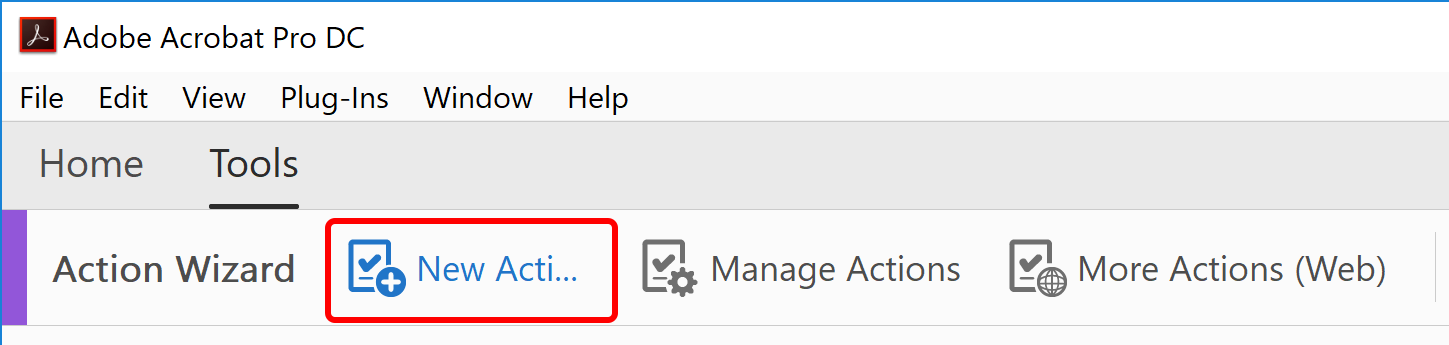
- Select "Action Wizard" tool from the Tools panel and press "New Action..." on the toolbar:
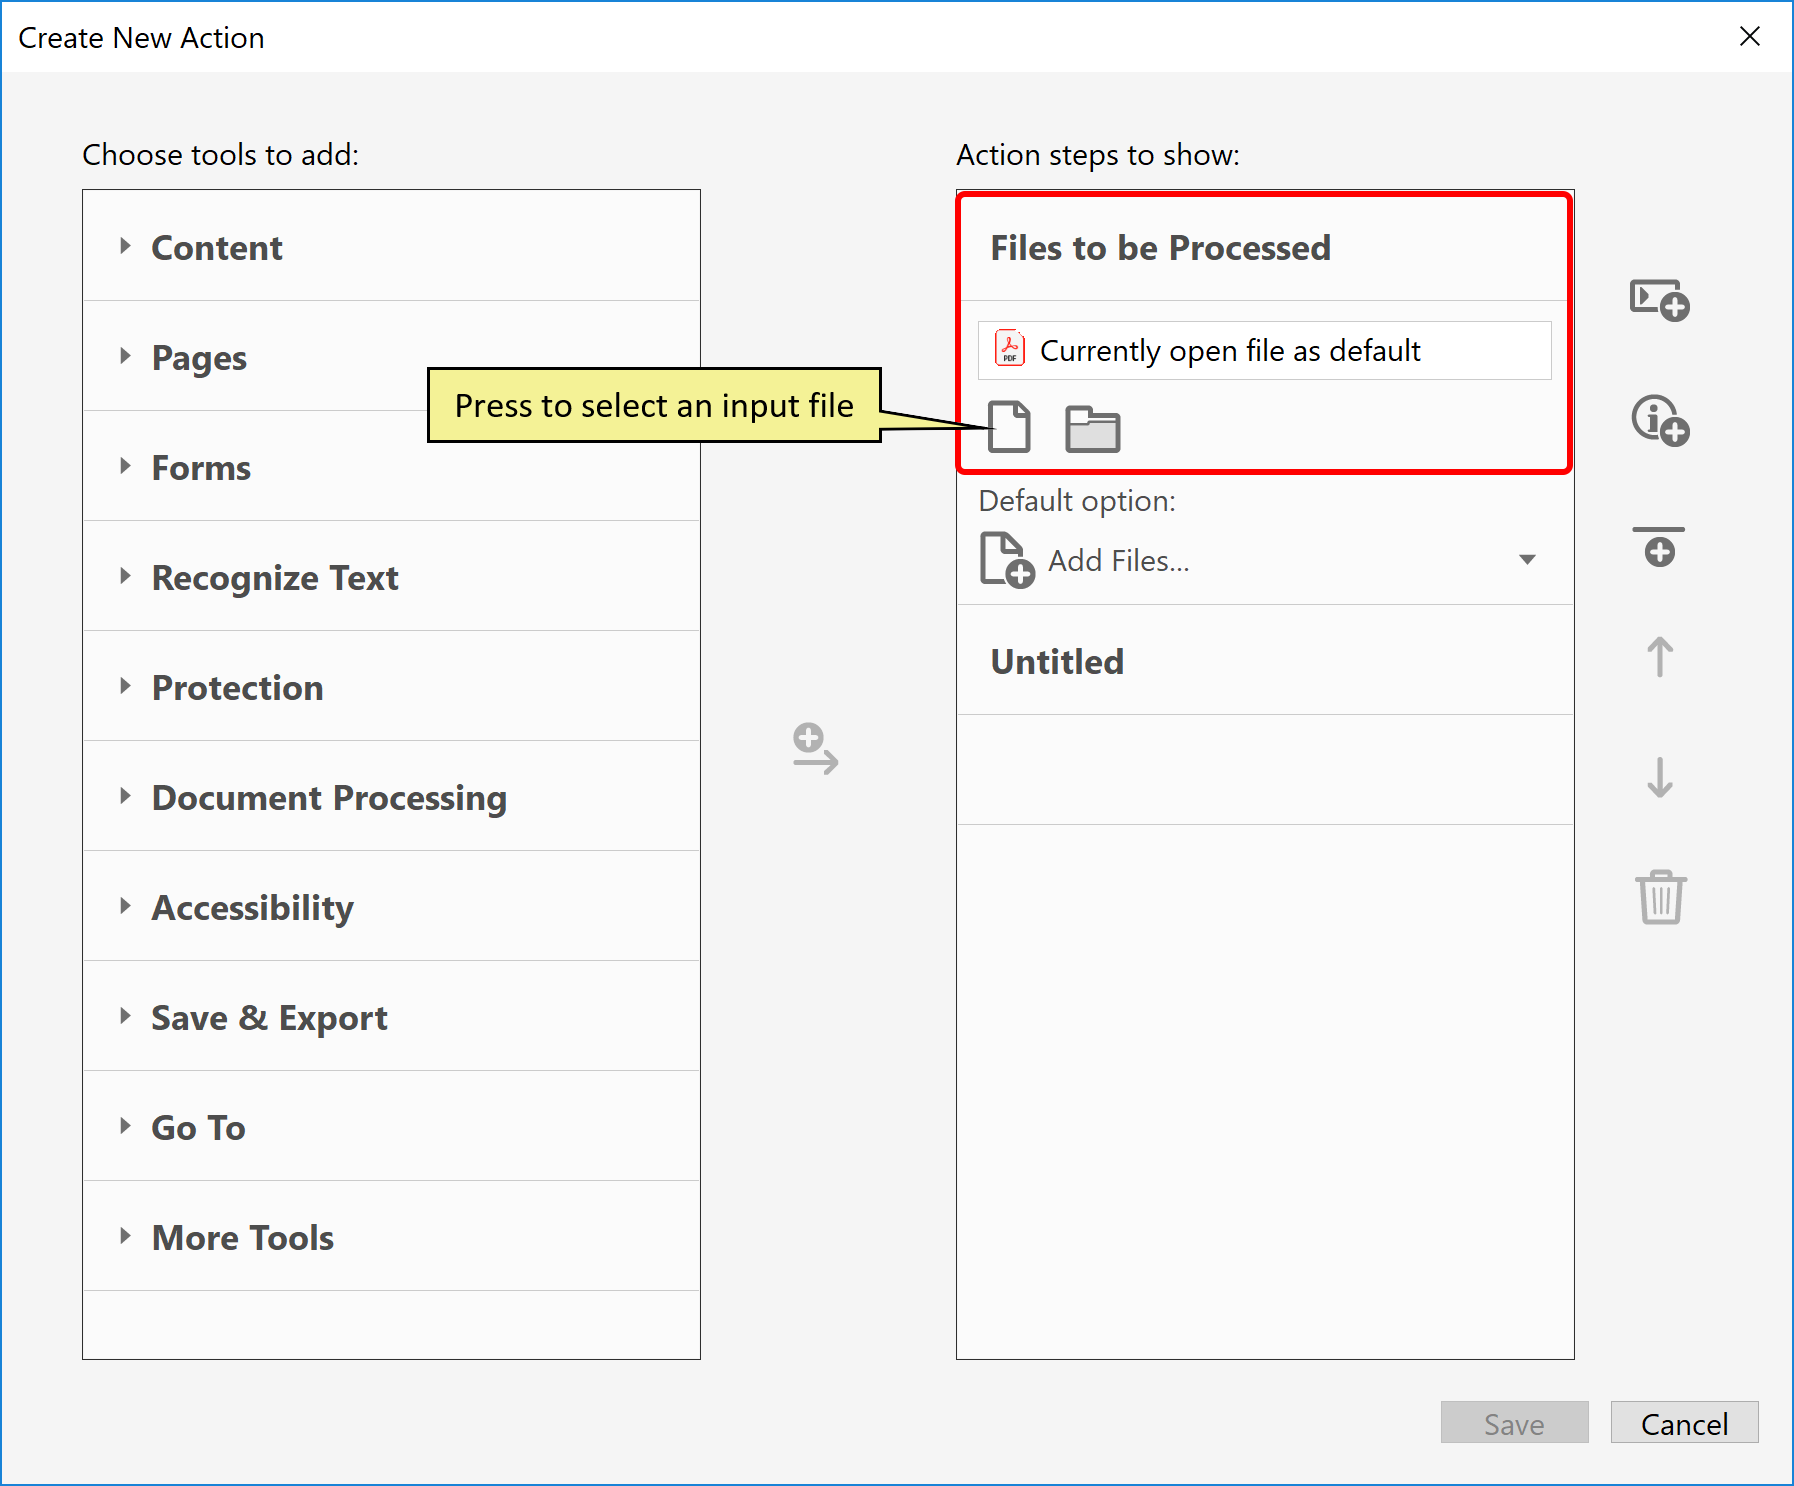
- The action can be configured to run on the "currently open file", or on the specific file(s) and/or folders. If you want to restrict the action to run only on the specific files/folders, then press file or folder icons located in the "File to be Processed" section.
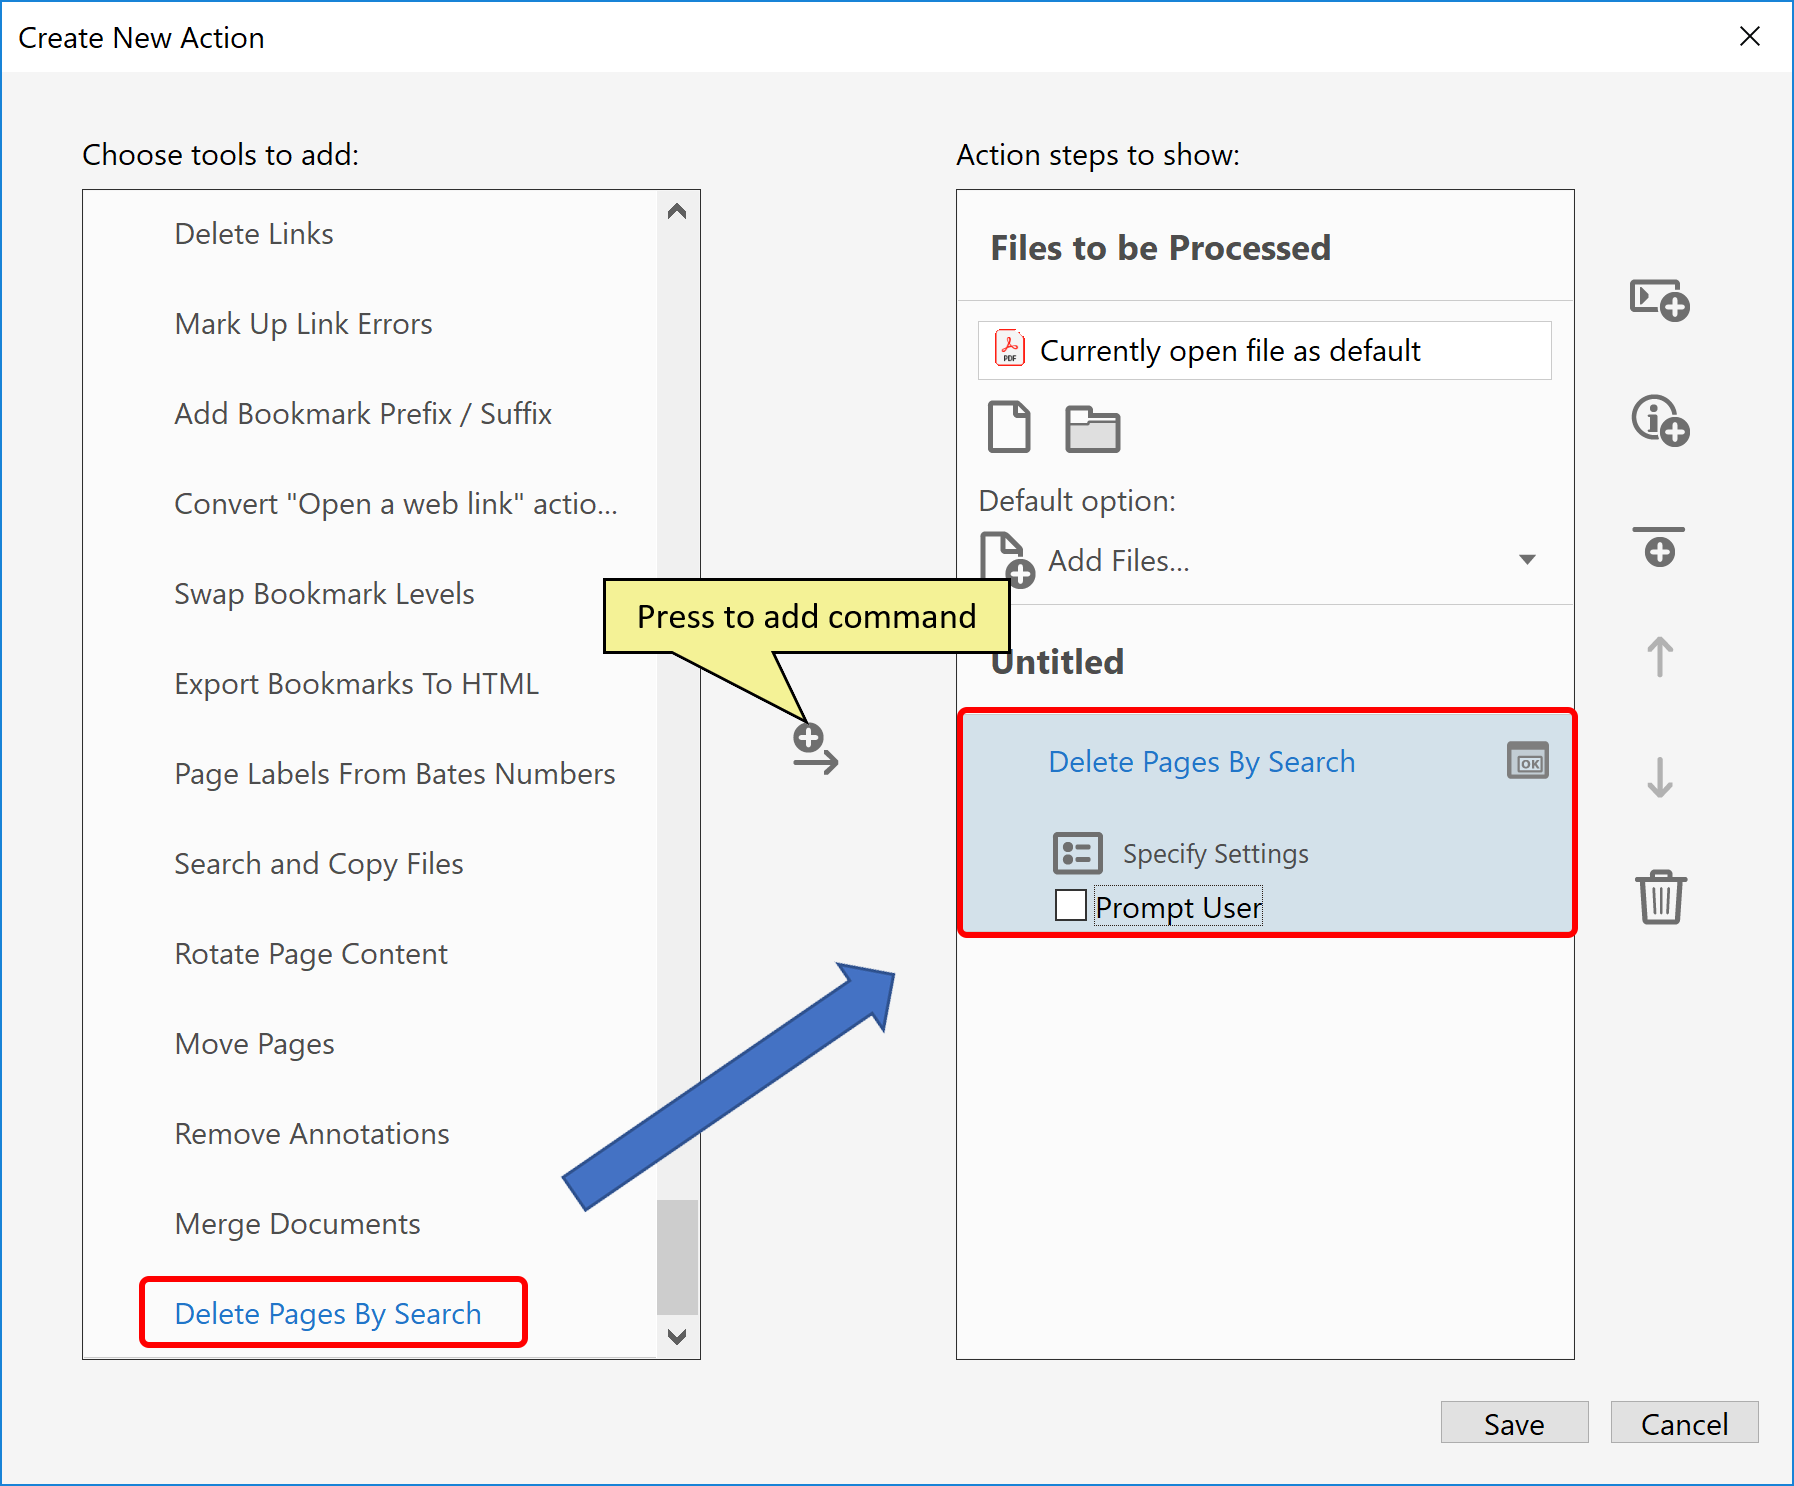
- Add "Delete Pages by Search" command to the action steps. The command is located in the "More Tools" category. Press "Specify Settings" icon to configure the command parameters. It is identical to using the "Plug-ins > Split Documents > Delete Pages by Search" menu.
- The next step is to add "Save" command to the action steps to save changes for the document. It is located in "Save & Export" category. The "Save" command is not necessary if you are planning to use this action to work with "currently open file". The changes can be saved back to file by using "File > Save" menu. However, this command is necessary if you are planning to run this action on the multiple files or folders.
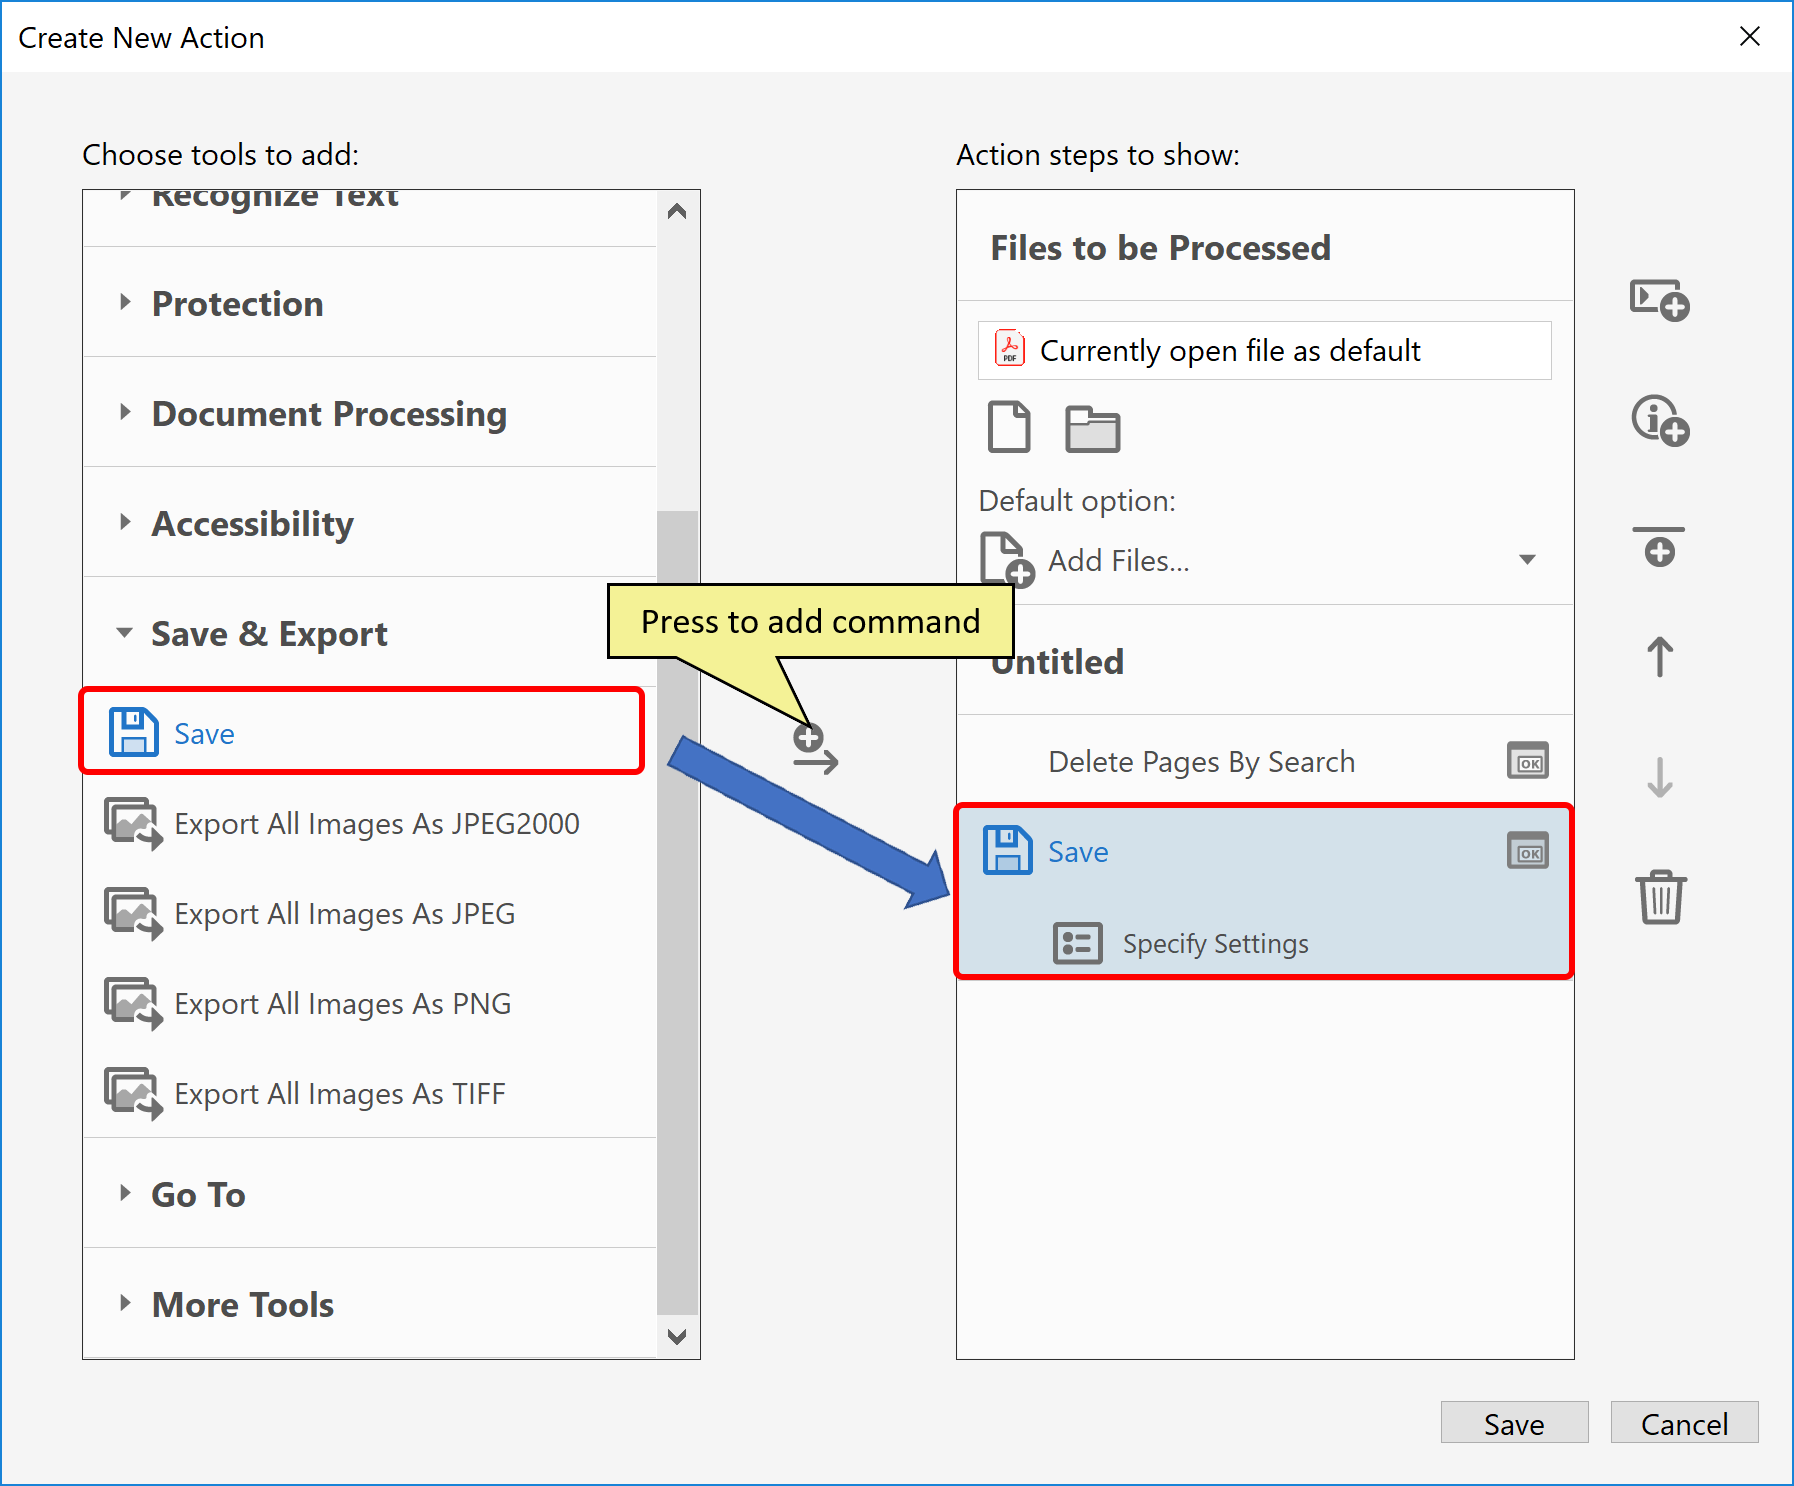
- Now press "Save" button to save the action. Enter the Action Name and optional description:

- Now the action is saved and can be executed from the Action Wizard panel.
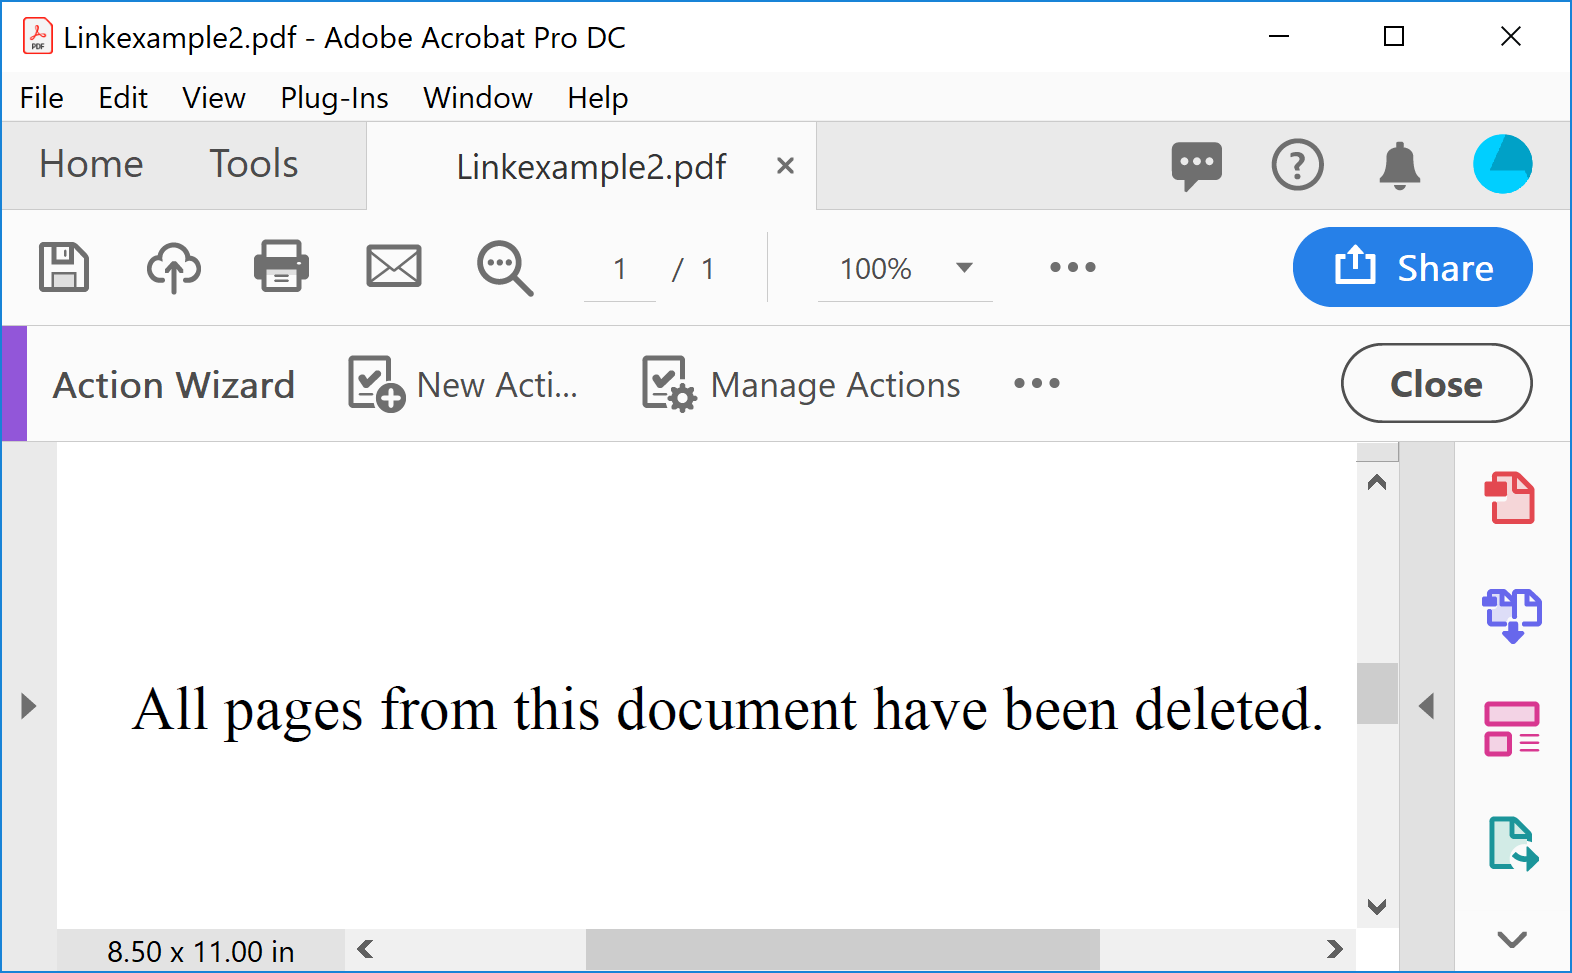
- Please note that if all pages in the document are deleted, a stub page is automatically inserted into the document with the following text: "All pages from this document have been deleted". This page is inserted to keep at least one page in the document. It is not possible to have a PDF file without any pages.
- Delete Pages by Text Search via Command-Line BAT File
- Please see the following tutorial on how to execute this operation from a command-line BAT file.
- You can find a list of other step-by-step tutorials here: http://www.evermap.com/AutoSplit.asp#tutorials.